To remotely connect to a Data Science Workshop (DSW) instance from your local tools, such as VSCode or Terminal, for machine learning development, use the ProxyClient tool provided by DSW. This tool lets you connect to your DSW instance over SSH without configuring a Virtual Private Cloud (VPC) or a NAT Gateway.
Procedure
Step 1: Download and install DSW ProxyClient
Download the DSW ProxyClient tool and save it to your user home directory.
The required directory depends on your operating system:
Windows: Save it to your user profile folder, such as C:\Users\.
Linux: Save it to /root for the root user, or /home/ for a regular user.
macOS: Save it to /Users/.
Replace with your actual username.
Download links for each version are listed below:
In the command line, make the client file executable. This step is not required for Windows.
chmod 755 <proxyclient>Replace
<proxyclient>with the name of the downloaded client file.Generate a configuration file.
Run the configuration command.
# macOS, Linux ./proxyclient config # Windows proxyclient.exe configImportantOn macOS, the first time you run the
./proxyclientcommand, you may see an error message:"proxyclient" cannot be opened because the developer cannot be verified.To resolve this, go to and allow the application to run.Follow the prompts to set the configuration file path.
Enter a name for the configuration file. You can include a path.
NoteWe recommend pressing Enter to use the default path and filename, which is
~/.proxyclientconfig.You can also specify a custom path and filename. For example, on Windows (x86-64):
C:/Users/<username>/xxx/.proxyclientconfig.If you set a custom path, you must specify it using the
-cor--config-fileflag when you run the./proxyclient addcommand in Step 3.
Follow the prompts to set the RegionId, AccessKey ID, AccessKey Secret, and STS Token parameters.
The following table describes these parameters.
Parameter
Description
RegionId
The ID of the region, for example,
cn-shanghaifor China (Shanghai). For a full list of region IDs, see Regions and zones.ImportantThe region ID configured here must match the region of your DSW instance.
AccessKey ID
Enter the AccessKey for your account. To learn how to get an AccessKey ID and AccessKey Secret for your Alibaba Cloud account, see Create an AccessKey pair.
AccessKey Secret
STSToken
Leave this empty if you are using an Alibaba Cloud account or a RAM user.
If you log on as a RAM role, you must provide a temporary identity credential (an STS Token). To learn how to generate a Security Token Service (STS) Token, see Obtain an STS token.
ImportantEnsure the STS Token is not expired.
Step 2: Configure the SSH authentication method
You can connect to your DSW instance using either an SSH key pair or a username and password.
For DSW instances in a dedicated resource group, after configuring authentication, click Save Image in the Actions column for the instance. This persists the public key or password to the instance image, ensuring it remains effective after restarts.
Method 1: Configure password-free logon (Recommended)
Generate a key pair.
In your local command line, run the following command to generate a key pair for passwordless login. By default, this command creates an RSA key pair.
ssh-keygenSpecify the files to save the key pair.
(Recommended) Press Enter without specifying a filename. The default key pair files are
~/.ssh/id_rsa(private key) and~/.ssh/id_rsa.pub(public key).(Optional) Specify a custom filename for the key pair, such as
example_id_rsa.NoteIf you specify a custom filename, you must declare the private key file path using the
IdentityFiledirective in the~/.ssh/configfile, which you generate in Step 3: Add the DSW instance proxy.
Follow the prompts to set a passphrase and save it locally. You will use this passphrase to connect to the DSW instance later.
On the DSW instance you want to connect to, open the Terminal and run the following commands. The
setup_ssh.shtool will automatically download and install the SSH server for you.wget https://dsw-resource.oss-cn-beijing.aliyuncs.com/tools/setup_ssh.sh bash setup_ssh.shFollow the prompts to configure the SSH public key and start the SSH server.
Method 2: Configure username and password login
On the DSW instance you want to connect to, open the Terminal.
Run the following command to set the password for the root user.
passwd rootModify the SSH configuration file to allow the root user to log in using a password.
Open the SSH configuration file.
vi /etc/ssh/sshd_configChange the line
#PermitRootLogin prohibit-passwordtoPermitRootLogin yesand save the file.
Restart the SSH server service to apply the changes.
service ssh stop
service ssh start
Step 3: Add the DSW instance proxy
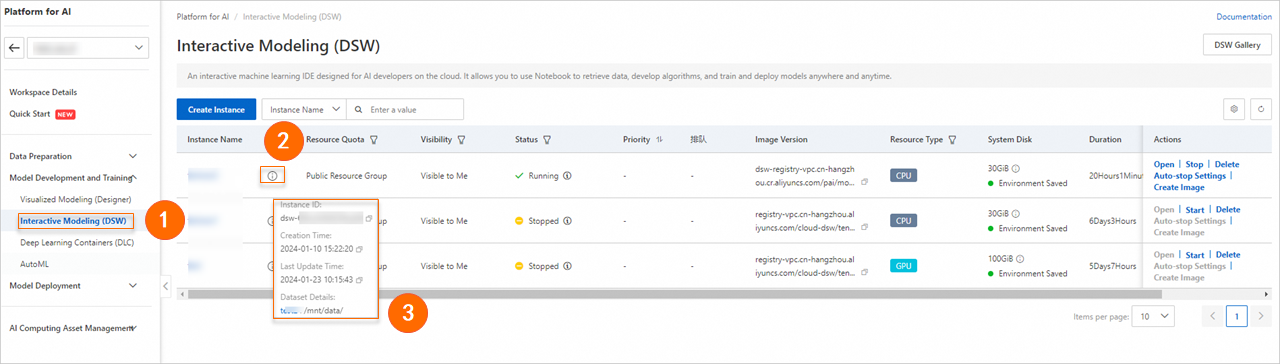
On the Instances page, find the instance you want to connect to and copy its instance ID as shown in the following figure.
In your local command line, run the following command to add the DSW instance as an SSH target host.
Replace
<instance ID>with the instance ID you copied in the previous step.# macOS, Linux: ./proxyclient add -i=<instance ID> # Windows: proxyclient.exe add -i=<instance ID>View the contents of the
.ssh/configfile to confirm that the proxy settings have been applied.# macOS, Linux cat .ssh/config # Windows. In your local command line, go to your user home directory and use the following command to view the contents of the config file. You can also double-click the config file to open it. explorer .ssh\configOptional: If you used a custom filename for your key pair, such as
example_id_rsa, you must modify the~/.ssh/configfile. Use theIdentityFiledirective to specify the path to your private key file, as shown in the following example.Host dsw-b7a2765b267e**** HostName dsw-b7a2765b267e**** User root ProxyCommand ~/proxyclient connect --region-id=cn-hangzhou --instance-id=dsw-b7a2765b267e**** --config-file=*** ServerAliveInterval 30 IdentityFile ~/.ssh/example_id_rsa
Step 4: Remotely connect to the DSW instance
Connect using a terminal
Open a terminal tool (such as your local command line) and run the following command to log in to the remote instance.
Replace <instance ID> with the ID of your DSW instance.
ssh <instance ID>You can also use the scp command to copy files or directories between your local machine and the remote instance.
# Copy a local file to the remote instance.
scp local_file_path root@<DSW instance ID>:<remote_file_path>
# Copy a local directory to the remote instance.
scp -r local_dir root@<DSW instance ID>:<remote_dir>
# Copy a file from the remote instance to your local machine.
scp root@<DSW instance ID>:<remote_file_path> <local_file_path>
# Copy a directory from the remote instance to your local machine.
scp -r root@<DSW instance ID>:<remote_dir> <local_dir>
Connect using VSCode
Steps may vary by VSCode version. For more information, see Visual Studio Code.
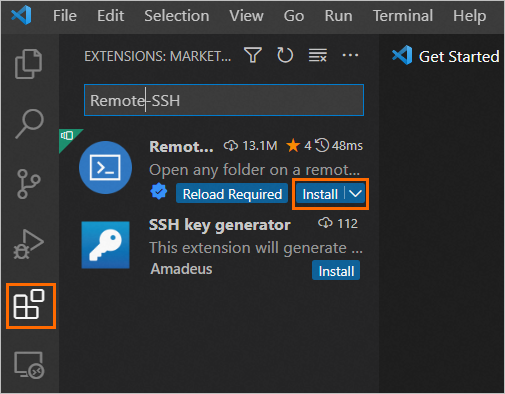
Open VSCode on your local machine and install the Remote Connection extension as shown in the following figure.
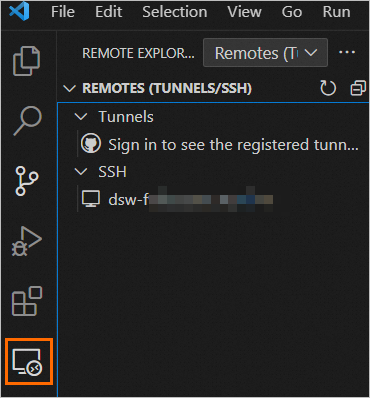
In the navigation pane on the left of VSCode, click
 .
.
Add a remote connection to the instance.
Click the
 icon next to Remote Connection. In the text box that appears, enter the DSW instance ID and press Enter.
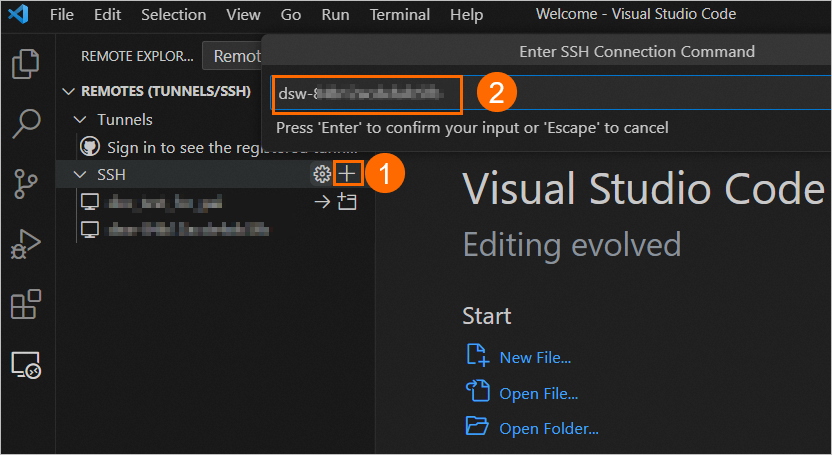
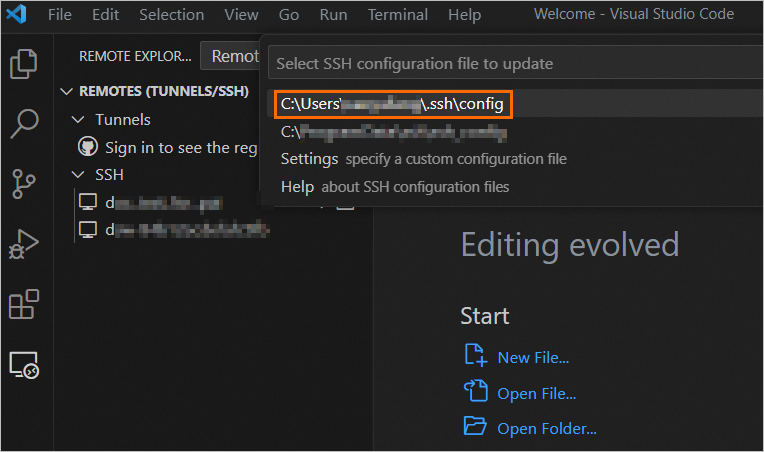
Click to select the config file you want to update.
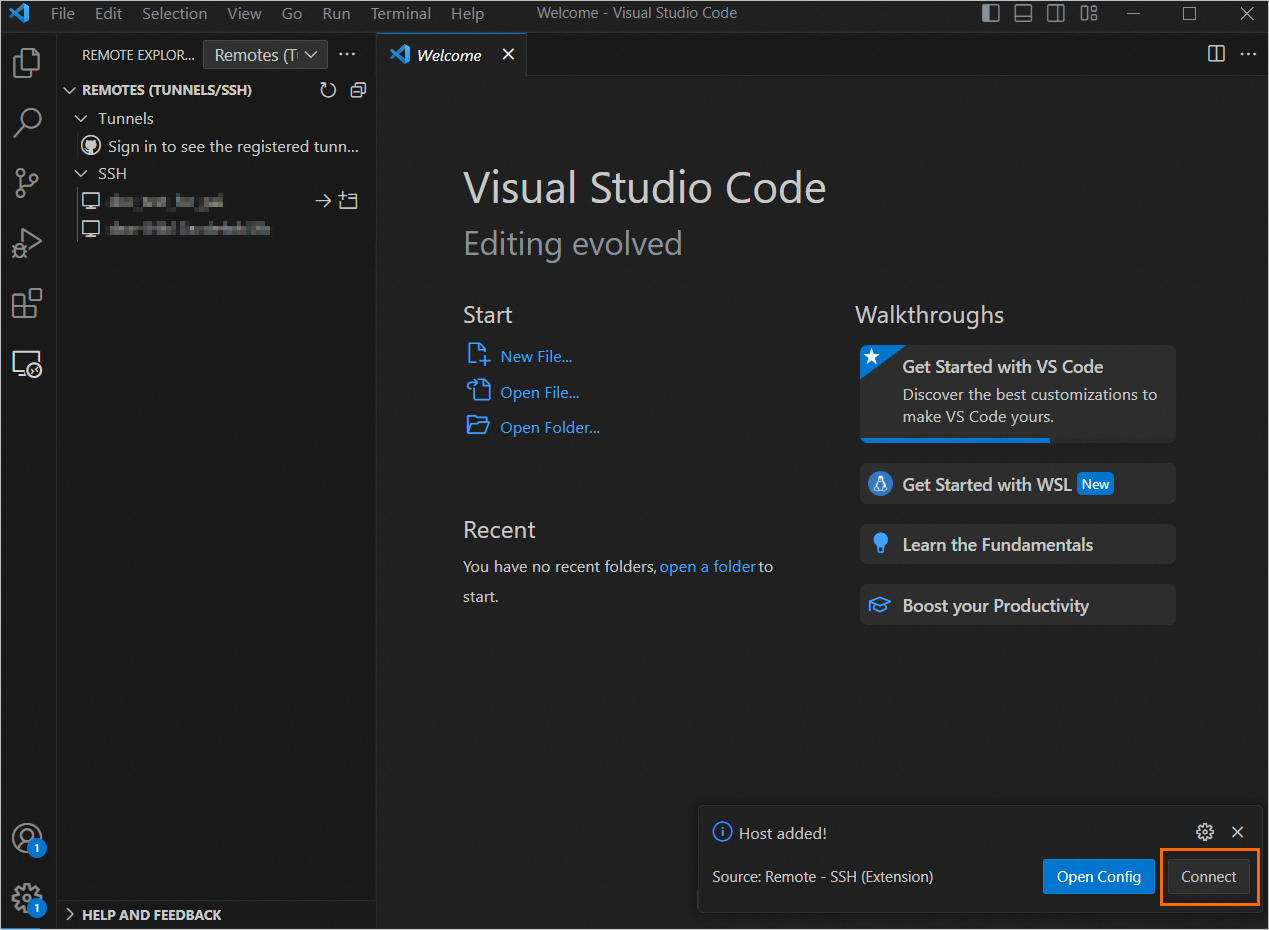
In the Host added dialog that appears in the bottom-right corner of VSCode, click Connect.
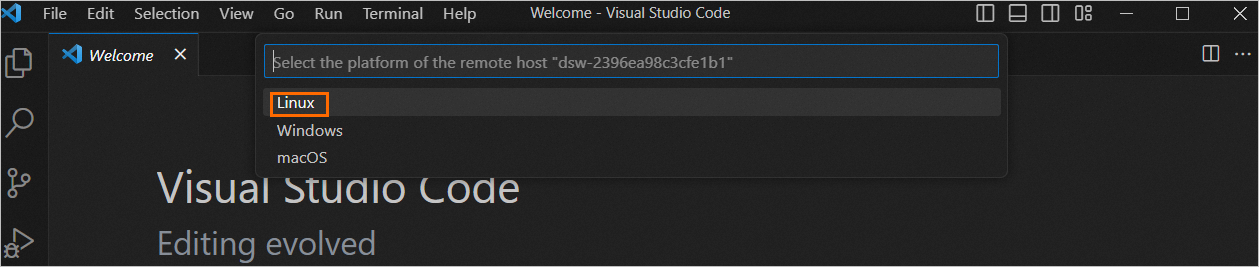
Click Linux to select the operating platform for the DSW instance.
In the text box, enter the passphrase you created in Step 2 and press Enter.
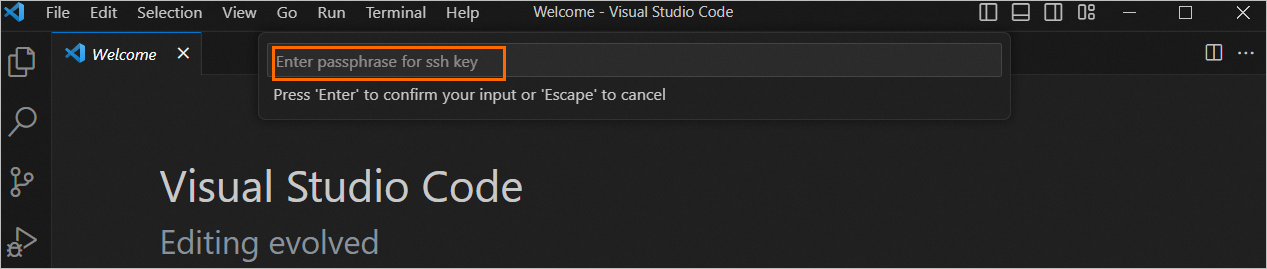
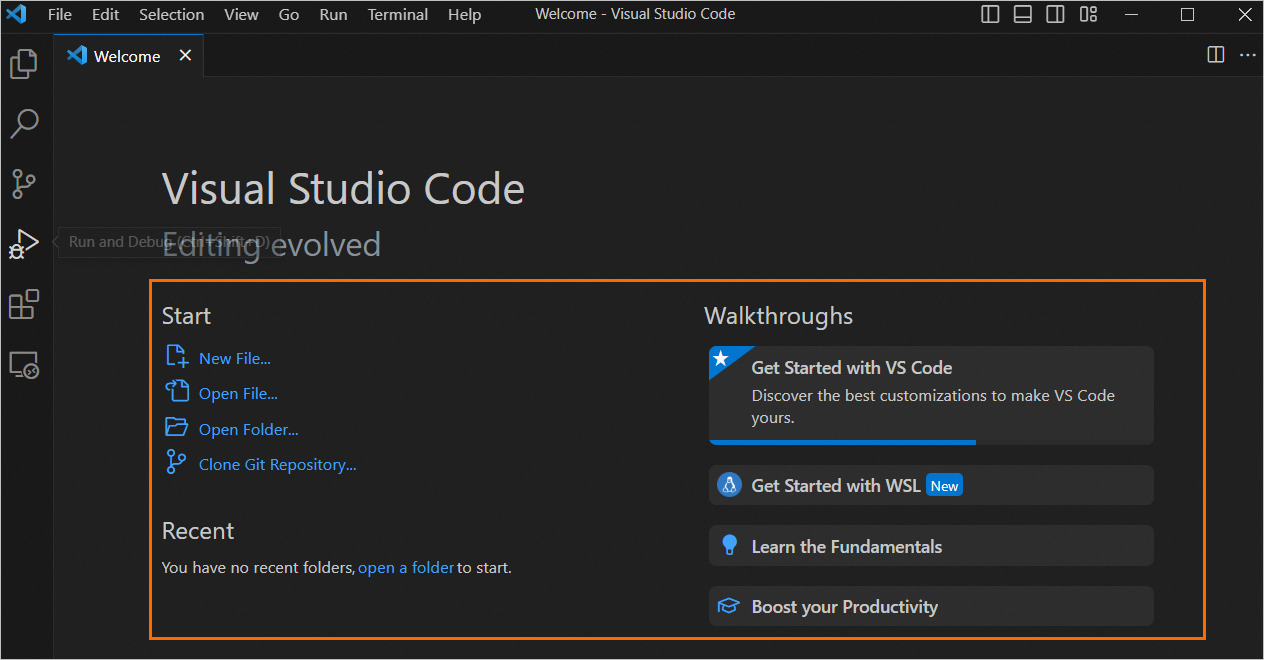
When VSCode opens a welcome page, the connection is successful. You can now open a remote folder in VSCode to start your development.
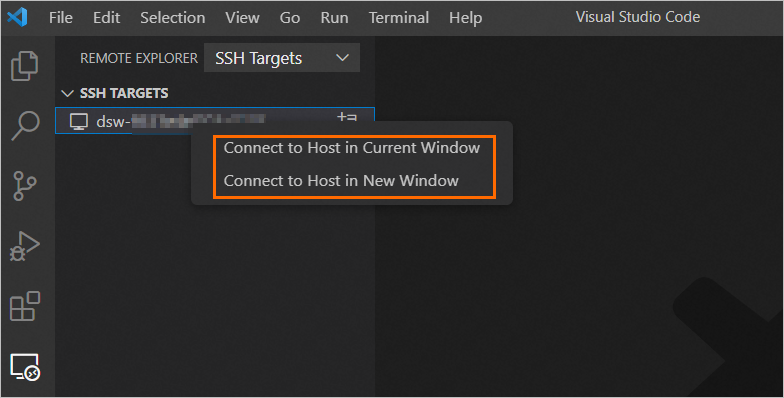
For subsequent connections to this DSW instance, you can right-click the target instance, choose a connection method, and follow the prompts.
FAQ
Q: What's the difference between connecting to a DSW instance via "Direct SSH" vs. the "ProxyClient" method?
Method A: Direct SSH connection (Recommended) | Method B: ProxyClient proxy | |
Features | Requires network components like a VPC and a NAT Gateway. Provides a faster, more stable connection. | No additional network components required. The connection may be slower or less stable. |
Supported instances |
| All instance types. |
Authentication method | A single-step authentication using an SSH key. |
|
Access path |
| Public internet access only. |
Configuration method | ||
How it works | PAI automatically creates a DNAT rule on the NAT Gateway to forward public SSH requests to your DSW instance. | All traffic is relayed through a PAI proxy server. |
Billing notice | The NAT Gateway and EIP incur charges as long as they exist, even if the DSW instance is stopped. Delete them if no longer needed. | This method does not incur additional costs. |
Q: Why does my ProxyClient connection to a DSW instance fail when using a RAM user's AccessKey?
If you use the AccessKey of a RAM user to connect through ProxyClient, you must ensure the Alibaba Cloud account has granted the paidsw:GetToken permission to the RAM user. Otherwise, authentication will fail. To add the permission, perform the following steps:
Q: How can I fix a "connection timed out" error when connecting to a DSW instance with ProxyClient?
A connection timeout error is often caused by a mismatch between the RegionId in your ProxyClient configuration file and the actual region of your DSW instance. To resolve this, open your configuration file (default is ~/.proxyclientconfig) and ensure the value for RegionId exactly matches the region where your DSW instance is located (e.g., cn-shanghai).
Q: Is there a way to create multiple users on a DSW instance for separate SSH logins?
No, DSW does not natively support creating multiple users for isolated SSH logins. By default, DSW instances provide only the root user for SSH access. While you can attempt to manually create new users within the instance's operating system, this is not an officially supported or recommended configuration.
Q: How do I access my project files in /mnt/workspace after connecting to a DSW instance via SSH from VSCode?
Your project files are located in /mnt/workspace, which is not the default directory (/root) when you first connect via SSH. You need to manually open this folder from your IDE.
To do this in VSCode:
After connecting to the DSW instance, go to File > Open Folder....
In the dialog box that appears, enter
/mnt/workspaceand click OK.Your project files will now appear in the VSCode Explorer sidebar.
References
The ProxyClient tool may cause issues such as frequent reconnections and low speeds. Therefore, we recommend that you use the Remote connection: Direct SSH method.