Manage resource quotas after creation: scale them, add child quotas, and view quota lists and details.
For Intelligent Computing Lingjun resources, ensure that all nodes use the same hz identifier to enable high-speed network connectivity between them.
Create parent-child quotas
On the Resource Quota page, create parent and child resource quotas. These quotas form a tree structure called a QuotaTree, which provides finer-grained resource management and allocation. For a diagram of the parent-child relationship, see Resource quota types.
To create a parent resource quota, click Add Resource Quota to create a root quota. For more information, see Cloud-native resource quotas.
To create a child resource quota, click New Child-level Resource Quota in the Actions column of an existing resource quota.

Scale quotas
Scale a resource quota to match job requirements and manage costs.

On the Resource Quota page, find the quota and click Scale in the Actions column. Adjust the Source or Nodes/Instance Type to scale the quota.
Scale out: Add or adjust resource sources or specifications to increase available resources.
Scale in: Reduce the node count of associated specifications or remove specifications to release idle resources.
View quota lists
On the Resource Quota page, click the Lingjun Intelligent Computing resources or General Computing Resources tab to view created quotas.
The list shows each quota's name, type, associated workspace, status, GPU type, node count, and resource amounts (GPUs, CPU cores, and memory). You can perform the following operations:
Filter resource quotas: Filter by Name/ID or Status.
Sort by resource amount: View scheduled and total resource amounts. Sort by total or scheduled CPU, memory, and GPU resources to understand resource distribution and usage.
View quota details
On the Resource Quota page, click the Lingjun Intelligent Computing resources or General Computing Resources tab. Then, click a quota name to view its details. The details page shows scheduled, dequeued, and submitted amounts, and the idle status of GPU, CPU, and memory resources. Use this information to understand resource usage and task queuing.
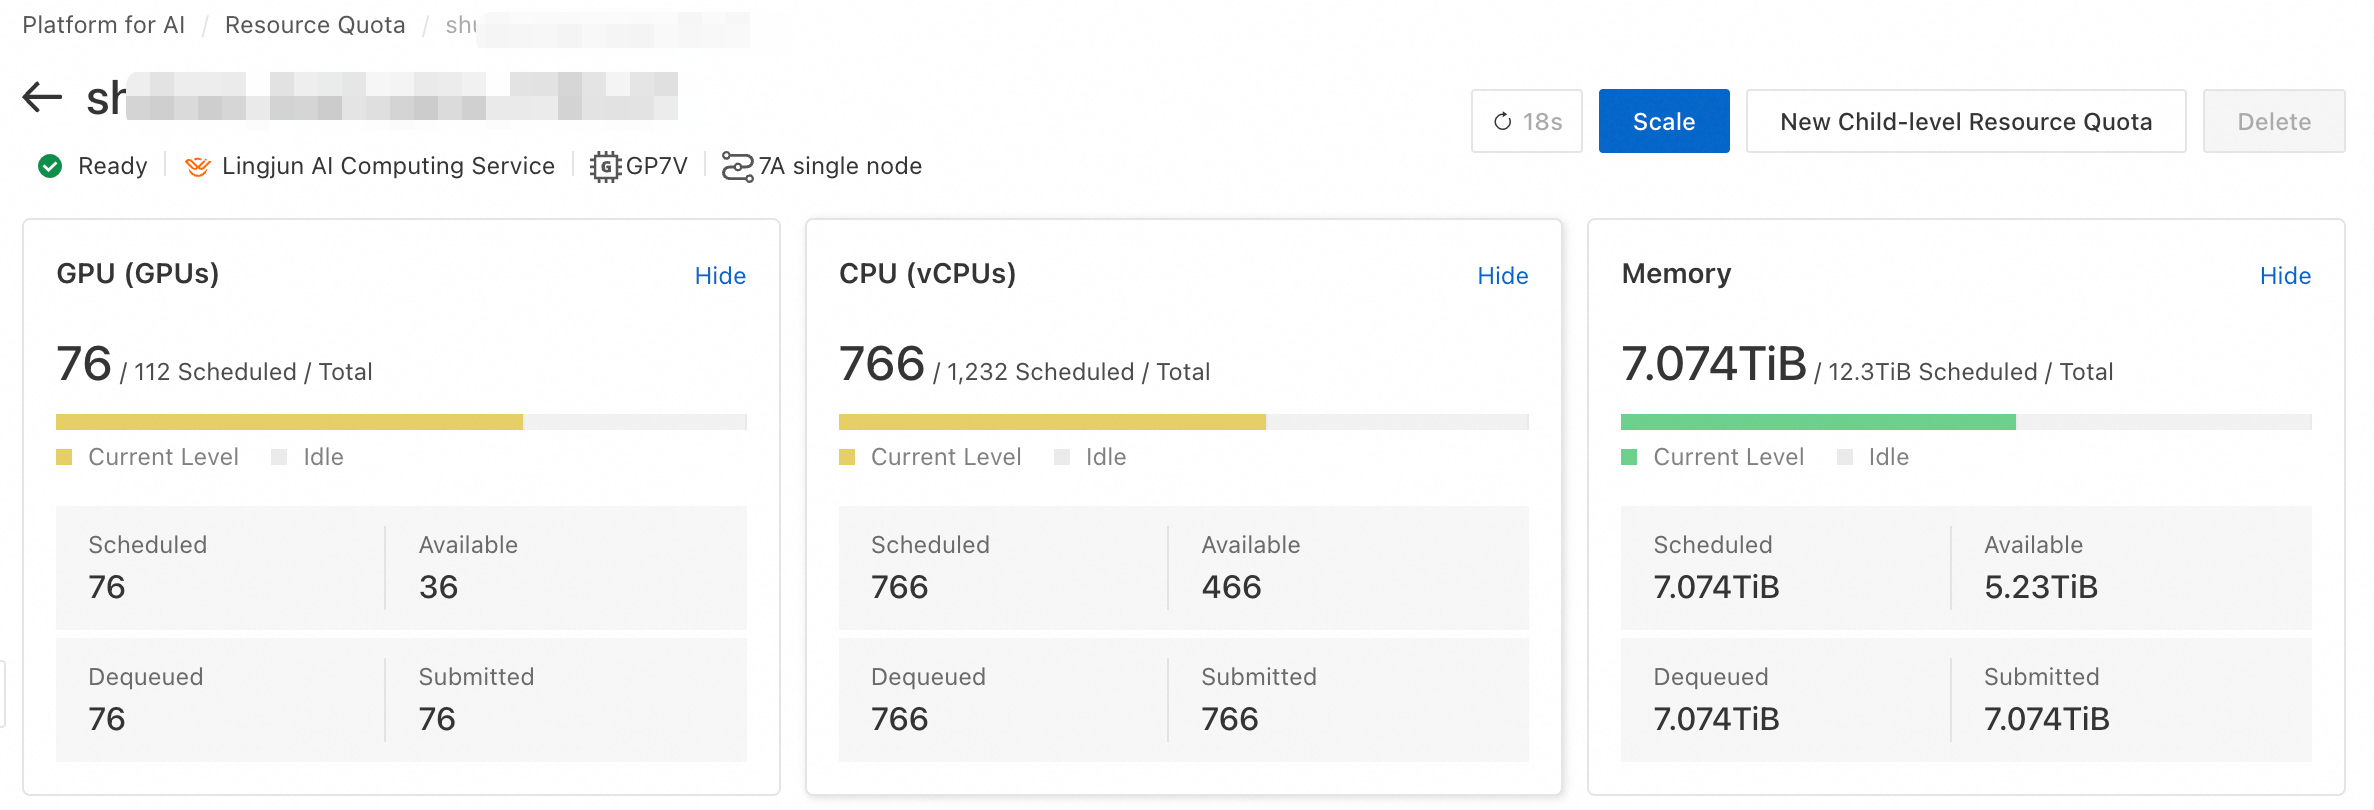
Overview
On the resource quota details page, click the Overview tab to view and update configurations:
-
Basic Information: Shows the quota name, ID, and associated workspace.
Click the
 button to update **Resource Quota Name, Associated workspace, and <!--@conref {"id":"25b6a36baar41","conref":"mcms_dita_pai-console-workspace.dita#pai-console-workspace/labels"}/--->**.
After you bind a workspace, click its name to open the details page and use the quota for AI development in that workspace.
-
Resource Information:
Resource group information: Shows the resource group to which the quota belongs, its parent and child quotas, and related details. For a diagram of the parent-child relationship, see the Create parent-child quotas section. Click a resource name to open its details page.
GPU Default Driver: Configure a default driver for your GPU type, driver, SDK, and container image requirements.
Network Information: Shows limits on network resources, including VPCs, security groups, and NAT gateways. This information defines the quota's network-level scope.
-
Scheduling Information: Shows scheduling settings for the quota and lets you update them.
Scheduling Policy: Select a scheduling strategy that matches your workload to improve dequeue efficiency and resource utilization. For configuration details, see Scheduling policies.
Child-level Preemption&Self-level Preemption: When resources are limited, queued tasks on the current quota can preempt running tasks on child or self quotas. For configuration details, see Preemption policy.
Idle Sharing: Enabled by default. Resources of the current quota and its child quotas can be used by idle-time tasks.
Resource Change History: View operation logs for create, scale, and delete operations. Records show the change type, initiator, status, and target specification.
Event History: View quota-level events, such as node scaling, disabling or enabling scheduling, and binding or unbinding nodes. The history includes trigger time, initiator, and event content.
-
Advanced Information:
-
Enable Local Cache: For Intelligent Computing Lingjun resource quotas, enable this feature to cache data near compute nodes and improve read speed. Enabling it consumes node resources, so ensure that enough resources are available. For more information, see Intelligent Computing Lingjun cache acceleration.
Storage service: Supports local cache for OSS, General-purpose NAS, and BMCPFS.
Supports RDMA: Cache-accelerated reads support RDMA and provide higher communication bandwidth for data reads.
ENI warm-up: Pre-provisions elastic network interfaces (ENIs) for nodes in a quota to accelerate job startup. Enabling this feature consumes ENI resources, so ensure that your VPC subnet has enough available IP addresses. For nodes allocated to child quotas, the leaf-level quota configuration takes precedence.
-
Nodes
On the resource quota details page, click the Nodes tab to view and manage nodes in the quota:
-
Node details: Shows Node Specification, Dedicated Resource Group Name/ID, resource In Use and Total amounts, the zone (az), the high-network interconnection zone (hz), and the Tasks and Instances created on the node. Resource amounts include GPU Type, Number of GPUs, and CPU Cores.
Job and instance details: In the Tasks and Instances columns for a target node, click the corresponding number to view job and instance details.
Filter nodes: Filter nodes by status or provisioning status, or sort by resource amount.
hz (high-network interconnection zone): For Intelligent Computing Lingjun resources, hz indicates the high-network zone where underlying compute resources reside. Resources with the same hz identifier can communicate over a high-speed network.
-
Node Status: The following statuses are supported:
Ready: The computing node is available.
Not Ready: The computing node is being initialized.
-
Scheduling Disabled: The node cannot be scheduled. Possible causes include:
Stopped by User: A user manually disabled scheduling on the node. The node is unavailable.
Expired: The node subscription has expired. The node is unavailable.
Self-healing in progress: If jobs are running on the node during self-healing, stop them promptly to avoid interfering with recovery.
Unknown: The cause is unknown. Contact your account manager for assistance.
-
Manage nodes:
Stop/Start scheduling on a node: In the Actions column for the target node, click Stop Scheduling or Start Scheduling to pause or resume scheduling on that node.
Clear a node: In the Actions column for the target node, click Clear Node to terminate all jobs (including DSW, DLC, and EAS jobs) on that node.
Download node list: Click the
 icon to export and download the node list from the current page.
Jobs
On the resource quota details page, click the Job tab to view job information. The page shows resource usage for Queuing and Dequeued jobs, including job status, resource quota, instance information, GPU count, CPU cores, and memory size.
Filter jobs: Filter by Type or Job Status.
View details: Click a job name, quota name, or workspace name to open the corresponding details page.
Filter jobs in the current quota: Enable the View Current Resource Quota switch to display only jobs created within this quota.
Users
On the resource quota details page, click the User tab to view resource usage per user within the quota, including GPU count, CPU cores, memory size, and number of jobs.
Filter users of current quota: Enable the View Current Resource Quota Users switch to display only users who submitted jobs directly to this quota, not its child quotas.
View job details: In the Number of Tasks column for a user, click Details to view the jobs submitted by that user. On the job list page, click a job name to view its details.
Monitoring
On the resource quota details page, click the Monitoring tab to view monitoring information for the quota.
Displays a GPU computing heatmap (real-time utilization), resource watermark, and task status distribution.

View monitoring information for quotas and nodes, covering CPU, memory, disk, network, and GPU metrics. For details about the metrics, see Monitoring and alerting. For information about using CloudMonitor and Application Real-Time Monitoring Service (ARMS) to view monitoring data, configure alerts, and subscribe to metrics, see Monitoring and alerting.

Topology
On the resource quota details page, click the Topology tab to view topology information for the quota. Two topology views are available:
Resource view: Shows CPU, memory, and GPU allocation for the current quota and its child quotas.

Job view: Shows the total number of jobs created through the current quota and its child quotas, and the number of jobs in each status.

Delete a quota
On the Resource Quota page, click Delete in the Actions column to delete a quota that you no longer use. If the quota is bound to a workspace, disassociate it before deletion. For more information, see Overview.