When critical issues occur in your applications, your team needs immediate visibility -- without switching between monitoring dashboards and communication tools. Managed Service for OpenTelemetry integrates with Lark to deliver alert notifications directly to your Lark groups. With this integration, you can:
Receive real-time alert notifications in designated Lark groups.
Schedule automated daily alert reports with triggered, resolved, and pending alert counts.
Customize the alert notification card layout and content.
View alert details and clear alerts directly from the Lark group chat.
The setup takes three steps: get a webhook URL from Lark, register the chatbot in the Managed Service for OpenTelemetry console, and link it to a notification policy.
Prerequisites
Before you begin, make sure that:
The administrator of your Lark organization has added the Application Real-Time Monitoring Service (ARMS) application to the Lark application directory
Members of your Lark organization can request access permissions for the ARMS application
Get the webhook URL from Lark
To connect Managed Service for OpenTelemetry to a Lark group, you first create a custom chatbot in Lark and copy its webhook URL.
Open the Lark desktop client.
(Optional) To create a new group, click the + icon, then click New Group.
Click the
 icon on the right side of the Lark group, then click Bots.
In the panel that appears, click Add and select a custom chatbot.
Enter a chatbot name and description, then click Add to group.
Copy the webhook URL. Under Set keywords, enter Alert as the keyword.
ImportantSave the webhook URL before closing this page. You need it in the next step to register the chatbot in the console.
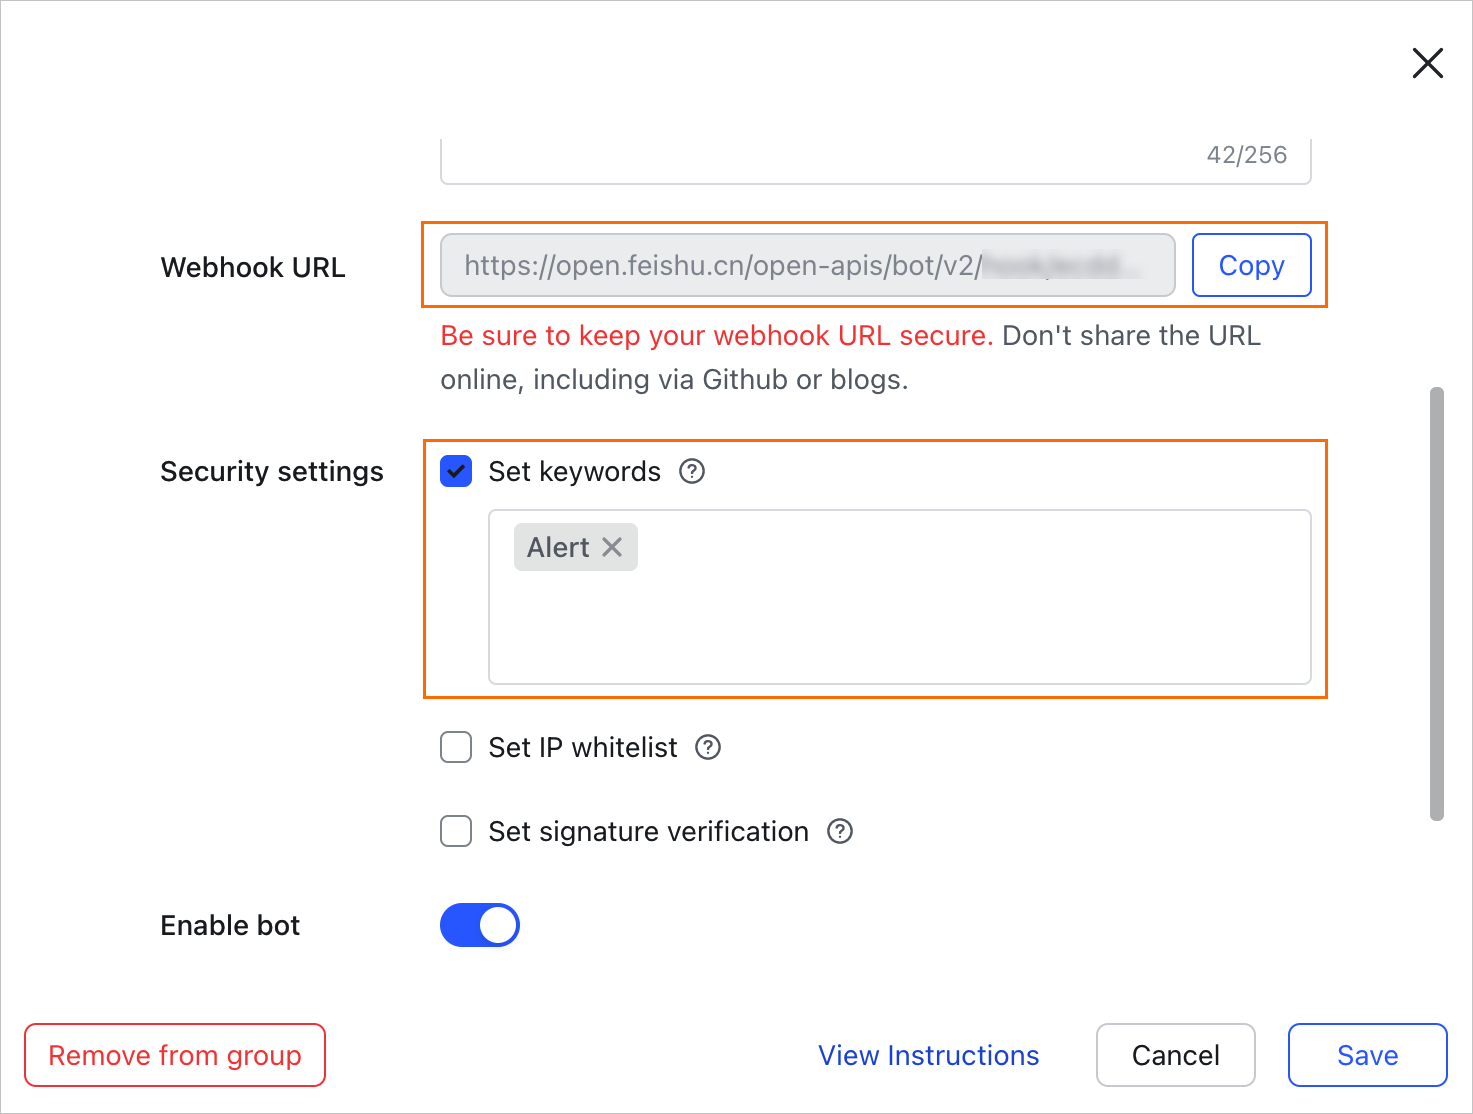
Click Save.
Register the chatbot in the console
After you obtain the webhook URL, register the Lark chatbot in the Managed Service for OpenTelemetry console so it can receive alert notifications.
Log on to the Managed Service for OpenTelemetry console.
In the left-side navigation pane, choose . Click the DingTalk/Lark/WeCom tab, then select Lark.
In the Create Lark Chatbot panel, configure the following parameters and click OK.
Parameter
Description
Name
A display name for the chatbot. Use a descriptive name so you can identify it when configuring notification policies.
Chatbot Webhook URL
The webhook URL you copied in the previous step.
Whether the Chatbot Sends Daily Statistics
Turn on this option to receive automated daily alert reports at specified times. Enter one or more time points in
HH:mmformat, separated by commas (,). At each time point, ARMS generates a report that includes:Total triggered alerts
Resolved alert count
Pending alert backlog
Card Content Configuration
Customize the style and content of the alert notification card. You can adjust the card layout and select which alert fields to display in the notification message.
After the chatbot is created, send a test alert to verify the integration. Trigger a test notification from a configured alert rule and confirm the message appears in your Lark group.
Route alerts to the chatbot
To start sending alerts to your Lark group, create or edit a notification policy and link it to the chatbot you registered.
In the left-side navigation pane, choose Alert Management > Notification Policies.
Create or edit a notification policy. Set the Notification Object to DingTalk/Lark/WeCom and select the Lark chatbot you registered in the previous step.
Configure the alert conditions and save the policy.
Alerts that match the policy conditions are automatically sent to the specified Lark group.
Manage alerts in Lark
When the chatbot delivers an alert to your Lark group, you can view alert details and clear alerts directly in the group chat -- no need to switch back to the console.
For the full list of in-group alert operations, see Handle alerts in group chats.
Edit or delete a chatbot
On the DingTalk/Lark/WeCom tab, you can manage your registered chatbots:
Search: Enter a keyword in the search box and click the
 icon to filter chatbots by name.
Edit: In the Actions column, click Edit. Update the settings in the dialog box and click OK.
Delete: In the Actions column, click Delete. Confirm the deletion in the dialog box by clicking OK.
Related topics
Create or manage notification policies: Control which alerts are routed to specific Lark groups.
Handle alerts in group chats: View, acknowledge, and clear alerts directly in Lark.