Overview
OpenSearch Vector Search Edition uses CloudMonitor to monitor your instances and sends alert notifications to the alert contacts or alert contact groups that you specify when you create alert rules. You need to create contacts and contact groups, and then add contacts to contact groups. When you create an alert rule, you can select a contact or a contact group. The system sends alert notifications to the contact or contact group that you specify.
Create a contact
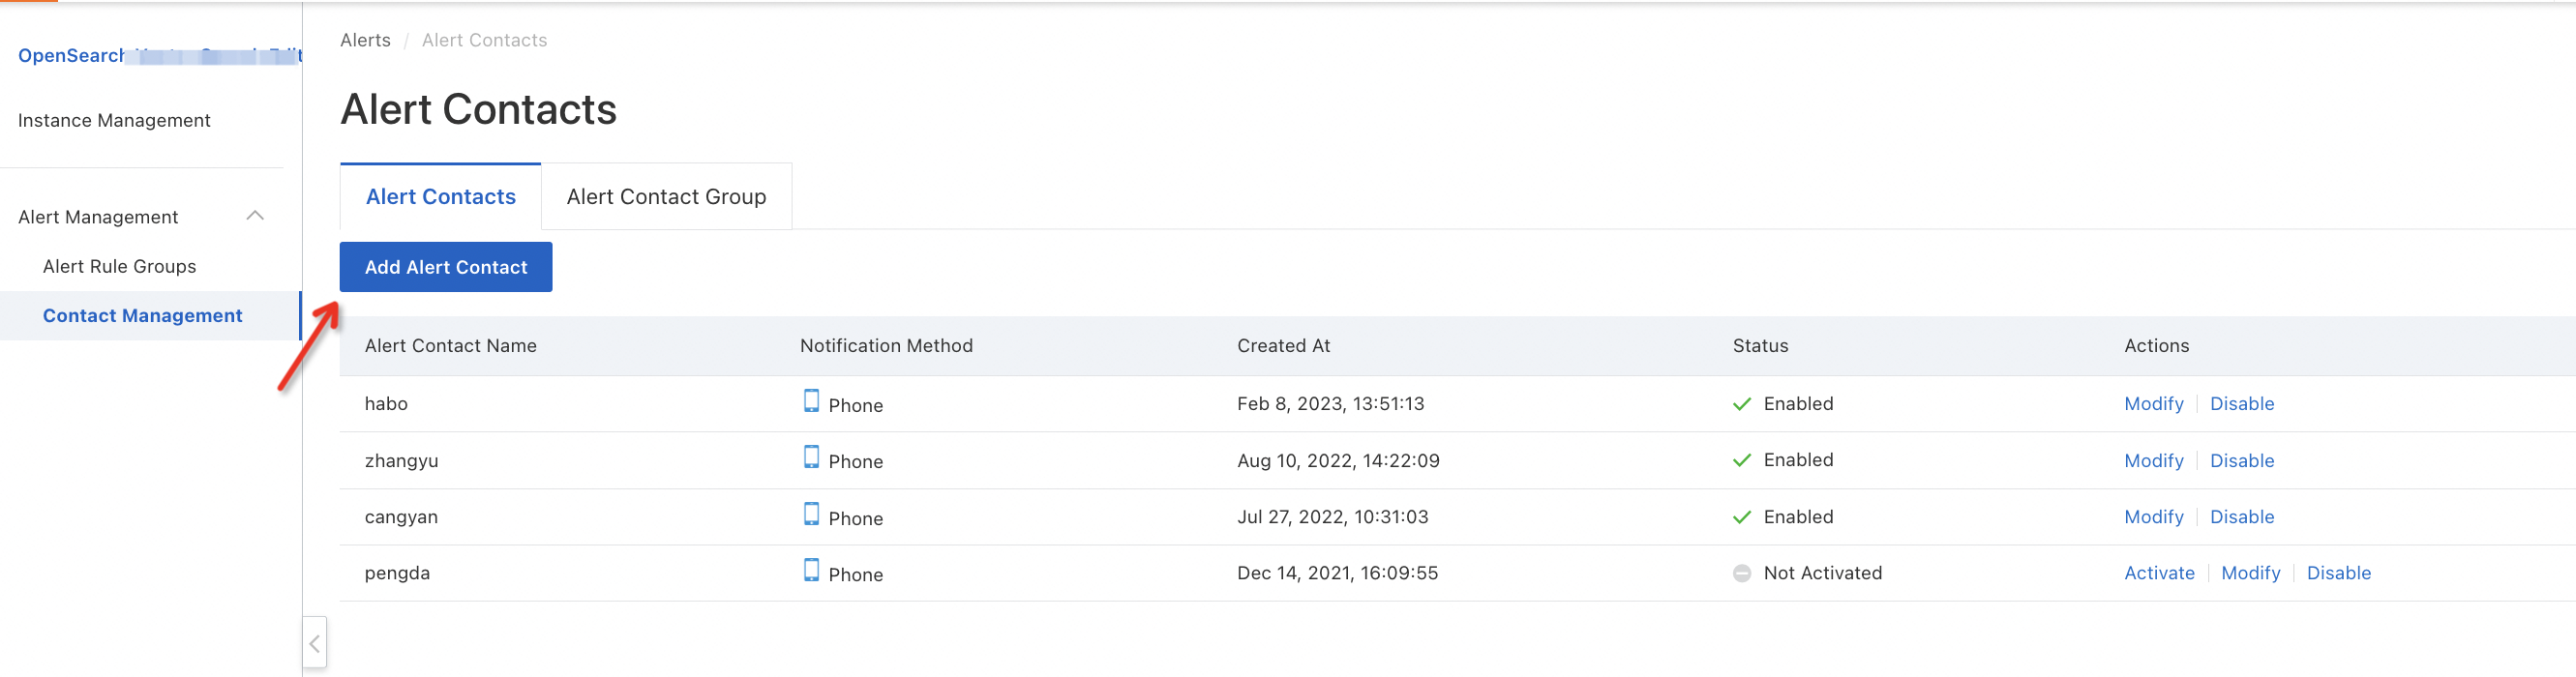
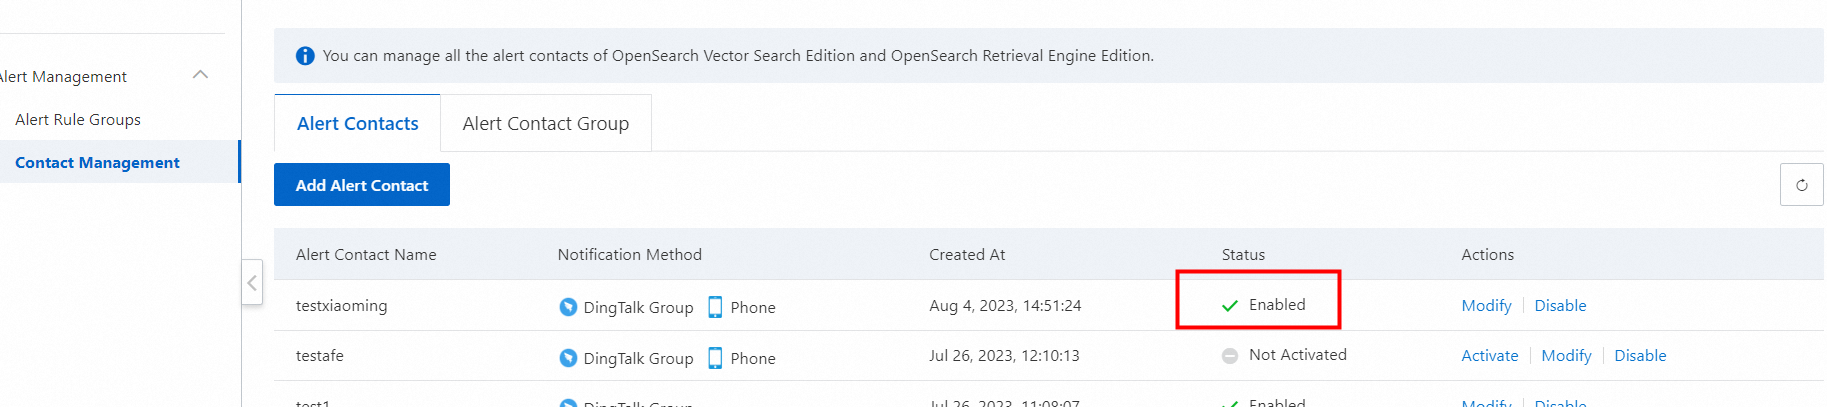
Log on to the OpenSearch Vector Search Edition console. In the left-side navigation pane, choose Alert Management > Contact Management. On the page that appears, click the Alert Contacts tab, and then click Add Alert Contact.
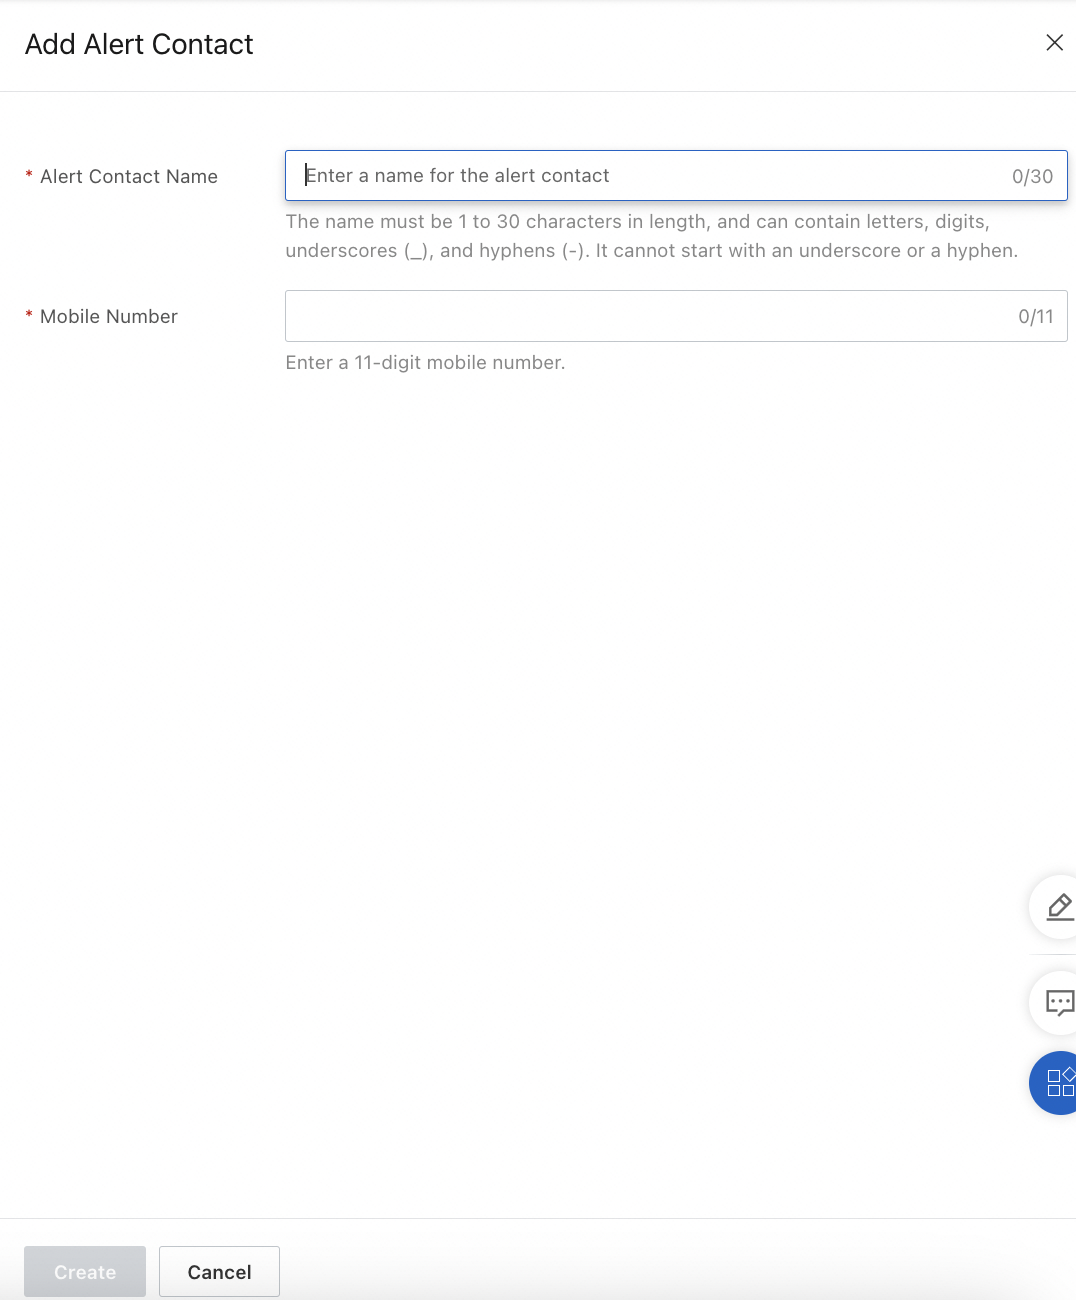
In the Add Alert Contact panel, configure the Alert Contact Name, Mobile Number, and DingTalk Chatbot parameters and click Create.
For more information about how to obtain the webhook URL of a DingTalk chatbot, see Receive alerts in a DingTalk group.
After you create a contact, you must activate it before you use it.
The DingTalk Chatbot parameter is optional. You can configure it based on your business requirements.
Activate a contact
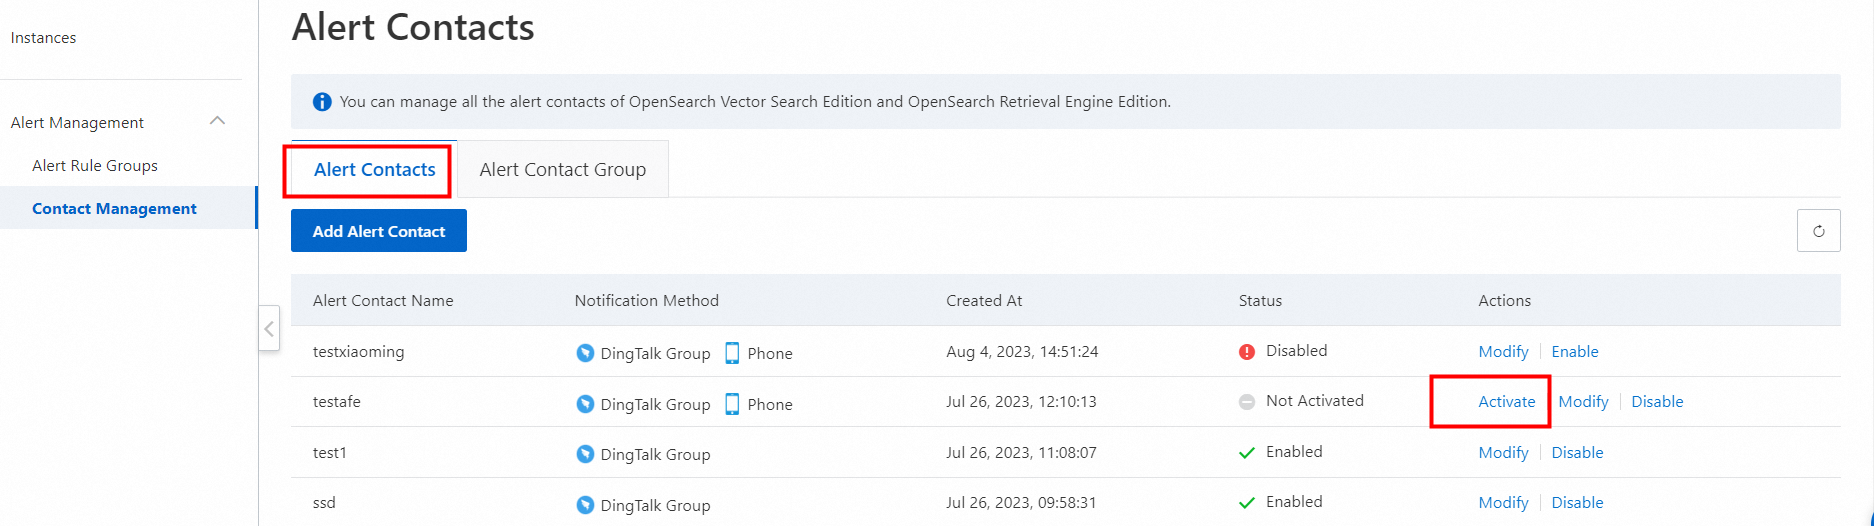
After you create a contact, you must activate the contact to ensure that it can receive alert notifications.
On the Alert Contacts page, find the contact that you want to activate and click Activate in the Actions column. The contact remains in the Not Activated state until you activate it.
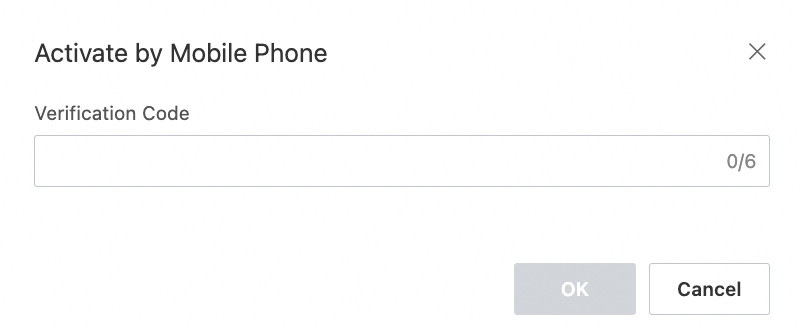
Enter the verification code that the system sent to the mobile phone number of the contact and click OK.
After you activate the contact, verify that the state of the contact changes to Enabled.
Modify a contact
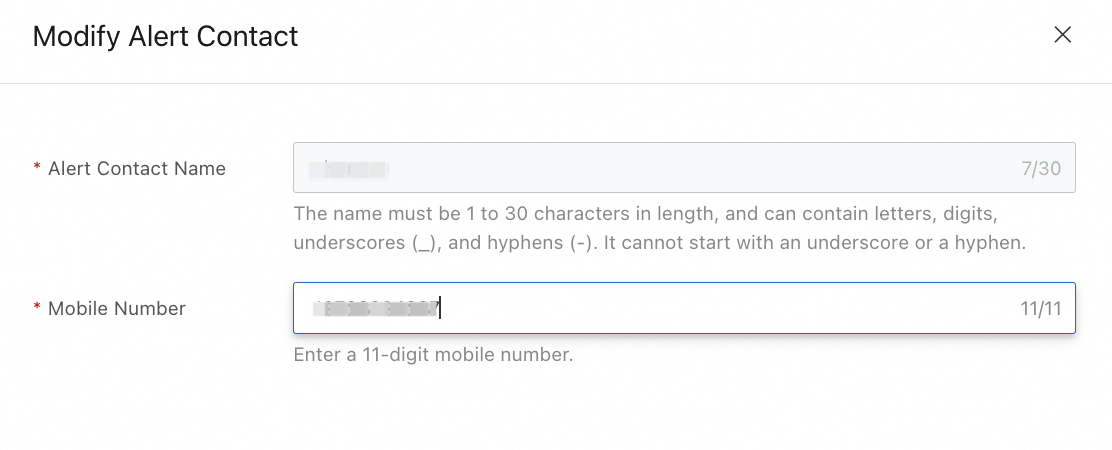
On the Alert Contacts page, find the contact that you want to modify and click Modify in the Actions column.

Enter a new mobile phone number for the contact and click Modify. You cannot change the name of the contact or the webhook URL of the DingTalk chatbot.
For more information about how to obtain the webhook URL of a DingTalk chatbot, see Receive alerts in a DingTalk group.
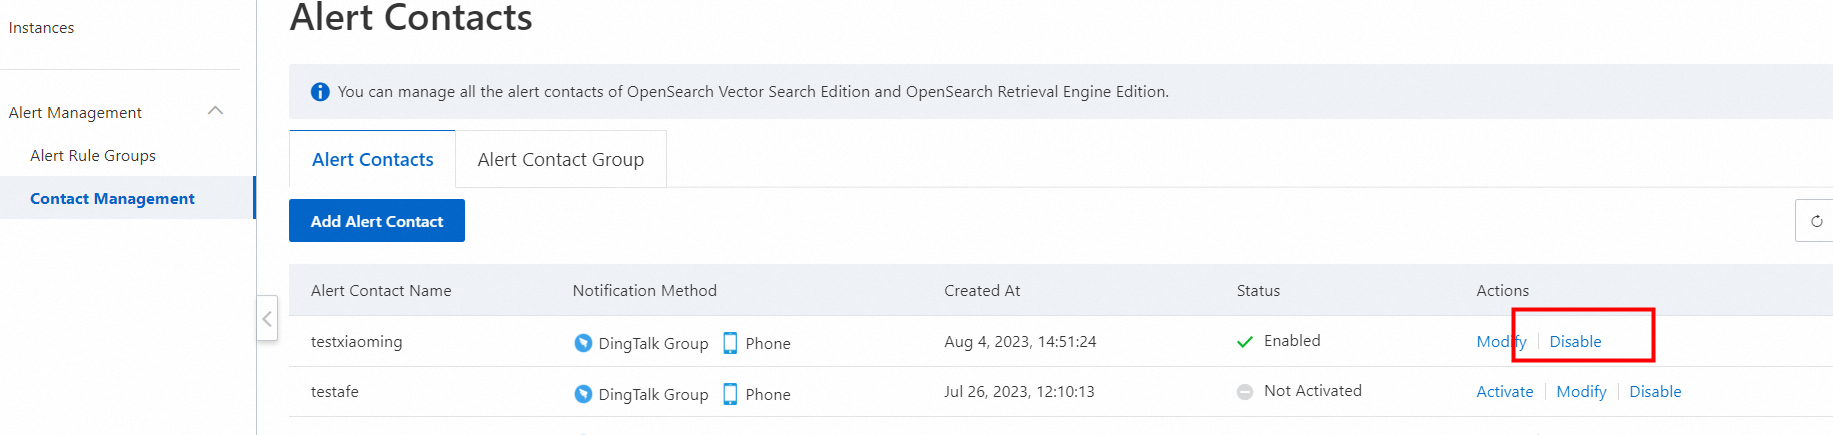
Disable a contact
On the Alert Contacts tab, find the contact that you want to disable and click Disable in the Actions column. You can disable only the contacts that are in the Enabled state.
After you disable the contact, verify that the status of the contact changes to Disabled.
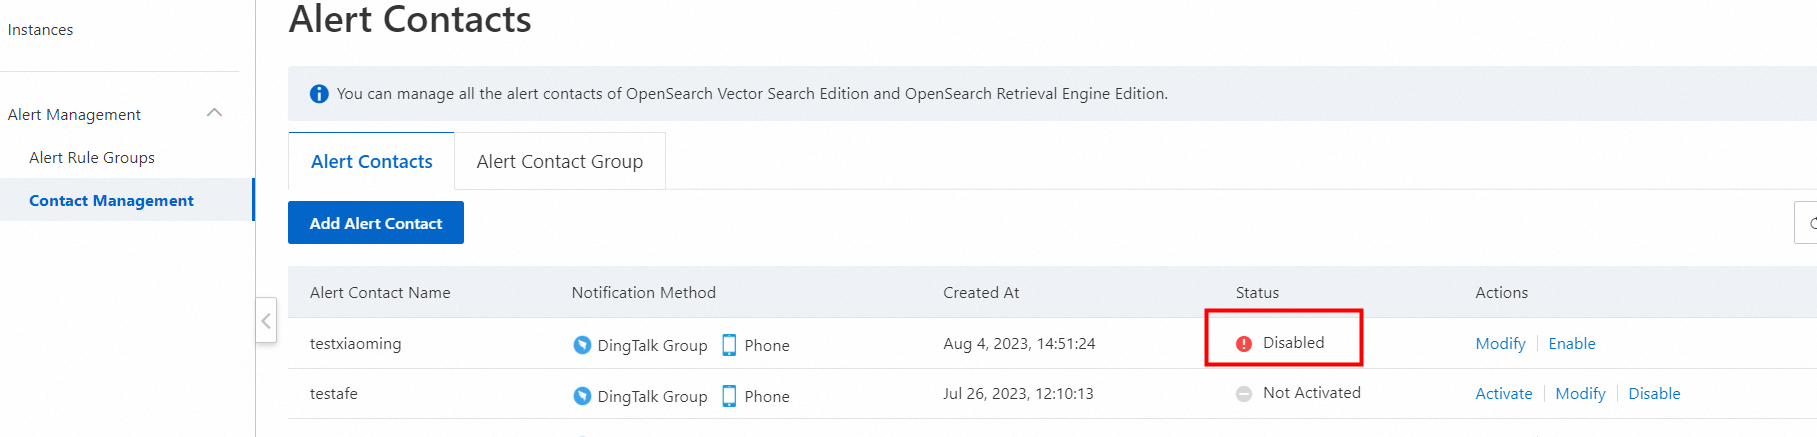
Contacts are the basis for CloudMonitor to send alert notifications. After a contact is disabled, the related notifier in the alert rule is disabled. To ensure that alert notifications can be sent, add an enabled contact or contact group in a timely manner.
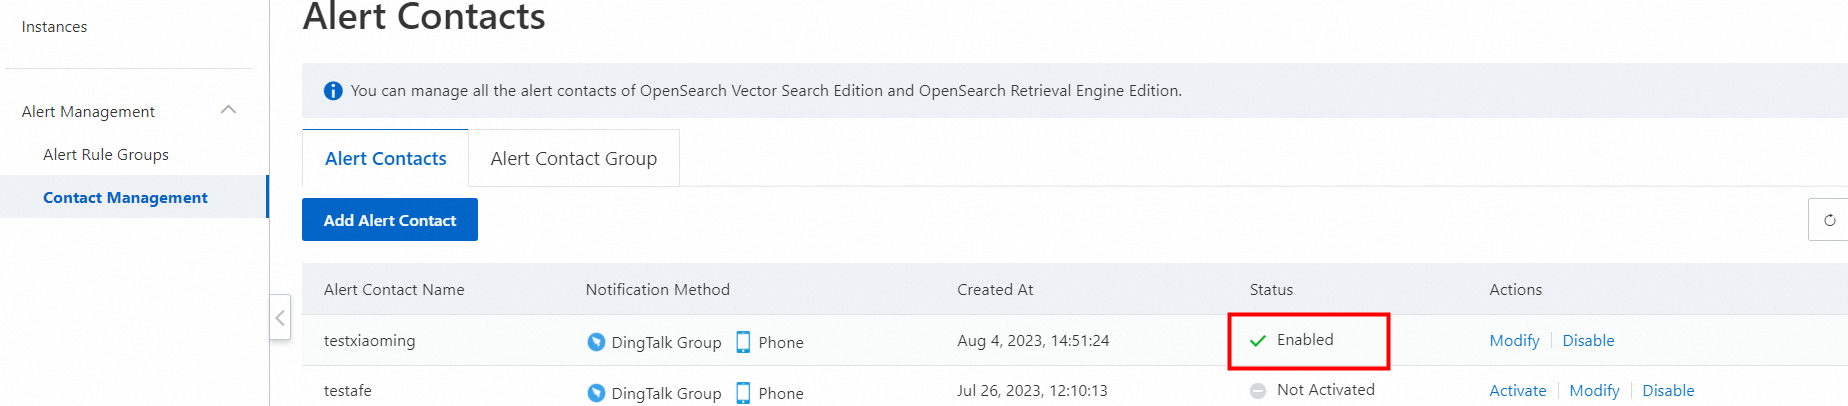
Enable a contact
On the Alert Contacts tab, find the contact that you want to enable and click Enable in the Actions column. You can enable only the contacts that are in the Disabled state.
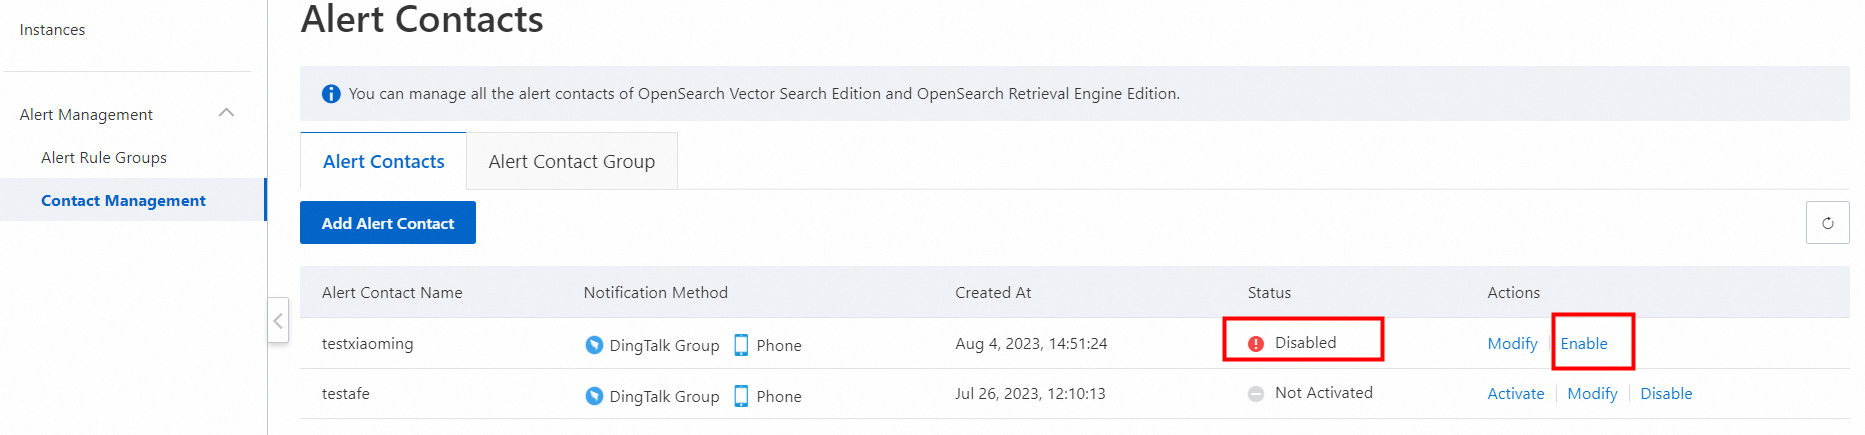
After you disable the contact, verify that the status of the contact changes to Enabled.
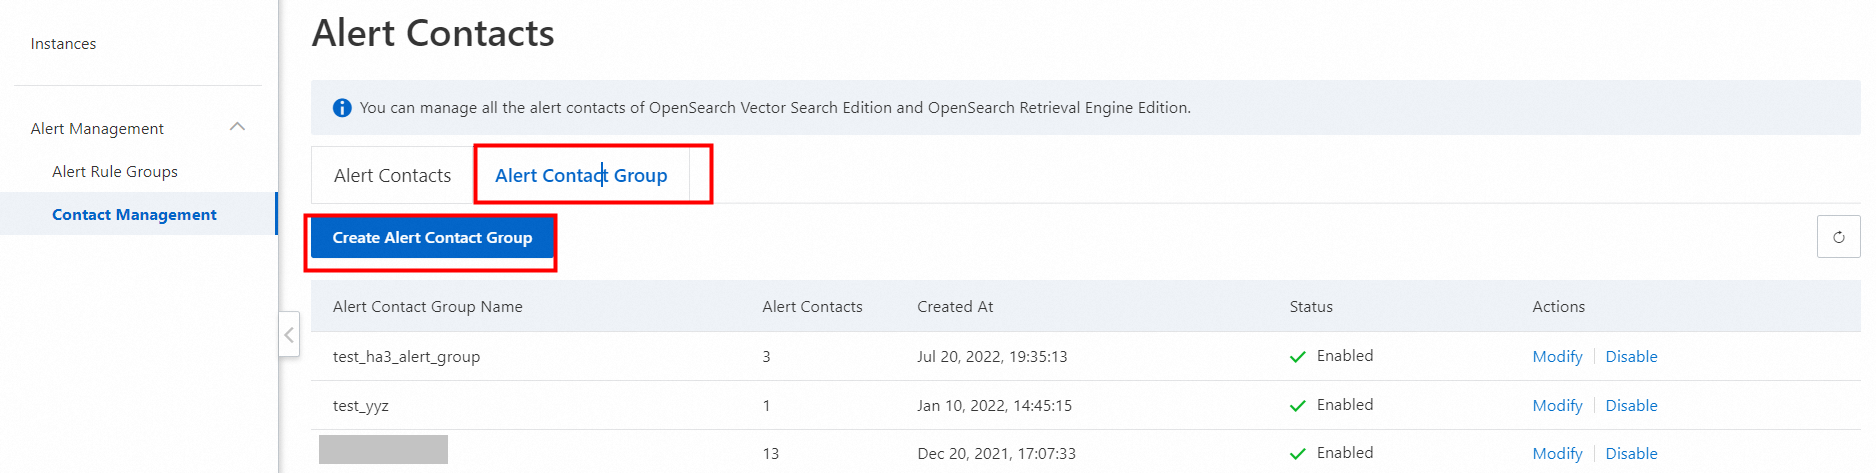
Create a contact group
Log on to the OpenSearch Vector Search Edition console. In the left-side navigation pane, choose Alert Management > Contact Management. On the page that appears, click the Alert Contact Group tab, and then click Create Alert Contact Group.
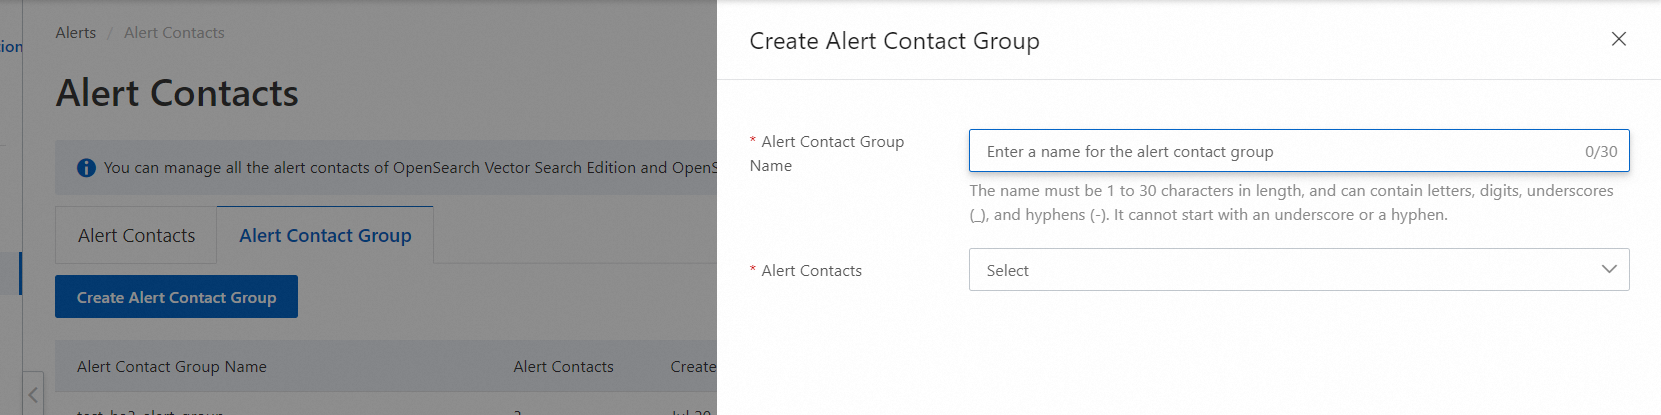
Configure the Alert Contact Group Name and Alert Contacts parameters and click Create.
Modify, enable, or disable a contact group
You can modify, enable, or disable a contact group in the same manner in which you modify, enable, or disable a contact.