SchedulerX supports task orchestration across applications. You can arrange tasks from the same or different applications into a single workflow based on their execution logic.
Create a workflow
Log on to the MSE SchedulerX console.
In the top menu bar, select a region.
In the left navigation pane, click Workflows.
On the Workflows page, select the target namespace and click Create workflow.
In the Createworkflow pane, set configuration items such as Name, Description, Application ID, and Time type, and then click Confirm.
NoteCurrently, workflow scheduling supports only cron expressions as the time type.
In the Advanced Configuration area, you can also set Time zone, Calendar, and Task concurrency.
Create a task
On the Workflows page, select an existing workflow and click Edit to go to the workflow details page.
Click Create Task and configure the parameters in the Create Task pane. The task is then added to the workflow and can be viewed on the Tasks page.
Import a task
On the Workflows page, select an existing workflow and click Edit to go to the workflow details page.
On the workflow details page, click Import tasks. From the Application drop-down list, select an application. Then, click Import in the Operation column for the desired task. The application for the current workflow is selected by default.
Task orchestration
Add a dependency
To add a dependency, drag your mouse to draw a line between nodes.
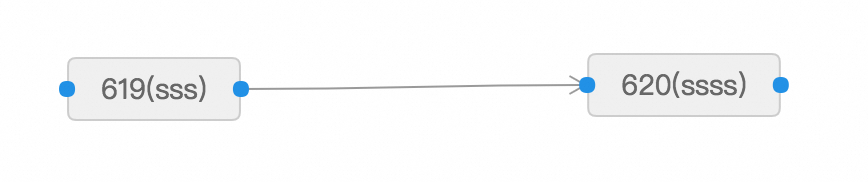
Example 1: Node 619 is the upstream node for 620. After node 619 completes, node 620 starts.
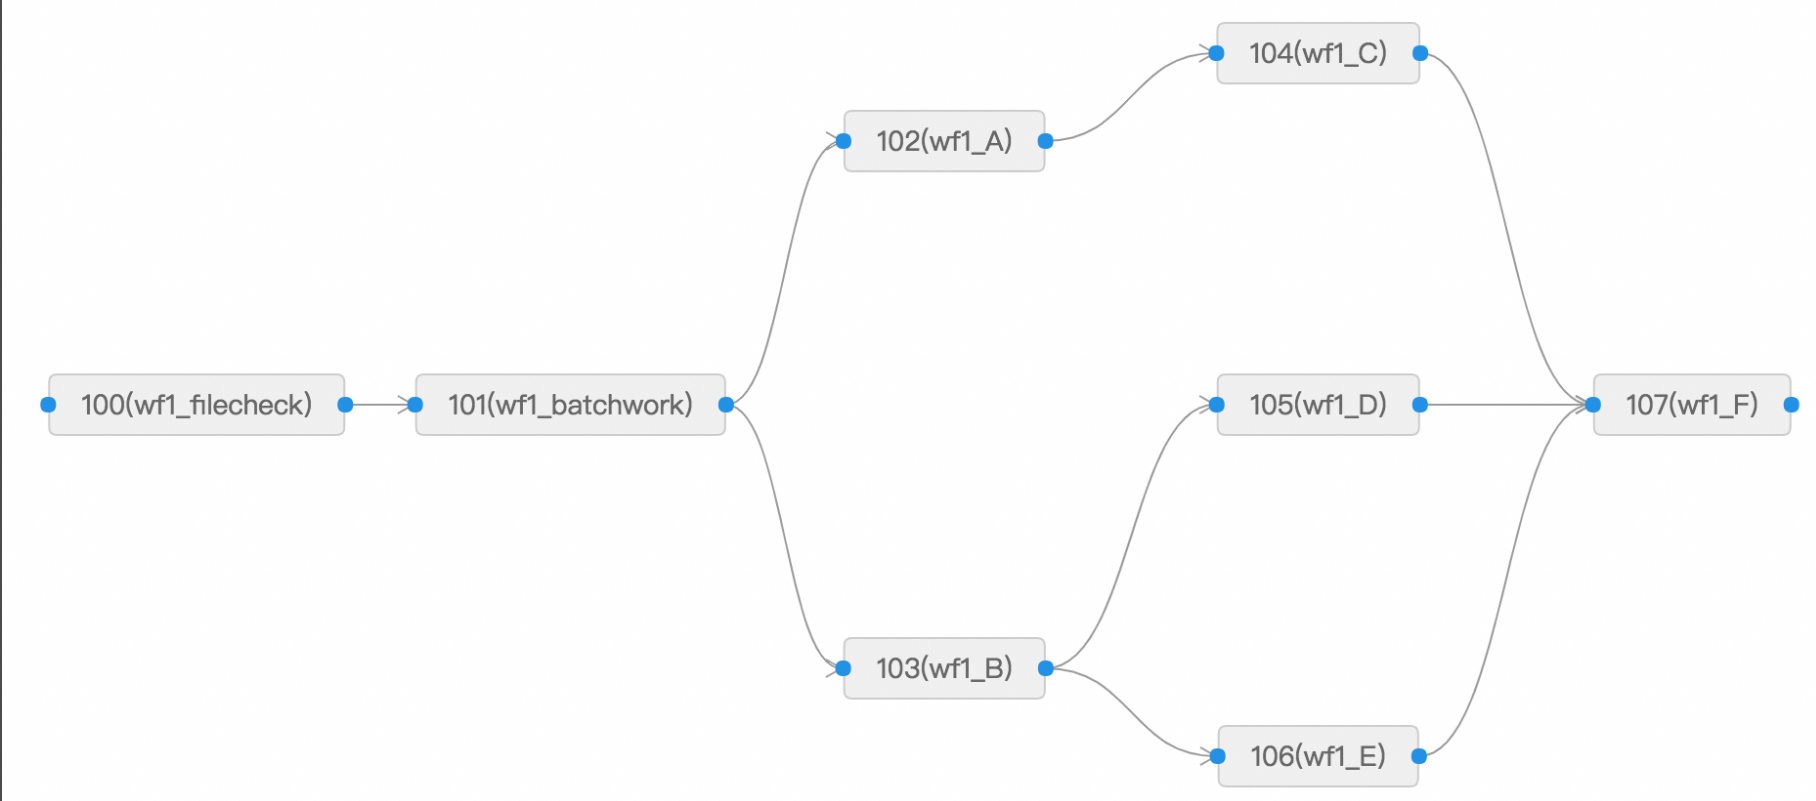
Example 2: After node 101 completes, nodes 102 and 103 start at the same time. Node 107 starts only after nodes 104, 105, and 106 all complete successfully.
Delete a dependency
Two methods are available:
Select a workflow line and press the Delete key.
Right-click a workflow line and click Remove.
Edit or delete a Job
You can right-click a workflow node and select Edit or Remove.
Save and run a workflow
After completing the workflow editing, click Save the workflow. If you don't need to activate it immediately, you can go to the Workflows page, click Run once to test it, and then click Enable after confirming there are no issues.
Manage workflows
View the workflow instance graph
On the Workflows page, in the Operation column, click More > History to view the workflow execution history.
In the Workflow Instance Records pane, click an ID in the Instance ID/Workflow Instance Graph column to view the running status of all nodes in the workflow.
Stop
On the Workflows page, in the Operation column, click More > History.
In the Process instance records pane, click Stop. This action forcibly stops all running nodes in the workflow, and the workflow status changes to failed.
Rerun
Rerun a workflow
You can rerun failed workflows.
On the Workflows page, in the Operation column, click More > History.
In the Process instance records pane, click More > Rerun to rerun all failed nodes in the workflow. The status of the workflow then changes to running.
Rerun a node
On the Workflows page, in the Operation column, click More > History.
In the Process instance records pane, click Details to view the workflow instance details.
Right-click the target node and select one of the following options:
Rerun current jobs and dependent jobs: Reruns the current node and all its descendant nodes.
Run again: Reruns only the current node, not its descendant nodes.
In the confirmation dialog box that appears, click OK. The relevant workflow nodes are rerun.
Pause
You can pause running workflows.
On the Workflows page, in the Operation column, click More > History.
In the Process instance records pane, click suspend. The system waits for the currently running nodes to complete, but subsequent nodes will not run. The workflow enters a paused state.
Resume
You can resume paused workflows.
On the Workflows page, in the Operation column, click More > History.
In the Process instance records pane, click Cancel Pause to resume the execution of the descendant nodes.
Skip
In a workflow, if a node has not started running, you can skip it. The workflow automatically proceeds to the next node.
On the Workflows page, in the Operation column, click More > History to view the execution history.
In the Process instance records pane, click Details to view the workflow instance details. On the Workflow Instance Details page, select a node and click skip.
Unskip
You can unskip a node to resume its execution, provided its descendant nodes have not started running.
On the Workflows page, in the Operation column, click More > History to view the workflow's execution history.
In the Process instance records pane, click Details to view the workflow instance details. On the Workflow Instance Details page, select a node and click Cancel Skip.
Import and export workflows
Workflows must be manually synchronized between different regions or namespaces.
Export a workflow
On the Workflows page, select an application from the Select an application drop-down list. Select the checkboxes for the workflows that you want to export. If you do not select any workflows, all workflows for the application are exported. Click Export workflow.
In the dialog box, select the application ID, confirm the workflow information for export, and click OK.
Import a workflow
On the Workflows page, click Import workflow, upload the workflow file, and then click OK.
Before you import a workflow, you must import its associated tasks. The application ID of the workflow to be imported must be the same as the application ID of the exported workflow. For more information about importing tasks, see Import or export a job.