Cloud-native gateways of Microservices Engine (MSE) integrate with Web Application Firewall 3.0 (WAF 3.0) to provide end-to-end security protection for your websites or apps. With this integration, WAF inspects and filters malicious traffic directly at the gateway, eliminating the extra network hop of a traditional WAF deployment. You can enable WAF at two levels:
Instance level -- protects all traffic through a gateway.
Route level -- protects only the routes you select, giving you fine-grained control over which traffic is inspected.
How the integration works
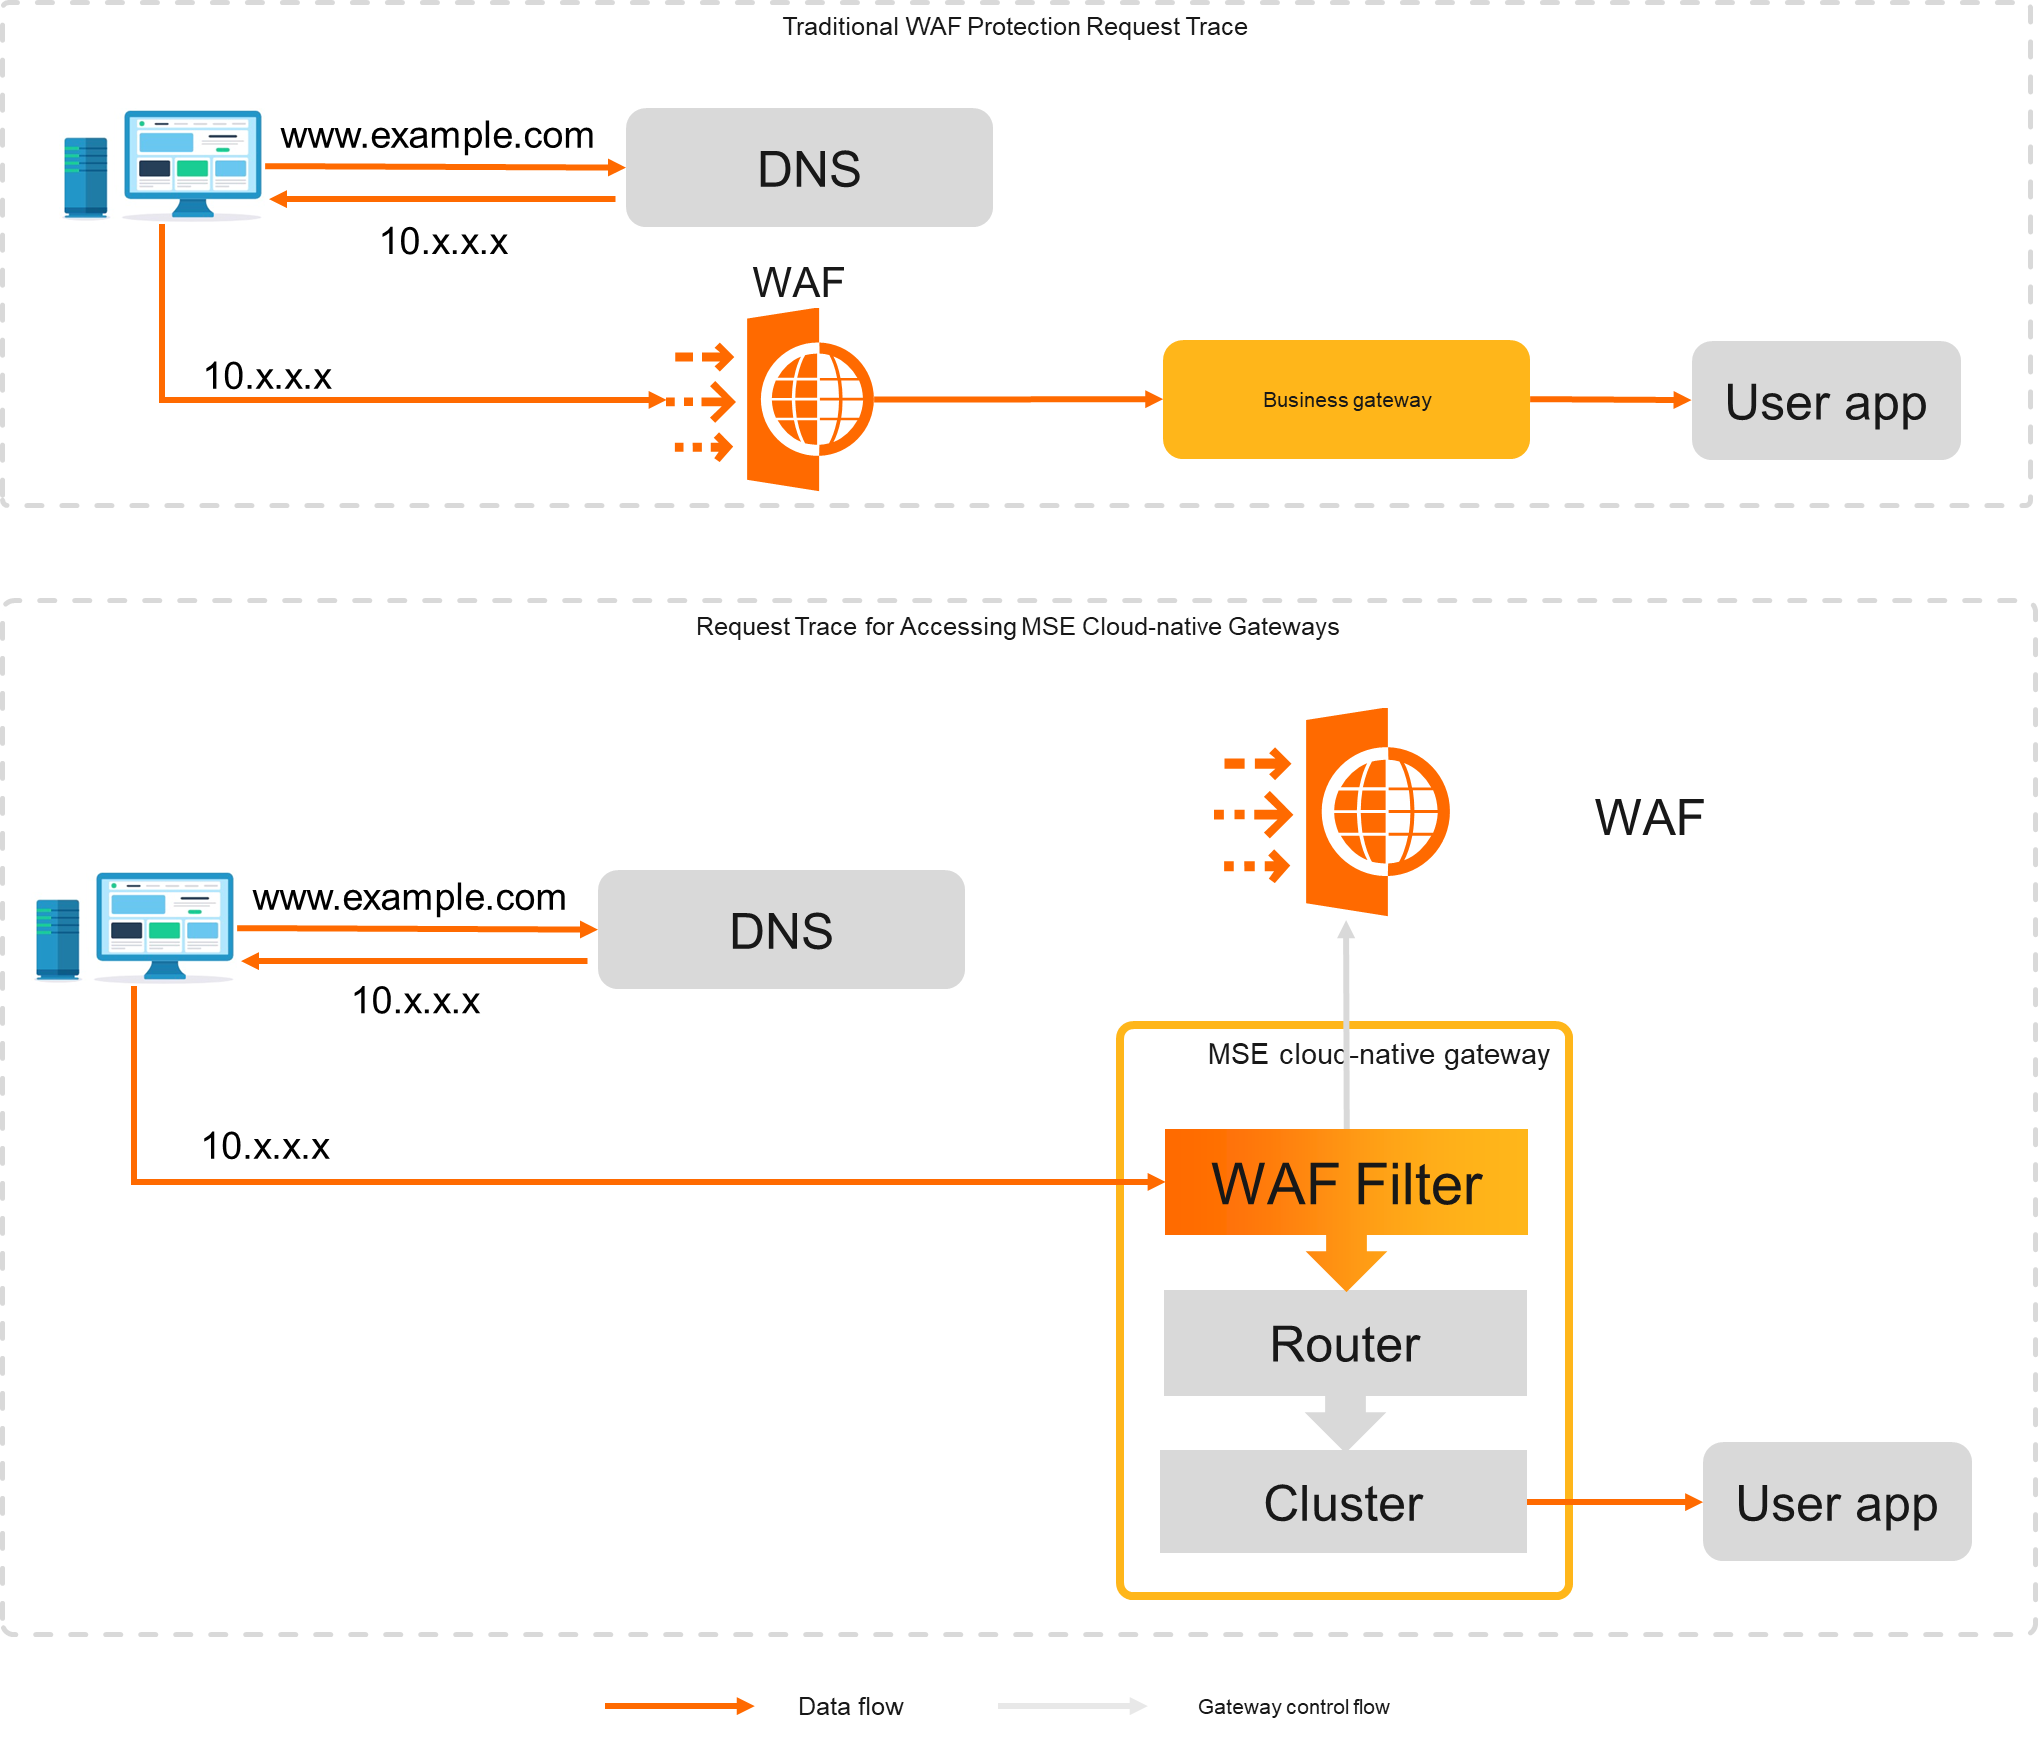
In a traditional WAF setup, requests pass through WAF before reaching the gateway. With the MSE integration, requests are directly forwarded to cloud-native gateways rather than WAF. This eliminates the extra network hop, reducing latency while maintaining the same security capabilities.
Billing
WAF 3.0 charges are not included in your MSE bill. WAF usage is billed separately in the WAF console based on actual resource consumption.
Supported regions
WAF 3.0 integration is available in the following regions:
China (Hangzhou), China (Shanghai), China (Beijing), China (Zhangjiakou), China (Shenzhen), Malaysia (Kuala Lumpur), and Singapore.
Enable instance-level WAF protection
Instance-level protection applies WAF to all traffic that passes through the gateway. This is the simplest option when all routes require the same level of protection.
Log on to the MSE console and select a supported region in the top navigation bar.
In the left-side navigation pane, choose Cloud-native Gateway > Gateways.
On the Gateways page, find the target gateway, click More in the Actions column, and select Enable WAF Protection.
In the Enable WAF Protection dialog, click OK.
Enable route-level WAF protection
Route-level protection applies WAF only to selected routes. Use this option when some routes do not need WAF inspection.
Log on to the MSE console and select a supported region in the top navigation bar.
In the left-side navigation pane, choose Cloud-native Gateway > Gateways. On the Gateways page, click the name of the target gateway.
In the left-side navigation pane, click Routes, then click the Routes tab.
Find the target route and click Policies in the Actions column. On the left side of the Policies page, click WAF, then click Enable Route-level WAF Protection (Recommended).
In the Tips dialog, click OK.
Default protection after enablement
After WAF is enabled, two protection features are active by default:
| Feature | Protection scope |
|---|---|
| Protection rules engine | Common web attacks: SQL injection, XSS, and webshell uploads |
| HTTP flood protection | HTTP flood (DDoS layer 7) attacks |
Other protection features require manual configuration. For details, see WAF protection overview.
FAQ
Where do I enable WAF -- the MSE console or the WAF console?
Either works. We recommend that you use the MSE console. You can also enable WAF from the WAF 3.0 console by following the steps in Enable WAF protection for an MSE instance.
What is the difference between instance-level and route-level protection?
Instance-level protection applies WAF to all traffic on the gateway. Route-level protection applies WAF only to specific routes. Use route-level protection when some routes do not need WAF inspection.
Can I use WAF 2.0 with MSE cloud-native gateways?
Yes. To integrate with WAF 2.0, add the IP address of the Server Load Balancer (SLB) instance associated with your cloud-native gateway to the back-to-origin IP addresses in WAF. For detailed steps, see WAF 2.0 tutorial.