This topic describes how to use the core capabilities of Microservices Governance for Java applications.
Prerequisites
Create an ACK managed cluster.
NoteThe minimum required configuration for a Kubernetes cluster is 12 cores and 24 GiB of memory.
The Kubernetes cluster must have an internet connection to download the demo from GitHub.
Expose the API server using elastic IP addresses (EIPs) to allow access from CloudShell.
Connect a microservice application in an ACK cluster to the MSE Governance Center.
Install the ack-kubernetes-cronhpa-controller component in the ACK cluster. For more information, see Install components.
If you are a RAM user, ask your Alibaba Cloud account administrator to temporarily grant the <a baseurl="t2314492_v4_2_0.xdita" data-node="4751410" data-root="45393" data-tag="xref" href="t2487291.xdita#" id="b5397d18a1u34">AliyunMSEFullAccess</a> permission and remove it after you complete this tutorial. In a production environment, grant permissions on an as-needed basis. For more information about service administration authorization, see Microservice Administration Authorization.
Deploy the demo
Demo introduction
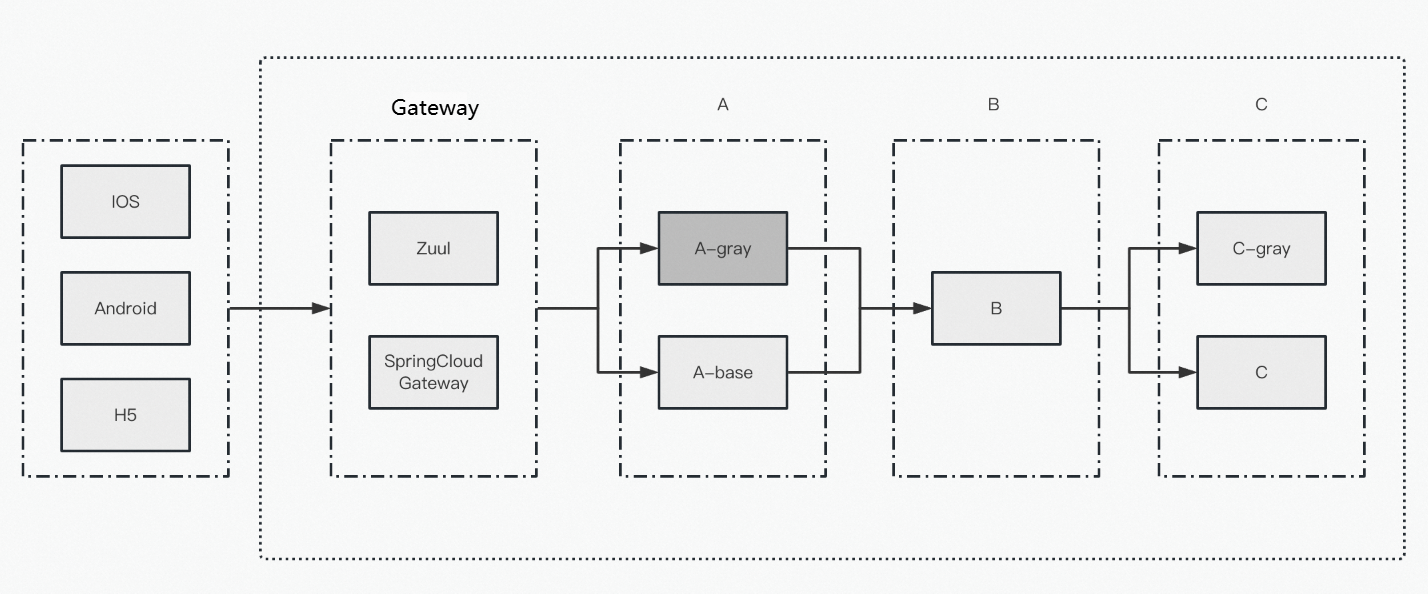
The demo uses a Nacos instance as the registry and includes a Spring Cloud gateway and a Zuul gateway, which you can enable as needed. The default application call workflow is A -> B -> C. Applications A and C have canary release versions. You can obtain the application code from the code repository.
Application name | Service framework version | Involved component | Demo |
Zuul | Spring Cloud Greenwich | zuul | |
SpringCloudGateway | spring-cloud-starter-gateway 4.1.2 | spring-cloud-starter-gateway | |
A | Spring Cloud 2023.0.1 Dubbo 3.3.0 | openfeign/httpclient/rocketmq/nacos/loadbalancer | |
B | Spring Cloud 2023.0.1 Dubbo 3.3.0 | httpclient/mybatis/druid/nacos | |
C | Spring Cloud 2023.0.1 Dubbo 3.3.0 | openfeign/httpclient/nacos |
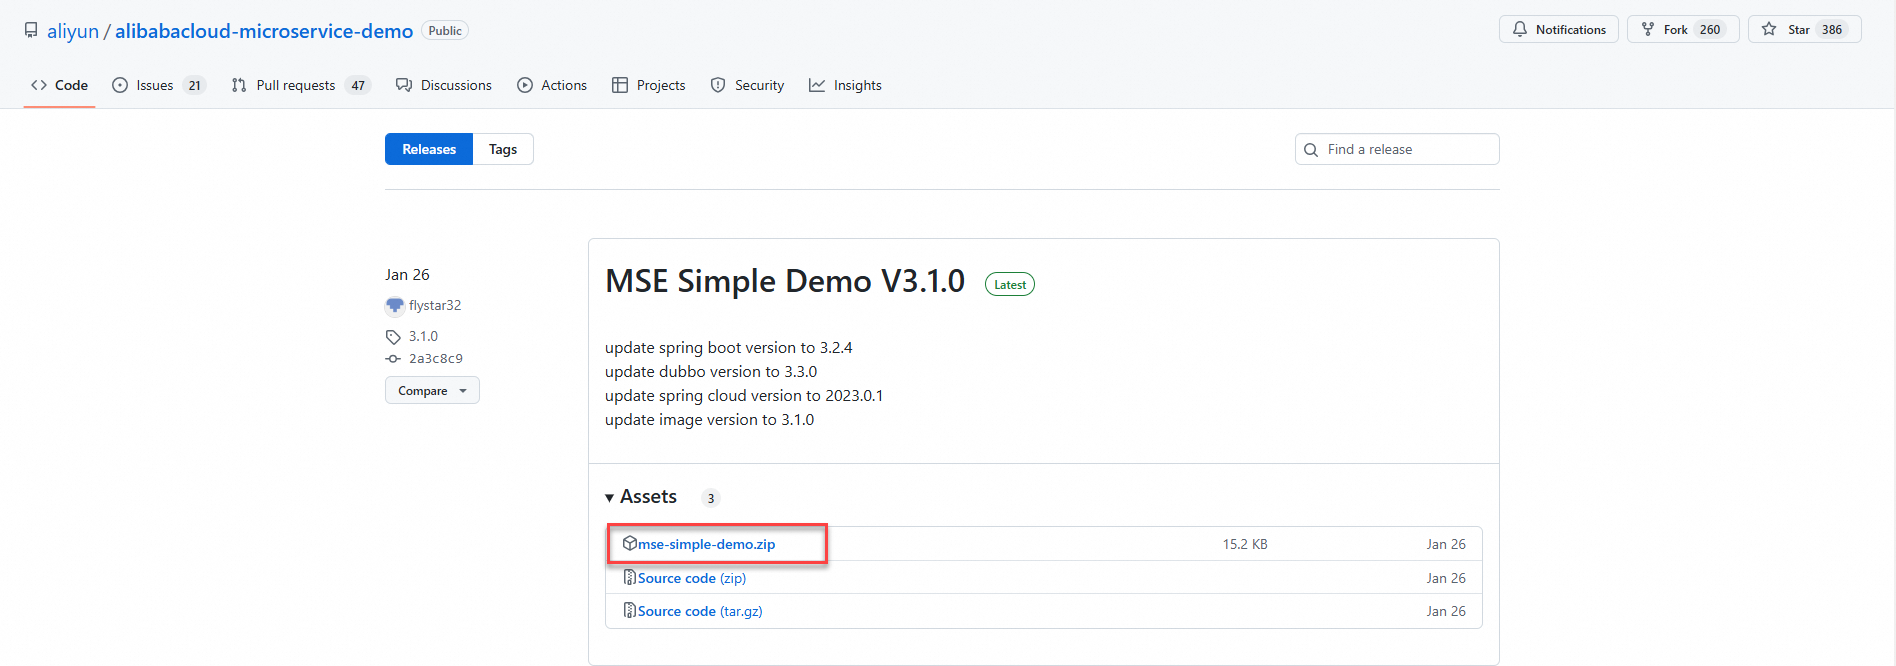
Download the Helm package
Download the Helm package for the demo. The Helm package and image are updated on a regular basis.
Deployment methods
Use CloudShell of the ACK cluster to deploy mse-simple-demo
Prepare the mse-simple-demo file.
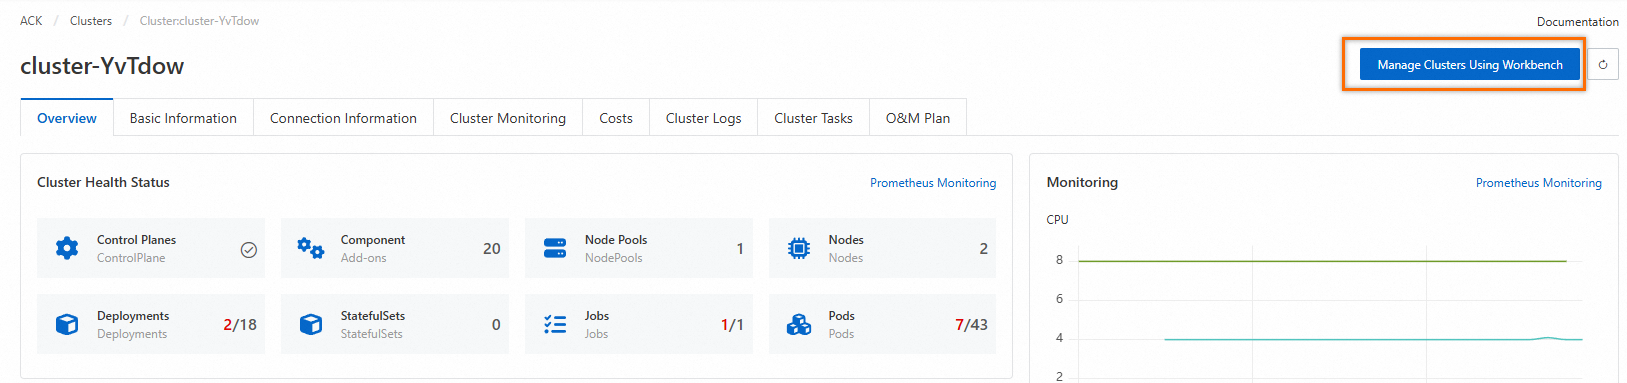
Log on to the ACK console. Select the target cluster, and on the Cluster Information page, click Manage Cluster With Workbench.
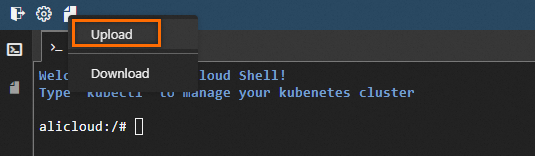
Upload the Helm package.
Run the
unzip mse-simple-demo.zipcommand to decompress the demo package.Run the
kubectl create namespace mse-democommand to create a namespace that corresponds to the --namespace parameter.
Use Helm to deploy mse-simple-demo
Run the following Helm command to deploy mse-simple-demo.
helm upgrade mse-simple-demo mse-simple-demo \
--set mse.namespace=mse-demo \
--set gateway.springcloud=true  \
--install \
--namespace mse-demo \
--values mse-simple-demo/values.yaml
The following parameters can be modified:
namespace: The Kubernetes namespace in which to install the demo. This parameter is optional. The default value is `default`.registry: The prefix of the container image address. If your cluster cannot pull the demo image, you can sync the image to your account's image repository and update this parameter with the new address.images.version: The image version. The latest version is 3.1.0.mse.namespace: The microservices namespace that is connected to MSE Microservices Governance. You can use this parameter to differentiate between environments. The default value is mse-demo.nacos.host: The address of the Nacos registry. The demo automatically starts a Nacos server. If you want to register demo applications with another Nacos address, configure this parameter.autoscaling: Specifies whether to enable auto scaling. The default value is false. Before you enable this feature, make sure that the kubernetes-cronhpa-controller component is installed in the cluster.resources.enable: Specifies whether to set the resource request configuration. The default value is true.
Verify basic features
End-to-end canary release
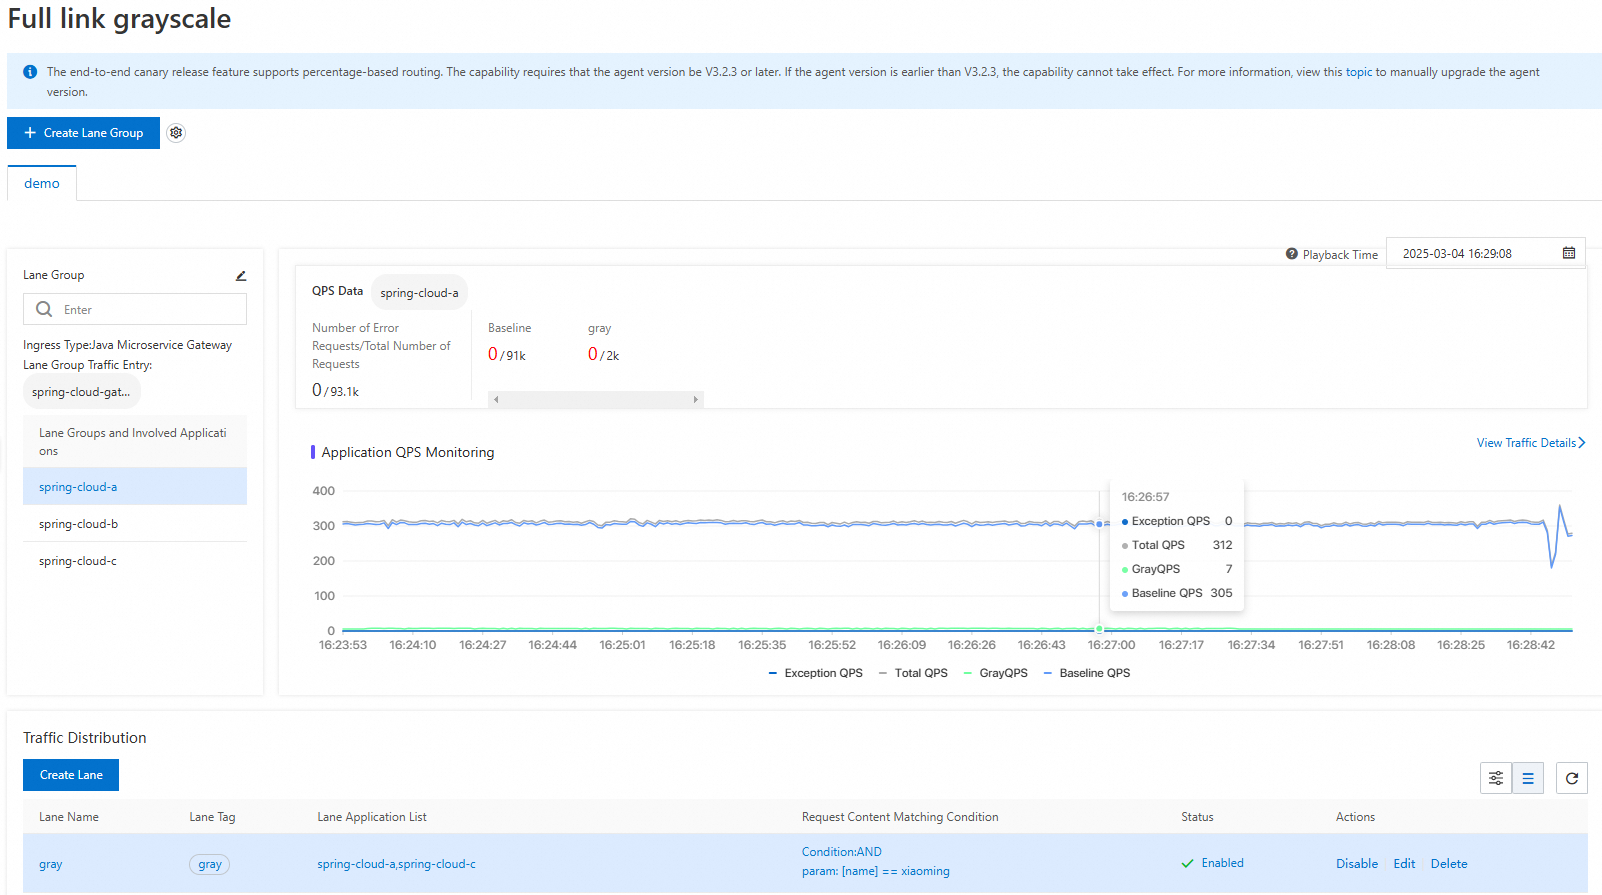
Log on to the MSE console. In the navigation pane on the left, choose Microservices Governance > End-to-end Canary Release.
Create a lane group
On the End-to-end Canary Release page:
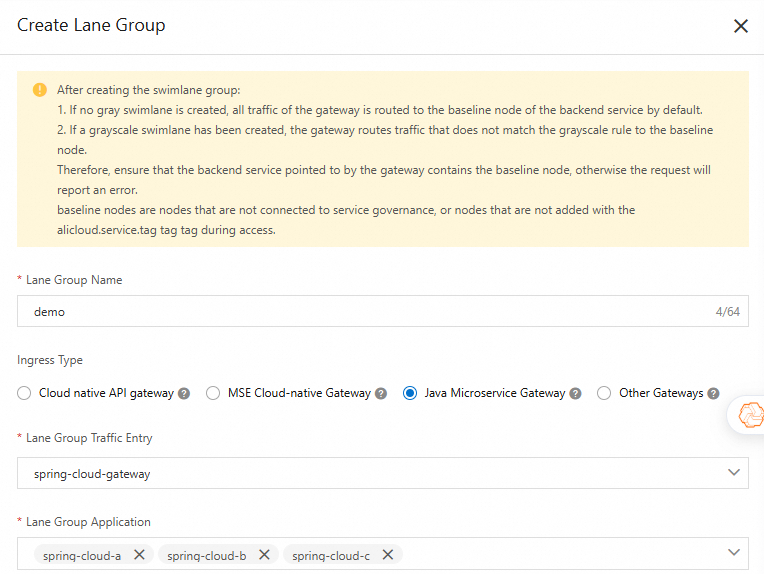
Click Create Lane Group and Lane. If a lane group already exists in the selected microservices namespace, click + Create Lane Group.
On the Create Lane Group page, configure the parameters, and then click OK.
Create a lane
At the bottom of the End-to-end Canary Release page:
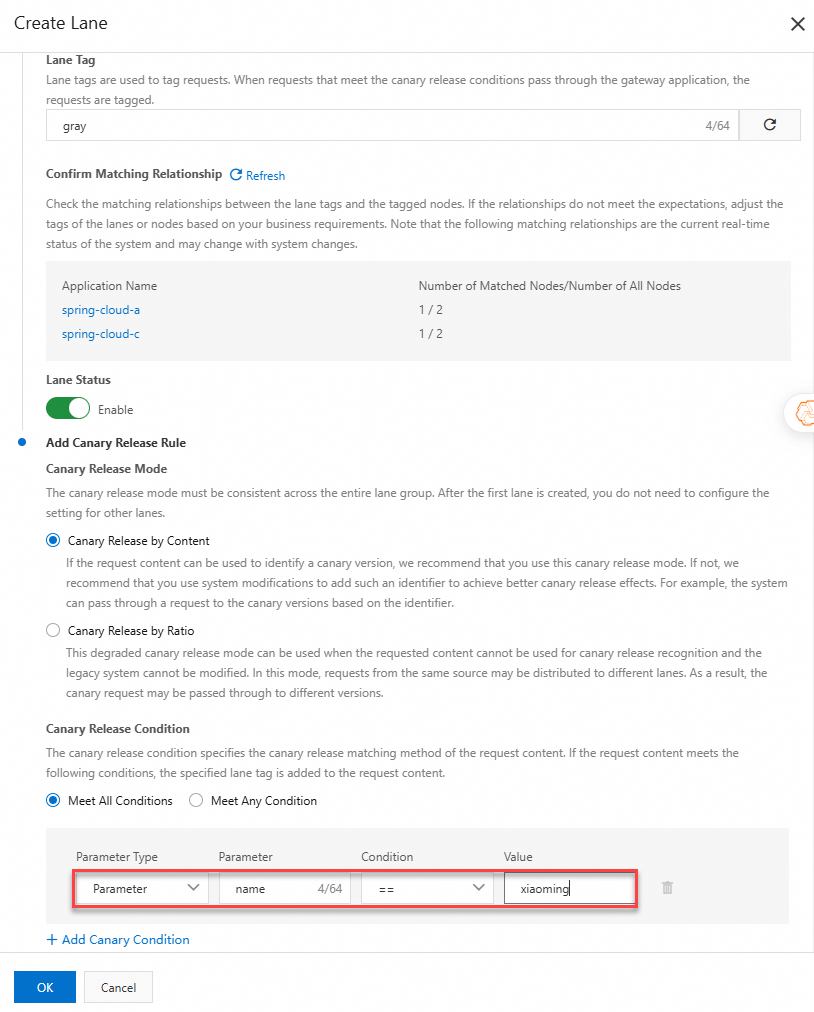
Click Create First Split Lane. If a lane has already been created in the selected microservices namespace, click Create Lane.
In the Create Lane panel, configure the lane settings, and click OK.
Route common requests to the base versions
The web page address is the address of the gateway SLB. To find this address, go to the details page of the cluster in the ACK console. Choose Workloads > Deployments. On the Deployments page, click the `spring-cloud-gateway` deployment. On the details page that appears, click the Access Method tab. In the Service section, you can find the IP address and port in the External Endpoint column.
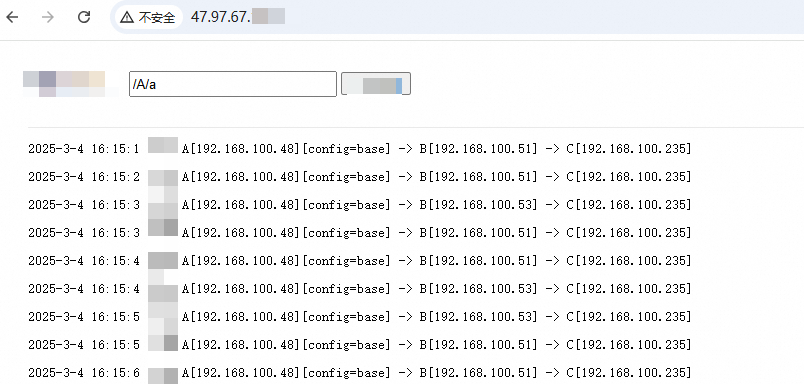
In a browser, access the SLB address of the gateway and send the following requests.
Route canary requests to the canary release versions
For more information, see Implement an end-to-end canary release based on a self-managed Spring Cloud Gateway or Zuul gateway.
Graceful start and shutdown
Log on to the MSE console. In the navigation pane on the left, choose Microservices Governance > Application Governance. On the Application List page, click the name of the desired application to go to its overview page.
Configure graceful start and shutdown
On the application overview page, in the navigation pane on the left, select Traffic Governance. By default, some graceful start and shutdown capabilities are provided. To use the full capabilities, you can enable and configure the graceful start and shutdown settings in the console.

View events and processes
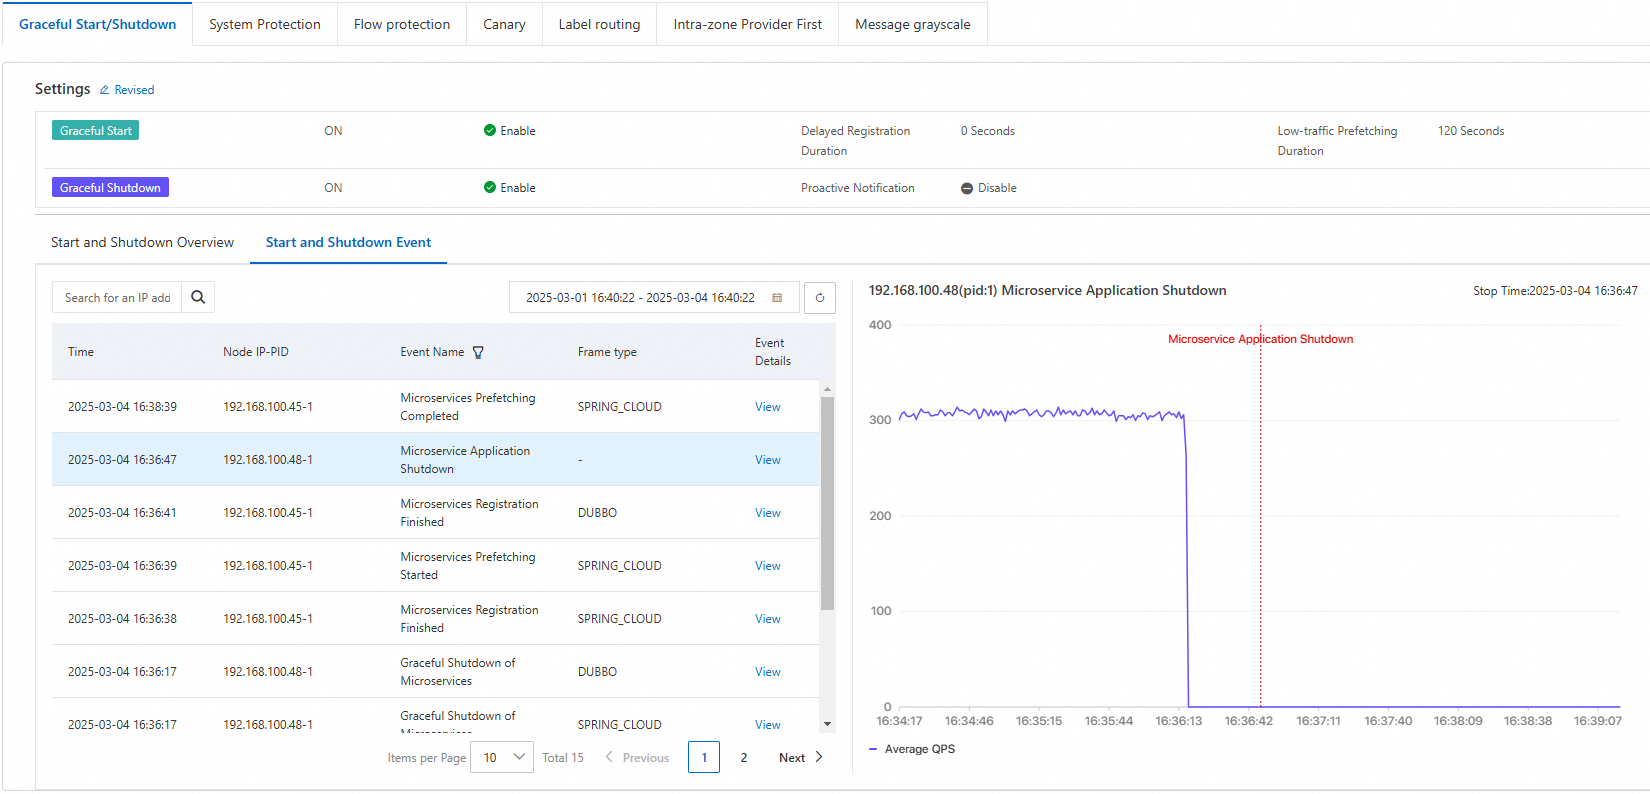
For more information, see Graceful start and shutdown.
Throttling rules
Log on to the MSE console. In the navigation pane on the left, choose Microservices Governance > Application Governance. On the Application List page, click the name of the desired application to go to its overview page.
Configure a throttling rule
In the navigation pane on the left of the application overview page, select Traffic Governance. On the Traffic Governance page, select Flow Protection > Interface Throttling, and then click Add Throttling Rule.
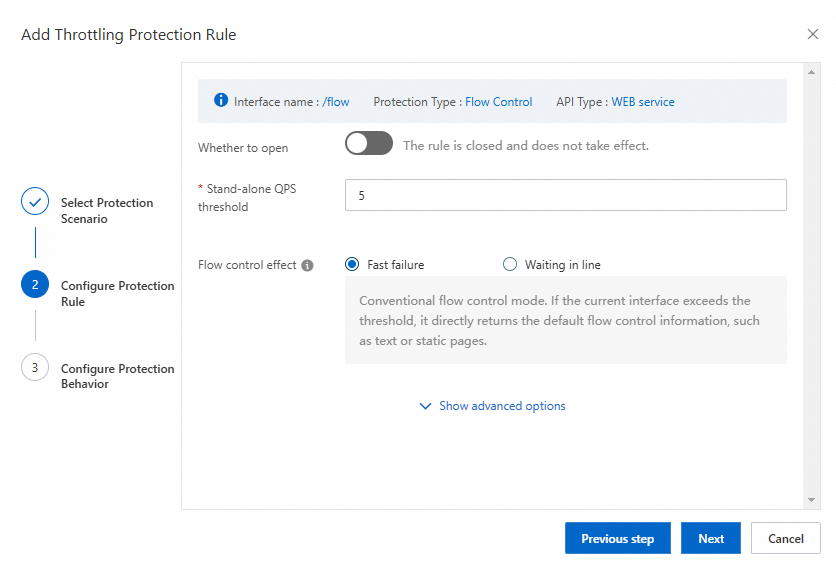
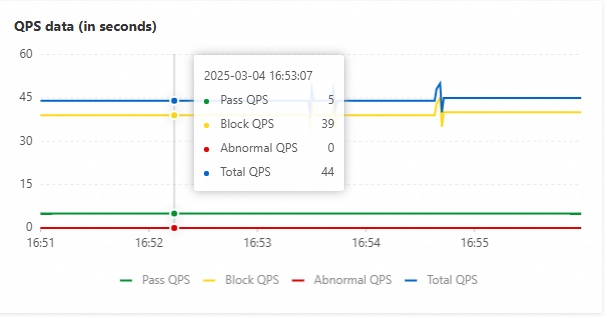
Throttling effect
In a browser, access the SLB address of the gateway and send the following requests.
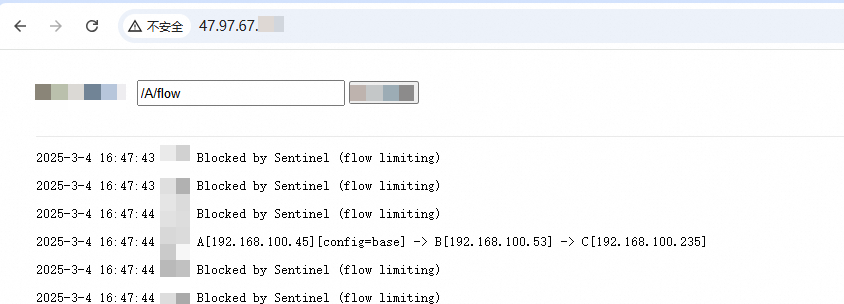
Application A has one node. The throttling threshold for a single node is set to 5, and the queries per second (QPS) is stable at 5.
For more information, see What is traffic protection?.
Sample requests
Replace `localhost` with the SLB address of the gateway. You can send requests from the gateway's pod.
# Common request
http://localhost:20000/A/a
A[10.0.0.47][config=base] -> B[10.0.0.39] -> C[10.0.0.48]
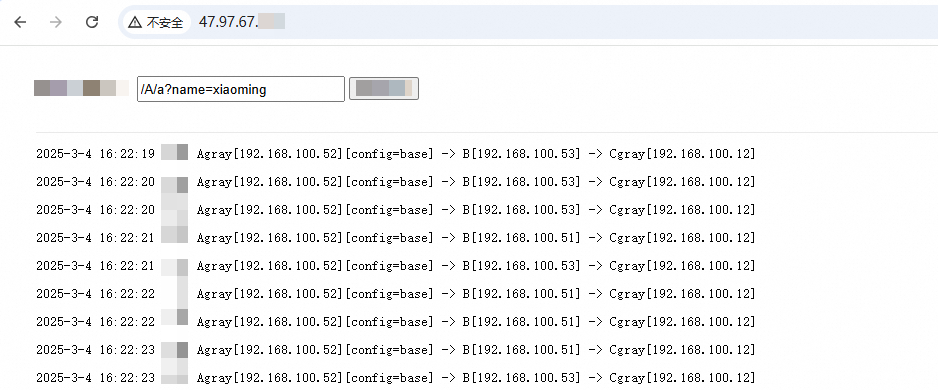
# Canary request
http://localhost:20000/A/a?name=xiaoming
Agray[10.0.0.41][config=base] -> B[10.0.0.55] -> Cgray[10.0.0.30]
# Common request (Feign)
http://localhost:20000/A/aByFeign
A[10.0.0.47][config=base] -> B[10.0.0.55]
# Common request (A requests B and C sequentially)
http://localhost:20000/A/a2bc
A[10.0.0.47][config=base] -> C[10.0.0.48]
A[10.0.0.47][config=base] -> B[10.0.0.55] -> C[10.0.0.49]
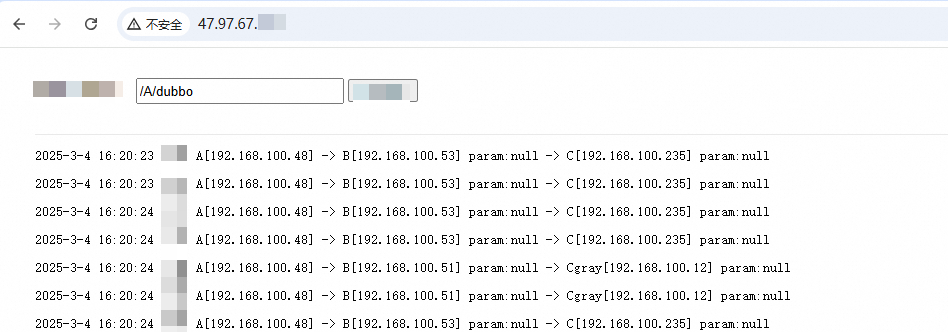
# Dubbo request
http://localhost:20000/A/dubbo
A[10.0.0.44] -> B[10.0.0.39]name:A -> C[10.0.0.49] params:A
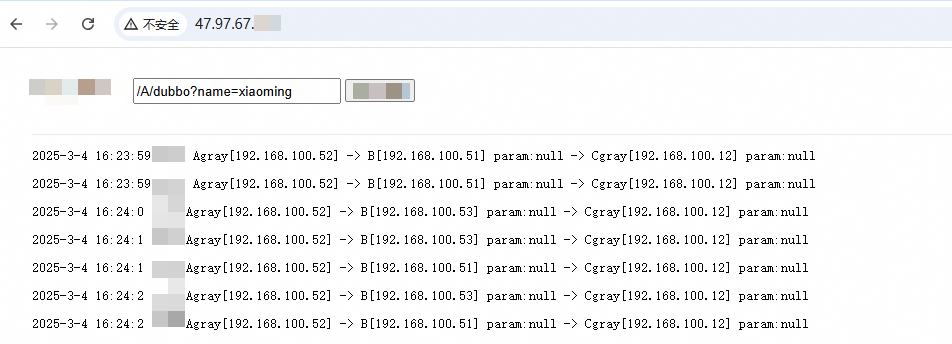
# Dubbo canary request
http://localhost:20000/A/dubbo?name=xiaoming
Agray[10.0.0.41] -> B[10.0.0.39]name:A -> Cgray[10.0.0.30] params:A
# Request for throttling test
http://localhost:20000/A/flow
A[10.0.0.17][config=base] -> B[10.0.0.39] sleepTime:9 -> C[10.0.0.48] sleepTime:8 code:200
http://localhost:20000/A/dubbo-flow
A[10.0.0.17] -> B[10.0.0.55]name:A -> C[10.0.0.48] params:A
http://localhost:20000/A/isolate
A[10.0.0.42][config=base] -> B[10.0.0.55] sleepTime:504 -> C[10.0.0.48] sleepTime:8 code:200
http://localhost:20000/A/dubbo-isolate
A[10.0.0.17] -> B[10.0.0.55]name:isolate -> C[10.0.0.49] params:isolate
http://localhost:20000/A/params/hot
A[10.0.0.17][config=base] params:hot -> B[10.0.0.55] sleepTime:5 params:hot -> C[10.0.0.49] sleepTime:6 params:hot code:200
http://localhost:20000/A/dubbo-params/hot
A[10.0.0.17] params:hot -> B[10.0.0.55]name:hot -> C[10.0.0.49] params:hot
# Database request
http://localhost:20000/A/sql?command=query&id=1
A[10.0.0.44][config=base] -> B[10.0.0.39] result:{"age":1,"email":"emailUpdate%40demo.com","id":1,"name":"name1Update"}
http://localhost:20000/A/sql?command=update&name=name1Update&email=emailUpd***@demo.com&age=1&id=1
A[10.0.0.44][config=base] -> B[10.0.0.55] result:true
# spring boot request
http://localhost:20000/spring_bootAdditional information
Application connection
This method requires you to explicitly add the msePilotAutoEnable: "on" label to the deployment of each application that you want to connect. In practice, you can enable microservices governance for an entire Kubernetes namespace in the MSE Operation Center to connect applications in batches.
For more information, see Connect ACK and ACS microservice applications to the MSE Governance Center (Java).
Graceful start and shutdown
If you did not enable graceful start and shutdown during deployment, you can enable it later by performing the following steps.
To use graceful start and shutdown, log on to the ACK console. In the navigation pane on the left of the Cluster Information page, select Operations Management > Add-ons, search for
cronhpain the search box, and click Install.Use the following YAML file to create a scheduled scaling task. The `Namespace` field must be set to the same Kubernetes namespace that you selected during the Helm installation.
apiVersion: autoscaling.alibabacloud.com/v1beta1
kind: CronHorizontalPodAutoscaler
metadata:
  labels:
    controller-tools.k8s.io: "1.0"
  name: cronhpa-deployment-spring-cloud-b
  namespace: mse-demo # Note: The namespace field must be the same as the Kubernetes namespace that you selected during the Helm installation.
spec:
  jobs:
  - name: scale-out
    schedule: 0 0/6 * * * *
    targetSize: 6
  - name: scale-in
    schedule: 0 5/6 * * * *
    targetSize: 2
  scaleTargetRef:
    apiVersion: apps/v1
    kind: Deployment
    name: spring-cloud-b
Gateway automatic request configuration
Automatic request sending is enabled by default. You can log on to the Container Service console. In the navigation bar, click Workloads > Stateless. On the Stateless page, click the spring-cloud-gateway application. On the details page, click Edit in the upper-right corner and configure the following environment variables for automatic requests.
Environment variable key | Description | Default value |
enable.auto | Master switch for automatic traffic | true |
enable.rpc.invoke | Switch for Dubbo requests | true |
enable.sql | Switch for database requests | true |
enable.sentinel.demo.flow | Switch for Sentinel rule-related requests. Among them:
| true |
enable.gray | Switch for tag-based canary requests | false |
demo.qps | Request rate in QPS. This controls the request rate for the /a path. The rates for other paths are relative to this value. | 20 |
