The steps to develop a Mini Program are as follows:
Download IDE
Download the Mini Program developer tool (IDE):
Create a Mini Program
After downloading and installing the Mini Program IDE, open the IDE, click Mini Program from the list on the left, and click + on the right to open the creation page, click mPaaS and Select Templet.
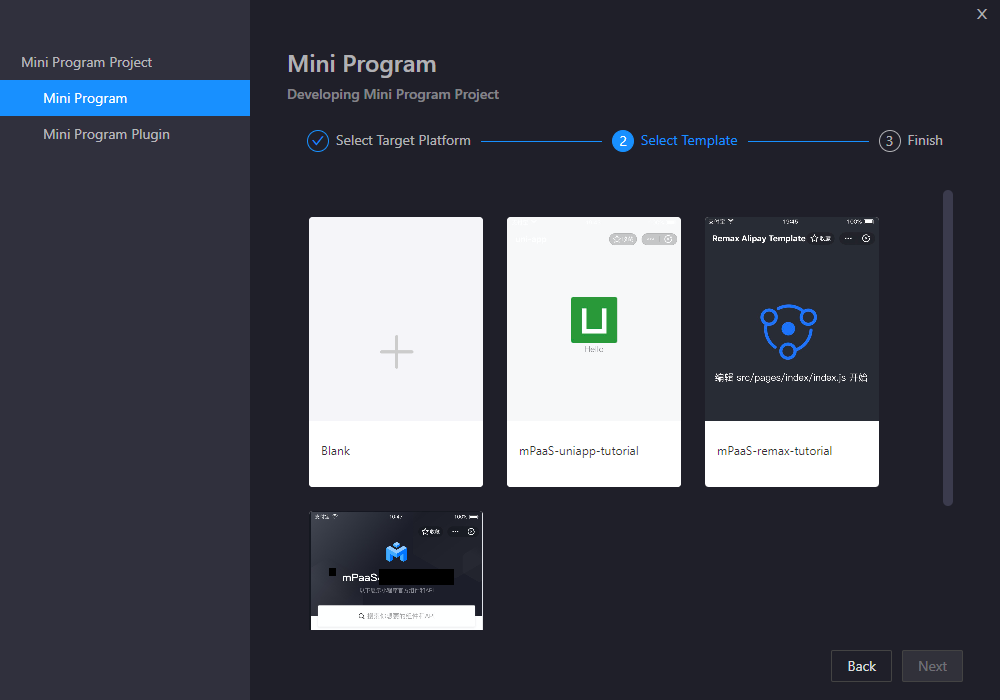
Set Project Name and Project Path in the project creation page, then click Finish to create the Mini Program.
ImportantWe recommend that you use a node version earlier than v18 for the uniapp template. Because uniapp templates may have compatibility issues with newer versions of node, it is recommended to use earlier node versions to avoid potential issues.
The steps of dependency installation wit YARN are as follows:
Open the command line tool and go to the root directory where the project is located.
Run the
yarn installcommand.
After you perform the preceding operations, the required dependencies are installed and the development environment is started. Then, you can develop and debug the uniapp project.
Download the configuration file
Each time you create a new environment, you need to upload the IDE configuration file of the corresponding Mini Program downloaded from the console.
Log on to the mPaaS console. In the left-side navigation pane, choose Mini Program > Mini Program Release > Manage Configuration. On the page that appears, click Manage IDE Configuration and click Download Configuration File to download the IDE configuration file.
NoteThe IDE configuration file is different from the configuration file of the mPaaS application.
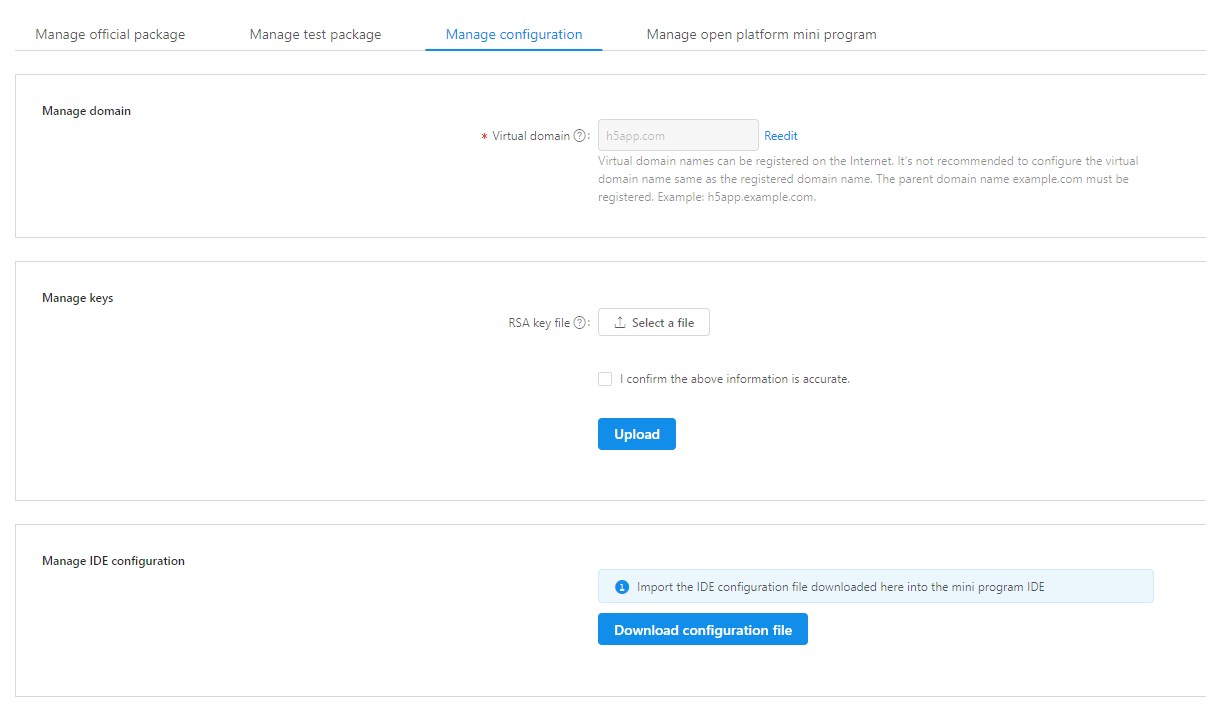
After you click Download Configuration File, the Download Configuration File dialog box appears. You must enter a password in the Dynamic Password field. The password is going to be used to log on to the IDE.
NoteThe default name of the downloaded configuration file is
config.json.
Login to the Mini Program IDE
You can login to the Mini Program IDE in two ways:
Dynamic password logon method
In the Mini Program IDE, click Log On in the upper-right corner.
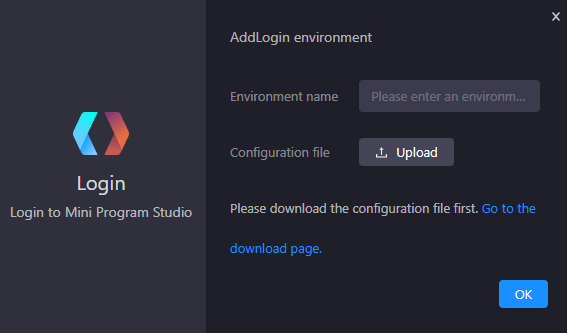
If there is no logon environment has been created, the Add Environment window appears. If a logon environment has been created, the Logon window appears.
If you are creating a logon environment for the first time, enter the environment name in the current window and upload the mini program IDE configuration file (
config.jsonfile) downloaded from the mPaaS console.
If you have created a logon environment, click the environment selection menu at the top of the window, choose + Add Environment at the bottom of the menu, enter an environment name, and then upload the Mini Program IDE configuration file (
config.jsonfile) downloaded from the mPaaS console.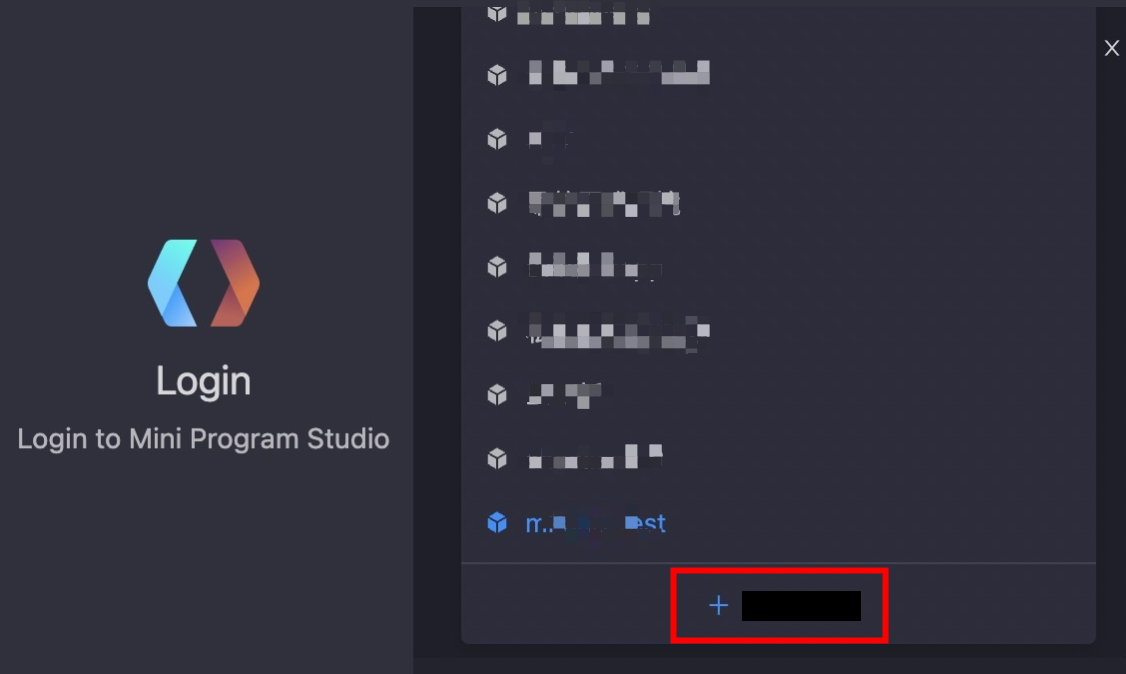
Click OK to create a new logon environment.
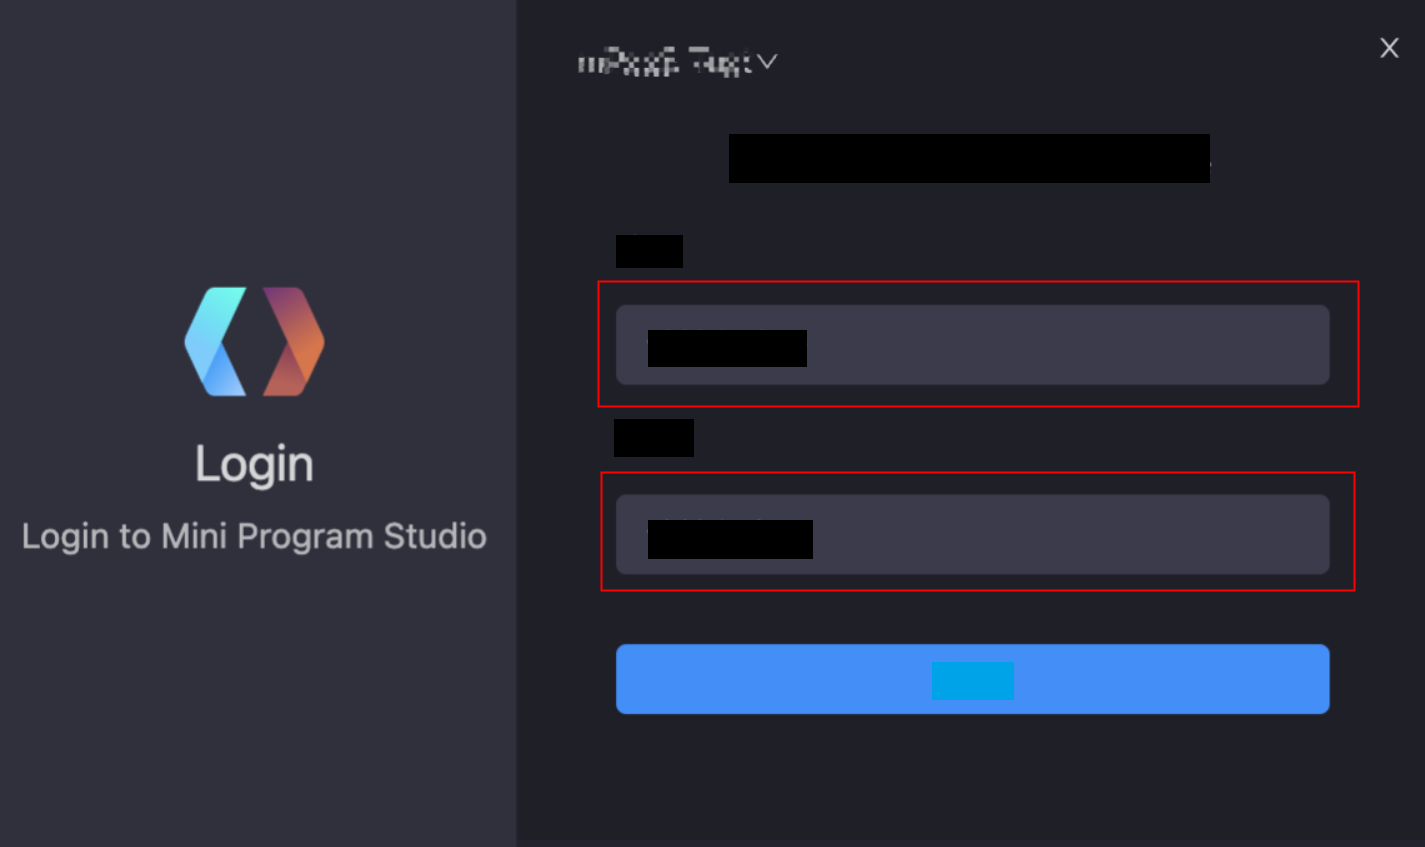
After successfully adding the logon environment, in the log on window, enter the account and password to log on.
An account is the username used to log on to the Aliyun console.
The password is the dynamic password that you set when you download the configuration file.
Aliyun AccessKey logon method
ImportantIf you use the Aliyun AccessKey, you must upgrade mPaaS Mini Program IDE to version 2.9 or later.
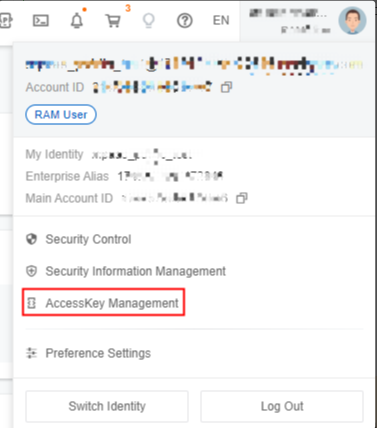
Move the pointer over the profile image in the upper-right corner of the Alibaba Cloud console and click AccessKey Management to enable Aliyun AccessKey.
 Important
You can use the AccessKey pair of an Alibaba Cloud account or a RAM user to call API operations.
If you use the AccessKey pair of an Alibaba Cloud account to call API operations, you must create an AccessKey pair.
We recommend that you use the AccessKey pair of RAM user instead of an Alibaba Cloud account to call API operations because RAM user permissions are controllable and easy to manage.
Click Use AccessKey Pair of RAM user.

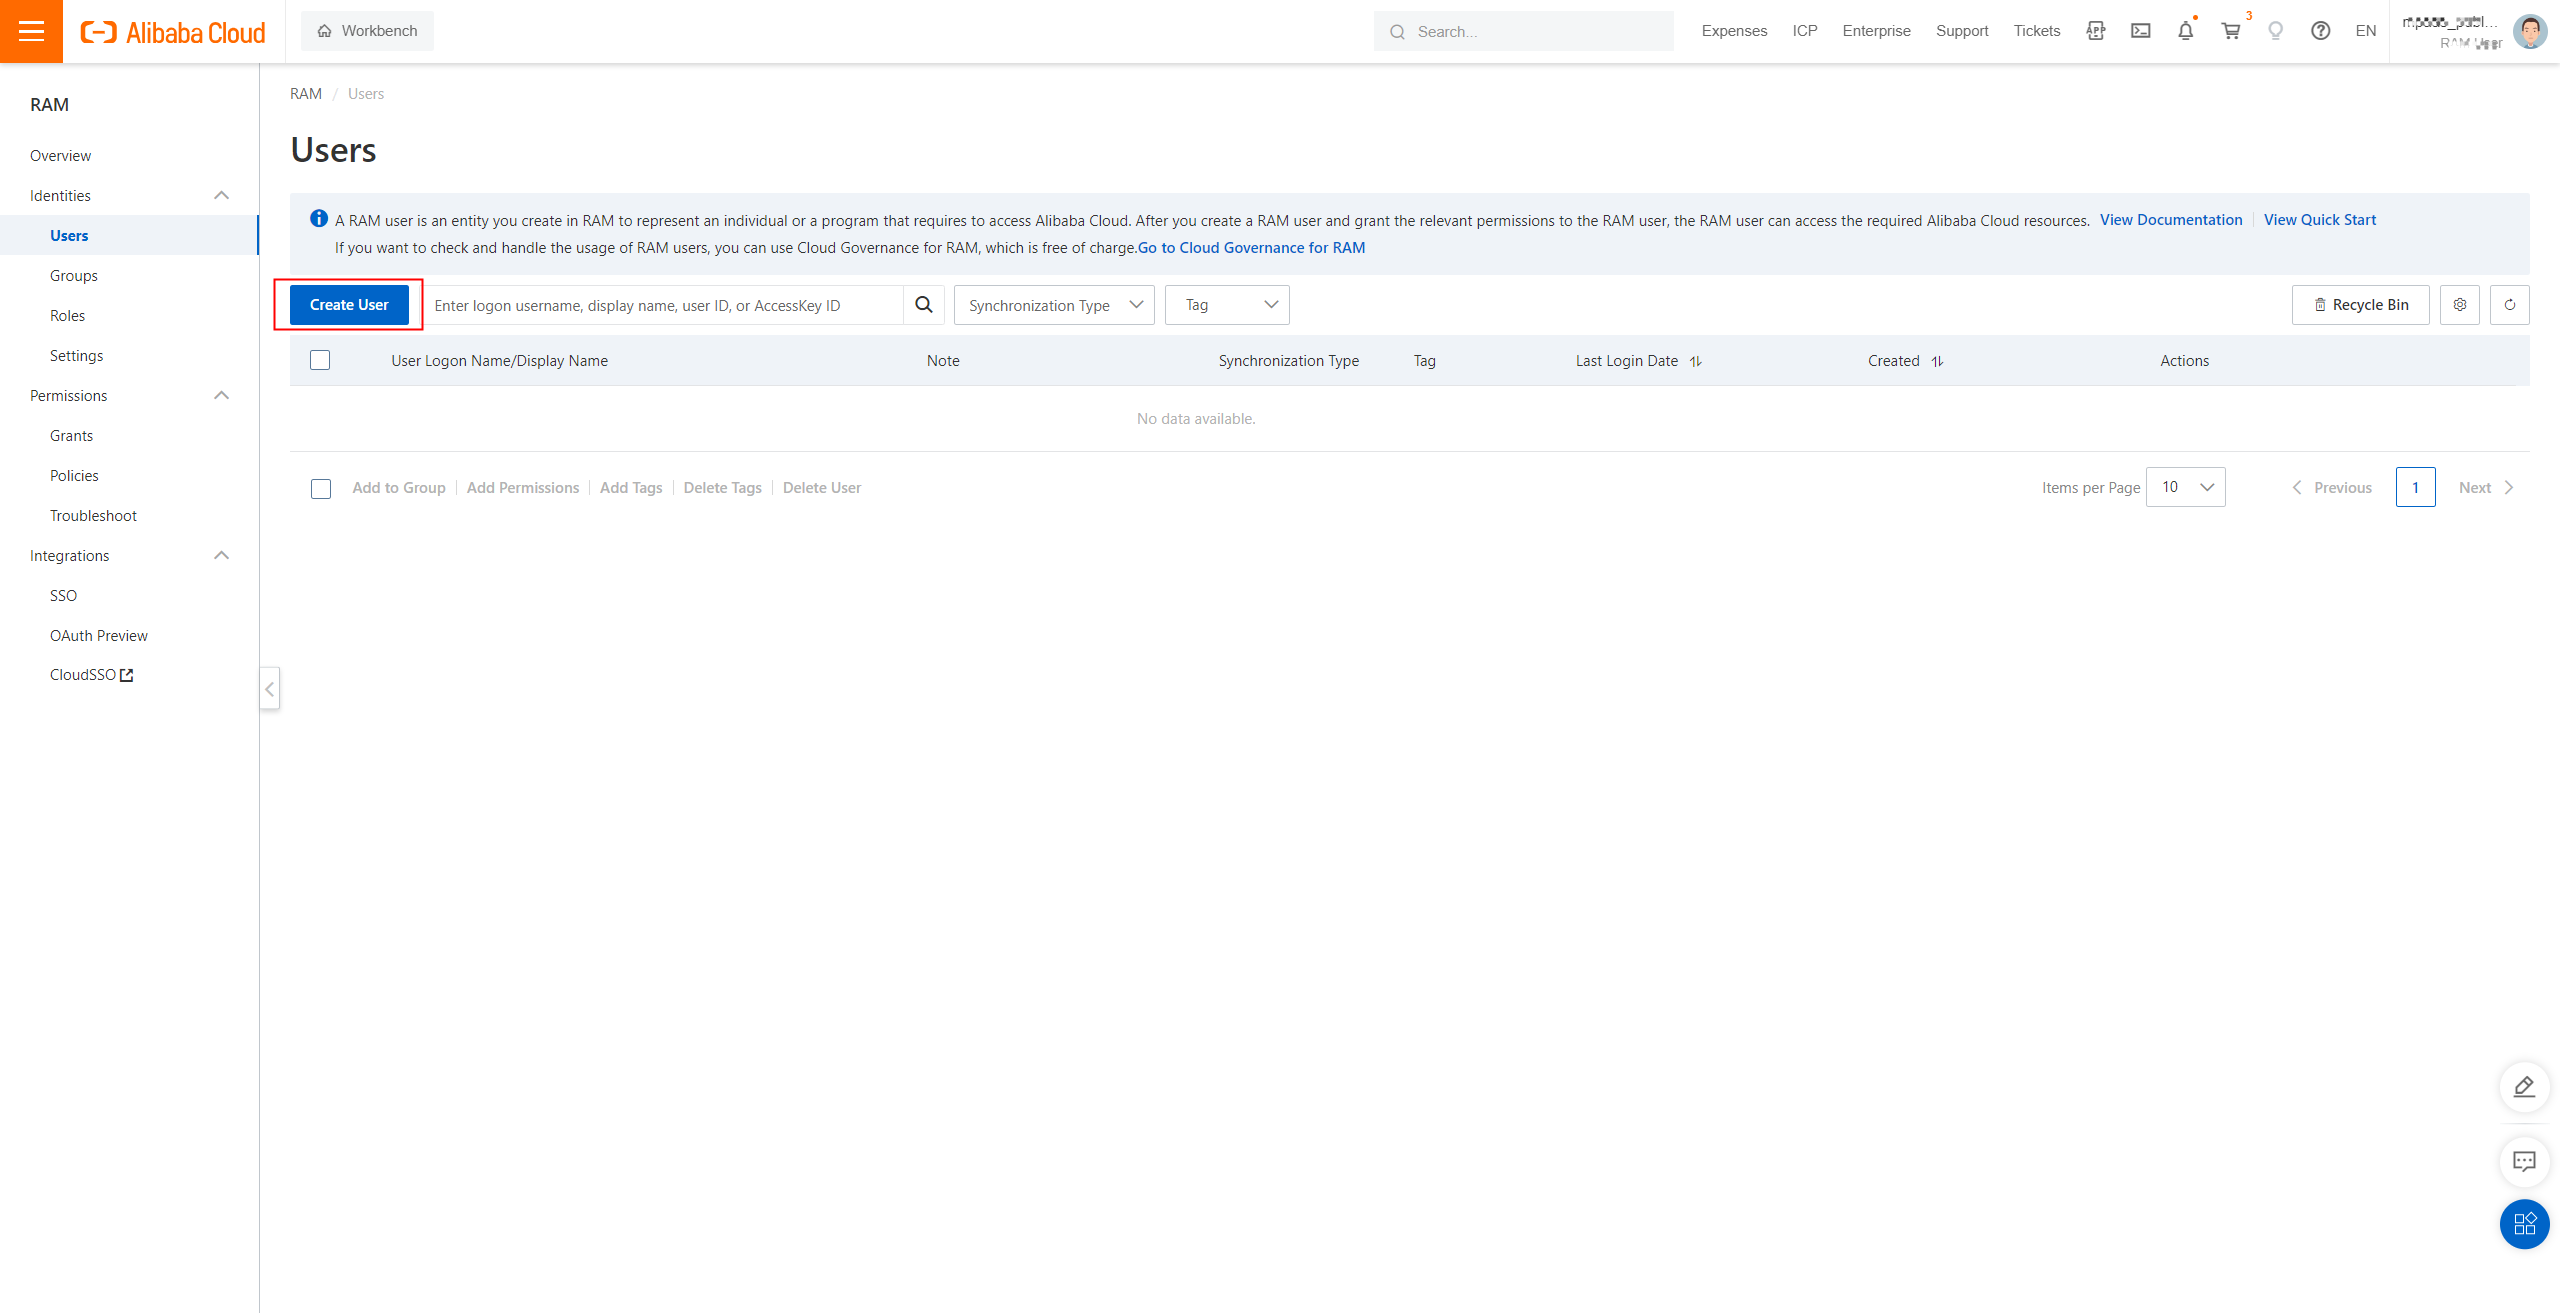
Click Create User. The Create User page appears.
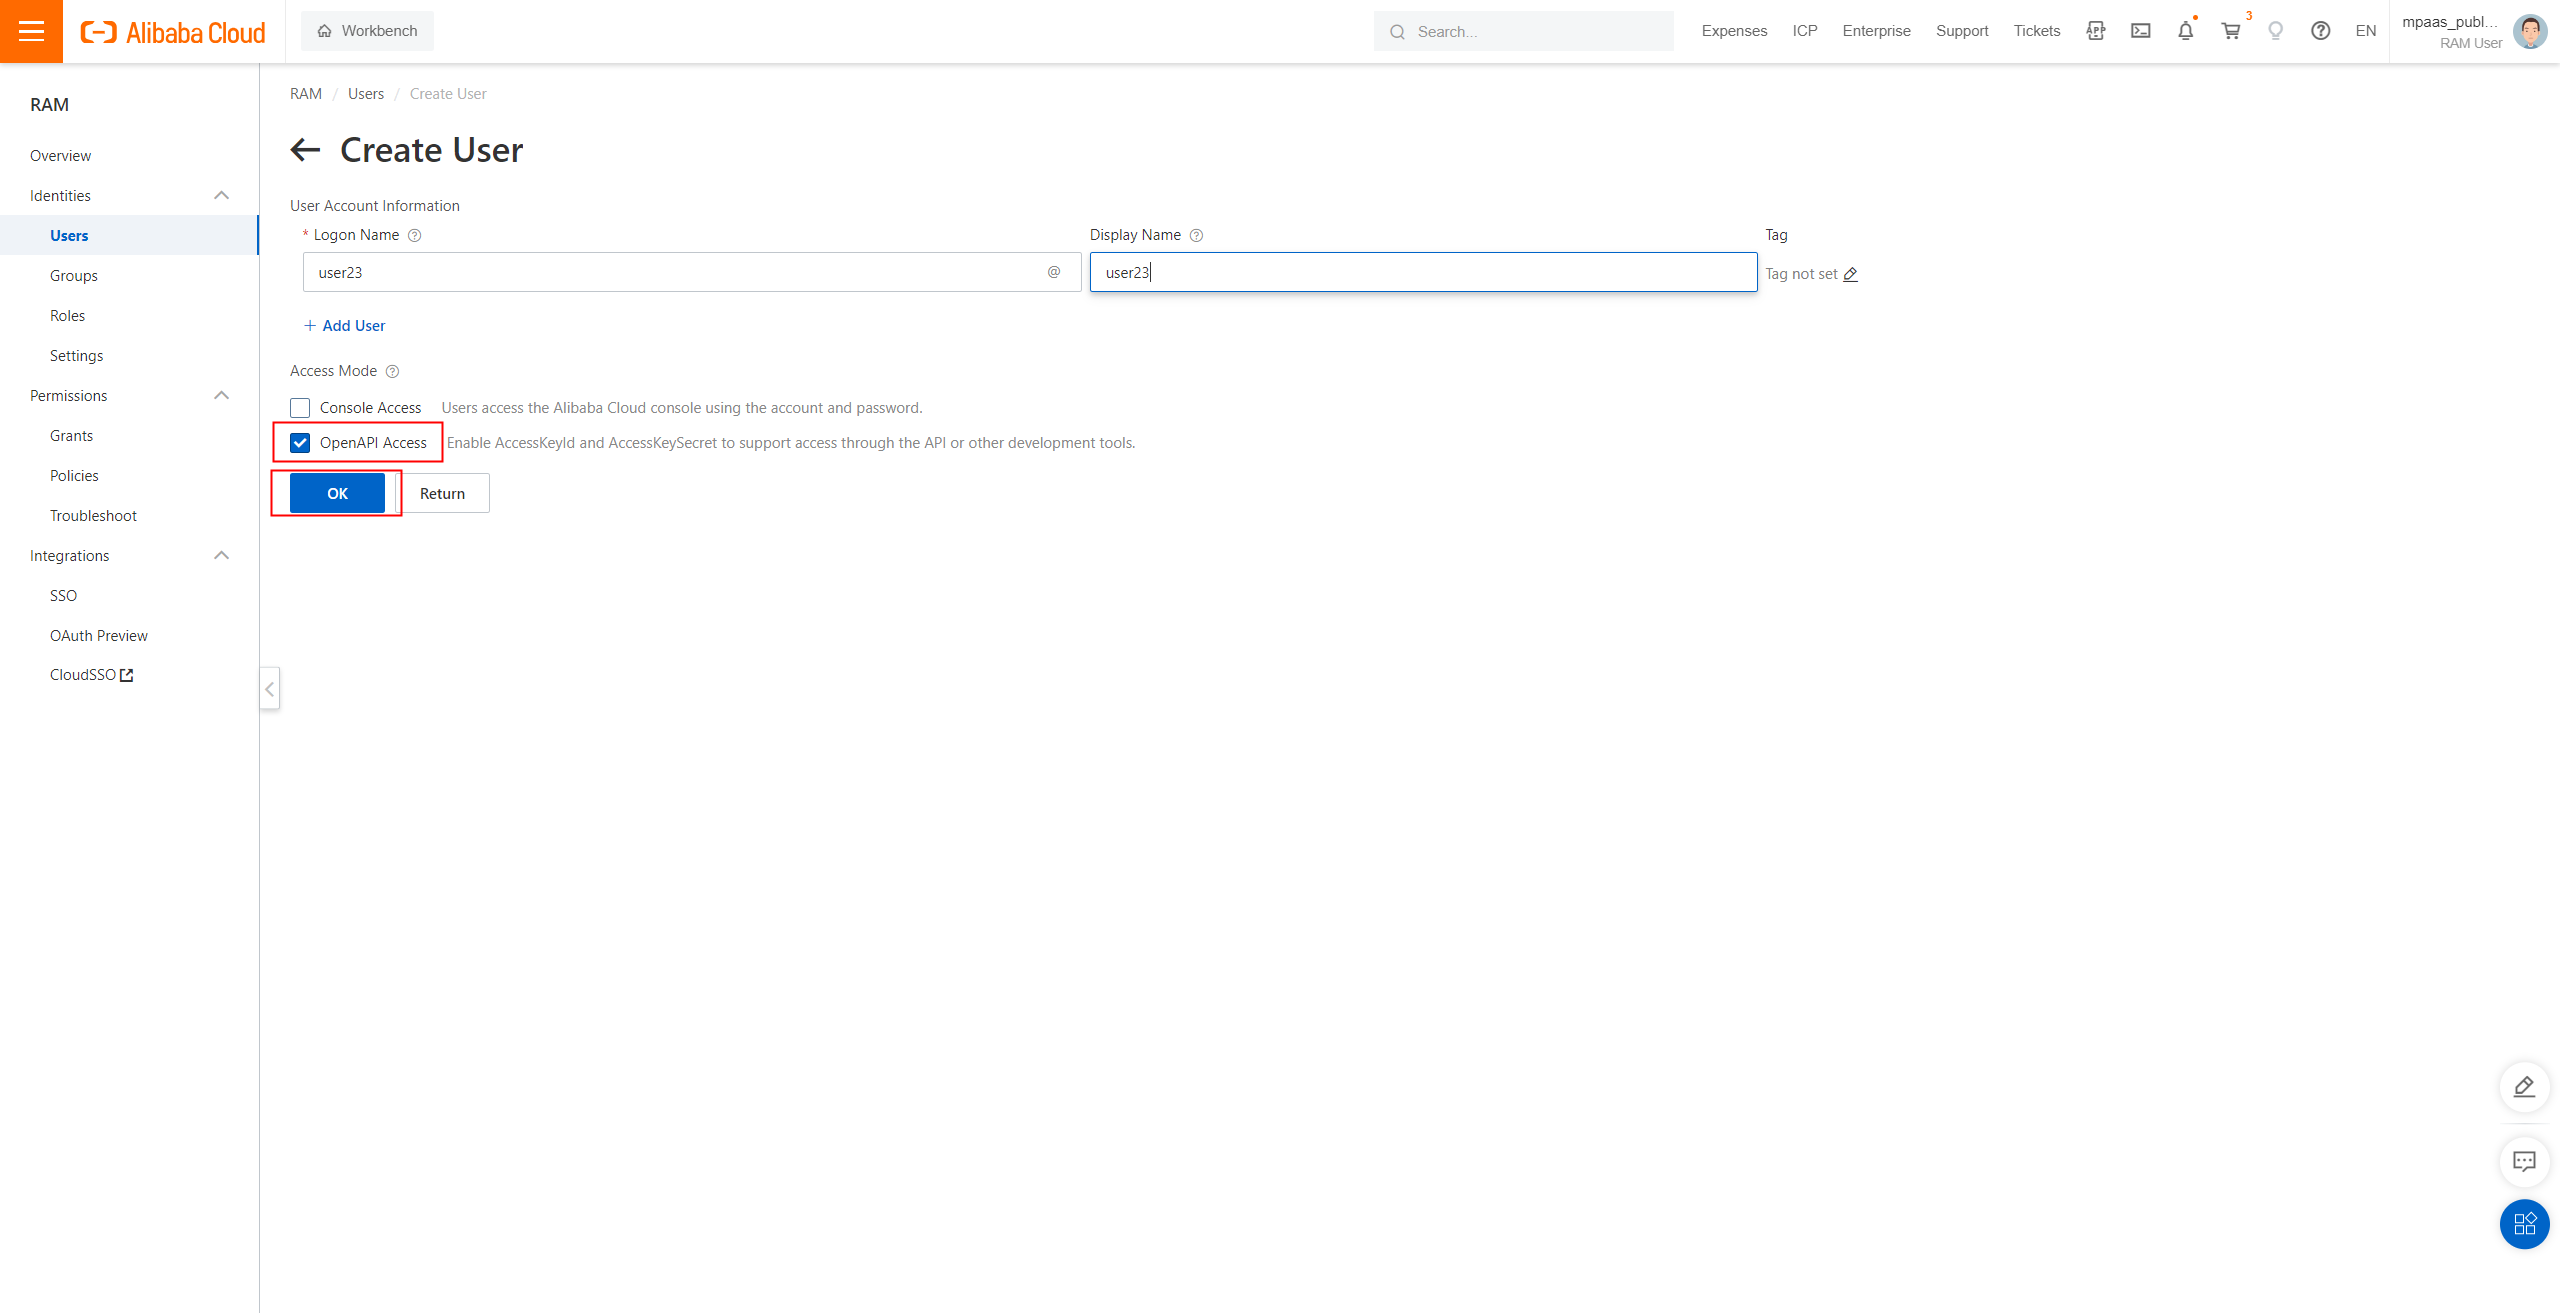
Set Logon Name and Display Name, select OpenAPI Access, and then click OK.
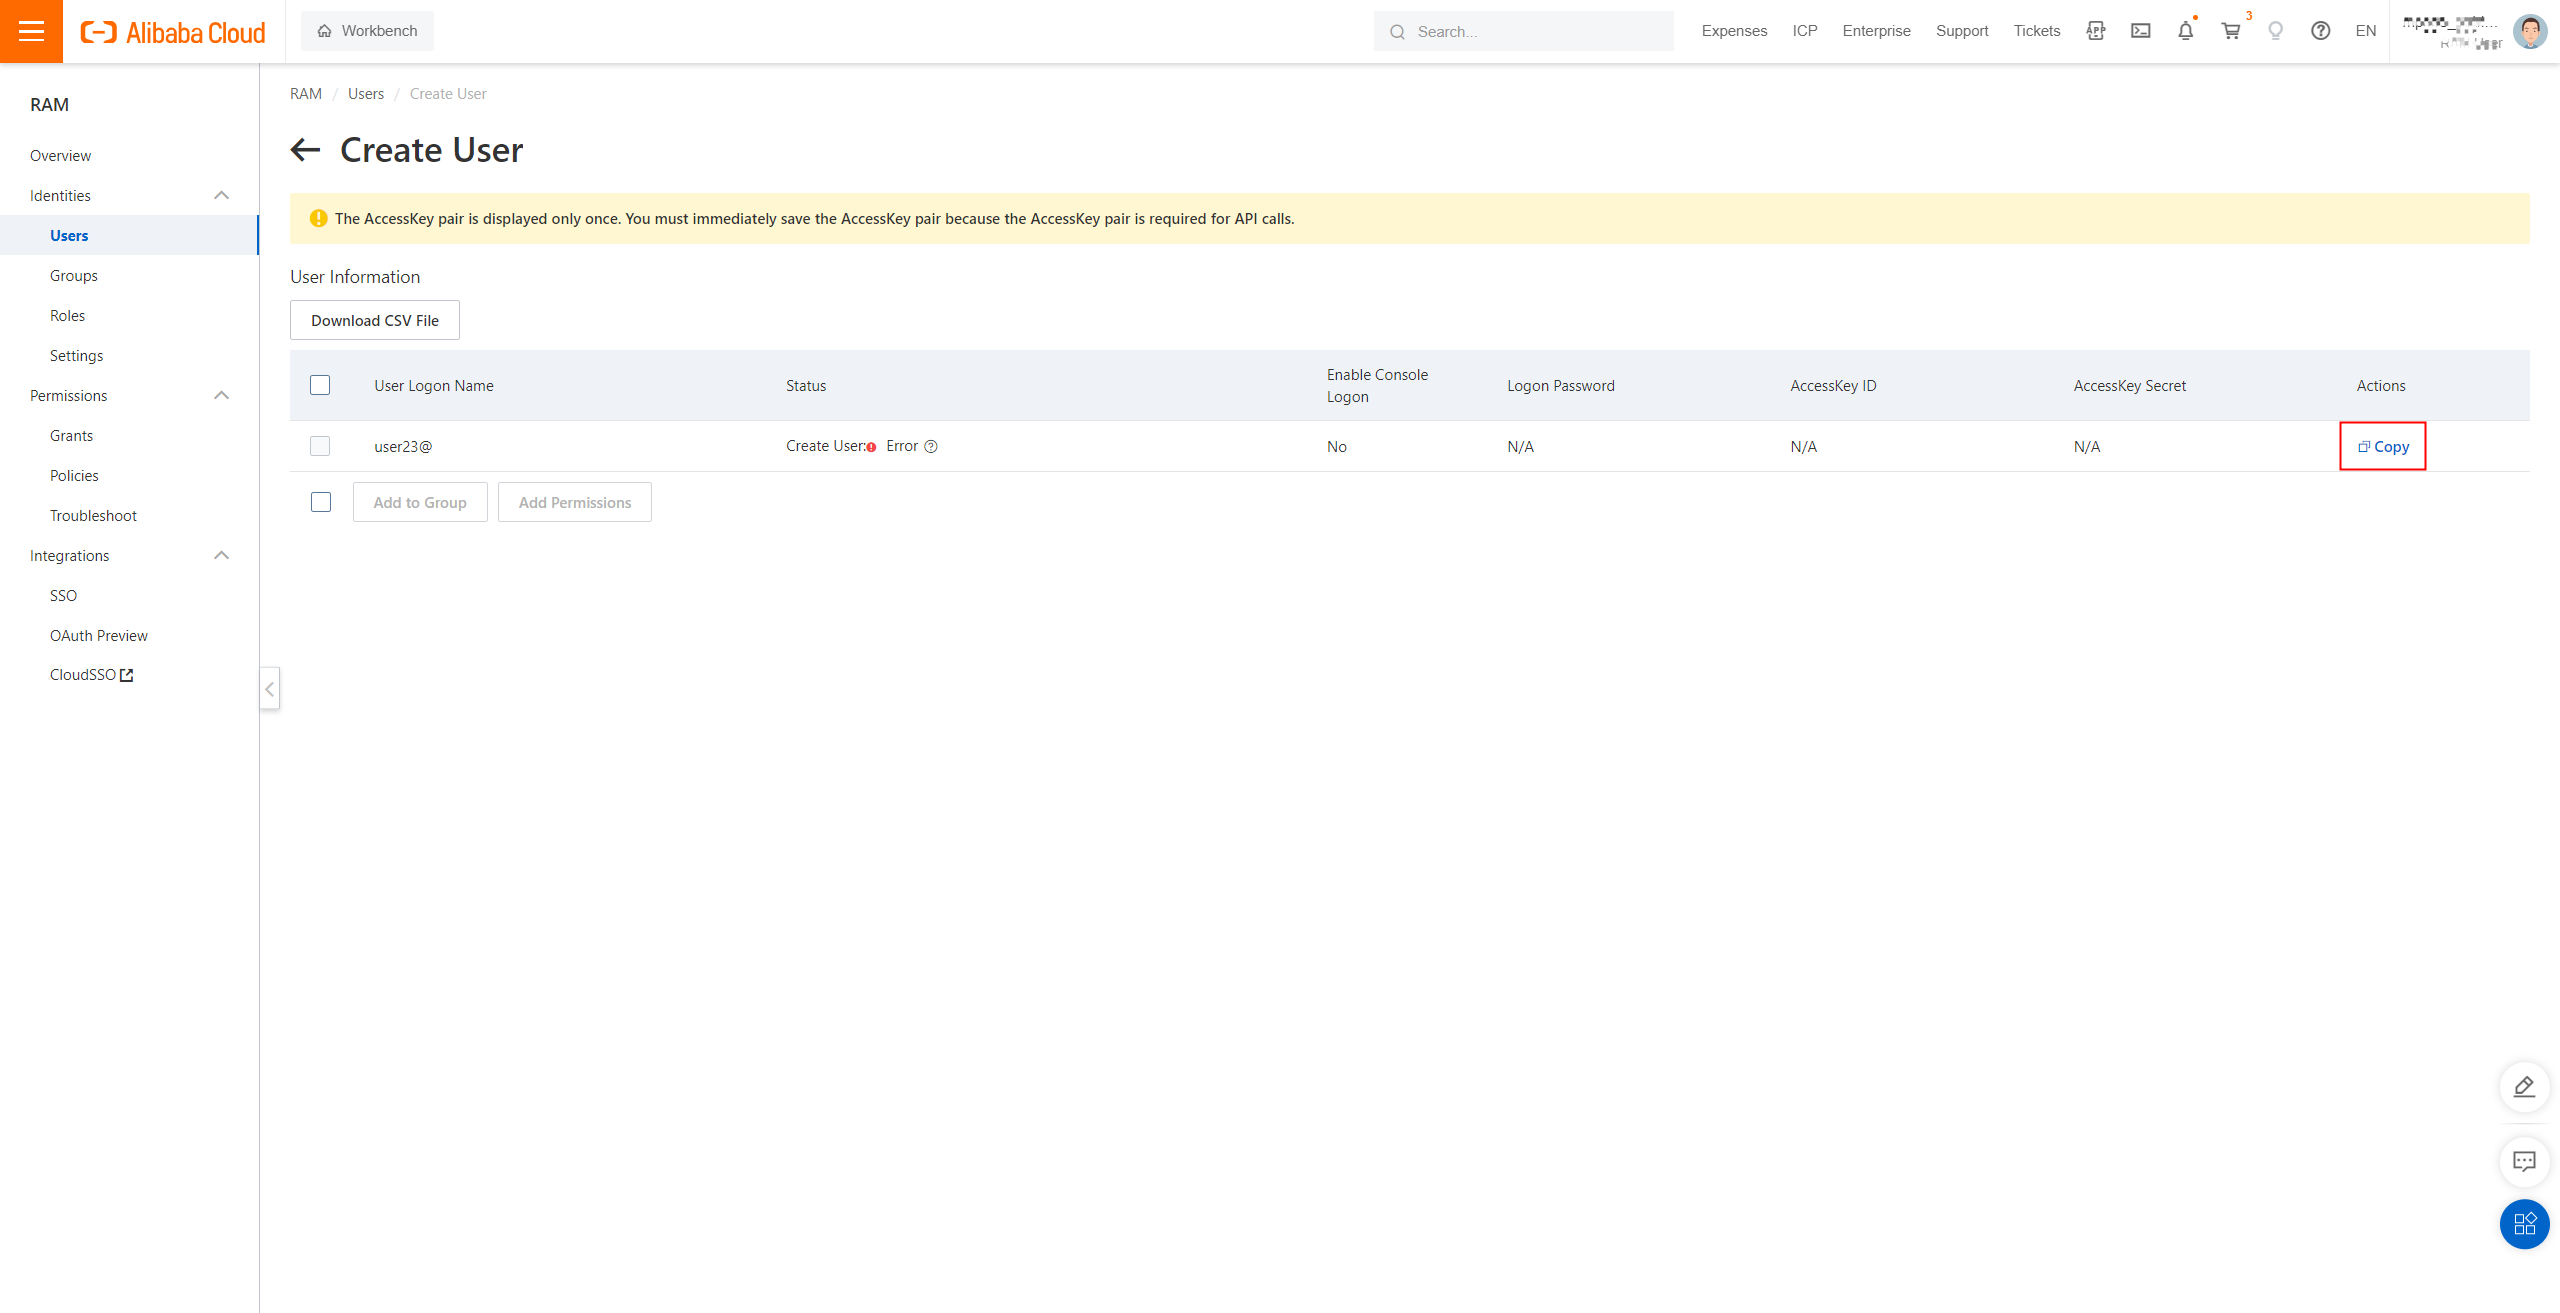
Copy and keep the generated AccessKey ID and AccessKey secret. If the AccessKey ID and AccessKey secret are not copied, you can generate them again.
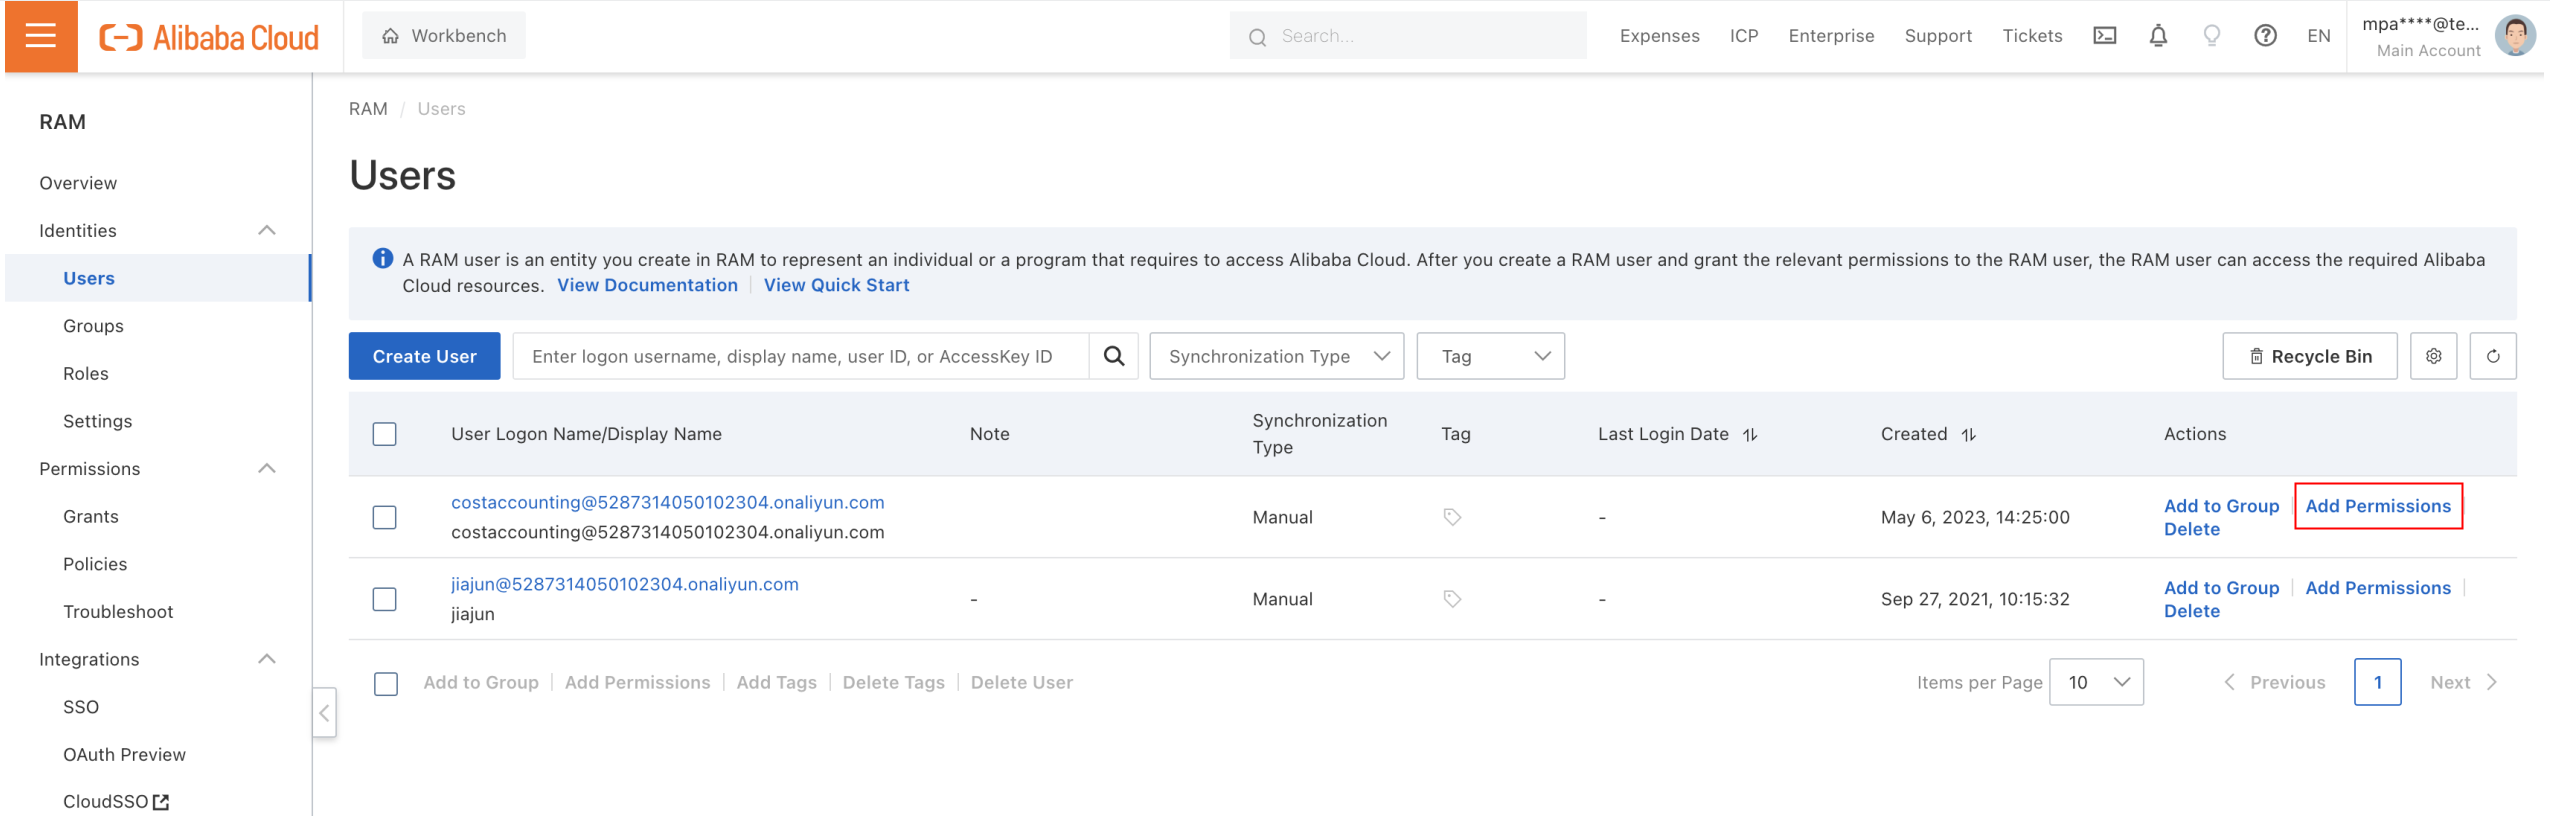
Click Add Permissions in the Actions column. The Add Permissions page appears.
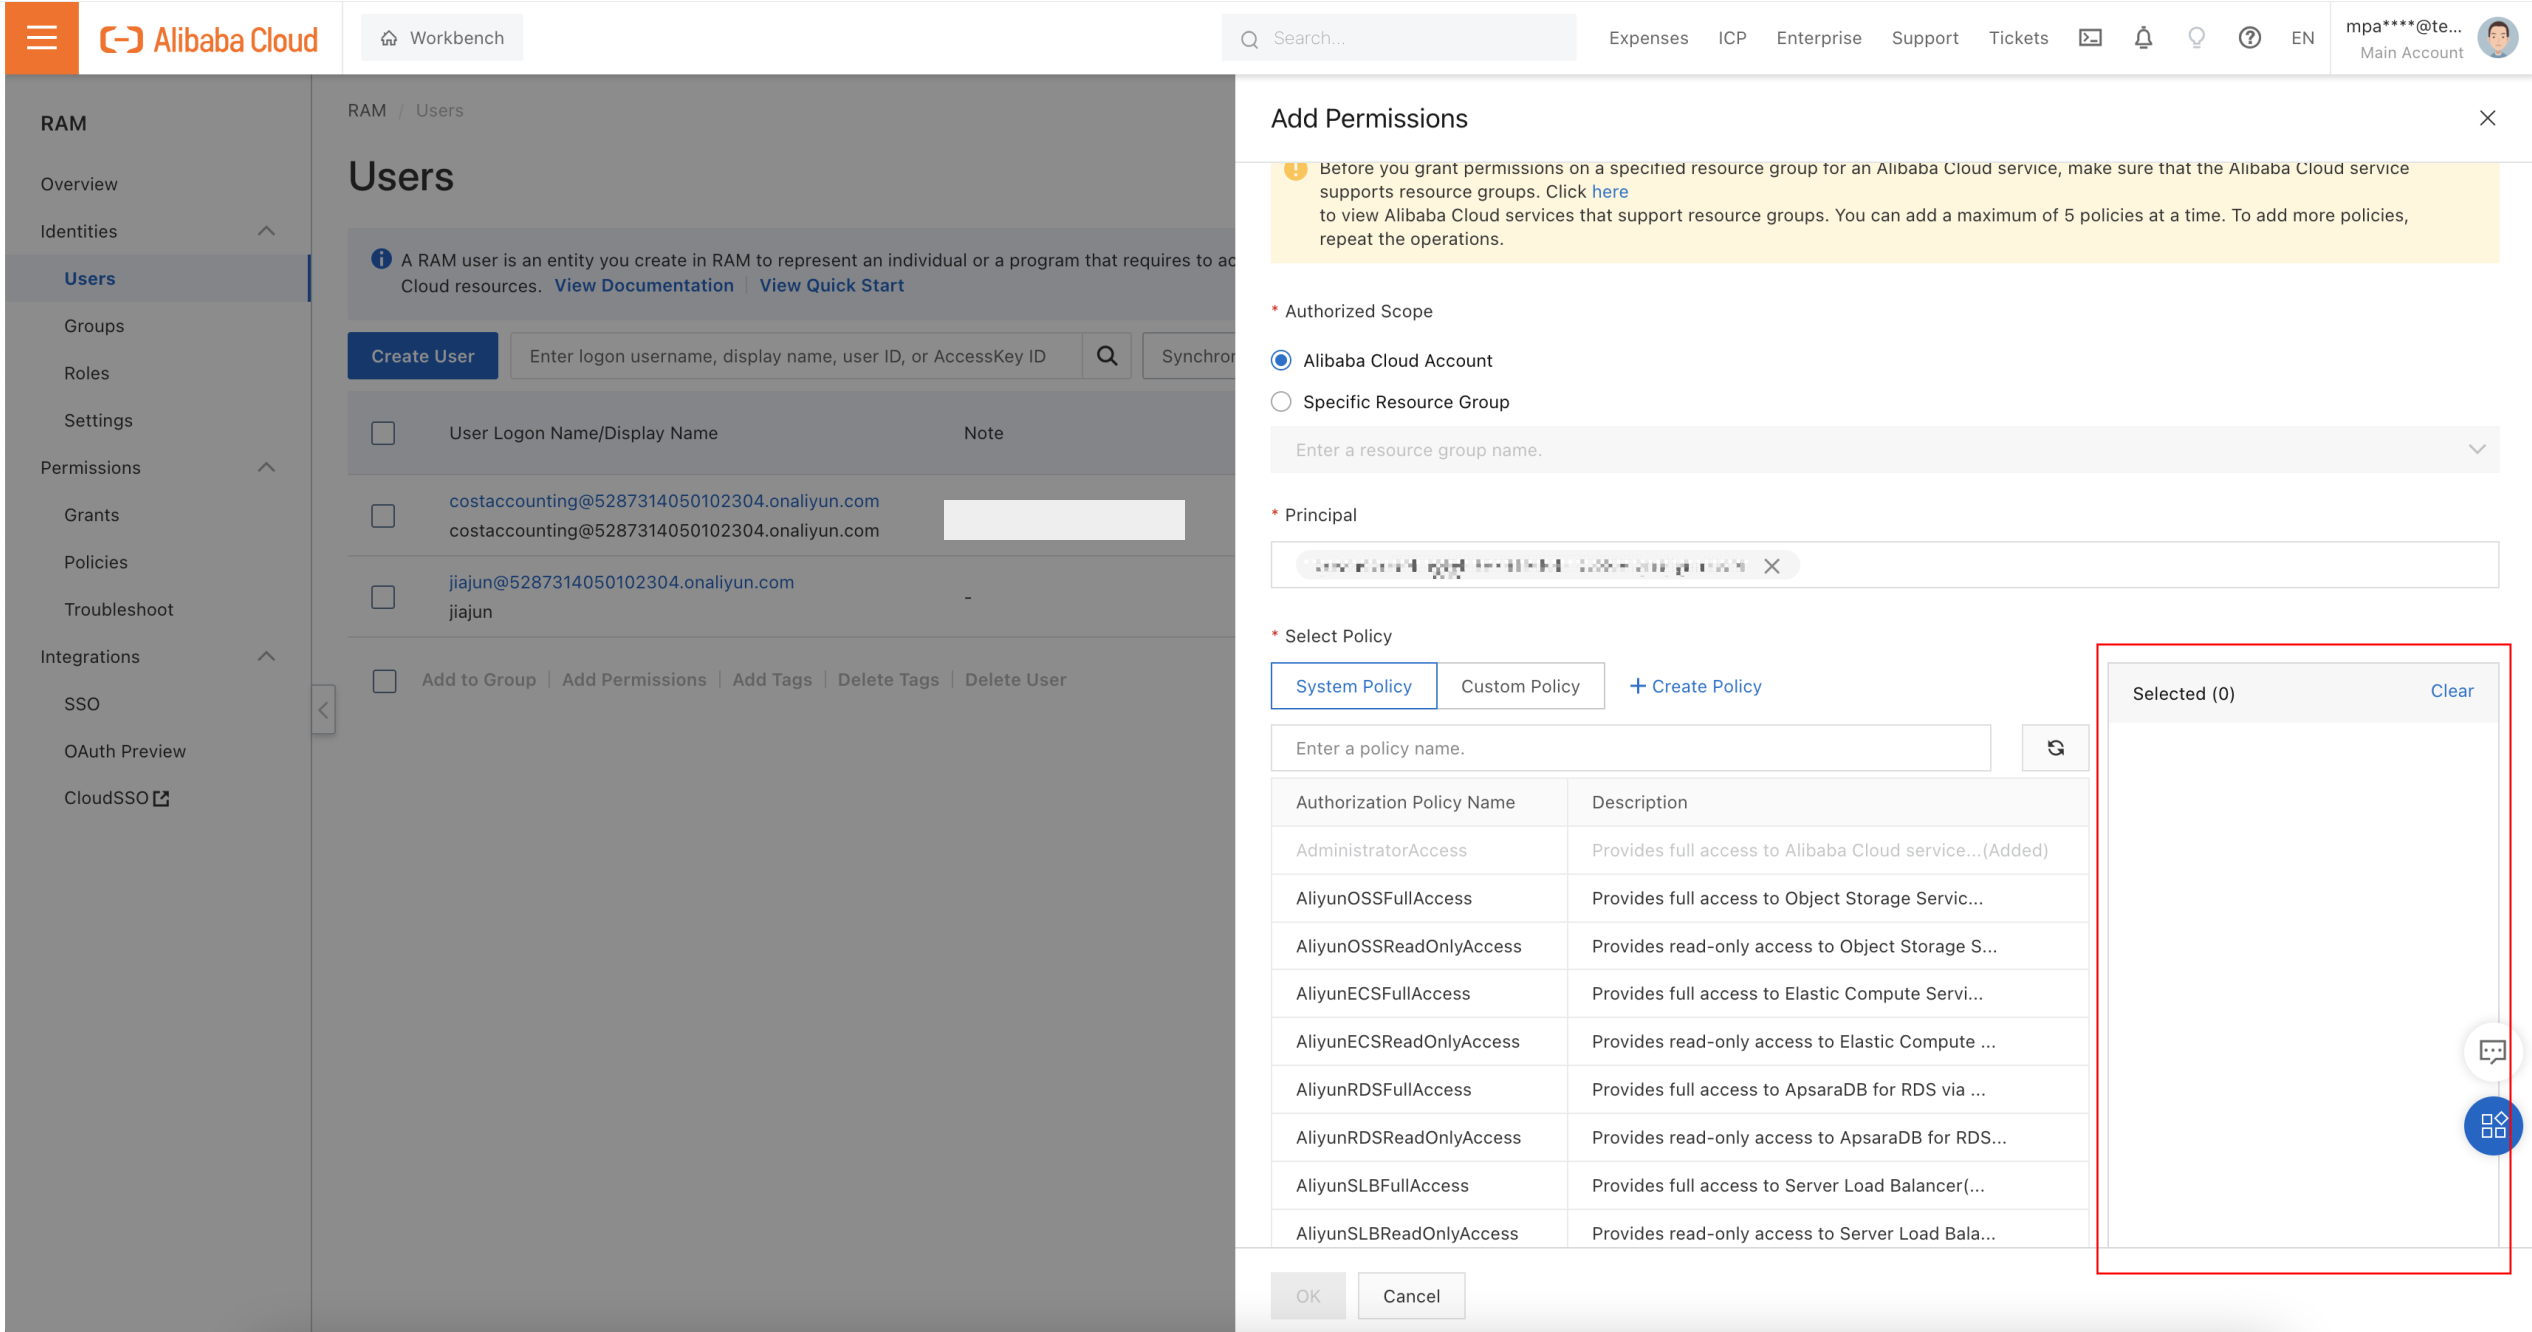
In the Select Permissions search box, enter MpaaSFullAccess, and select a AliyunMpaaSFullAccess, then click OK. Add mPaaS permissions to the created user.
Open the configuration file that you downloaded in the editor, enter the following content, and save the file:
{
 // The content of the original configuration file,
  "openapi": {
    "type": "aliyun",
    "accessKeyId": "AccessKey ID generated in step 5",
    "accessKeySecret": "The AccessKey secret generated in step 5",
    "endpoint": "mpaas.cn-hangzhou.aliyuncs.com",
    "userId": "Username entered in Step 5"
  }
}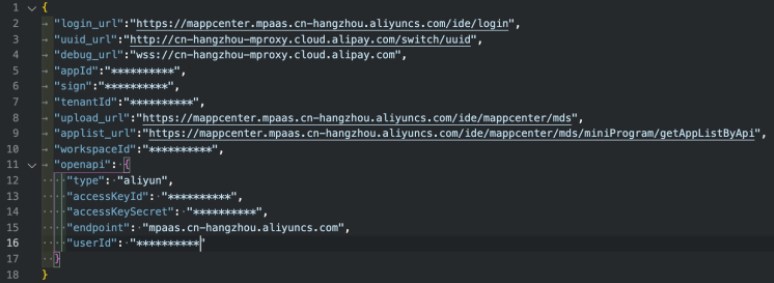
In the mPaaS mini program IDE, click Login to open the logon page.
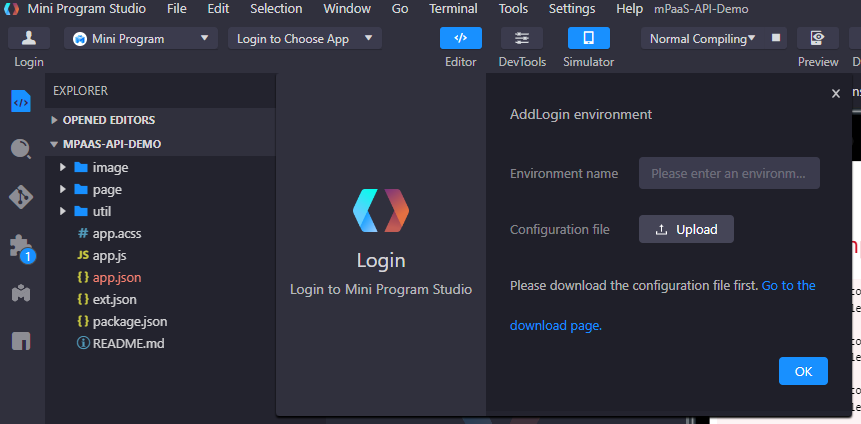
Click + Add Environment to open the Add Logon Environment page.

Enter an environment name in the Environment Name field, upload the configuration file configured in Step 8, and then click OK.
 It shows Aliyun AccessKey in the Logon dialog box, then click Login.
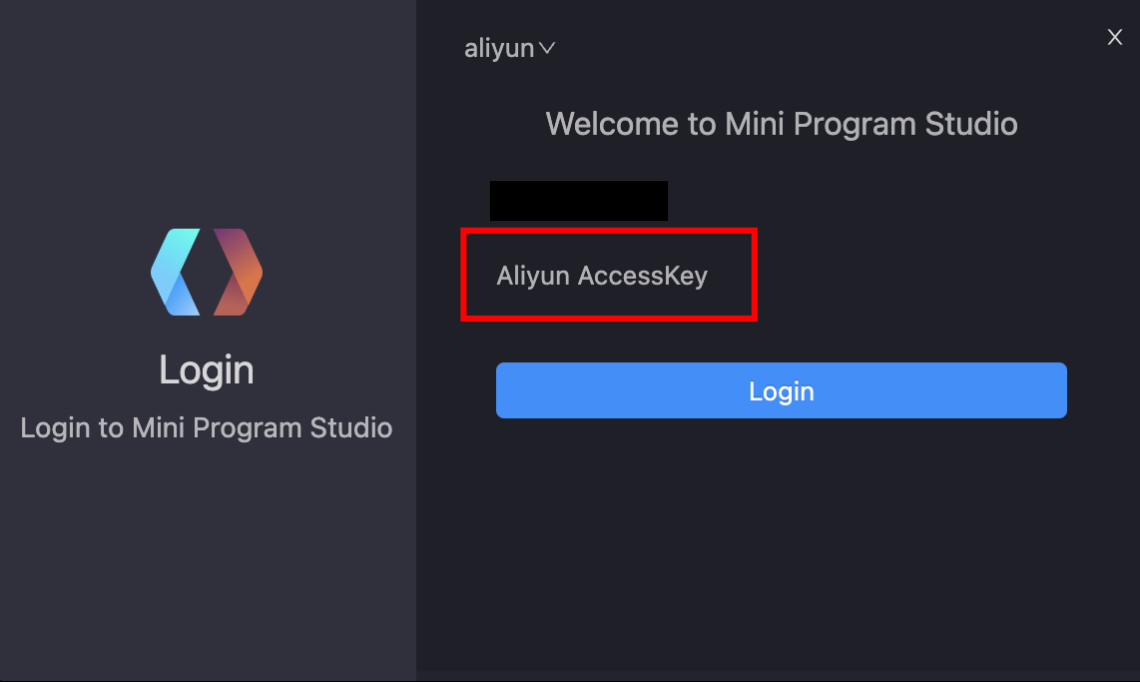
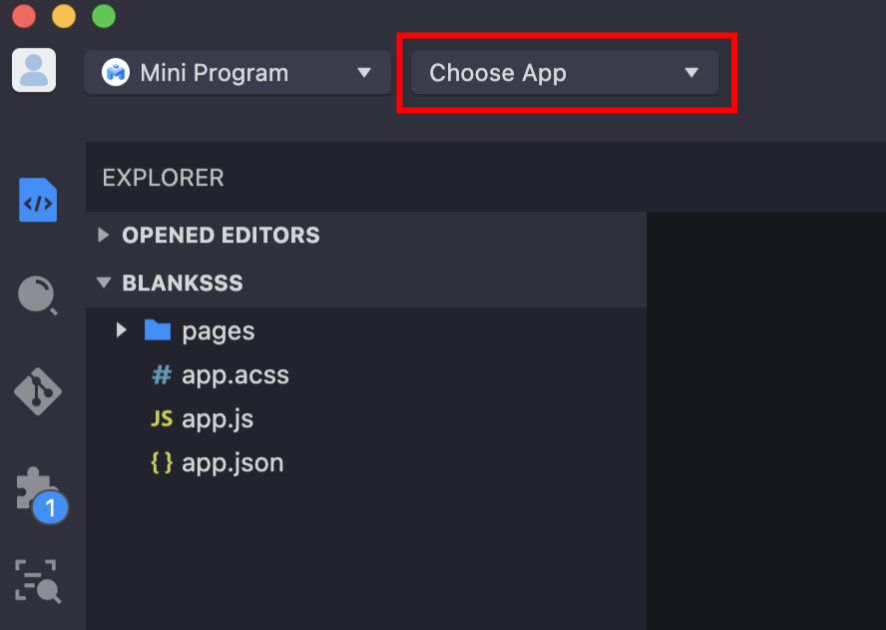
Select the Associated Mini Program
After you log on to the IDE, click Choose App in the upper-left corner and select the Mini Program that you created in the console from the drop-down list.
Edit the code
After selecting the associated Mini Program, you can start editing the code.
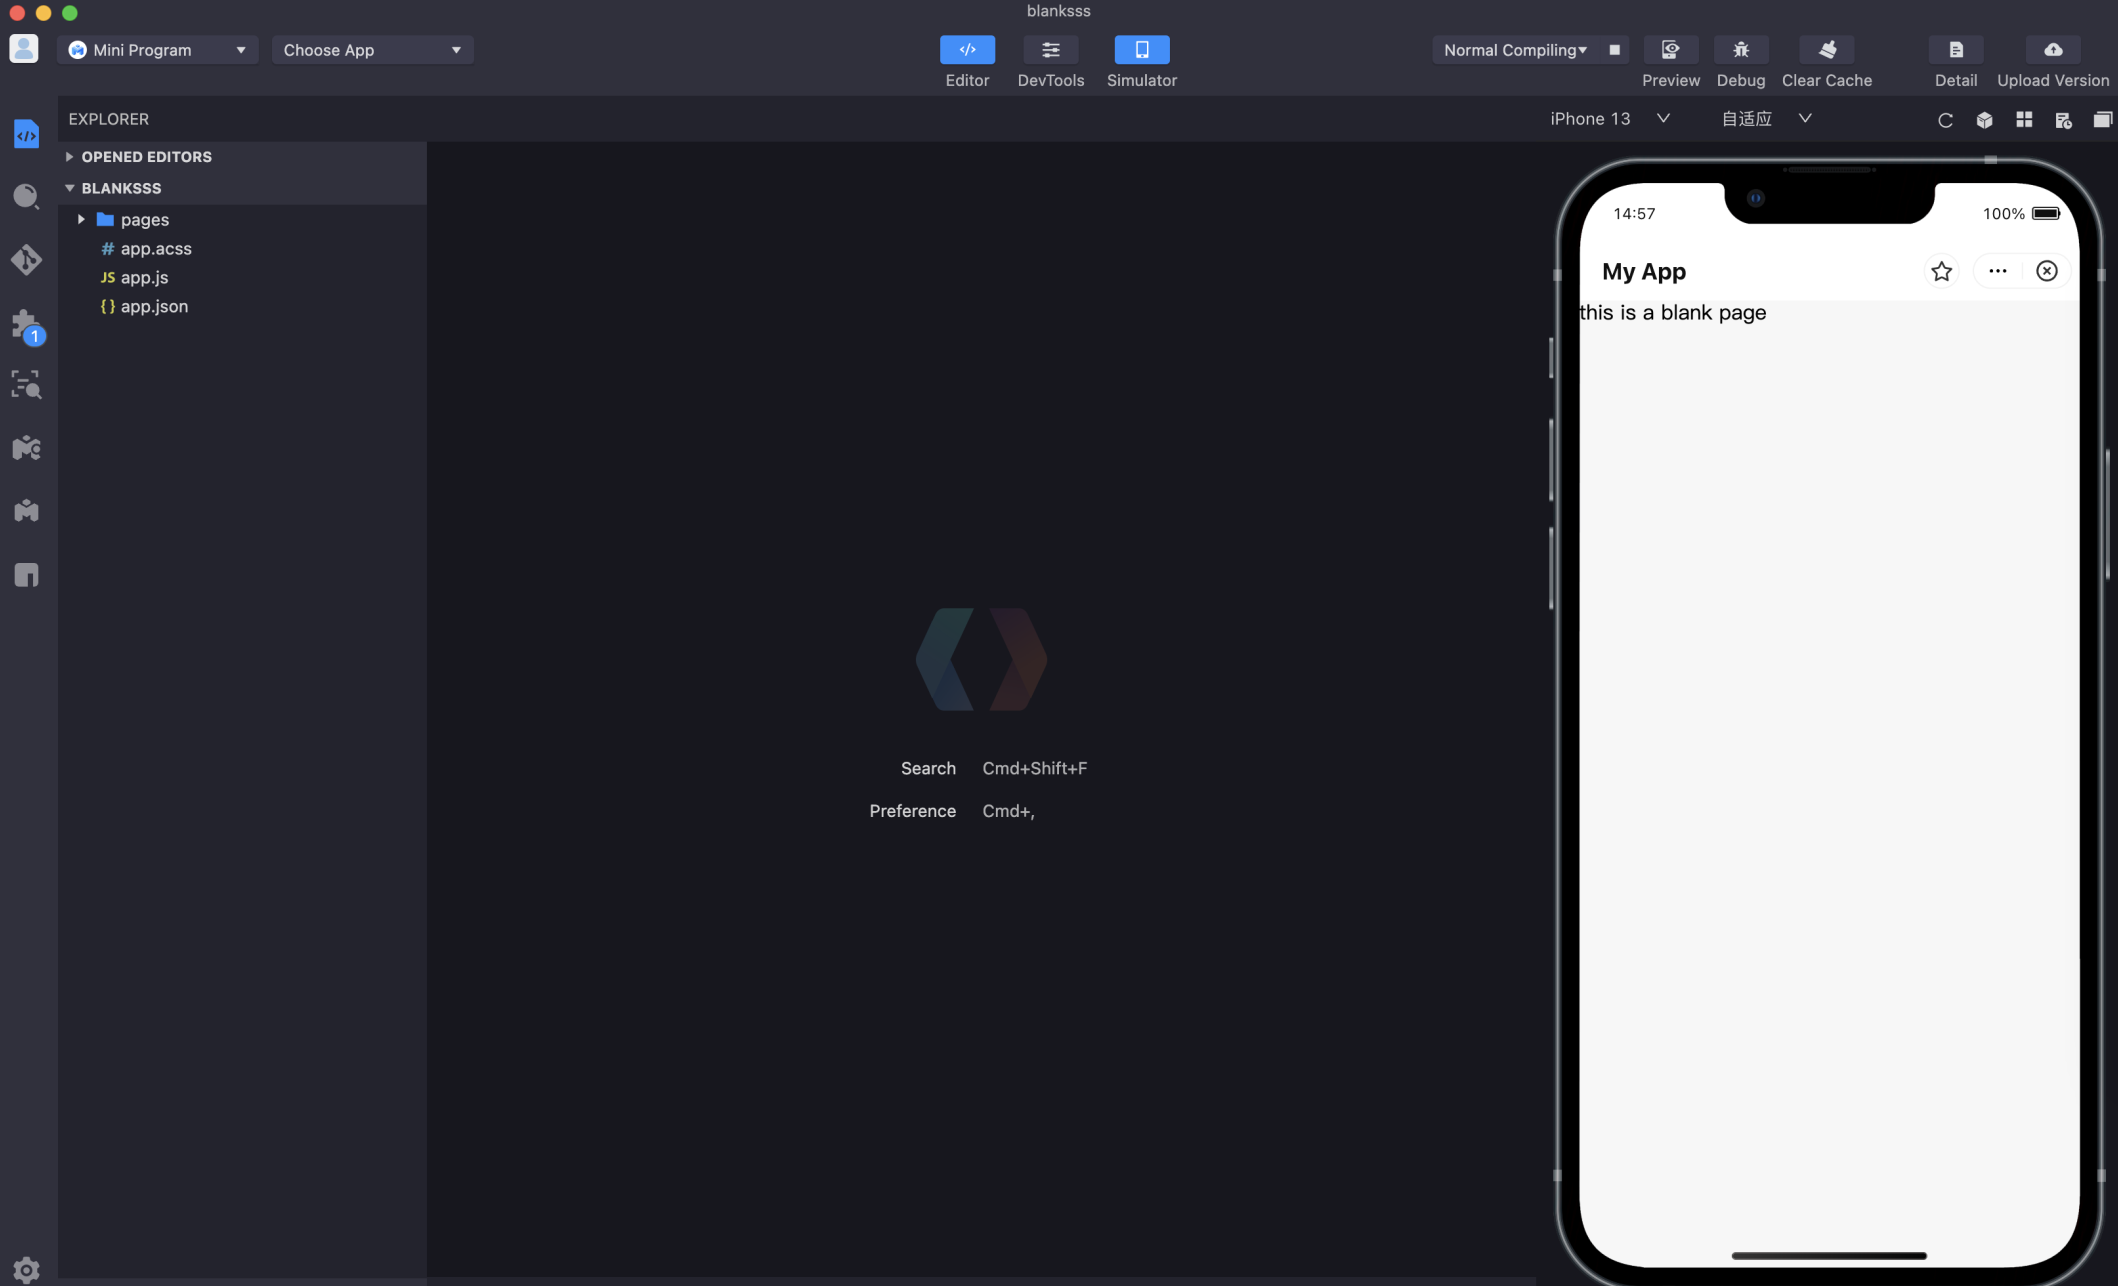
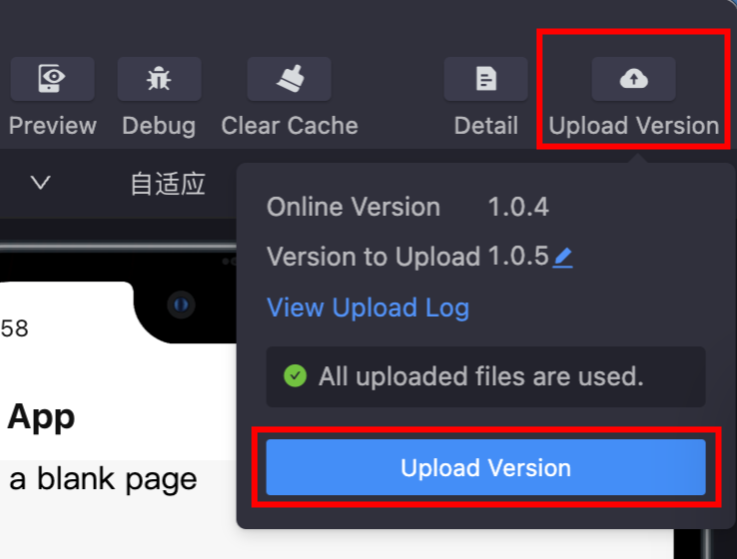
Upload Mini Program
After you edit the code, click Upload in the upper-right corner of the IDE to upload the Mini Program to the mPaaS console.
Release the Mini Program
Log on to the mPaaS console. In the left-side navigation pane, choose Mini Program > Release Mii Program. For more information, see Publish a Mini Program package.