When multiple users or services share a Lindorm instance, batch read/write operations from offline services can disrupt time-sensitive online services. Group management resolves this by assigning region servers and tables to isolated groups, so each group's requests are handled exclusively by its own region servers.
This topic describes how to create and manage groups in the Lindorm cluster management system.
How it works
A group binds a set of region servers to a set of tables. All regions of the tables in a group are distributed only to the region servers in that same group.
The following diagram shows a two-group setup: RegionServer1 and RegionServer2 are in Group1, and RegionServer3 and RegionServer4 are in Group2. Table1 and Table2 belong to Group1, so their regions are served exclusively by RegionServer1 and RegionServer2. Table3 and Table4 belong to Group2, so their regions are served exclusively by RegionServer3 and RegionServer4.

Prerequisites
Before you begin, ensure that you have:
Logged on to the cluster management system of your Lindorm instance. For more information, see Log on to the cluster management system.
View group information
In the left-side navigation pane, choose Cluster Manager > Server Manager.
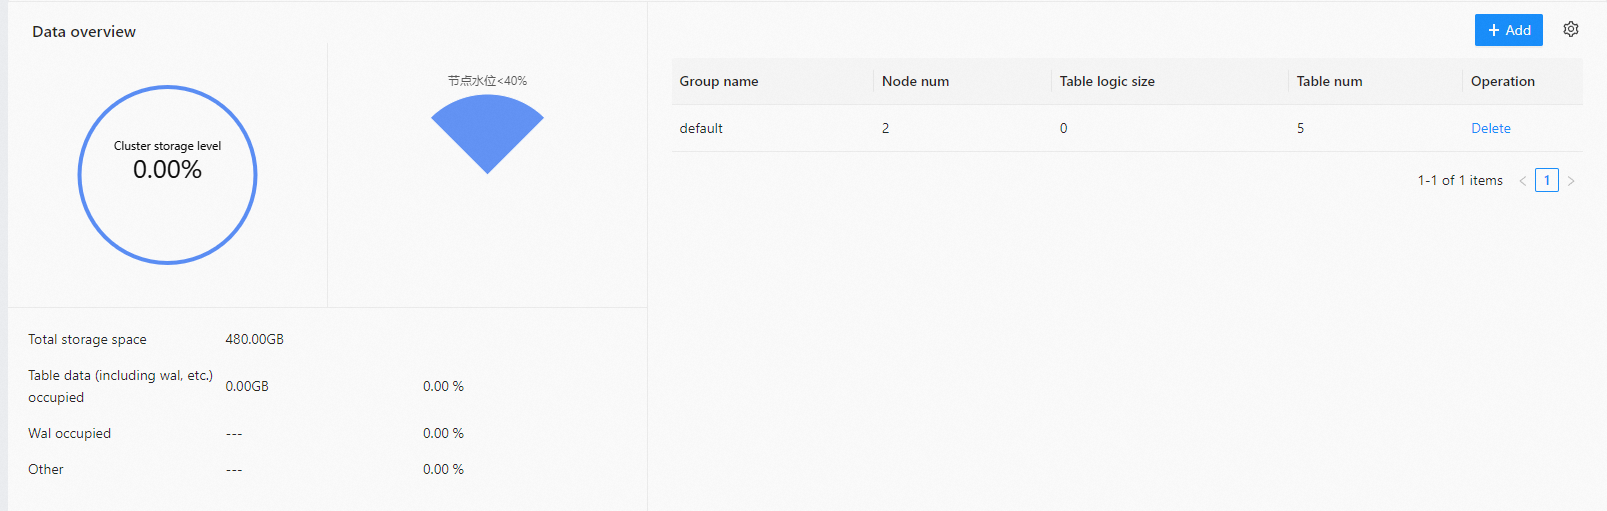
In the Data overview section, view all groups for the current cluster.
If no group has been created, a group named default is created automatically, and all region servers and tables belong to it.
Create a group
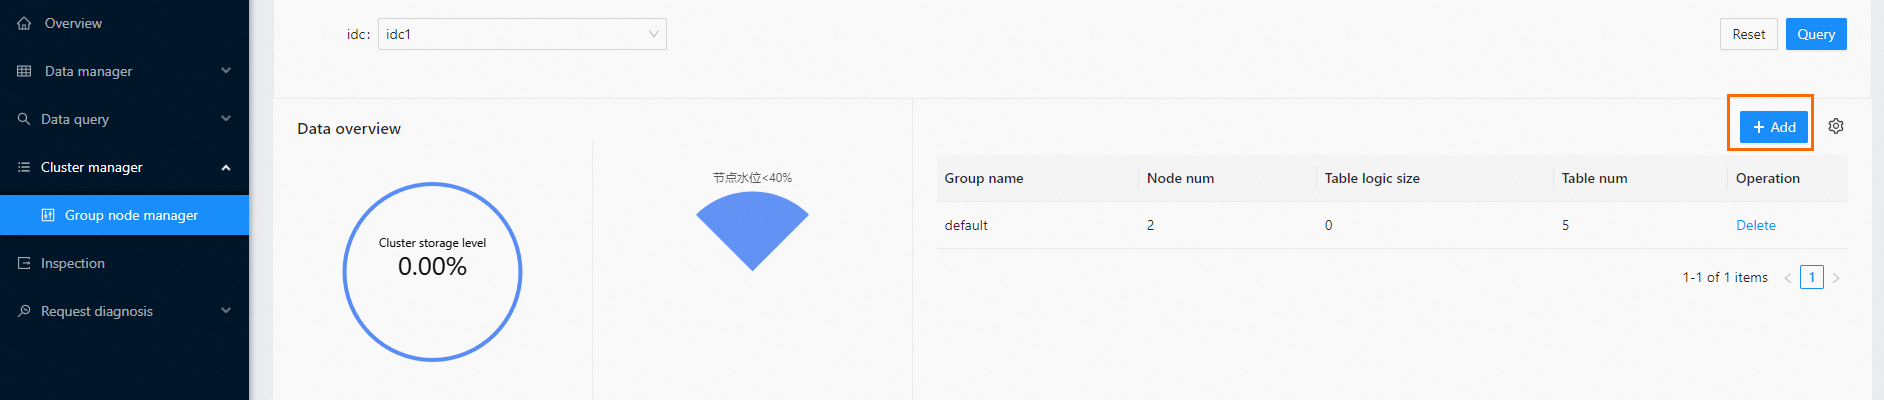
In the left-side navigation pane, choose Cluster Manager > Server Manager.
Click + Add in the upper-right corner.
In the New group dialog box, enter a Group name.
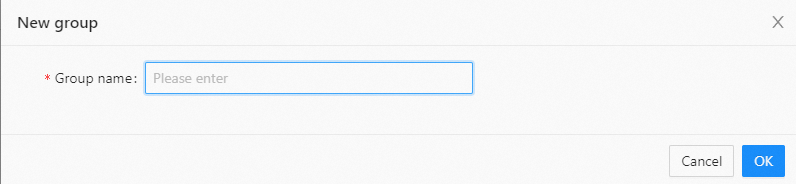
Click OK.
A newly created group contains no region servers or tables. Add region servers and tables to the group manually after creation.
Move a region server to a group
All region servers belong to the default group by default. Move region servers to the appropriate group before using them.
If you add a table to a group that does not contain region servers, the region of the table becomes inaccessible because no region server is available for the region.
Add at least two region servers to each group. If a group has only one region server and that server goes down, all tables in the group become inaccessible. With two or more region servers, regions are redistributed to the remaining servers automatically.
When you move a region server, the regions that are being accessed on the region server are redistributed to other region servers in the same group during the move.
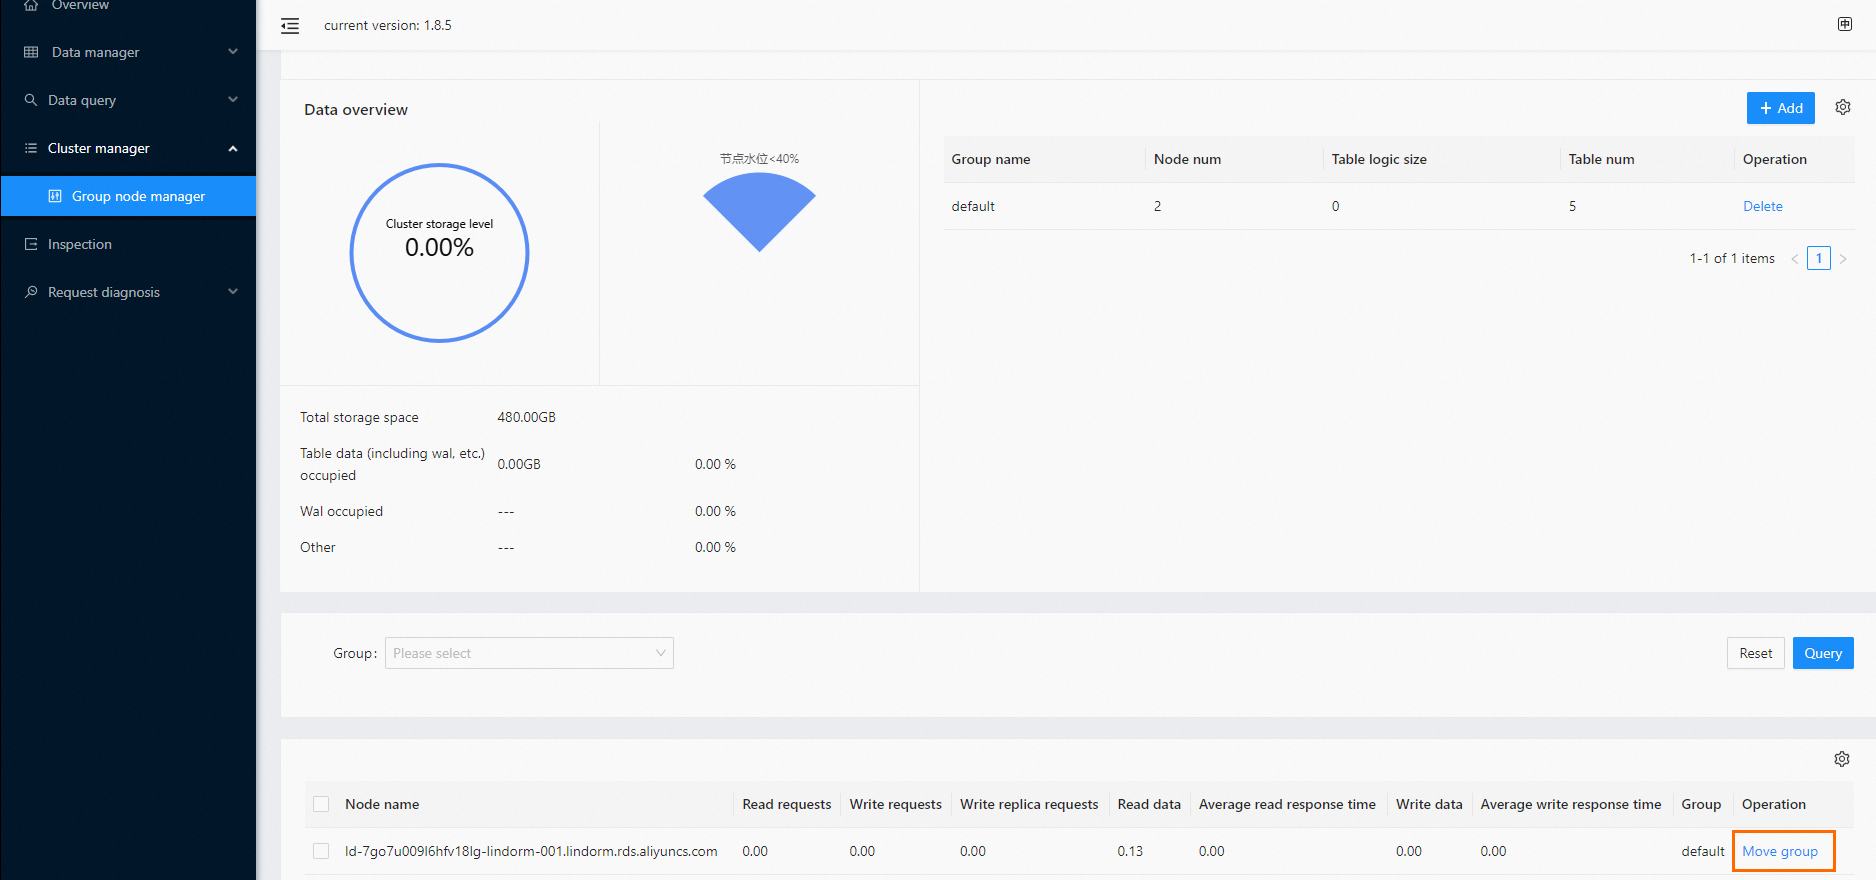
In the left-side navigation pane, choose Cluster Manager > Server Manager.
In the Operation column for the region server, choose More > Move group.
In the Move group dialog box, select the target group from the Target group drop-down list.
Click OK.
Move a table to a group
Do not move a table to a group that has no region servers. The table will become inaccessible.
On the Overview page, click Move group in the Operation column.
In the Move group dialog box, select the target group from the Target group drop-down list.
Click OK.
Delete a group
Remove all region servers and tables from the group before deleting it.
In the left-side navigation pane, choose Cluster Manager > Server Manager.
In the Operation column for the group, choose More > Delete.

Click OK to confirm.
View instance and cluster information
In the left-side navigation pane, choose Cluster Manager > Server Manager.
In the Instance/Cluster info section, view details such as the database type and the on-premises data center where the database is deployed.
To adjust read and write permissions for the current instance or cluster, choose More > ReadWriteControl in the Operation column.
Best practices
Minimum region servers per group
Add at least two region servers to each group. A single-server group has no fault tolerance: if the server goes down, all tables in the group become inaccessible. With two or more servers, Lindorm redistributes regions to the remaining servers automatically.
Follow the setup order
Always follow the sequence: create group, add region servers, move tables. Moving tables into a group before its region servers are assigned makes those tables inaccessible immediately.
Plan group boundaries before migration
Identify which workloads should be isolated before creating groups. For example, place online transaction tables in one group and batch analytics tables in another. Plan your group structure before production traffic begins to avoid disruption during reassignment.