Lindorm Distributed Processing System (LDPS) provided by Lindorm allows you to use the task orchestration feature of Data Management (DMS) to schedule Lindorm Spark jobs and view the publishing history and logs of Lindorm Spark jobs. LDPS can meet your computing requirements in scenarios such as data production, interactive analytics, machine learning, and graph computing. This topic describes how to use DMS to manage Lindorm Spark jobs.
Prerequisites
DMS is activated.
LDPS is activated for the Lindorm instance. For more information, see Activate LDPS and modify the configurations.
A job is developed. For more information, see Create a job in Java or Create a job in Python.
The developed job is uploaded to HDFS or Object Storage Service (OSS). For more information, see Upload files in the Lindorm console.
Create a Lindorm Spark task flow
Log on to the DMS console V5.0.
Go to the Task Orchestration page.
Simple mode:
In the Scene Guide section, click Data Transmission and Processing (DTS).
Click Task Orchestration in the Data processing section on the right side of the page.
Normal mode: In the top navigation bar, choose .
On the Task Orchestration page, click Create Task Flow.
In the Create Task Flow dialog box, specify Task Flow Name and Description, and click OK.
In the Task Type section on the left side, drag Lindorm Spark nodes to the canvas, and connect one node to another node to specify the dependencies between the nodes.
Configure the Lindorm Spark node.
Double-click the Lindorm Spark node, or click the Lindorm Spark node and then click the
 icon.
icon. On the page that appears, configure the basic parameters and custom parameters of the job that you want to run.
In the Basic configuration section, configure the basic parameters. The following table describes the basic parameters.
Parameter
Description
Region
Select the region where your Lindorm instance is deployed.
Lindorm Instance
Select the ID of your Lindorm instance.
Task Type
Select a Spark job type. The following types of jobs are supported:
JAR
Python
SQL
In the Job configuration section, configure the custom parameters of the job that you want to run. The following sections describe the configuration templates and custom parameters of different types of Spark jobs.
The following section describes the configuration template and custom parameters of a JAR Spark job:
{
  "mainResource" : "oss://path/to/your/file.jar",
  "mainClass" : "path.to.main.class",
  "args" : [ "arg1", "arg2" ],
  "configs" : {
    "spark.hadoop.fs.oss.endpoint" : "",
    "spark.hadoop.fs.oss.accessKeyId" : "",
    "spark.hadoop.fs.oss.accessKeySecret" : "",
    "spark.hadoop.fs.oss.impl" : "org.apache.hadoop.fs.aliyun.oss.AliyunOSSFileSystem",
    "spark.sql.shuffle.partitions" : "20"
  }
}
Parameter
Type
Required
Description
Example
mainResource
String
Yes
The path in which the JAR package is stored in HDFS or OSS.
HDFS path in which the JAR package is stored: hdfs:///path/spark-examples_2.12-3.1.1.jar
OSS path in which the JAR package is stored: oss://testBucketName/path/spark-examples_2.12-3.1.1.jar
mainClass
String
Yes
The class that is used as the entry point for your program in the JAR job.
com.aliyun.ldspark.SparkPi
args
Array
No
The parameter that is passed to the mainClass parameter.
["arg1", "arg2"]
configs
Json
No
The system parameters of the Spark job. If the job is uploaded to OSS, you must configure the following parameters in configs:
spark.hadoop.fs.oss.endpoint: The path in which the Spark job is stored in OSS.
spark.hadoop.fs.oss.accessKeyId: The AccessKey ID used to access OSS. You can obtain the AccessKey ID in the console. For more information, see Obtain an AccessKey pair.
spark.hadoop.fs.oss.accessKeySecret: The AccessKey secret used to access OSS. You can obtain the AccessKey secret in the console. For more information, see Obtain an AccessKey pair.
spark.hadoop.fs.oss.impl: The class used to access OSS. Set the value to org.apache.hadoop.fs.aliyun.oss.AliyunOSSFileSystem.
{ "spark.sql.shuffle.partitions": "200"}
The following section describes the configuration template and custom parameters of a Python Spark job:
{
  "mainResource" : "oss://path/to/your/file.py",
  "args" : [ "arg1", "arg2" ],
  "configs" : {
    "spark.hadoop.fs.oss.endpoint" : "",
    "spark.hadoop.fs.oss.accessKeyId" : "",
    "spark.hadoop.fs.oss.accessKeySecret" : "",
    "spark.hadoop.fs.oss.impl" : "org.apache.hadoop.fs.aliyun.oss.AliyunOSSFileSystem",
    "spark.submit.pyFiles" : "oss://path/to/your/project_file.py,oss://path/to/your/project_module.zip",
    "spark.archives" : "oss://path/to/your/environment.tar.gz#environment",
    "spark.sql.shuffle.partitions" : "20"
  }
}
Parameter
Type
Required
Description
Example
mainResource
String
Yes
The path in which the Python file is stored in OSS or HDFS.
OSS path in which the Python file is stored: oss://testBucketName/path/spark-examples.py
HDFS path in which the Python file is stored: hdfs:///path/spark-examples.py
args
Array
No
The parameter that is passed to the mainClass parameter.
["arg1", "arg2"]
configs
Json
No
The system parameters of the Spark job. If you need to upload the job to OSS, you must configure the following parameters in configs:
spark.hadoop.fs.oss.endpoint: The path in which the Spark job is stored in OSS.
spark.hadoop.fs.oss.accessKeyId: The AccessKey ID used to access OSS. You can obtain the AccessKey ID in the console. For more information, see Obtain an AccessKey pair.
spark.hadoop.fs.oss.accessKeySecret: The AccessKey secret used to access OSS. You can obtain the AccessKey secret in the console. For more information, see Obtain an AccessKey pair.
spark.hadoop.fs.oss.impl: The class used to access OSS. Set the value to org.apache.hadoop.fs.aliyun.oss.AliyunOSSFileSystem.
{"spark.sql.shuffle.partitions": "200"}
The following section describes the configuration template and custom parameters of an SQL job:
{
  "mainResource" : "oss://path/to/your/file.sql",
  "configs" : {
    "spark.hadoop.fs.oss.endpoint" : "",
    "spark.hadoop.fs.oss.accessKeyId" : "",
    "spark.hadoop.fs.oss.accessKeySecret" : "",
    "spark.hadoop.fs.oss.impl" : "org.apache.hadoop.fs.aliyun.oss.AliyunOSSFileSystem",
    "spark.sql.shuffle.partitions" : "20"
  }
}
Parameter
Type
Required
Description
Example
mainResource
String
Yes
The path in which the SQL file is stored in OSS or HDFS.
OSS path in which the SQL file is stored: oss://testBucketName/path/spark-examples.sql
HDFS path in which the SQL file is stored: hdfs:///path/spark-examples.sql
configs
Json
No
Other configurations of the SQL job.
{ "spark.executor.memory" : "8g"}
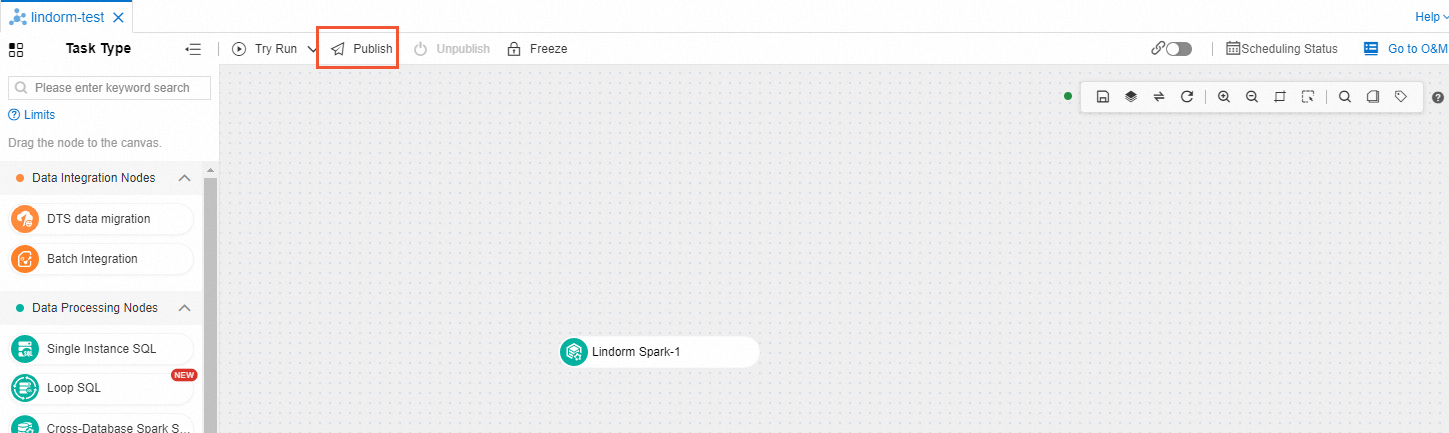
After the preceding configuration is complete, click Try Run in the upper-left corner to check whether the job runs as expected.
Publish the task flow. After all nodes are configured, click Publish in the upper-left corner of the page of the current task flow.
View the publishing history and logs of a task flow
On the Task Orchestration page, click the name of the task flow whose publishing history and logs you want to view.
On the page that appears, click Go to O&M in the upper-right corner.

View the publishing history and logs of the task flow.
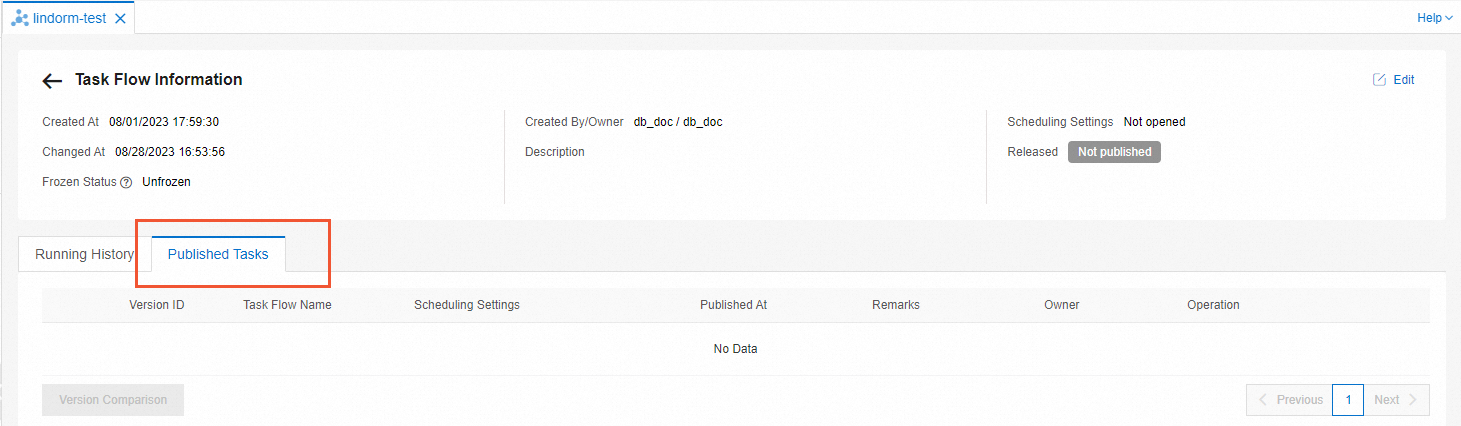
View the publishing history of the task flow. On the Task Flow Information page, click the Published Tasks tab to view the publishing history of the task flow.
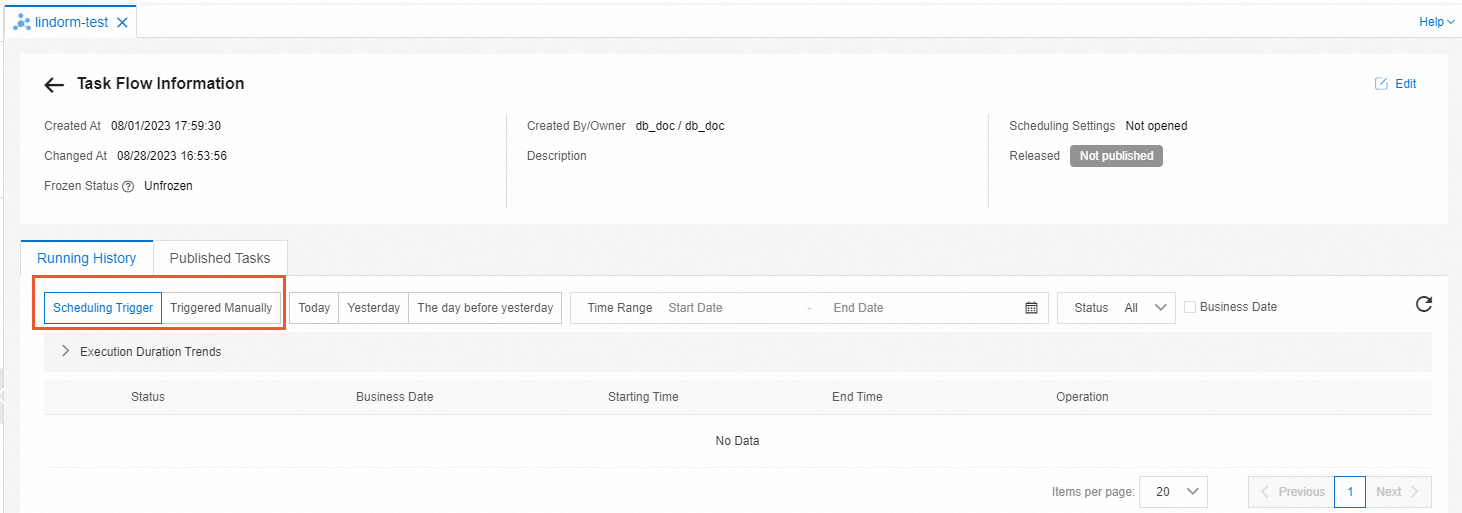
View the logs of the task flow.
On the Running History tab, select Scheduling Trigger or Triggered Manually from the drop-down list in the upper-left corner to view the details of all nodes in the task flow.
Click View in the line of the node that you want to view. Then, view the logs for the submission of the Lindorm Spark job, and obtain the job ID and SparkUI of the node.
NoteIf the job failed to be submitted, provide the job ID and SparkUI when you submit a ticket.
Advanced settings
You can configure a Lindorm Spark task flow in the DMS console. After the Lindorm Spark task flow is configured, you must republish the task flow.
Configure the scheduling settings
You can configure a scheduling policy based on your business requirements. The Lindorm Spark task flow is automatically executed based on the scheduling policy. You can perform the following steps to configure a scheduling policy:
On the Task Orchestration page, click the name of the task flow for which you want to configure a scheduling policy.
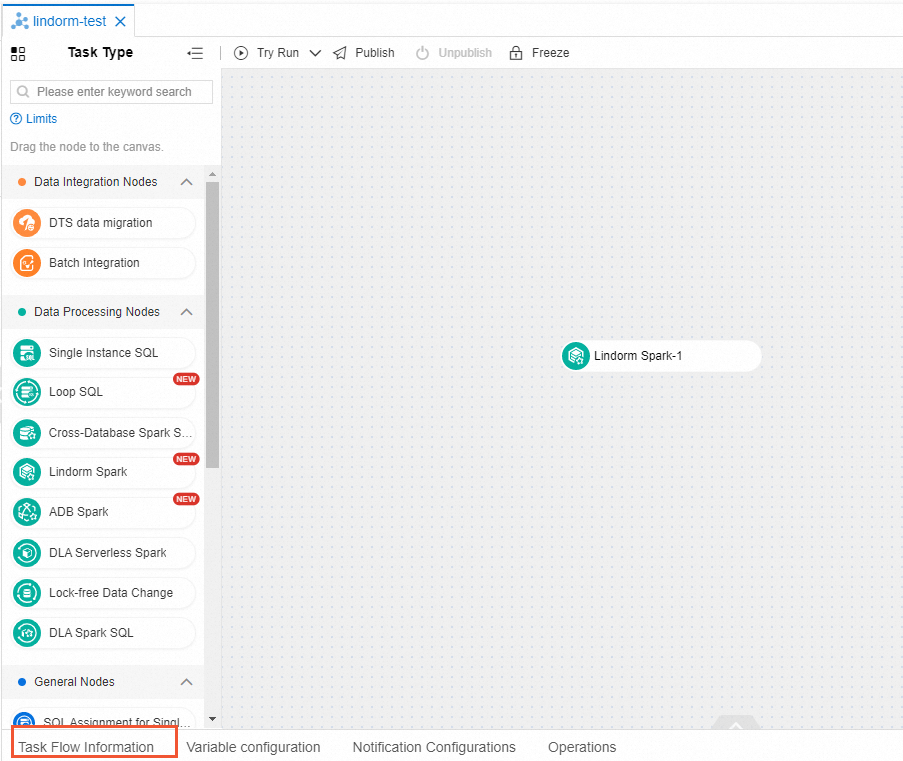
In the lower-left corner of the page that appears, click Task Flow Information.
In the Scheduling Settings section on the right, turn on Enable Scheduling and configure a scheduling policy. The following table describes the parameters that you can configure.
Parameter
Description
Scheduling Type
The scheduling type of the task flow. Valid values:
Cyclic scheduling: The task flow is periodically scheduled. For example, the task flow is run once a week.
Schedule once: The task flow is run once at a specific point in time. You need to specify only the point in time when the task flow is run.
Effective Time
The period during which the scheduling properties take effect. The default time period is from January 1, 1970 to January 1, 9999, which indicates that the scheduling properties permanently take effect.
Scheduling Cycle
The scheduling cycle of the task flow. Valid values:
Hour: The task flow is run within the hours that you specify. If you select this value, you must set the Timed Scheduling parameter.
Day: The task flow is run at the specified point in time every day. If you select this value, you must set the Specific Point in Time parameter.
Week: The task flow is run at the specified point in time on the days that you select every week. If you select this value, you must set the Specified Time and Specific Point in Time parameters.
Month: The task flow is run at the specified point in time on the days that you select every month. If you select this value, you must set the Specified Time and Specific Point in Time parameters.
Timed Scheduling
The scheduling method of the task flow. DMS provides the following scheduling methods:
Run at an interval:
Starting Time: the time when DMS runs the task flow.
Intervals: the interval at which the task flow is run. Unit: hours.
End Time: the time when DMS stops running the task flow.
For example, you can set the Starting Time parameter to 00:00, the Intervals parameter to 6, and the End Time parameter to 20:59. In this case, DMS runs the task flow at 00:00, 06:00, 12:00, and 18:00.
Run at the specified point in time: You can select the hours at which DMS runs the task flow by using the Specified Time parameter.
For example, if you select 0Hour and 5Hour, DMS runs the task flow at 00:00 and 05:00.
Specified Time
If you set the Scheduling Cycle parameter to Week, you can select one or more days of a week from the drop-down list.
If you set the Scheduling Cycle parameter to Month, you can select one or more days of a month from the drop-down list.
Specific Point in Time
The point in time of the specified days at which the task flow is run.
For example, if you set this parameter to 02:55, DMS runs the task flow at 02:55 on the specified days.
Cron Expression
The CRON expression that is automatically generated based on the values that you specify for the preceding parameters.
Example: If you want your task flow to be scheduled at 00:00 and 12:00 every day, configure the scheduling policy by setting the following parameters:
Set Scheduling Type to Cyclic scheduling.
Select Hour from the Scheduling Cycle drop-down list.
In the Timed Scheduling field, select Specified Time. Select 0Hour and 12Hour from the Specified Time drop-down list.
Configure variables
For a task flow for which cyclic scheduling is enabled, you can configure a time variable for the job that you want to execute. For example, you can configure the time variable bizdate for the node. The time variable specifies the day before the time in point when the task is executed. You can perform the following steps to configure the time variable:
On the current task flow page, double-click the Lindorm Spark node, or click the Lindorm Spark node and click the
icon. In the right-side navigation pane, click Variable Setting.
On the Node Variable or Task Flow Variable tab, add a variable.
In the Job configuration section, use the variable. For information about other variables, see Variables.
Manage notifications
If you enable the notification feature for your task flow, the system sends a notification message based on the execution result of the task flow. You can perform the following steps to enable the notification feature:
In the lower-left corner of the current task flow page, click Notification Configurations.
Turn on one of the following notification switches based on your business requirements:
Basic Notifications
Success Notification: The system sends a notification message if the task flow is executed.
Failure Notification: The system sends a notification message if the task flow fails to be executed.
Timeout Notification: The system sends a notification message if the task flow times out.
Alert Notification: The system sends a notification message when the task is about to start.
(Optional): Configure the recipients of the messages. For more information about how to configure message recipients, see Manage notification rules.
Execute SQL statements
Log on to the DMS console V5.0.
Click the Home tab.
In the left-side navigation pane, click the
 icon to create an instance.
 In the Add Instance dialog box, select Lindorm_Compute in the NoSQL Database section.
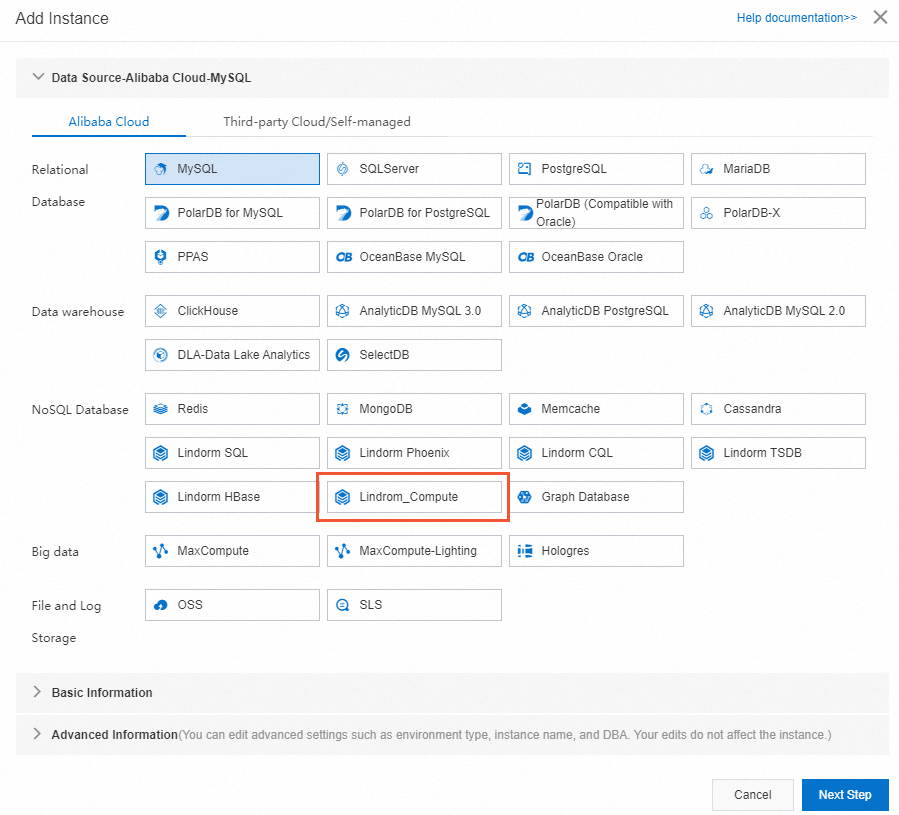
Specify Instance Region, Instance ID, Database Account, and Database password for the instance, and then click Submit.
In the dialog box that appears, click Submit to go to SQLConsole.
On the SQLConsole tab, enter the SQL statement to be executed and click Execute.
References
For more information about the task orchestration feature of DMS, see Overview.