To enable Internet access for a cloud resource in an IPv6-enabled virtual private cloud (VPC), activate Internet bandwidth for its IPv6 address.
Use case
A company needs its Elastic Compute Service (ECS) instance, ECS01, to use an IPv6 address to access the Internet. The company also wants to allow public access to the ECS01 instance.
Proper network planning helps prevent CIDR block conflicts and ensures network scalability. To avoid high rebuilding costs incurred by improper planning, plan your network before you create a VPC.

Procedure
Step 1: Create an IPv6-enabled VPC and vSwitch
Go to the VPC console - Create VPC page.
Configure the VPC:
Region: Select the region where you want to create cloud resources.
IPv4 CIDR Block: Select a recommended CIDR block provided by the console, or enter a custom CIDR block. If you plan to connect multiple VPCs, ensure their CIDR blocks do not overlap to prevent conflicts. We recommend creating a VPC with IPAM.
1. Use the private IPv4 addresses specified in RFC 1918 as the CIDR block for the VPC, with a network mask length of 16 to 28. For example, 10.0.0.0/16, 172.16.0.0/16, and 192.168.0.0/16.
2. Do not use 100.64.0.0/10, 224.0.0.0/4, 127.0.0.0/8, or 169.254.0.0/16 as the IPv4 CIDR block for the VPC.
IPv6 CIDR Block: Use Allocated by system and select Assign BGP (Multi-ISP). The system automatically creates an IPv6 Gateway and assigns an IPv6 CIDR block with a /56 mask.
Configure the vSwitch:
Zone: The zone where you will create your cloud resources. Select a zone based on the availability of your required resources.
IPv4 CIDR Block: Use the default CIDR block provided by the console, or adjust the range as needed.
IPv6 CIDR Block: The default mask for the vSwitch's IPv6 CIDR block is /64. You can enter a decimal number from 0 to 255 to customize the last 8 bits of the IPv6 CIDR block.
Step 2: Create an ECS instance
Go to the VPC console - vSwitch page. Find the vSwitch that you want to use and in the Actions column, click .
On the Elastic Compute Service purchase page, on the Custom Launch tab, configure the ECS instance and complete the purchase.
This section lists only the required parameters.
IPv6: Select Assign IPv6 Address Free of Charge.
Step 3: Enable IPv6 Internet bandwidth
You can only activate internet bandwidth for the specific IPv6 address of an ECS instance, not for an entire IPv6 CIDR block.
Log on to the IPv6 Gateway console.
Click the ID of the target IPv6 Gateway instance. On the IPv6 Internet Bandwidth tab, find the target IPv6 address and click Activate Internet Bandwidth in the Actions column.
On the IPv6 Internet Bandwidth (PostPay) page, set Traffic, Billing Method, Bandwidth, and Billing Cycle parameters. Then, complete the purchase.
Step 5: Add security group rules
Check whether the current security group rules meet your IPv6 service requirements. If not, add IPv6 security group rules for the ECS01 instance. Set the security group rules are as follows:
Inbound rules:
Allow ICMPv6 traffic to ping the ECS instance using the
ping -6command.Allow traffic on SSH port 22 and RDP port 3389 to connect to the ECS instance, and on HTTP port 80 and HTTPS port 443 to access web services that run on the instance.
Log on to the ECS console. In the navigation pane on the left, choose . Click Manage Rules in the Operation column of the target security group.
Add a security group rule to allow ICMP traffic from all IPv4 and IPv6 addresses.
Step 6: Test network connectivity
Log on to the ECS01 instance.
This example uses an instance that runs the Alibaba Cloud Linux 3.2104 64-bit operating system.
On the ECS01 instance, run
ping -6 aliyun.comto test the Internet connectivity over IPv6. If you receive reply packets, the connection is successful.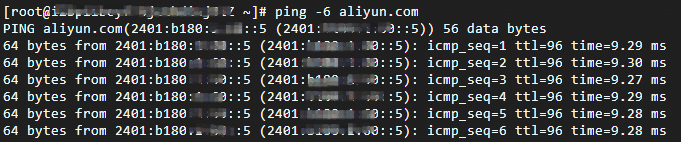
Step 7: (Optional) Delete the IPv6 Internet bandwidth
Deleting the IPv6 internet bandwidth stops all related charges. Afterward, the instance can only communicate over the private network.
Log on to the IPv6 Gateway console. Click the ID of the IPv6 Gateway. On the IPv6 Internet Bandwidth tab, find the target IPv6 address and click Delete Internet Bandwidth in the Actions column.
Billing
You are charged Internet bandwidth fees when you enable Internet bandwidth for an IPv6 address.
Enabling IPv6 for a VPC or a vSwitch is free of charge.