Configure Okta as an external identity provider (IdP) for IDaaS Employee Identity and Access Management (EIAM) over OpenID Connect (OIDC), so employees can log in to the IDaaS EIAM portal using their existing Okta accounts.
The setup follows a three-step exchange: retrieve a redirect URI from IDaaS, create an OIDC app integration in Okta, then copy the client credentials back into IDaaS. After configuration is complete, employees click the Okta button on the IDaaS EIAM login page and authenticate through Okta.
Prerequisites
Before you begin, ensure that you have:
An IDaaS EIAM instance
Admin access to the Okta Admin Console
Considerations
Review the following before you start:
Proof Key for Code Exchange (PKCE): PKCE adds an extra layer of security to the OIDC flow. Okta's PKCE implementation supports only Secure Hash Algorithm 256 (SHA-256) for the code challenge. Enable PKCE based on your business requirements.
Dynamic issuer mode: If you use a self-managed Okta authorization server instead of the default Okta org authorization server, you must configure Dynamic mode for the issuer and add access policies to the Okta app. See step 3 for details.
Controlled access: During Okta app setup, the Controlled access setting determines which Okta users can authenticate. If you select a restricted option, grant access to the relevant users or groups before testing the login flow.
Step 1: IDaaS — Start the binding process
Go to the details page of your IDaaS EIAM instance. In the left-side navigation pane, click IdPs.
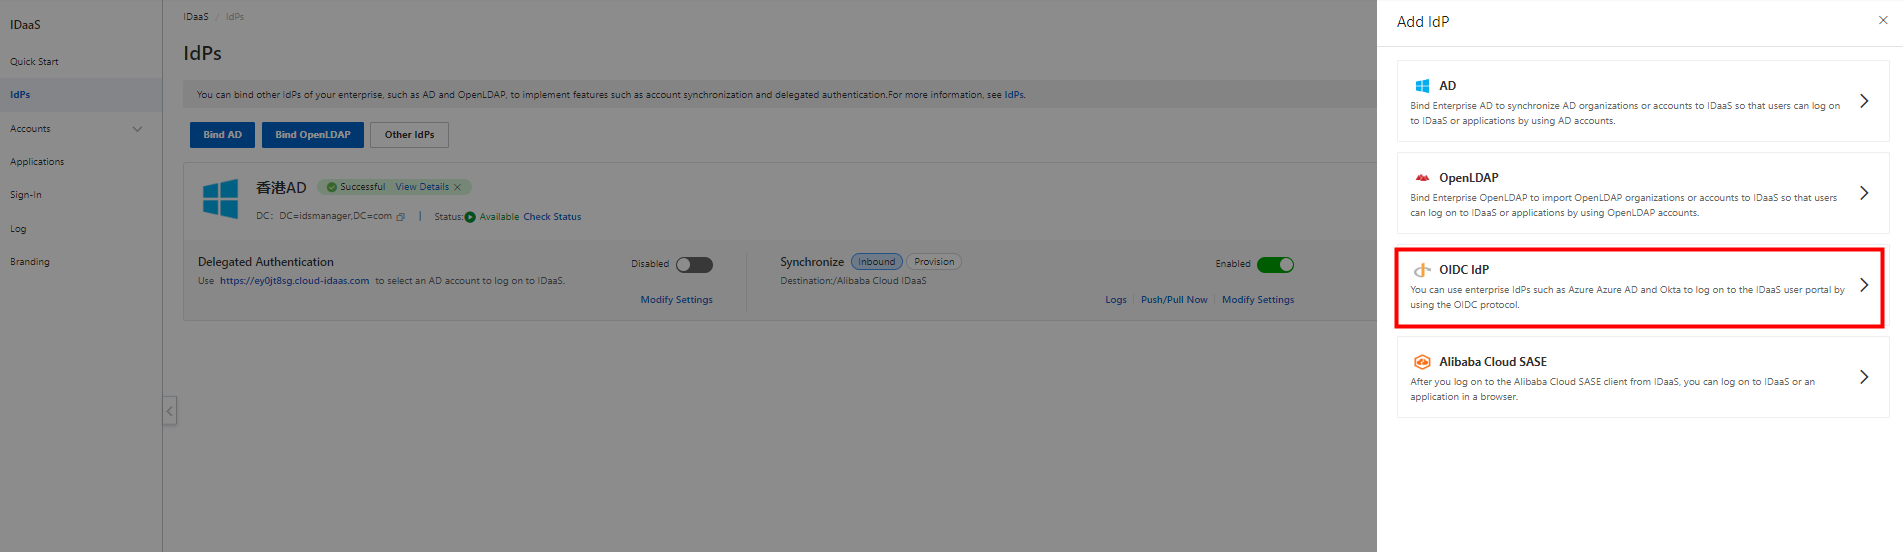
On the IdPs page, click Other IdPs. In the Add IdP panel, click OIDC IdP.
In the Bind OIDC Identity Provider panel, enter a display name in the Nickname field and select an authentication mode. To enable PKCE, select the corresponding option — note the SHA-256-only constraint above.
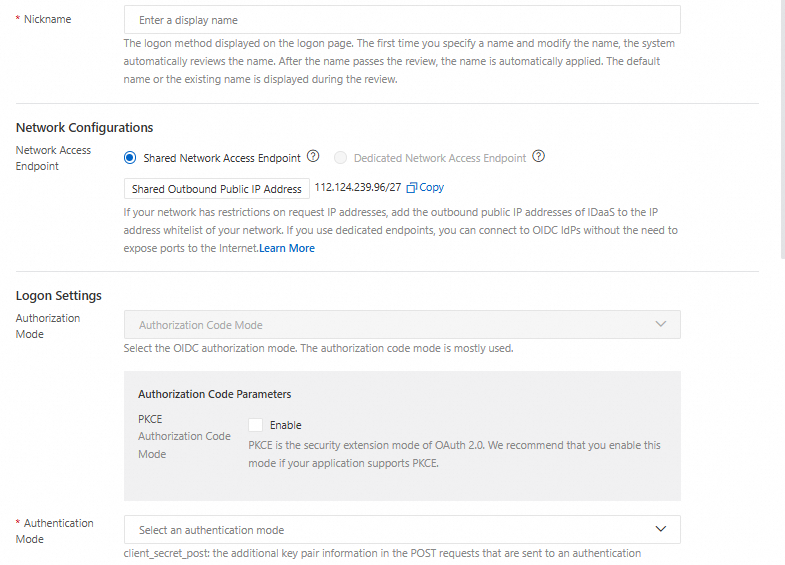
In the lower part of the panel, copy the value of IDaaS Redirect URI. You will paste this into Okta in the next step.

Step 2: Okta — Create an app integration
Log in to the Okta Admin Console.
Go to Applications and click Create App Integration.
Set Sign-in method to OIDC - OpenID Connect and Application type to Web Application.
Enter a name in the App integration name field.
Paste the IDaaS Redirect URI you copied in step 1 into the Sign-in redirect URIs field.
Configure Controlled access. For testing, or when you do not need to restrict access, select Allow everyone in your organization to access. Otherwise, grant access to the appropriate users or groups.
Click Save. The app integration details page opens.
Step 3: IDaaS — Configure the OIDC IdP
Go back to the Bind OIDC Identity Provider panel in the IDaaS console and fill in the following fields using values from the Okta app integration details page.
Client ID
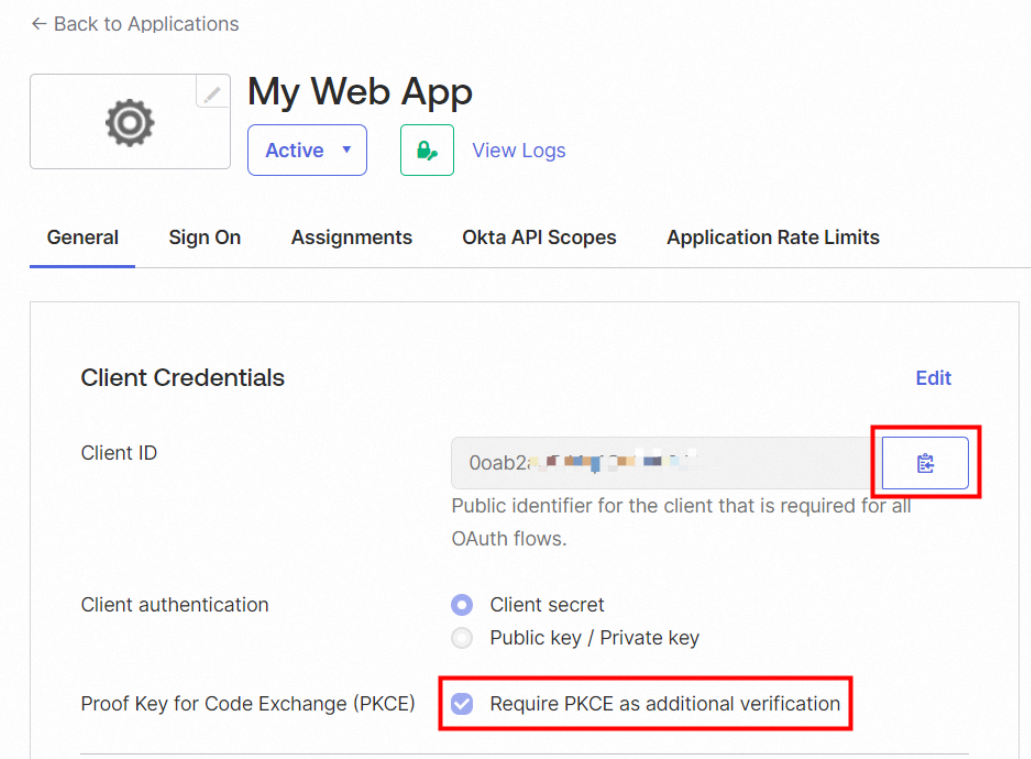
On the General tab in Okta, click the copy icon next to Client ID and paste the value into the Client ID field in IDaaS. If you enabled PKCE in step 1, also select Require PKCE as additional verification.
Client Secret
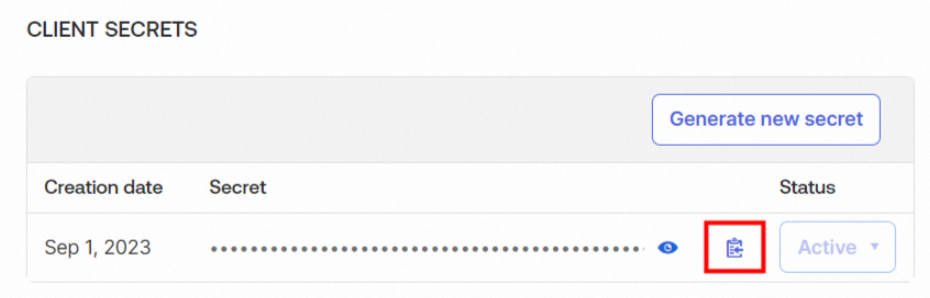
On the General tab, click the copy icon next to Client Secret and paste the value into the Client Secret field in IDaaS.
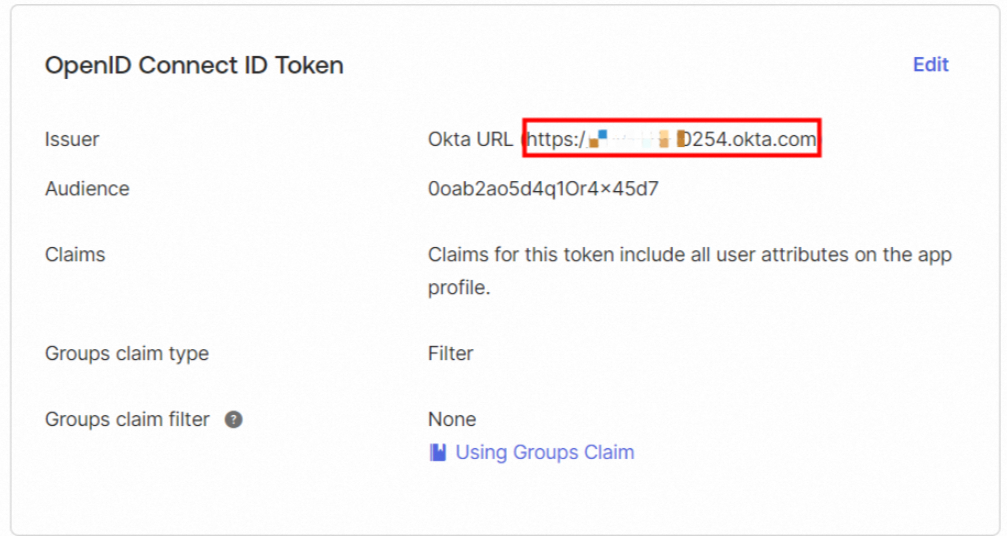
Issuer
On the Sign On tab, click Edit in the OpenID Connect ID Token section. Set Issuer to Okta URL, copy the URL, and paste it into the Issuer field in IDaaS.
If you use a self-managed authorization server (Dynamic mode), go to Security > API in the Okta Admin Console, open the Authorization Servers tab, and copy the issuer URI from there instead. Also add access policies to the Okta app before proceeding.
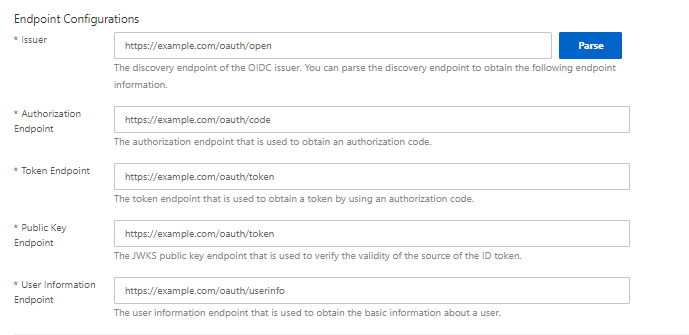
After entering the issuer URL, click Parse next to the Issuer field. The endpoints are automatically populated.
Click Next to go to the Select Scenario step. For details on scenario configuration, see Select a scenario.
Log in to IDaaS EIAM with Okta
After configuration is complete, employees can log in to the IDaaS EIAM portal through Okta.
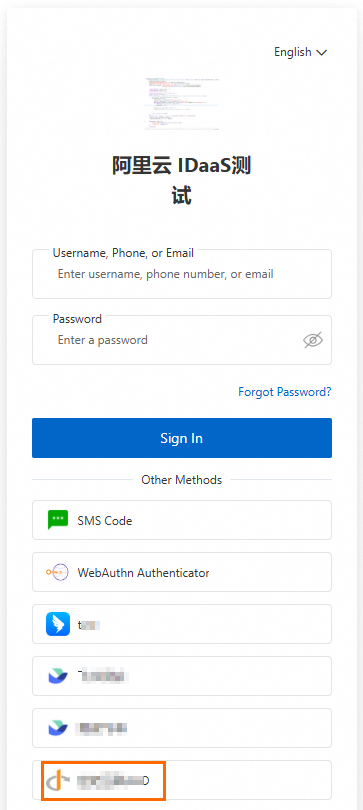
On the IDaaS EIAM login page, click the Okta button.
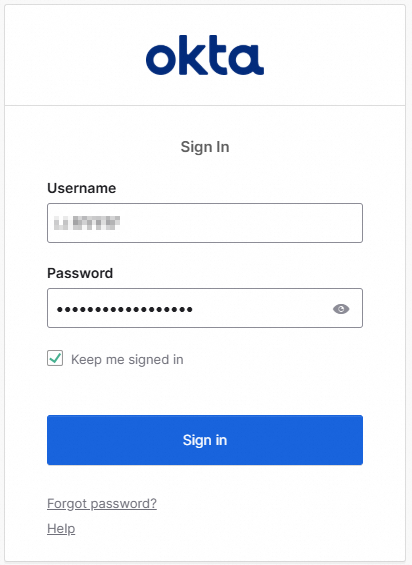
IDaaS sends an authentication request to Okta. If no Okta session is active, the Okta login page appears. Authenticate with your Okta credentials. If an Okta session is already active, you are redirected to IDaaS EIAM.
After Okta authenticates the user, one of the following occurs based on how accounts are configured:
Situation Result The Okta account is already bound to an IDaaS EIAM account The user is logged in directly No binding exists IDaaS automatically binds the Okta account to the matching IDaaS account Automatic binding fails The user must manually bind the accounts or trigger automatic account creation For details on account binding behavior and scenario configuration, see Select a scenario.