Protect your APIs with machine-to-machine (M2M) authentication by combining Alibaba Cloud API Gateway with IDaaS EIAM. This tutorial walks you through registering an API, granting permission scopes to an M2M client, and configuring gateway plugins so that only authorized systems can call your API.
Prerequisites
Before you begin, ensure that you have:
An M2M application server and M2M client configured in IDaaS

How it works
M2M authentication uses the OAuth 2.0 client credentials grant. The three components map to OAuth 2.0 roles as follows:
| Component | OAuth 2.0 role | Description |
|---|---|---|
| M2M server | Authorization server | The IDaaS EIAM application that issues JSON Web Tokens (JWTs) and exposes the public key endpoint. |
| M2M client | OAuth 2.0 client | The calling system (daemon, service, or CLI) that requests tokens and passes them to the API. |
| API Gateway | Resource server | Validates incoming JWTs against the M2M server's public key and enforces permission scope rules before forwarding requests to your backend. |
Set up M2M authentication for your API
Complete the following steps in order:
Register the API with API Gateway — expose your backend as a managed API endpoint.
Grant permissions to the M2M client — assign the permission scopes the client is allowed to request.
Configure API Gateway plugins — add JWT authentication and access control rules that tie the allowed scopes to the API.
Register the API with API Gateway
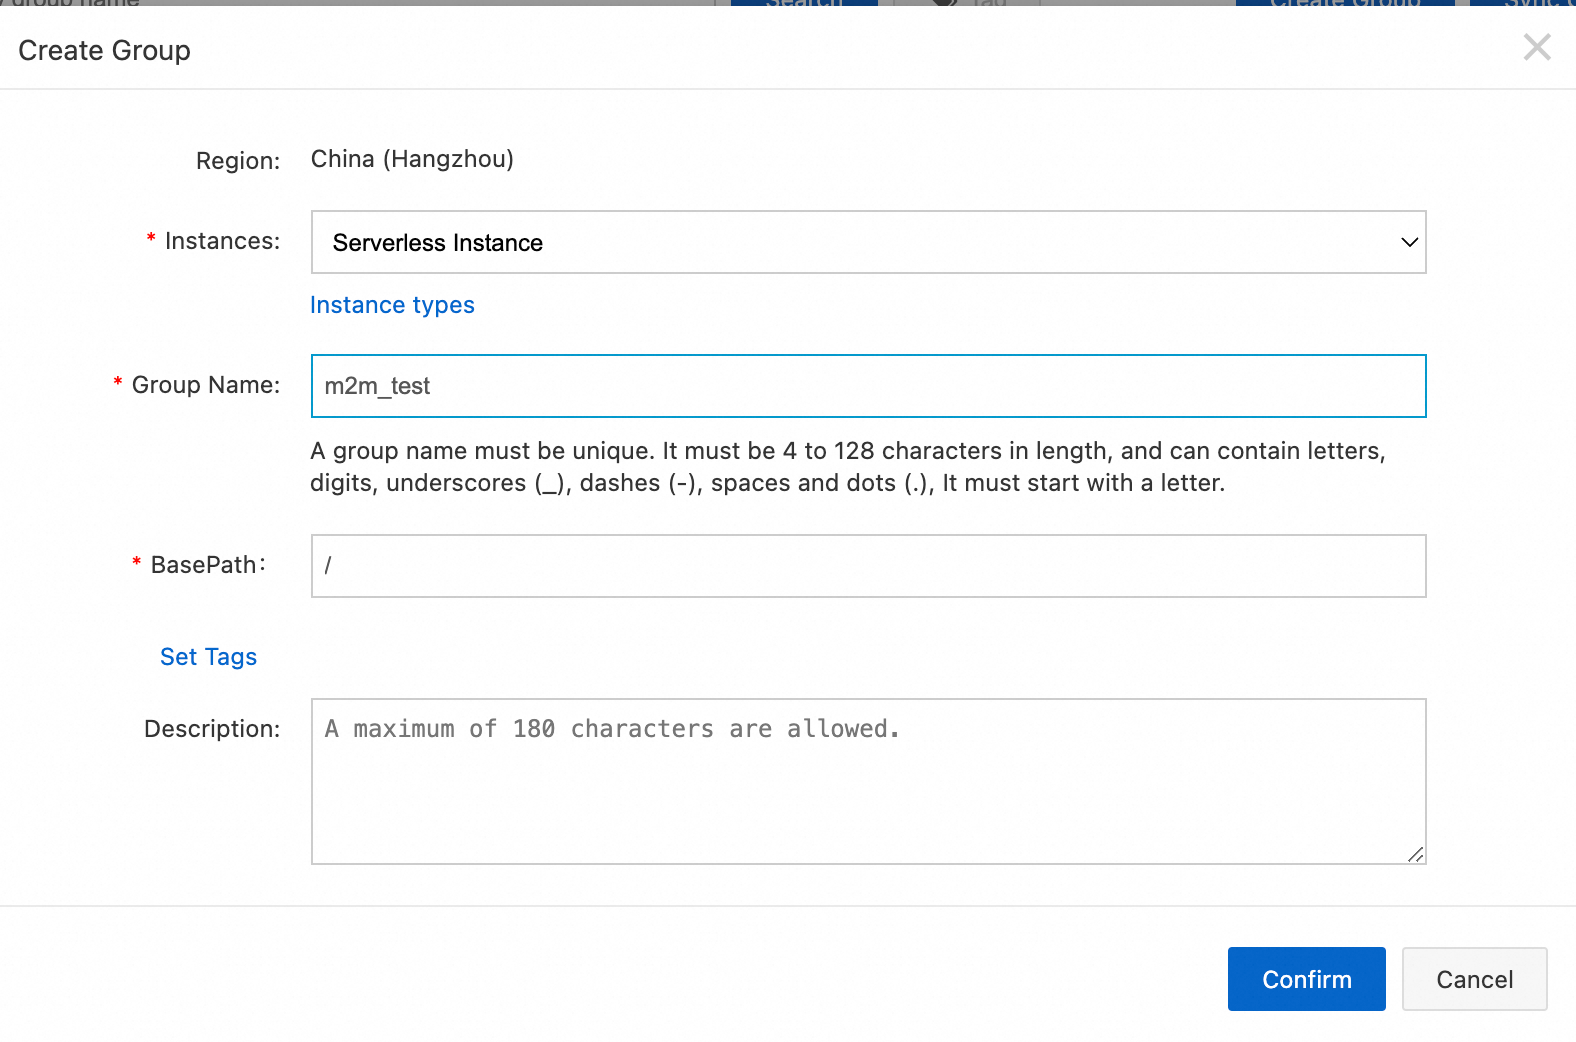
Log on to the API Gateway console. In the left navigation pane, choose Manage APIs > API Groups. Click Create Group.
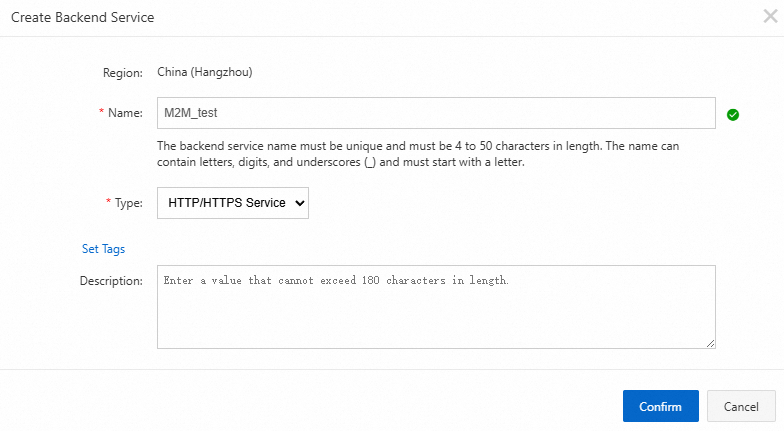
In the Backend Services menu, click Create Backend Service to register your business service endpoint. This simplifies how you manage API operations for that service. Attach your business service endpoint to the backend service you created.

In the backend service, click Create API. The Create API page appears.

On the Create API page, set Security Authentication to No Authentication for this tutorial. Click Next.
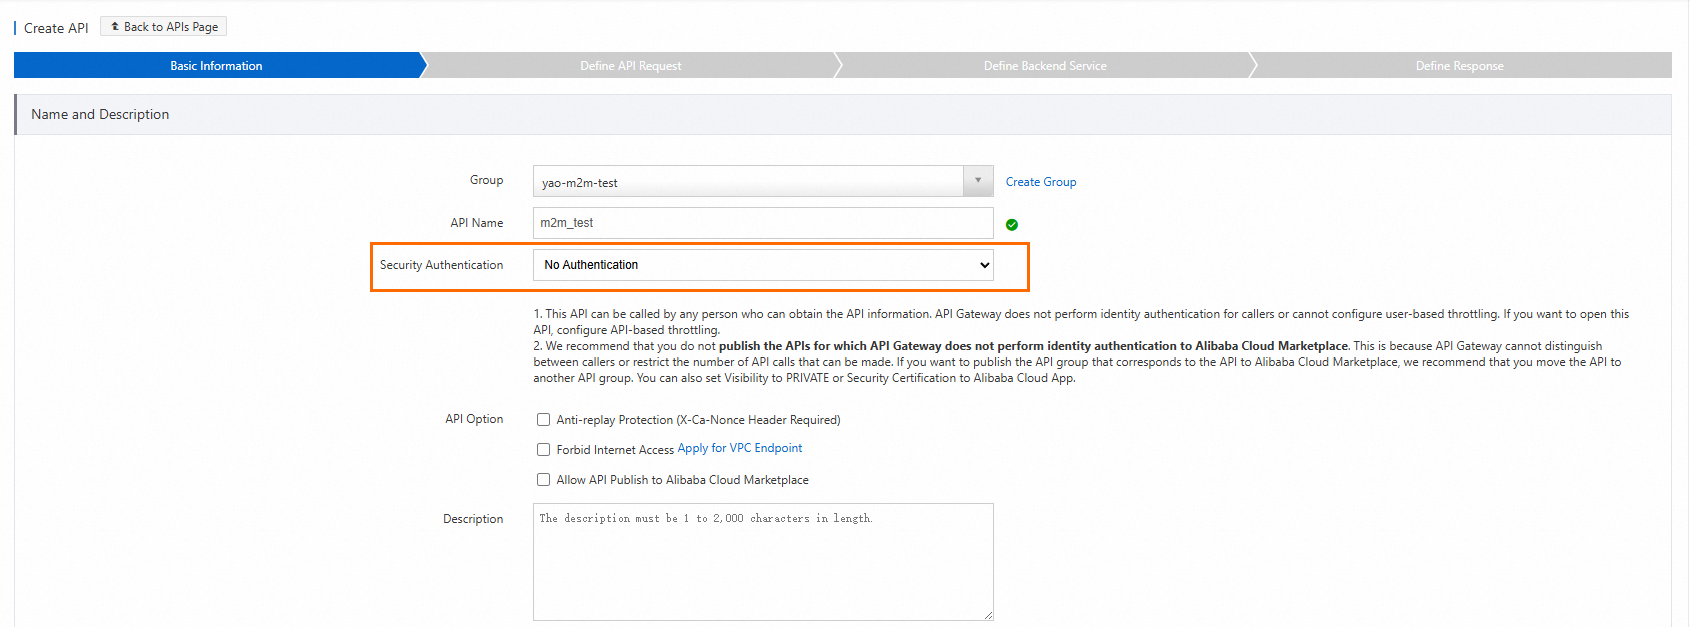
Set Security Authentication to No Authentication because this tutorial uses API Gateway plugins to handle authentication instead of the built-in mechanism.
In the Request Basic Settings section, enter the Request Path and select the HTTP Method.
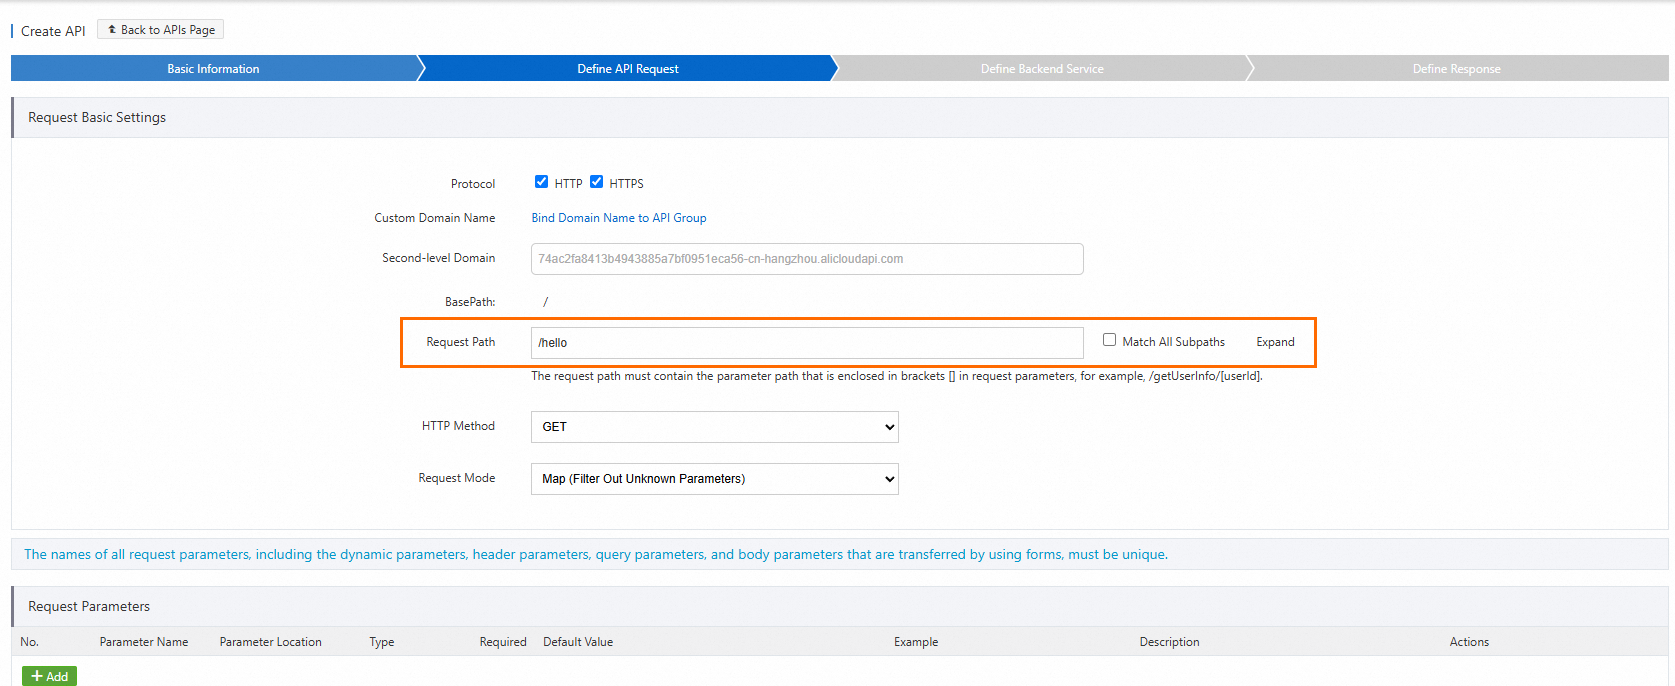
Enter the actual backend request path. When a caller invokes the API using the path you defined, the gateway maps that path to this backend path.
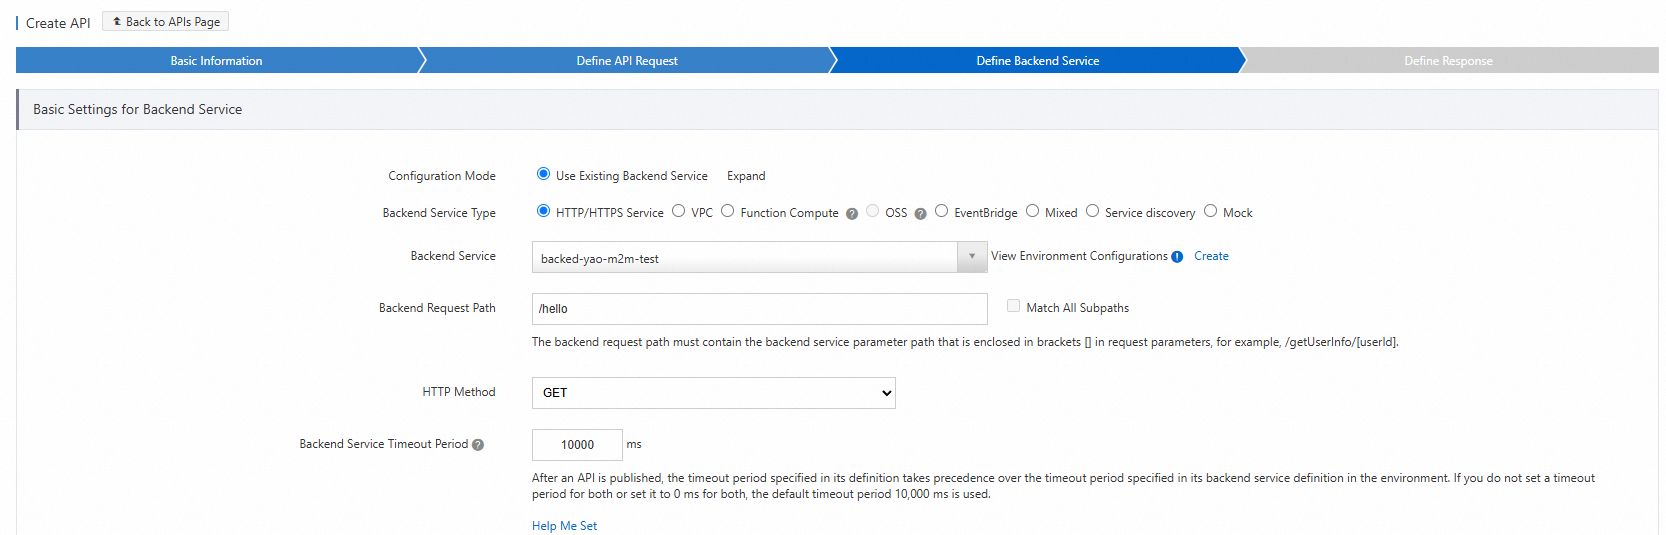
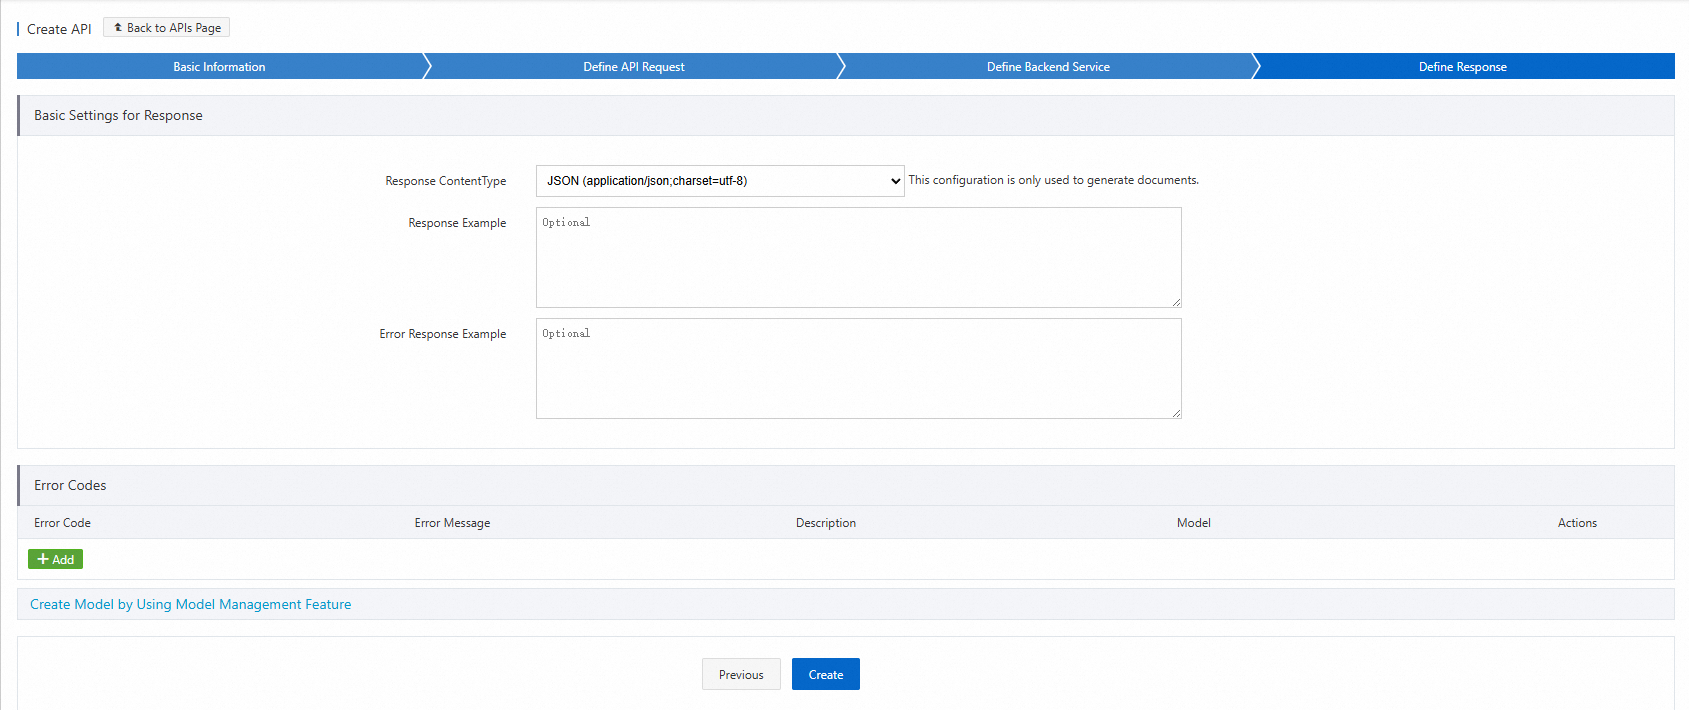
Select the response ContentType and complete the API creation.
Publish and debug the API to confirm it is working before adding authentication.
Select an environment and publish the API.
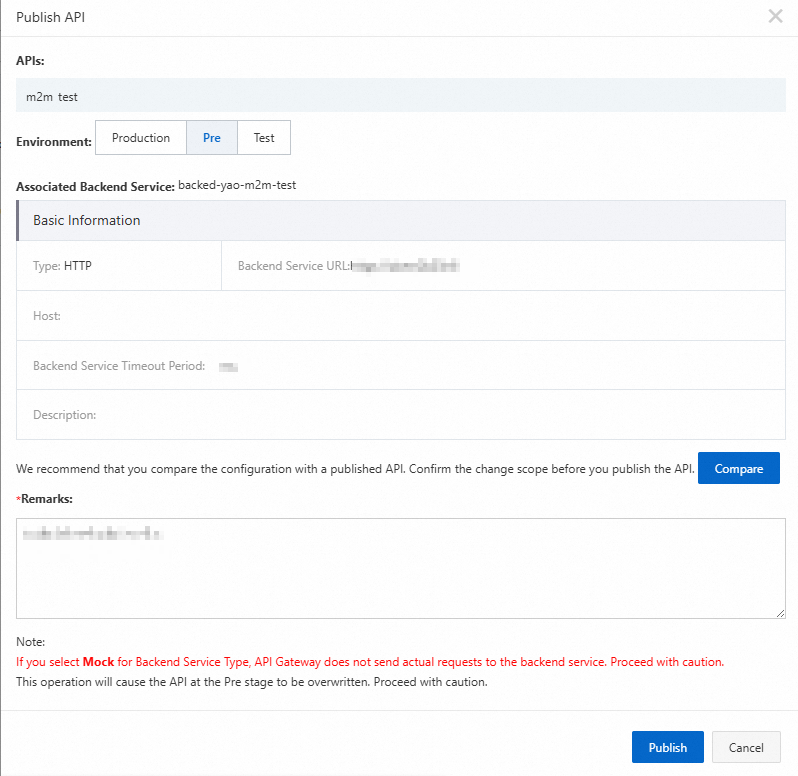
Send a test request in the staging environment. A successful response confirms the API is available and the backend is reachable.
Grant permissions to the M2M client
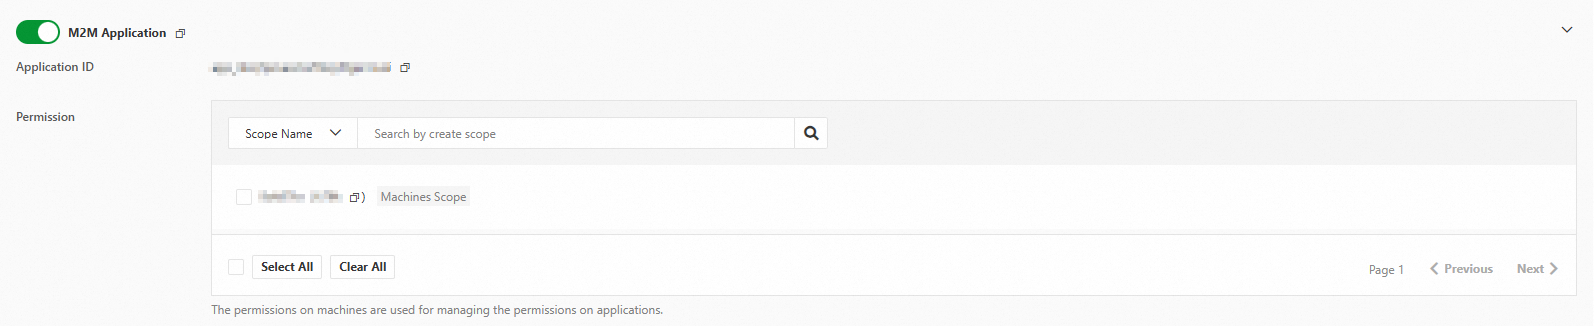
In the IDaaS console, open your M2M application. In the authorized applications section, find the M2M client and grant it the required permission scopes.
In this example, the user:read:one permission scope is granted to the client.
Configure API Gateway plugins
Two plugins work together to authenticate and authorize incoming requests:
JWT Authentication — validates the JWT in the request against the M2M server's public key.
Parametric Access Control — checks that the token's
client_idandscopeclaims satisfy the required access rule.
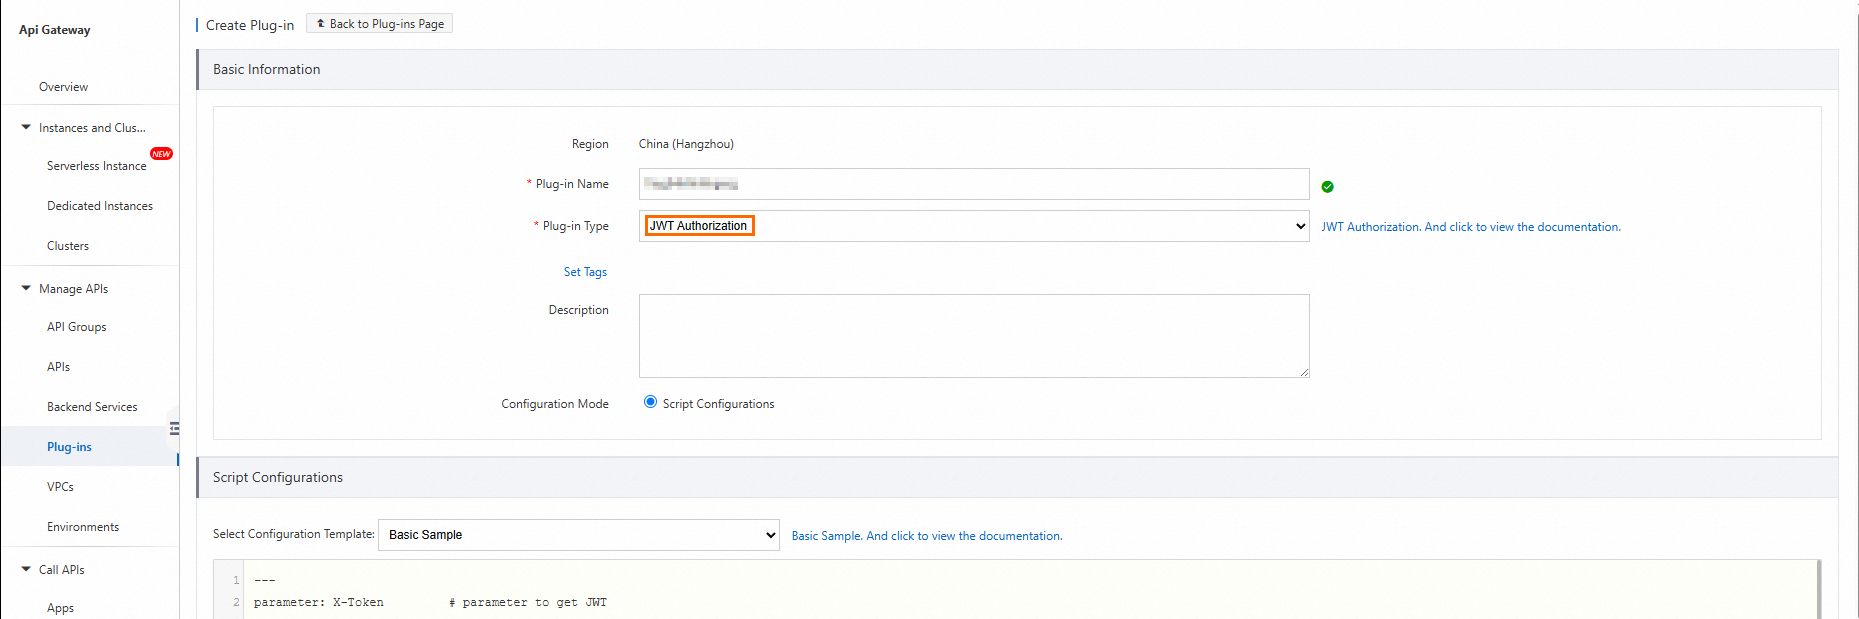
Create a JWT Authentication plugin
In the API Gateway console, choose Manage APIs > Plugins in the left navigation pane. On the Plugin List page, click Create Plugin and set Plug-in Type to JWT Authentication.
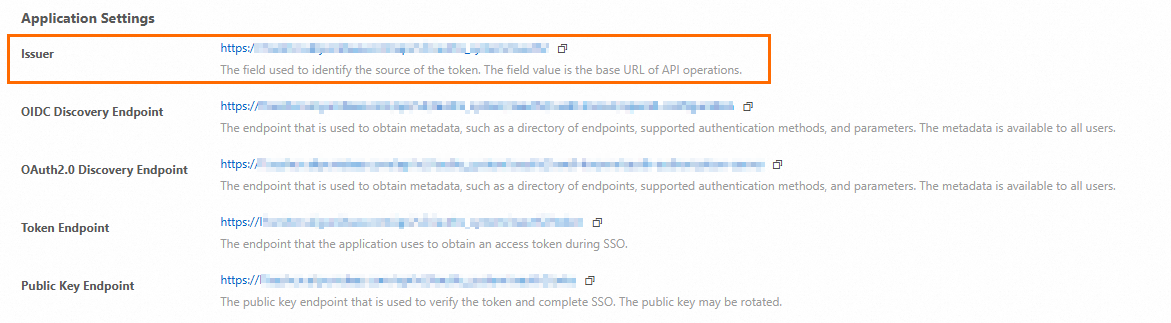
Get the public key of the M2M server. In the IDaaS console, open the M2M application, go to Application Settings, and copy the URL of the Public Key Endpoint. Open the URL in a browser to view the public key.
Public key link in the console 
Public key content displayed in the browser 
In the plugin script, replace the
jwksection with the JSON Web Key (JWK) information from your M2M server's public key endpoint.The following table explains each parameter in the script.
Parameter Description parameterThe request parameter that carries the JWT. Set to the parameter name you defined for the API (for example, id_token).parameterLocationWhere the gateway reads the JWT from. Supported values: query,header. Required in pass-through mode; optional in mapping mode.bypassEmptyTokenWhether to allow requests with no JWT to pass. claimParametersMaps JWT claims to backend parameters. Each entry specifies a claimName(for example,scope), aparameterName, and alocation.preventJtiReplayWhether to enable anti-replay checks for the jticlaim. Default:false.jwkThe public key of the M2M server in JWK format. Replace with the key retrieved from the Public Key Endpoint. WarningSet
bypassEmptyTokentofalseto require a valid token on every request. Setting it totrueallows unauthenticated requests to reach your backend. SetpreventJtiReplaytotruein production to block replay attacks.Script before replacing the `jwk` section (placeholder key):
---
parameter: id_token         # Get the JWT from the specified parameter, which corresponds to the API parameter.
parameterLocation: query  # Optional when the API is in mapping mode. Required in pass-through mode. Specifies where to read the JWT. Only `query` and `header` are supported.
bypassEmptyToken: false    # Specifies whether to allow verification to pass if the JWT is empty.
claimParameters:           # Claims parameter transformation. The gateway maps JWT claims to backend parameters.
- claimName: aud           # Claim name. Public and private claims are supported.
  parameterName: aud     # Name of the mapped parameter.
  location: query         # Location of the mapped parameter. `query`, `header`, `path`, and `formData` are supported.
- claimName: scope        # Claim name. Public and private claims are supported.
  parameterName: scope    # Name of the mapped parameter.
  location: query          # Location of the mapped parameter. `query`, `header`, `path`, and `formData` are supported.
- claimName: client_id      # Claim name. Public and private claims are supported.
  parameterName: client_id  # Name of the mapped parameter.
  location: query          # Location of the mapped parameter. `query`, `header`, `path`, and `formData` are supported.
preventJtiReplay: false    # Specifies whether to enable anti-replay checks for `jti`. Default: false.
#
# The following content needs to be replaced.
jwk:
  kty: RSA
  e: AQAB
  use: sig
  kid: O8fpdhrViq2zaaaBEWZITz 	# When only one JWK is configured, kid is optional. However, if the JWT contains a kid, the gateway verifies its consistency.
  alg: RS256
  n: qSVxcknOm0uCq5vGsOmaorPDzHUubBmZZ4UXj-9do7w9X1uKFXAnqfto4TepSNuYU2bA_-tzSLAGBsR-BqvT6w9SjxakeiyQpVmexxnDw5WZwpWenUAcYrfSPEoNU-0hAQwFYgqZwJQMN8ptxkd0170PFauwACOx4Hfr-9FPGy8NCoIO4MfLXzJ3mJ7xqgIZp3NIOGXz-GIAbCf13ii7kSStpYqN3L_zzpvXUAos1FJ9IPXRV84tIZpFVh2lmRh0h8ImK-vI42dwlD_hOIzayL1Xno2R0T-d5AwTSdnep7g-Fwu8-sj4cCRWq3bd61Zs2QOJ8iustH0vSRMYdP5oYQ
Script after replacing the `jwk` section (actual public key from your M2M server):
The
kidandnvalues below are from this tutorial's example environment. Replace them with the values from your own M2M server's Public Key Endpoint.--- parameter: id_token # Get the JWT from the specified parameter, which corresponds to the API parameter. parameterLocation: query # Optional when the API is in mapping mode. Required in pass-through mode. Specifies where to read the JWT. Only `query` and `header` are supported. bypassEmptyToken: false # Specifies whether to allow verification to pass if the JWT is empty. claimParameters: # Claims parameter transformation. The gateway maps JWT claims to backend parameters. - claimName: aud # Claim name. Public and private claims are supported. parameterName: aud # Name of the mapped parameter. location: query # Location of the mapped parameter. `query`, `header`, `path`, and `formData` are supported. - claimName: scope # Claim name. Public and private claims are supported. parameterName: scope # Name of the mapped parameter. location: query # Location of the mapped parameter. `query`, `header`, `path`, and `formData` are supported. - claimName: client_id # Claim name. Public and private claims are supported. parameterName: client_id # Name of the mapped parameter. location: query # Location of the mapped parameter. `query`, `header`, `path`, and `formData` are supported. preventJtiReplay: false # Specifies whether to enable anti-replay checks for `jti`. Default: false. # # Public Key of the JSON Web Key jwk: kty: RSA e: AQAB use: sig kid: AUTHSKEY7Ph6QS83xkN76oRwvZsJT68ejJ4PdAXmk # When only one JWK is configured, kid is optional. However, if the JWT contains a kid, the gateway verifies its consistency. alg: RS256 n: i1tIYhXvfilaJi8kaIS8EpgsnDp6G4c1lEg2qRD_-1lY8jOIWAVcetq89itl7rjFJ9gmbKGBMJoutaxGHtbAkY0aINkg1_n_0NnNTZDt2UC1UNJaZh12bkYyubRLA_t6JS8PVSr5bpse1SErvDiumqU9CjxBUCd4K8R0ALxOwup6yY5gVT4Juia1bEVGPlJ-RnuMvXXbVmwuklKTiWNfBFw1lCDPftfzKVEDTXt4VphAWOT-CyZKJ8hcYiTnd_VaAYxjMQSCxmE-utrdXGhyDUaQobs0myvD2eJfzcSWG-qOTC7Hin8bvXIQ_v9BkJO3D6uoLpB14XQozWVTXaPTIw
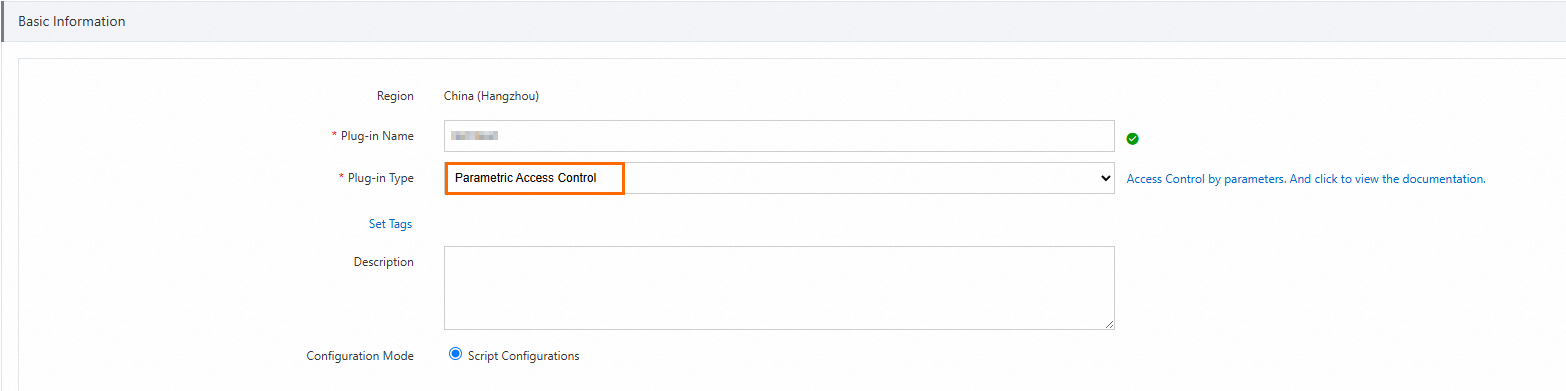
Create a Parametric Access Control plugin
Click Create Plugin and set Plug-in Type to Parametric Access Control.
Enter the script content. The script uses a
conditionto validate the incoming request against the expectedclientIdandscopevalues.Replace the values in the condition with your own M2M client's application ID and the required permission scope.
Parameter Description Where to find it clientIdThe application ID of the M2M client IDaaS console > M2M client > Application Settings scopeThe permission scope granted to the M2M client — for example, user:read:oneIDaaS console > M2M application > authorized applications section --- # # In this example, assume that our API request path is `/{userId}/...`, # The API uses JWT authentication, and the JWT contains two claims: userId and userType. # The validation conditions for this plugin are as follows: # - If userType=admin, all paths are allowed. # - If userType=user, only requests with a matching /{userId} path are allowed. parameters: scope: "Token:scope" clientId: "Token:client_id" # # The rules are processed sequentially. Based on whether the condition returns `true` or `false`, the `ifTrue` or `ifFalse` logic is executed. # `ALLOW` immediately results in a success. `DENY` immediately returns an error code to the client. # If neither `ALLOW` nor `DENY` is triggered, the next rule is executed. rules: - name: checkScope condition: "$clientId = 'app_m7hfgn66xkyyxlhpkiw5kjenhy' and $scope like '%user:read:one%'" ifFalse: "DENY" statusCode: 403 errorMessage: "No permission by client id: ${clientId}" responseHeaders: Content-Type: application/json X-IDaaS-clientId: ${clientId} X-IDaaS-scope: ${scope} responseBody: | <Reason>No permission by client id: ${clientId}</Reason>
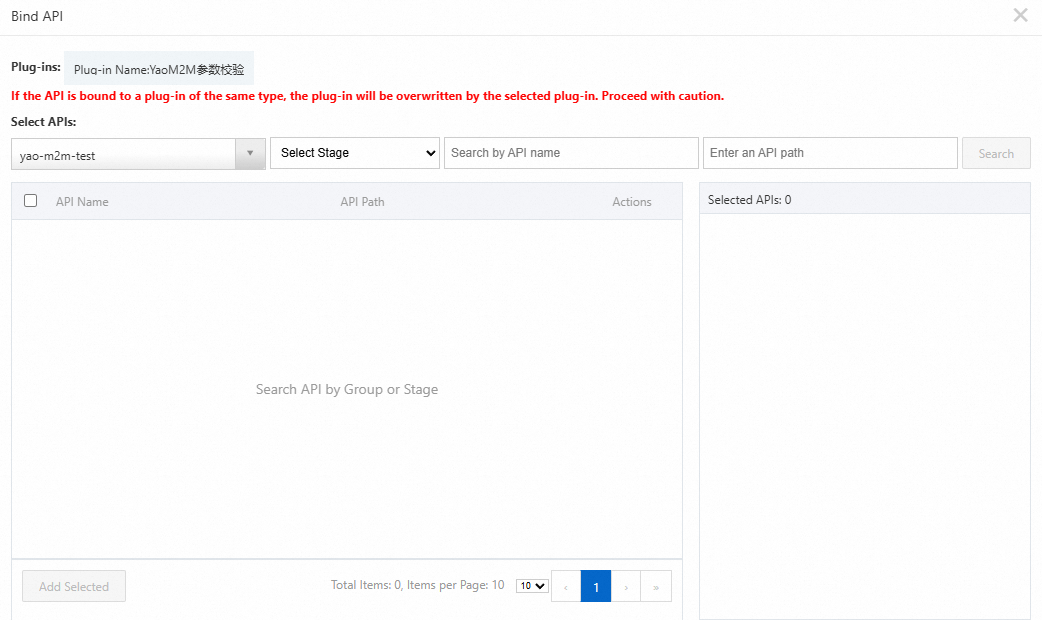
Bind the plugins to the API
For each of the two plugins, click Bind API in the Actions column and select the API operation to protect.
After binding both plugins, the user:read:one permission scope controls access to the hello API. Callers must present a valid JWT containing that scope to reach the backend.
Verify the setup
With the configuration complete, get an authorization token from the M2M server and use it to call the protected API.
Get a token
Use the client_secret_post authentication method to request an access token.
In the IDaaS console, copy the Issuer URL of the M2M server.
Send a POST request to the Issuer URL with the following parameters.
Parameter Description Where to find it client_idThe application ID of the M2M client IDaaS console > M2M client > Application Settings client_secretThe application secret of the M2M client IDaaS console > M2M client > Application Settings grant_typeMust be client_credentialsStatic value scopeThe audience identifier of the M2M server followed by the permission scope, separated by |. Example:https://xxxx.aliyunidaas.com|user:read:oneAudience identifier: IDaaS console > M2M server > Application Settings Example request:
curl -X POST "<issuer-url>" \
  -d "grant_type=client_credentials" \
  -d "client_id=<your-client-id>" \
  -d "client_secret=<your-client-secret>" \
  -d "scope=https://xxxx.aliyunidaas.com|user:read:one"
Placeholder Description <issuer-url>The Issuer URL of the M2M server <your-client-id>The application ID of the M2M client <your-client-secret>The application secret of the M2M client 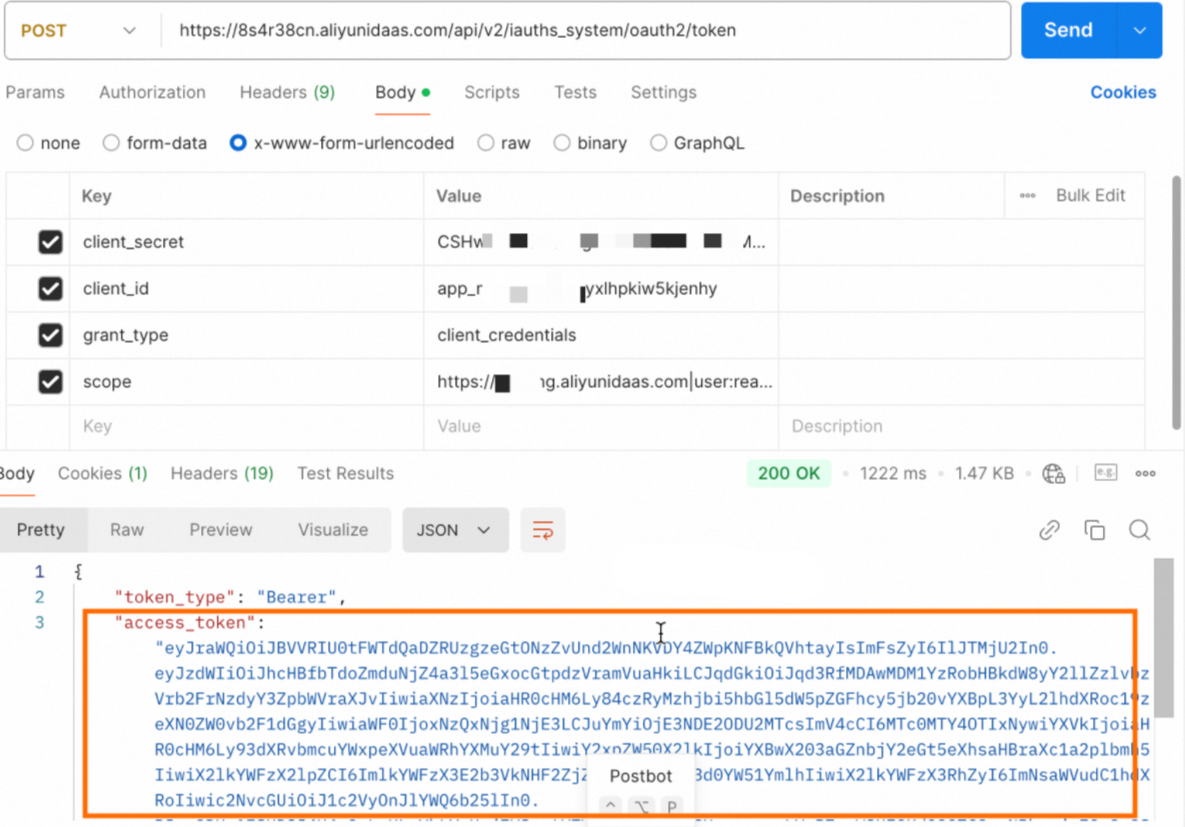
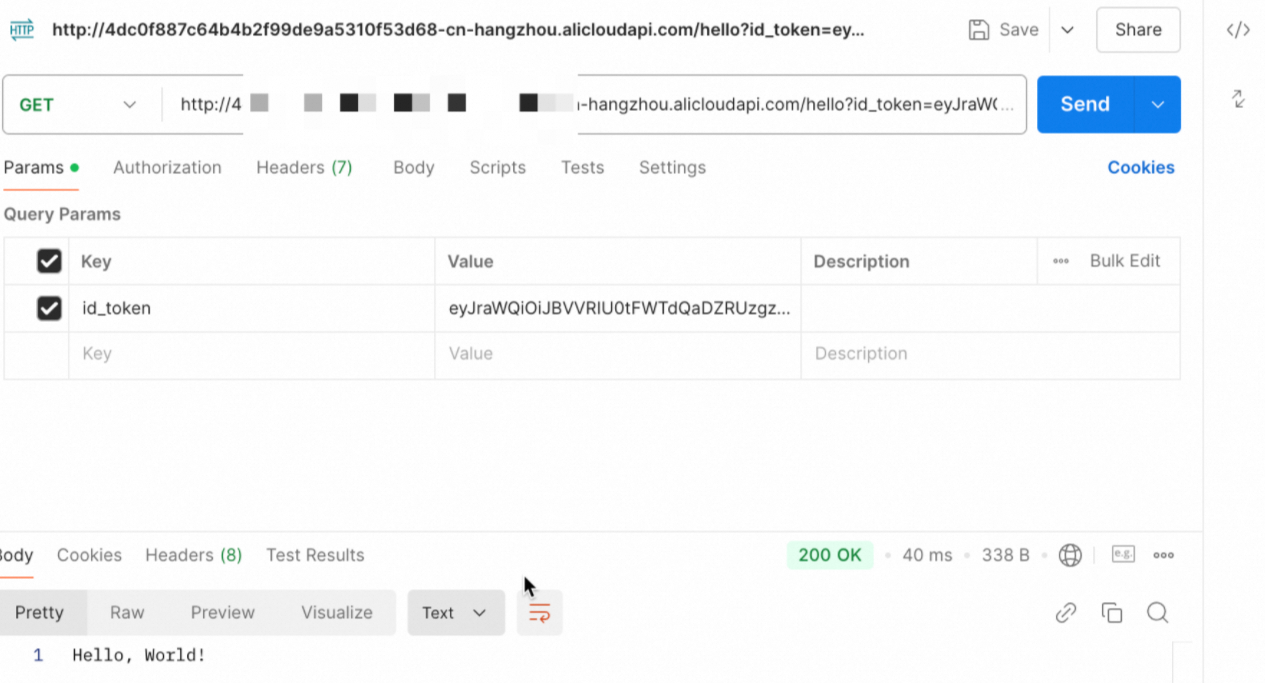
Call the protected API
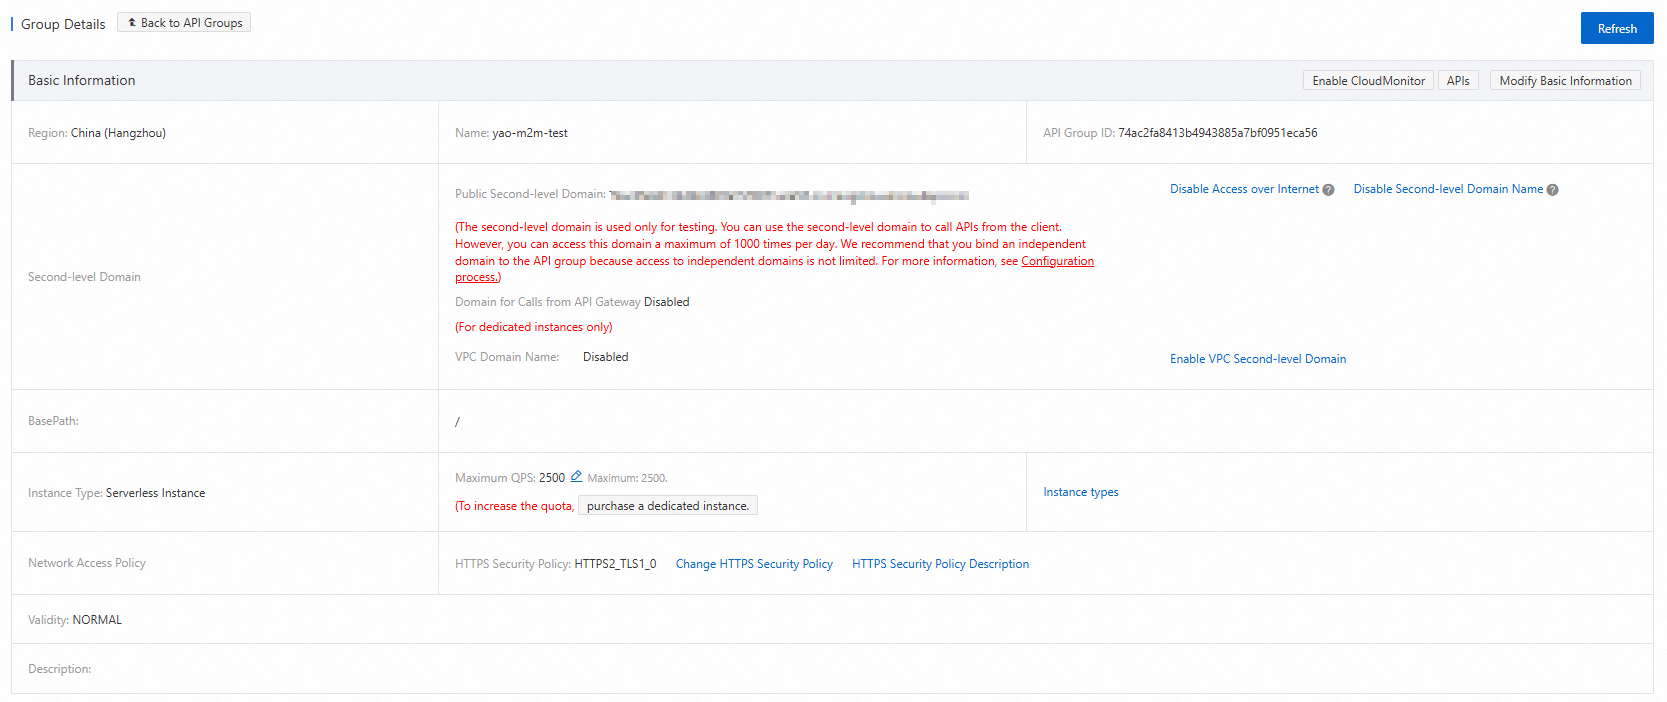
Use the second-level domain of the API group as the request URL. Find this domain in the group details.
Pass the token as the id_token query parameter. This matches the parameter field in the JWT Authentication plugin configuration.
curl "https://<group-domain>/<request-path>?id_token=<your-token>"| Placeholder | Description |
|---|---|
<group-domain> | The second-level domain of the API group, found in the group details |
<request-path> | The request path you defined when creating the API |
<your-token> | The access token retrieved in the previous step |
A successful response confirms that the M2M client has permission to access the API.
What's next
To learn how M2M applications work, see M2M applications.
To set up access without an AccessKey using Alibaba Cloud Resource Access Management (RAM), see Configuration procedure for access without an AccessKey.