Connect your Hologres data warehouse to Dify's hologres_text2data plugin to let business users query data in plain language — no SQL required. For example, a sales manager can ask "What were the top 5 products by revenue last quarter?" and receive a direct answer from your Hologres data. This guide walks you through the full setup: installing the plugin, configuring a model provider, importing a pre-built workflow, and connecting it to your Hologres instance.
What you'll accomplish:
Install the
hologres_text2dataplugin and a Qwen model provider in DifyImport a ready-to-use ChatBI workflow via DSL file
Configure the workflow to connect to your Hologres database
Publish and run the ChatBI application
This guide uses a pre-built DSL file to get you started quickly. To build a custom workflow instead, see the hologres_text2data source code on GitHub.Prerequisites
Before you begin, ensure that you have:
Dify version 1.2.0 or later deployed. See Install Dify on your own infrastructure
A Hologres instance with data loaded. Complete the following steps:
Create a user and grant the user permissions on the target database. See Create a custom user and Grant permissions to a user
Load business data into the database. This guide uses the public TPC-H 10 GB dataset. See Import a public dataset with one click
Usage notes
Dify runs all queries against Hologres using the credentials you configure. Because a single set of credentials is shared across all user queries, apply the following controls before you proceed:
Resource isolation: Use Serverless Computing to isolate query resources and prevent ChatBI queries from competing with other workloads on the instance.
Permission isolation: Grant only
SELECTpermissions to the Dify user, not write or admin permissions. This limits the blast radius if the user account is misused. For access control details specific to ChatBI, see the Dify documentation.
Set up the ChatBI application
Step 1: Install the plugin and model extension
In the Dify console, click Extensions, then select Explore Marketplace.
Search for hologres_text2data and click Install.
Search for tongyi and click Install.
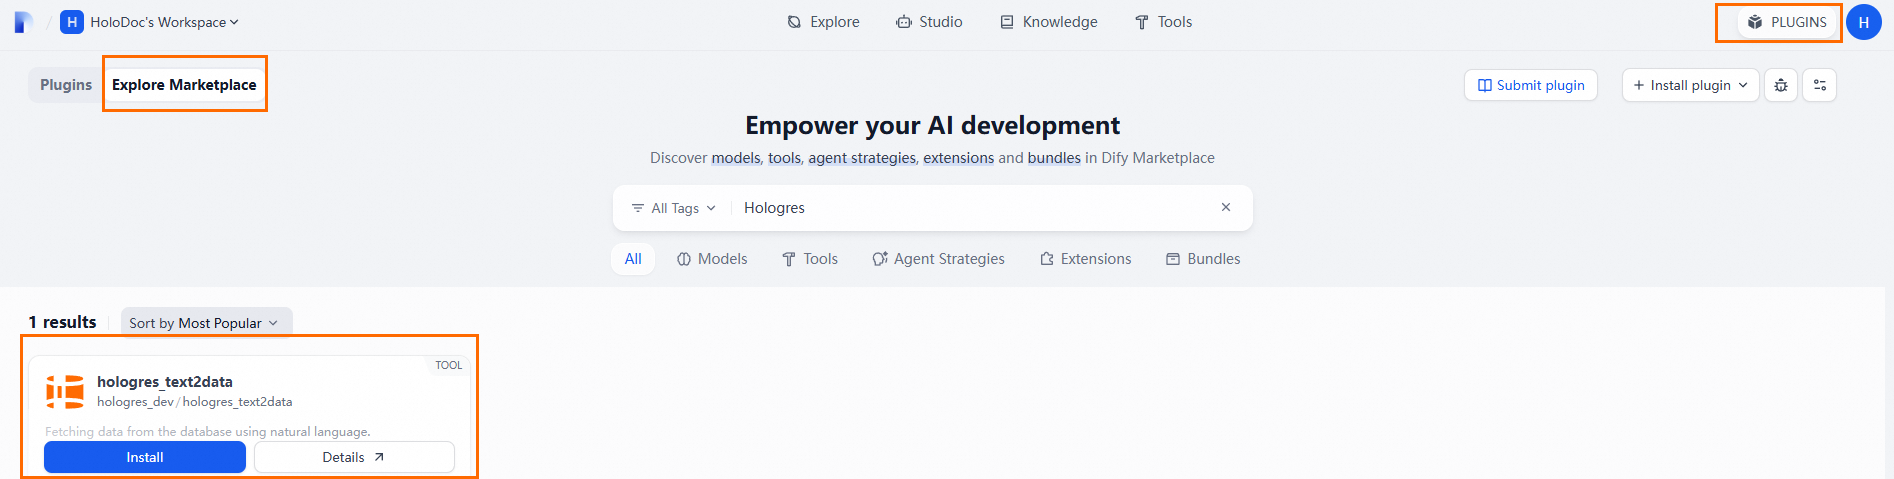
The hologres_text2data plugin is available in the Dify Marketplace. Its source code is open source on GitHub.Step 2: Configure a model provider
In the Dify console, click My Account and select Settings.
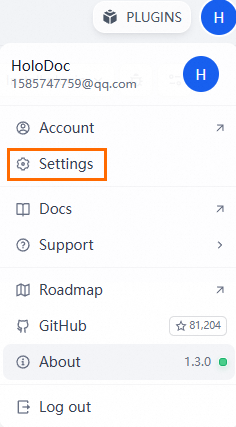
In the left navigation pane, click Model providers.
Click Settings next to Qwen. In the Add Qwen dialog box, enter your API key. To get an API key, click Get API key from Alibaba Cloud Model Studio in the dialog box. See Call the Qwen API for the first time.
Click Save.
Step 3: Import the ChatFlow DSL file
In the Dify console, select Studio from the menu bar, then click Import DSL file.

In the dialog box, upload the DSL file: Hologres ChatBI with Holo Plugin-250422-v1.yml.
Click Create.
After the upload completes, Dify generates the following workflow. It uses the Qwen-Max-Latest model from Alibaba Cloud Model Studio by default. For available models, see Model list.

Step 4: Configure Hologres connection parameters
On the Orchestration page of the ChatFlow, click the hologres_text2data node and the hologres_excute_sql node. Configure the following parameters for each node:
| Parameter | Description |
|---|---|
| Database IP address or domain name | The endpoint of the Hologres instance. Example: hgprecn-cn-xxxk3ovx003-cn-hangzhou.hologres.aliyuncs.com. To find the endpoint, log on to the Hologres Management Console, go to Instances, click the instance ID, and find the Network Information section on the Instance Details page. See Endpoint. |
| Database port | The port number. Default value: 80. |
| Database Name | The name of the database you created. To find the database name, log on to the Hologres Management Console, go to Instances, click the instance ID, then click Database Management. The database name is listed on the Database Authorization page. |
| Username | The name of the Hologres user. Format: BASIC$<name>. To find the username, log on to the Hologres Management Console, go to Instances, click the instance ID, then click Account Management. The username is listed on the Users page. See User management. |
| Password | The password for the Hologres user. |
Step 5: Publish and run
In the upper-right corner, click Publish > Publish update.
After publishing completes, click Publish > Run to open the ChatBI application and start querying your data in natural language.
What's next
Explore additional models available in Alibaba Cloud Model Studio to replace the default Qwen-Max-Latest model.
Review the
hologres_text2datasource code on GitHub to understand how Text-to-SQL queries are generated and to customize the plugin for your schema.Apply Serverless Computing resource quotas to the Dify user to limit query resource consumption in production. See Serverless Computing overview.