This topic describes how to import local files into Hologres using HoloWeb.
Prerequisites
You have purchased a Hologres instance and created a database.
Background information
The visualization feature in HoloWeb supports importing files that are smaller than 100 MB into Hologres. To import files that are 100 MB or larger, use the COPY command. For more information, see Import or export local data using the COPY command.
Procedure
-
Log on to the Hologres Management Console.
-
In the navigation pane on the left of the top menu bar, select the desired region.
-
You can click Go to HoloWeb to go to the HoloWeb development page.
From the top menu bar on the HoloWeb development page, click Data Solutions.
In the navigation pane on the left, choose .
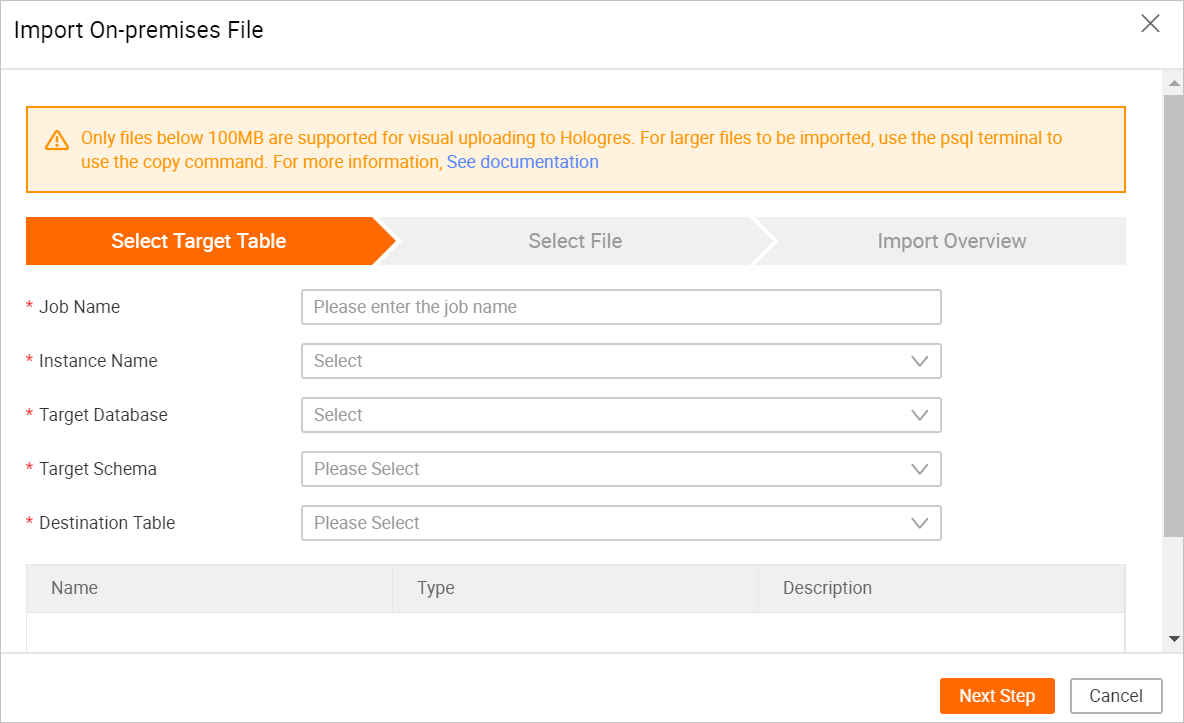
In the Import On-premises File dialog box, configure the parameters on the Select Destination Table page and click Next.
Parameter
Description
Job name
The name of the job to create.
Instance name
Select the name of the instance you logged on to.
Destination database
The name of the database created in the Hologres instance.
Destination schema
The name of the schema created in Hologres.
If you did not create a custom schema, select only the default public schema. If you created a custom schema, you can also select it.
Select the data table to import.
The name of the table used to store the local file.
Before importing the local file, create a table in the destination database to store the file.
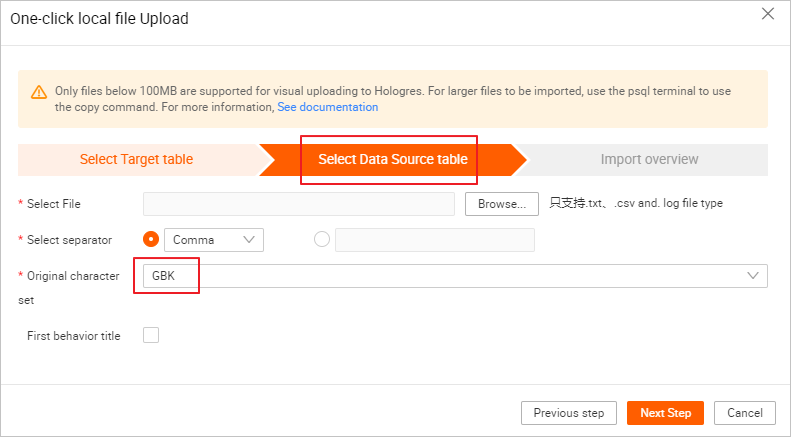
On the Upload File page, configure the parameters and click Next.
Parameter
Description
File to upload
The local file to upload.
You can upload only TXT, CSV, and LOG files.
Separator
Comma
Tab
Semicolon
Space
|
#
&
You can also specify a custom separator.
Source character set
GBK
UTF-8
CP936
ISO-8859
First row as title
Select this option to use the first row of data as column headers.
On the Confirm Import Information page, click Upload.
You can view details such as the schema, database, table, status, and start time of the import job.