Official public layers in Function Compute (FC) ship pre-configured runtimes and common dependencies for popular programming languages. Attach a layer to your function instead of bundling dependencies in your code package. Compared to custom layers, official public layers require no environment setup — runtimes and libraries are pre-installed.
Why use official public layers:
Smaller deployment packages. Keep dependencies out of your code archive.
Zero environment configuration. Standard runtimes and libraries are pre-installed.
Reuse across functions. Attach the same layer to any function in your account.
Independent updates. Update function code without touching its dependencies.
For the latest layer versions and usage instructions, see awesome-layers.
Example 1: Capture web page screenshots with Node.js 16 and Puppeteer
Puppeteer automates browser tasks through Chrome or Chromium: capturing screenshots, generating PDFs, submitting forms, running UI tests, and simulating keyboard input. It runs as a headless browser on Node.js.
This example creates a function that takes a full-page screenshot of any URL and returns the image as a PNG.
Steps overview: Create an event function → Add the function code → Attach the Puppeteer public layer → Test the function.
Step 1: Create an event function
On the Create Function page, set the following parameters and keep the defaults for everything else. For details, see Create an event function.
| Parameter | Value |
|---|---|
| Function type | Event Function |
| Runtime | Node.js 16 |
| Memory Capacity | 1024 MB |
Step 2: Add the function code
On the function details page, click the Code tab, replace the content of index.js with the following code, and then click Deploy.
const fs = require('fs');
const puppeteer = require('puppeteer');
function autoScroll(page) {
return page.evaluate(() => {
return new Promise((resolve, reject) => {
var totalHeight = 0;
var distance = 100;
var timer = setInterval(() => {
var scrollHeight = document.body.scrollHeight;
window.scrollBy(0, distance);
totalHeight += distance;
if (totalHeight >= scrollHeight) {
clearInterval(timer);
resolve();
}
}, 100);
})
});
}
exports.handler = async (event, context, callback) => {
console.log('Node version is: ' + process.version);
try {
const browser = await puppeteer.launch({
headless: true,
args: [
'--disable-gpu',
'--disable-dev-shm-usage',
'--disable-setuid-sandbox',
'--no-first-run',
'--no-zygote',
'--no-sandbox'
]
});
// 1. Read the target URL from the query string; fall back to the Serverless Devs homepage
let url = 'https://www.serverless-devs.com';
if (event.queryStringParameters && event.queryStringParameters.url) {
url = event.queryStringParameters.url;
}
if (!url.startsWith('https://') && !url.startsWith('http://')) {
url = 'http://' + url;
}
const page = await browser.newPage();
await page.emulateTimezone('Asia/Shanghai');
await page.goto(url, { waitUntil: 'networkidle2' });
await page.setViewport({ width: 1200, height: 800 });
// 2. Scroll the full page before taking the screenshot
await autoScroll(page);
// 3. Save a full-page PNG screenshot to /tmp/example
let path = '/tmp/example';
let contentType = 'image/png';
await page.screenshot({ path: path, fullPage: true, type: 'png' });
await browser.close();
const screenshot = fs.readFileSync(path);
// 4. Return the screenshot as a base64-encoded HTTP response body
const response = {
statusCode: 200,
headers: {
'Content-Type': contentType
},
body: screenshot.toString('base64'),
isBase64Encoded: true
};
callback(null, response);
} catch (err) {
const errorResponse = {
statusCode: 500,
headers: {
'Content-Type': 'text/plain'
},
body: err.message
};
callback(null, errorResponse);
}
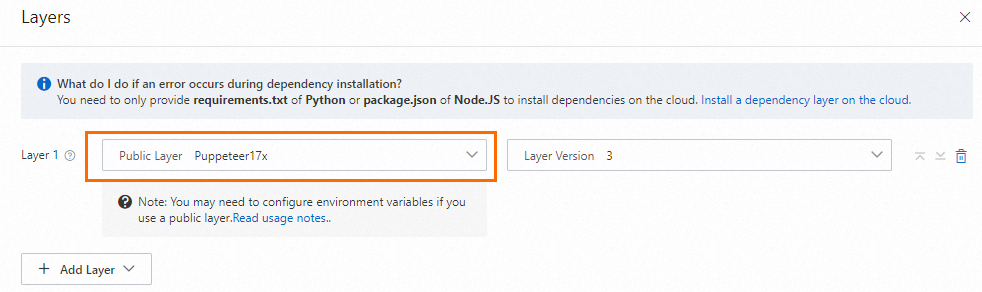
};Step 3: Attach the Puppeteer public layer
Attach the Puppeteer17x official public layer to your function. For step-by-step instructions, see Configure common layers in the Function Compute console.
Step 4: Test the function
Create an HTTP trigger. In the Configurations column of the trigger, copy the Public Endpoint URL and paste it into a browser. For instructions, see Create a trigger.
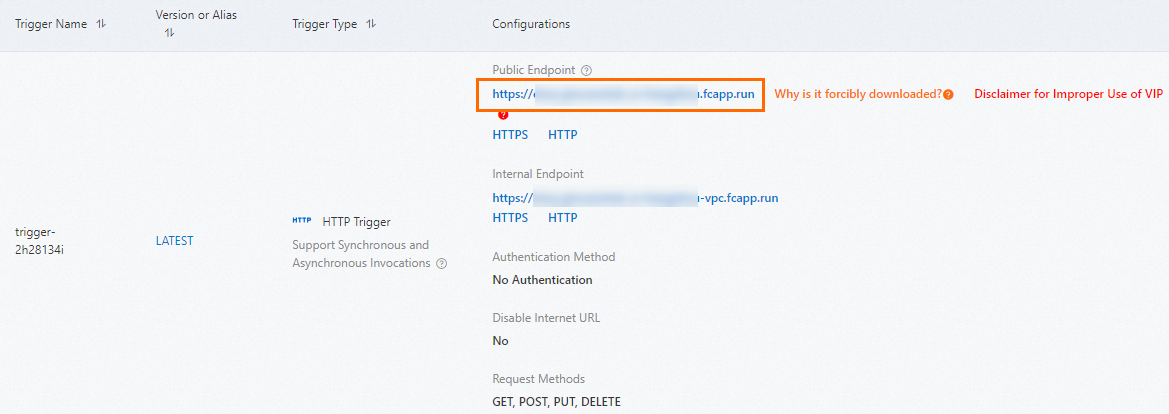
A full-page PNG screenshot of the Serverless Devs website is captured and automatically downloaded to your local machine.
Example 2: Run a .NET 6 custom runtime with public layers
This example shows how to use an official public layer to run a .NET 6 web function without bundling the .NET runtime in your code package.
Steps overview: Create a web function → Test the function.
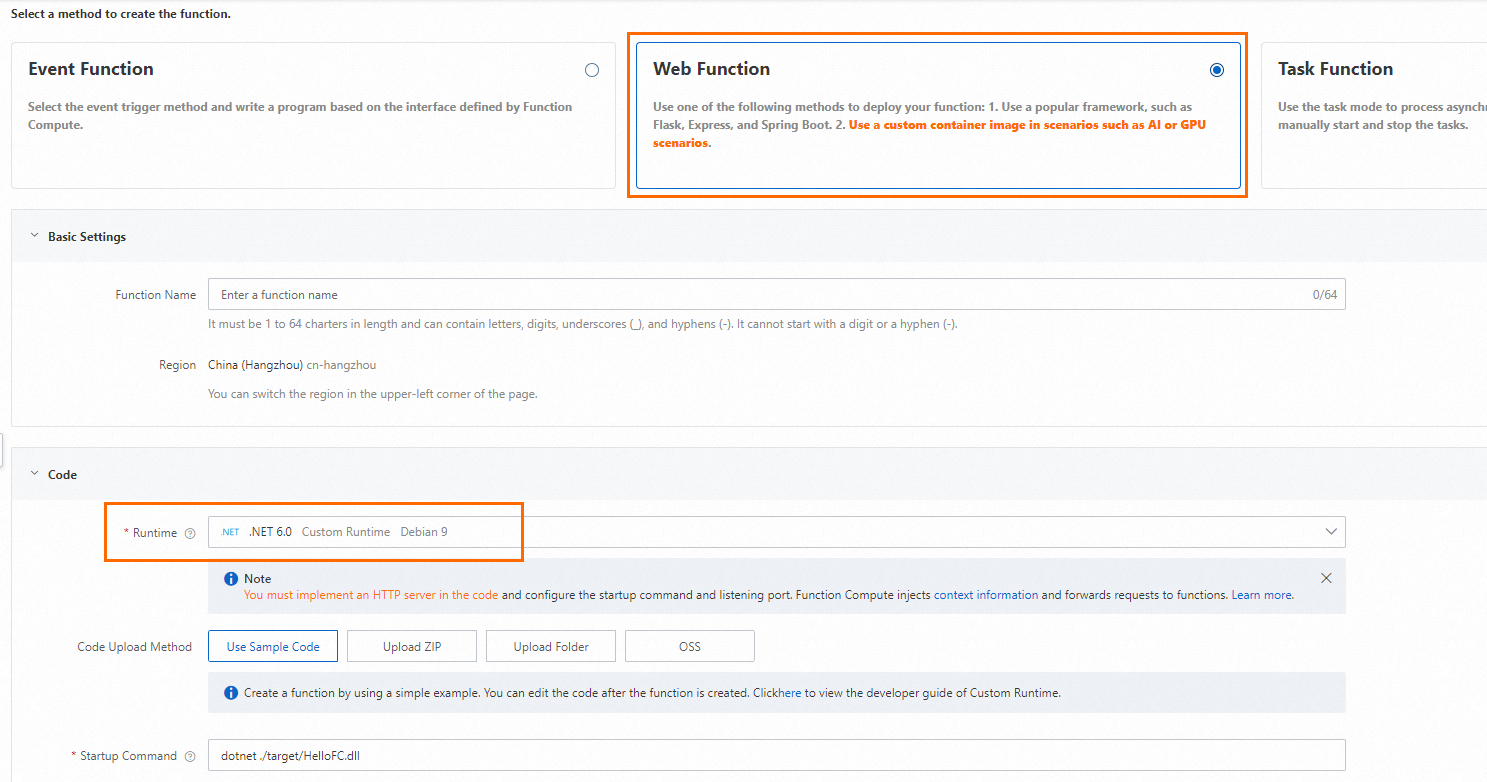
Step 1: Create a web function
On the Create Function page, configure the parameters as shown below and keep the defaults for everything else. For details, see Create a web function.
After the function is created, open the Program.cs sample file in WebIDE:

The sample code sets up four key behaviors:
① The server listens on
0.0.0.0:9000. Custom runtime services must listen on0.0.0.0:CAPortor*:CAPort— not on127.0.0.1orlocalhost. For details, see Principles.② The
/route returns the string"Hello World! ".③ The
/invokeroute handles function invocations. For details, see Web functions.④ The
/initializeroute maps to the Initializer lifecycle hook, which runs once during instance startup. For details, see Lifecycle hooks for function instances.
Step 2: Test the function
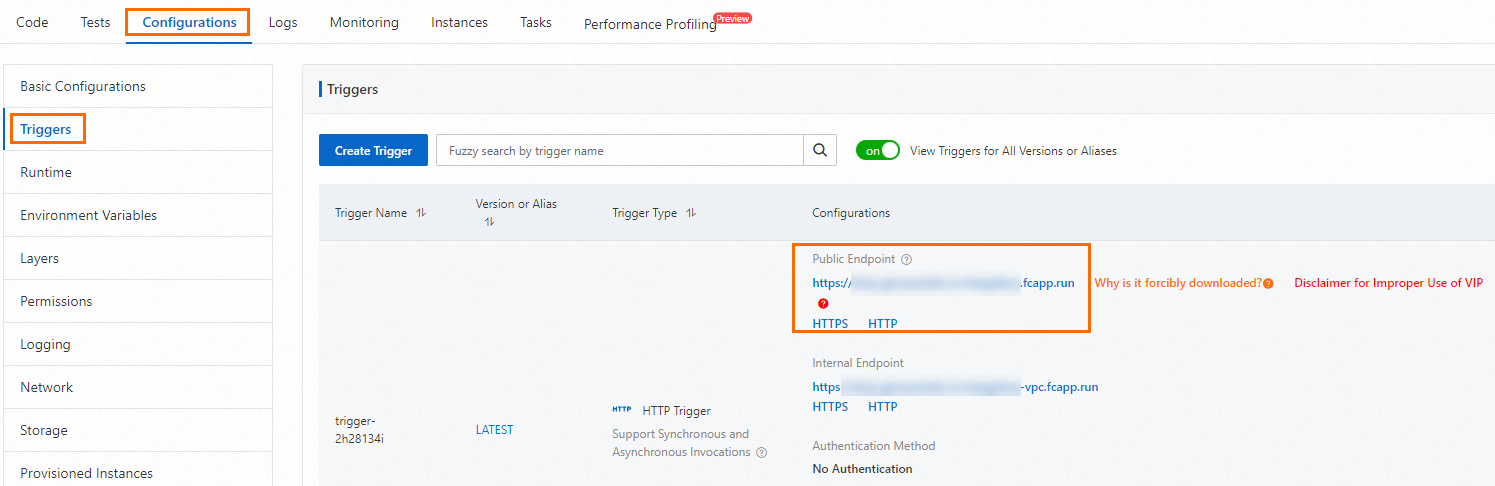
Test the root route
In the Configurations column of the trigger, copy the Public Endpoint URL and paste it directly into a browser (no path suffix). The response is automatically downloaded to your local machine.
Test the invoke and initialize routes
Append /invoke or /initialize to the public endpoint and send a POST request:
curl -XPOST <public-endpoint>/invoke
curl -XPOST <public-endpoint>/initialize
The following figure shows the execution result.
