After you create a workflow, you can perform operations on existing workflow instances and task instances. This topic describes how to view a workflow instance and the logs of a task instance.
Prerequisites
A workflow is created and run. For more information, see Create a workflow and Run a workflow.
View the details of a workflow instance
Log on to the Realtime Compute for Apache Flink console.
Find the workspace that you want to manage and click Console in the Actions column.
In the left-side navigation pane, click .
Find the desired workflow and click the name of the workflow to go to the details page of the workflow.
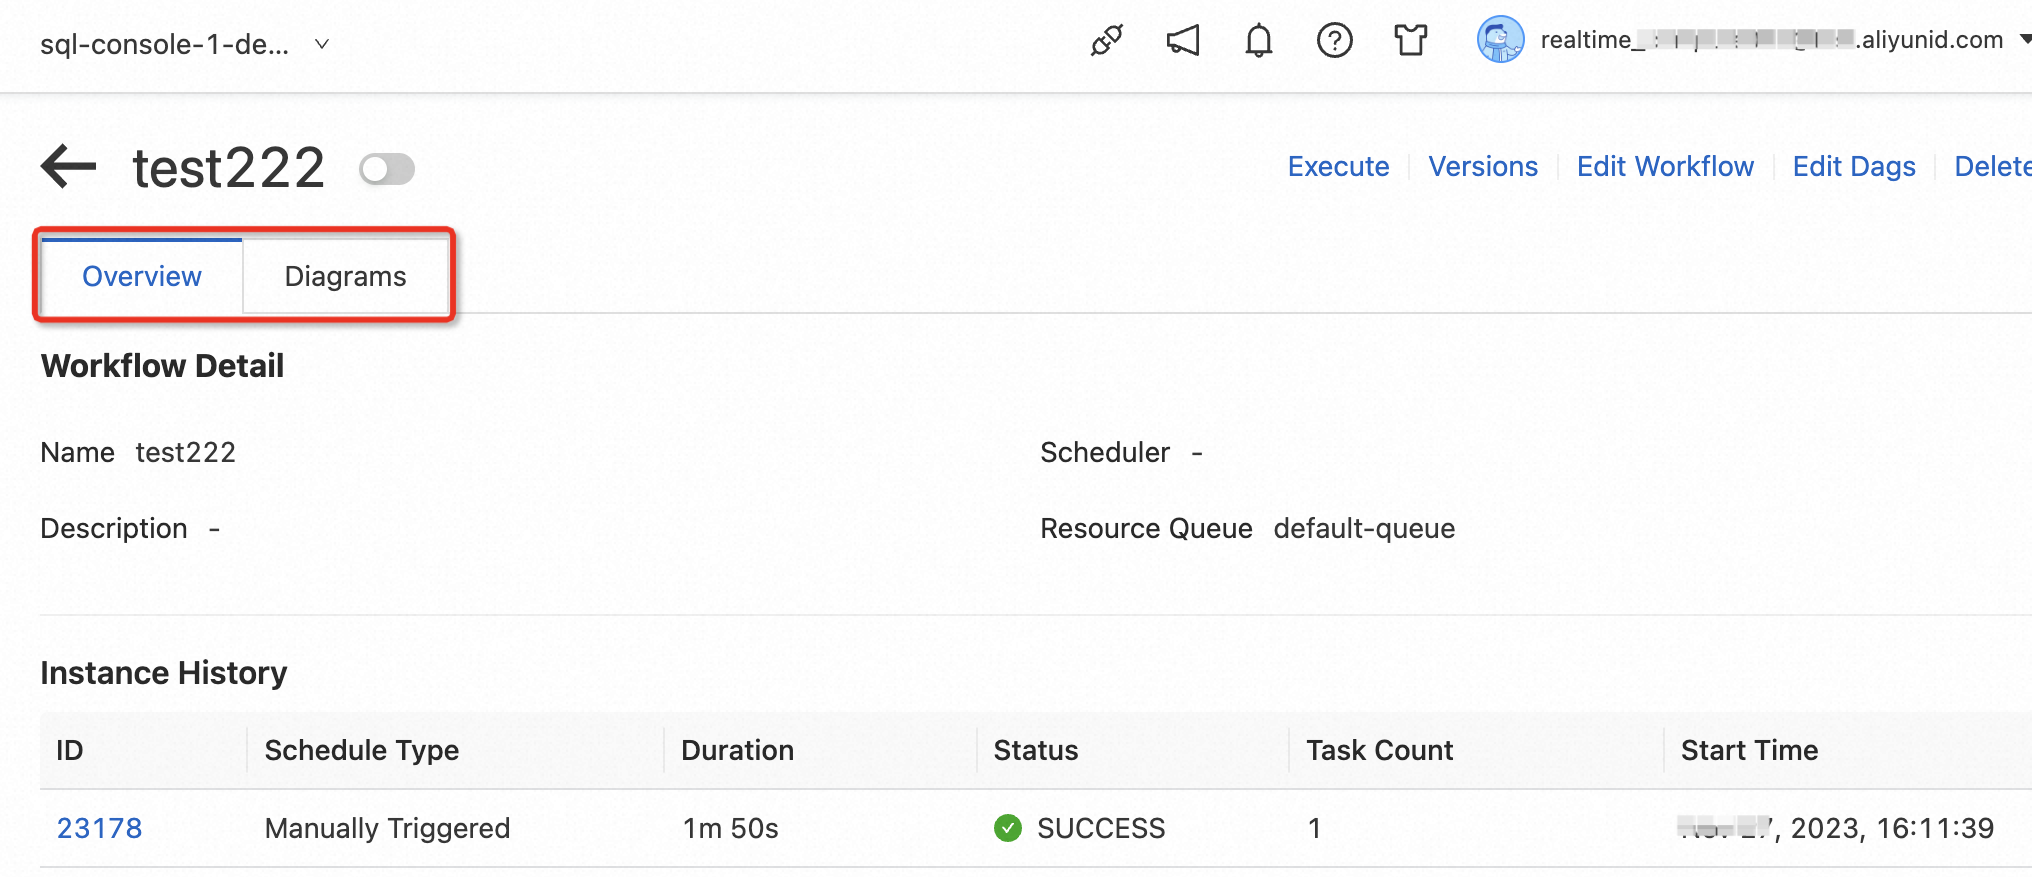
On the Overview tab, view all workflow instances of the workflow, and the execution time and the status of each workflow instance.
Click the value in the ID column for a workflow instance in the Instance History section on the Overview tab or click the Diagrams tab to view the diagram of the workflow instance. The states of task instances are represented by different colors. For more information, see View the status of a workflow.
View the details of a task instance
Log on to the Realtime Compute for Apache Flink console.
Find the workspace that you want to manage and click Console in the Actions column.
In the left-side navigation pane, click .
Find the desired workflow and click the name of the workflow to go to the details page of the workflow.
On the Overview tab that appears, click the value in the ID column for a workflow instance in the Instance History section to go to the Diagrams tab.
Click the desired task instance on the Diagrams tab. In the dialog box that appears, you can view the information about the task instance.
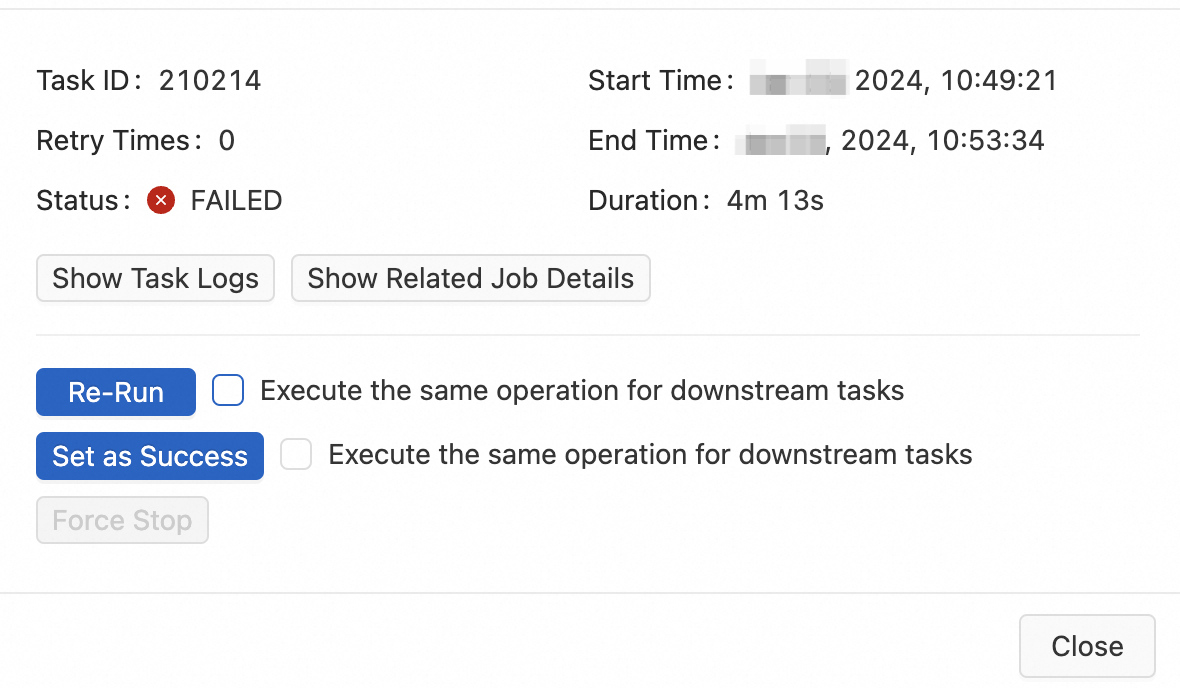
Show Task Logs: View the operational logs of the task instance.
Show Related Job Details: Redirect to the Deployments page to view the details of the deployment.
Re-Run: Rerun the task. You can select Execute the same operation for downstream tasks to rerun all subsequent tasks.
Set as Success: Set the state of a failed task to SUCCESS to skip the task. You can select Execute the same operation for downstream tasks to set the states of all subsequent tasks to SUCCESS.
Force Stop: Terminate a task instance.
References
For more information about the concepts related to the Workflows feature, see Workflows (public preview).
You can add queues to isolate and manage resources. For more information, see Manage queues.
For more information about how to create a batch deployment of the SQL, JAR, or Python type, see Create a deployment.