An SLS Catalog maps Simple Log Service (SLS) Logstores to Flink SQL tables by automatically inferring their schemas from log data. Once configured, Flink SQL jobs can query SLS Logstores directly without manually declaring table schemas.
An SLS Catalog is a read-only metadata view of SLS. DDL operations that create, modify, or delete databases or tables are not supported.
How it works
An SLS Catalog translates SLS metadata into queryable Flink tables. The following table shows how SLS concepts map to the Flink catalog hierarchy:
| SLS concept | Flink concept | Notes |
|---|---|---|
| SLS Catalog | Catalog | Maps to a Flink catalog |
| project | Database | Maps to a Flink database |
| Logstore | Table | Each Logstore becomes a queryable Flink table |
When the catalog infers a Logstore schema, it consumes one log message to parse field names and types. Because SLS stores all log data as strings, all inferred fields are of the String type.
Limitations
All fields are inferred as the String type. Use Flink SQL type casting to convert to other data types.
Only Flink jobs running on Ververica Runtime (VVR) 6.0.7 or later support SLS Catalogs.
Existing SLS Catalogs cannot be modified with DDL statements.
You can only query data tables. Creating, modifying, or deleting databases and tables is not supported.
Tables from an SLS Catalog can be used as source tables and sink tables in Flink SQL jobs, but not as lookup dimension tables.
Schema consistency risk
An SLS Catalog infers schemas from sample log data. For Logstores with inconsistent data formats, the catalog retains all columns by default to return the widest possible schema.
If the data format of a Logstore changes over time, the inferred schema can differ between reads. This creates a risk when a job restarts from a savepoint: the job may retrieve a schema that differs from the one used before the restart. The saved execution plan references the previous schema, which can cause mismatches in downstream operations such as filter conditions or field value retrieval.
To avoid this, define a fixed schema with CREATE TEMPORARY TABLE in your Flink SQL job instead of relying on the catalog-inferred schema.
Prerequisites
Before you begin, make sure you have:
An SLS project with at least one Logstore, with indexing enabled on each Logstore you plan to use as a source or sink
Your Alibaba Cloud AccessKey ID and AccessKey secret. Store them as project variables rather than hardcoding them in configuration. For details, see Project variables
A Flink workspace running VVR 6.0.7 or later
Create an SLS Catalog
You can create an SLS Catalog from the console UI or with a SQL command.
After you create a catalog, its settings cannot be changed. To change any setting, delete the catalog and create a new one.
Use the console UI (recommended)
Log on to the Realtime Computing for Apache Flink console. In the Actions column for the target workspace, click Console.
Click Data Management.
Click Create Catalog, select SLS, and then click Next.
Configure the following parameters:
Parameter Type Required Description catalog name String Yes A custom name for the catalog. Use English characters only. endpoint String Yes The SLS service endpoint. See Endpoints. project String Yes The name of the SLS project. accessId String Yes Your Alibaba Cloud AccessKey ID. See How do I view the AccessKey ID and AccessKey secret? To protect your AccessKey information, use variables to specify the AccessKey value. See Project variables. accessKey String Yes Your Alibaba Cloud AccessKey secret. See How do I view the AccessKey ID and AccessKey secret? 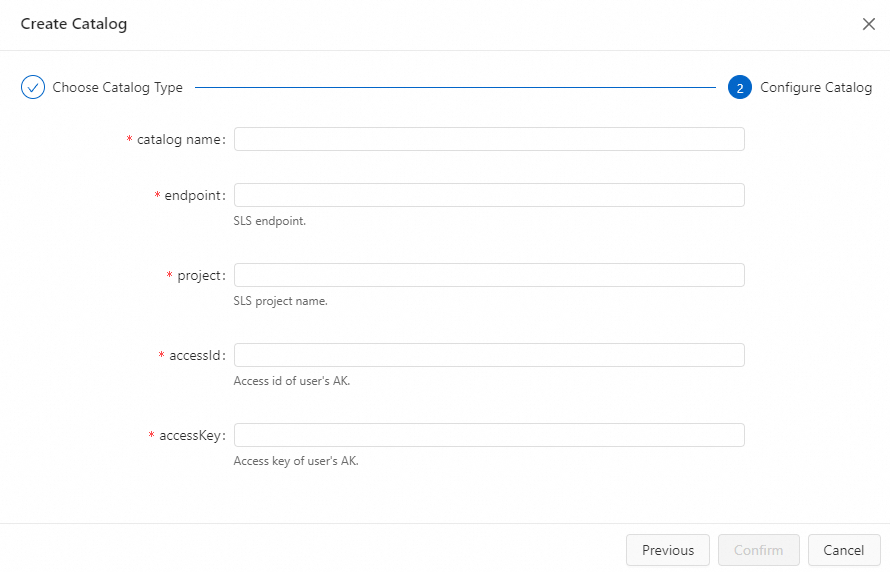
Click Confirm.
The created catalog appears in the Metadata panel on the left.
Use a SQL command
Open the Data Query editor and enter the following command:
CREATE CATALOG <catalogName> WITH(
  'type'='sls',
  'endpoint'='<endpoint>',
  'project'='<project>',
  'accessId'='${secret_values.ak_id}',
  'accessKey'='${secret_values.ak_secret}'
)
Parameter Type Required Description catalogName String Yes A custom name for the catalog. Use English characters only. type String Yes Fixed value: sls.endpoint String Yes The SLS service endpoint. See Endpoints. project String Yes The name of the SLS project. accessId String Yes Your Alibaba Cloud AccessKey ID. Use secrets management to avoid hardcoding credentials. See Manage variables. accessKey String Yes Your Alibaba Cloud AccessKey secret. Use secrets management to avoid hardcoding credentials. See Manage variables. Select the
CREATE CATALOGstatement and click Run next to the line numbers.Verify that the catalog appears in the Metadata panel on the left.
View SLS Catalog metadata
View all catalogs
Log on to the Realtime Computing for Apache Flink console. In the Actions column for the target workspace, click Console.
Click Data Management.
On the Catalog List page, review the Name and Type columns. To view the Logstores in a catalog, click View next to the catalog name.
View a Logstore schema
Open the Data Query editor and enter the following command:
DESCRIBE `${catalog_name}`.`${project_name}`.`${logstore_name}`;Parameter Description ${catalog_name}The name of the SLS Catalog. ${project_name}The name of the SLS project. ${logstore_name}The name of the SLS Logstore. Select the
DESCRIBEstatement and click Run next to the line numbers. The table schema appears in the results panel.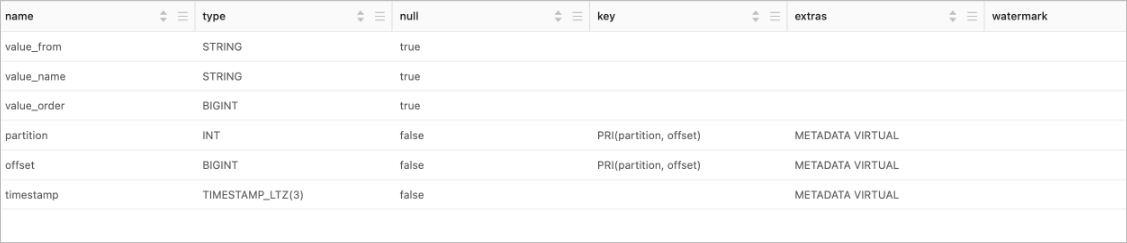
Use an SLS Catalog in Flink SQL jobs
Before reading from or writing to a Logstore, enable indexing on that Logstore. The catalog reads data from the sink table to verify that the schema of the data to be written matches the schema of the destination SLS Logstore. For details on enabling indexing, see Create an index.
Read from a Logstore (source table)
INSERT INTO ${other_sink_table}
SELECT ...
FROM `${catalog_name}`.`${project_name}`.`${logstore_name}`/*+OPTIONS('startTime'='2023-06-01 00:00:00')*/;
To pass additional WITH parameters without modifying the catalog definition, use SQL Hints. The example above uses a SQL Hint to set the data consumption start time. For all available parameters, see the Simple Log Service connector.
Write to a Logstore (sink table)
INSERT INTO `${catalog_name}`.`${project_name}`.`${logstore_name}`
SELECT ...
FROM ${other_source_table}
Delete an SLS Catalog
Deleting a catalog does not interrupt running jobs. However, any job that references a table from the deleted catalog will fail when published or restarted.
Use the console UI (recommended)
Log on to the Realtime Computing for Apache Flink console. In the Actions column for the target workspace, click Console.
Click Data Management.
On the Catalog List page, click Delete in the Actions column next to the target catalog.
In the confirmation dialog, click Delete.
Verify that the catalog no longer appears in the Metadata panel on the left.
Use a SQL command
Open the Data Query editor and enter the following command, replacing
${catalog_name}with the name of the catalog to delete:DROP CATALOG ${catalog_name};Right-click the statement and select Run.
Verify that the catalog no longer appears in the Metadata panel on the left.
Default table configuration
When the SLS Catalog maps a Logstore to a Flink table, it automatically adds the following connection parameters. These values come from the catalog configuration and cannot be overridden per table without using SQL Hints.
| Parameter | Description |
|---|---|
| connector | Fixed to sls. |
| endpoint | The SLS service endpoint. |
| project | The SLS project name. |
| logstore | The Logstore or metricstore name. |
| accessId | The AccessKey ID used by the catalog. To protect your AccessKey information, use secrets management to specify the AccessKey ID value. See Manage variables. |
| accessKey | The AccessKey secret used by the catalog. To protect your AccessKey information, use secrets management to specify the AccessKey secret value. See Manage variables. |
What's next
Simple Log Service connector — Full list of source and sink parameters for the SLS connector.
SQL Hints — How to pass per-query parameters when using catalog tables.
Create an index — Enable indexing on an SLS Logstore before using it as a source or sink.