Alibaba Cloud Web Application Firewall (WAF 3.0) identifies malicious traffic of functions and applications, scrubs and filters out malicious traffic, and returns normal traffic to backend functions to protect your functions against malicious intrusions. This topic describes how to enable WAF for a custom domain name in the Function Compute console.
Background information
After you integrate WAF 3.0 with Function Compute, WAF 3.0 can be used to protect custom domain names and can provide end-to-end security protection for your websites or applications.
Usage notes
WAF protection for custom domain names in Function Compute is available only in the China (Hangzhou), China (Shanghai), China (Beijing), China (Shenzhen), and China (Zhangjiakou) regions.
Billing
After you enable WAF for a custom domain name, you are charged for using WAF 3.0. For more information, see Overview.
Prerequisites
WAF 3.0 is activated. For more information, see Purchase a subscription WAF 3.0 instance or Purchase a pay-as-you-go WAF 3.0 instance.
Procedure
You can enable WAF for a custom domain name when you add the custom domain name. You can also enable WAF for an existing custom domain name.
Enable WAF when you add a custom domain name
Log on to the Function Compute console. In the left-side navigation pane, choose .
In the top navigation bar, select a region. On the Custom Domains page, click Add Custom Domain Name.
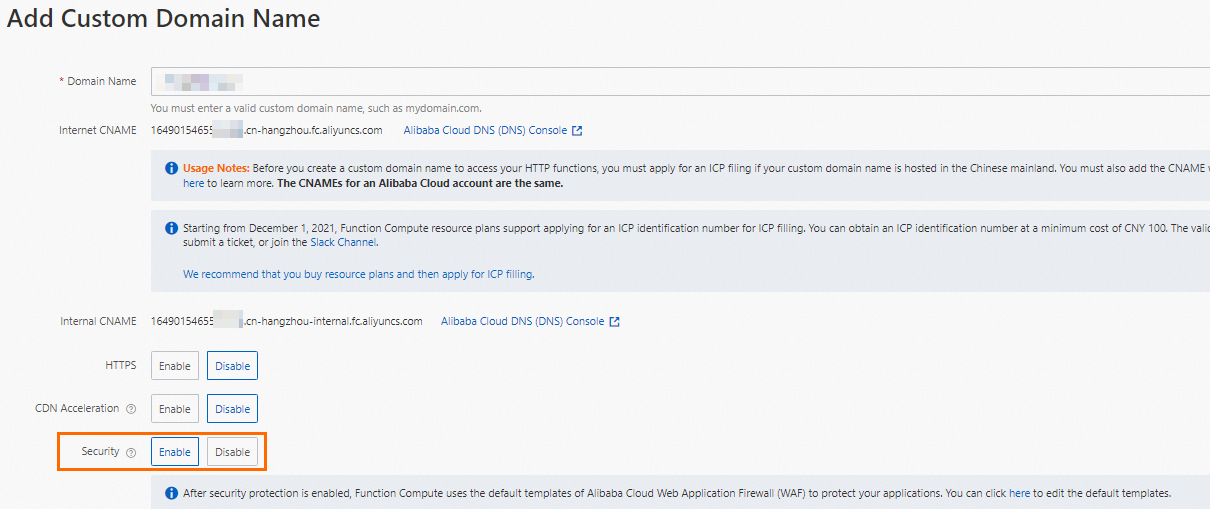
In the Add Custom Domain Name page that appears, configure Domain Name. Set Web Application Firewall (WAF) to Enable and click Create.
For information about the parameters on the Add Custom Domain Name page, see Configure a custom domain name.
Enable WAF for an existing custom domain name
Log on to the Function Compute console. In the left-side navigation pane, choose .
On the Custom Domains page, find the custom domain name for which you want to enable WAF and click Modify in the Actions column.
On the Modify Custom Domain Name page, set Web Application Firewall (WAF) to Enable and click Save.
What to do next
After WAF is enabled, traffic destined for your website passes through WAF and is protected by WAF. WAF provides multiple features to protect your website against different types of attacks. By default, the Protection Rules Engine feature and the HTTP Flood Protection feature are enabled. The Protection Rules Engine feature protects websites against common web attacks, such as SQL injections, cross-site scripting (XSS) attacks, and webshell uploads. The HTTP Flood Protection feature protects websites against HTTP flood attacks. You must manually enable other features of WAF and configure protection rules based on your business requirements. For more information, see Protection configuration overview.