Cerebro is an open source management tool for Elasticsearch. It is lightweight and starts quickly. It lets you view cluster health, manage index data, and run search queries from a browser-based interface. Developers and operations engineers use it to quickly inspect and manage Elasticsearch clusters.
Prerequisites
Before you begin, make sure you have:
-
An Alibaba Cloud Elasticsearch cluster (the cluster endpoint is required in a later step)
-
An Elastic Compute Service (ECS) instance running Linux in the same Virtual Private Cloud (VPC) as the Elasticsearch cluster, or with public network access enabled
-
Java Development Kit (JDK) 1.8 or later installed on the ECS instance. See Manually deploy OpenJDK for installation steps.
Get the cluster endpoint
Cerebro connects to your Elasticsearch cluster over either a private or public endpoint.
-
VPC private endpoint: Connects over the internal network for low latency and high stability. Enabled by default after the cluster is created.
-
Public endpoint: Connects over the internet. Must be enabled manually.
For most setups, use the VPC private endpoint. Enable the public endpoint only when the ECS instance running Cerebro is outside the cluster's VPC.
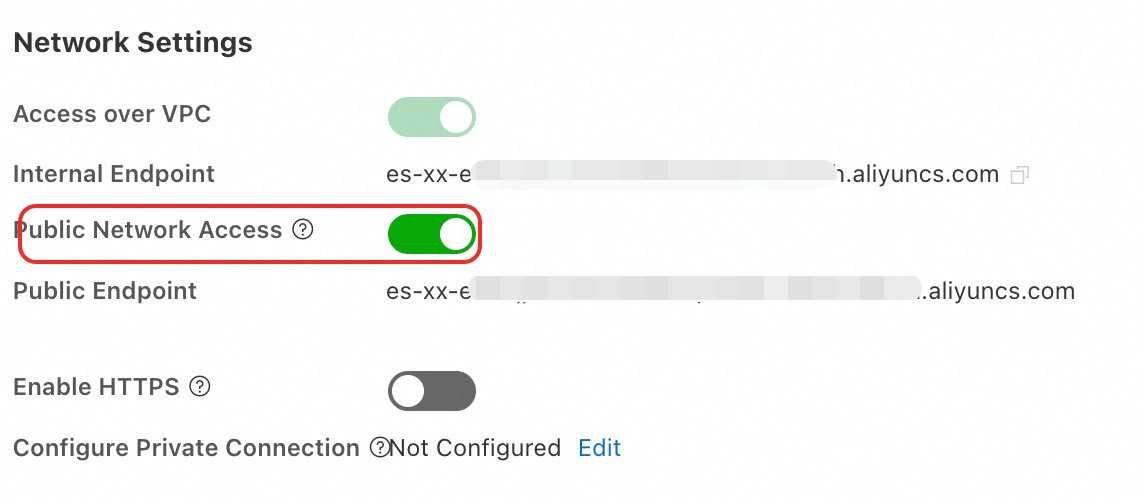
Enable public network access
-
Log on to the Elasticsearch console and go to the Basic Information page of your cluster.
-
In the navigation pane on the left, choose Configuration and Management > Security Settings, then enable public network access. Wait for the cluster status to change from Initializing to Valid.
ImportantA public endpoint reduces cluster security. Configure an IP address whitelist and disable public network access promptly after use.
Set up an IP address whitelist
Add the IP address of the device running Cerebro to the cluster's whitelist. Only devices with whitelisted IP addresses can connect to the cluster.
Step 1: Find the IP address to add
| Scenario | IP address to add | How to find it |
|---|---|---|
| Connecting from an on-premises device | Public IP address of the device. If the device is behind a local area network (LAN), such as a home or corporate network, use the public egress IP of the LAN. | Run curl ipinfo.io/ip on the device. |
| Connecting from an ECS instance in a different VPC | Public IP address of the ECS instance | Log on to the ECS console and check the instance list. |
| Connecting from an ECS instance in the same VPC | Private IP address of the ECS instance | Log on to the ECS console and check the instance list. |
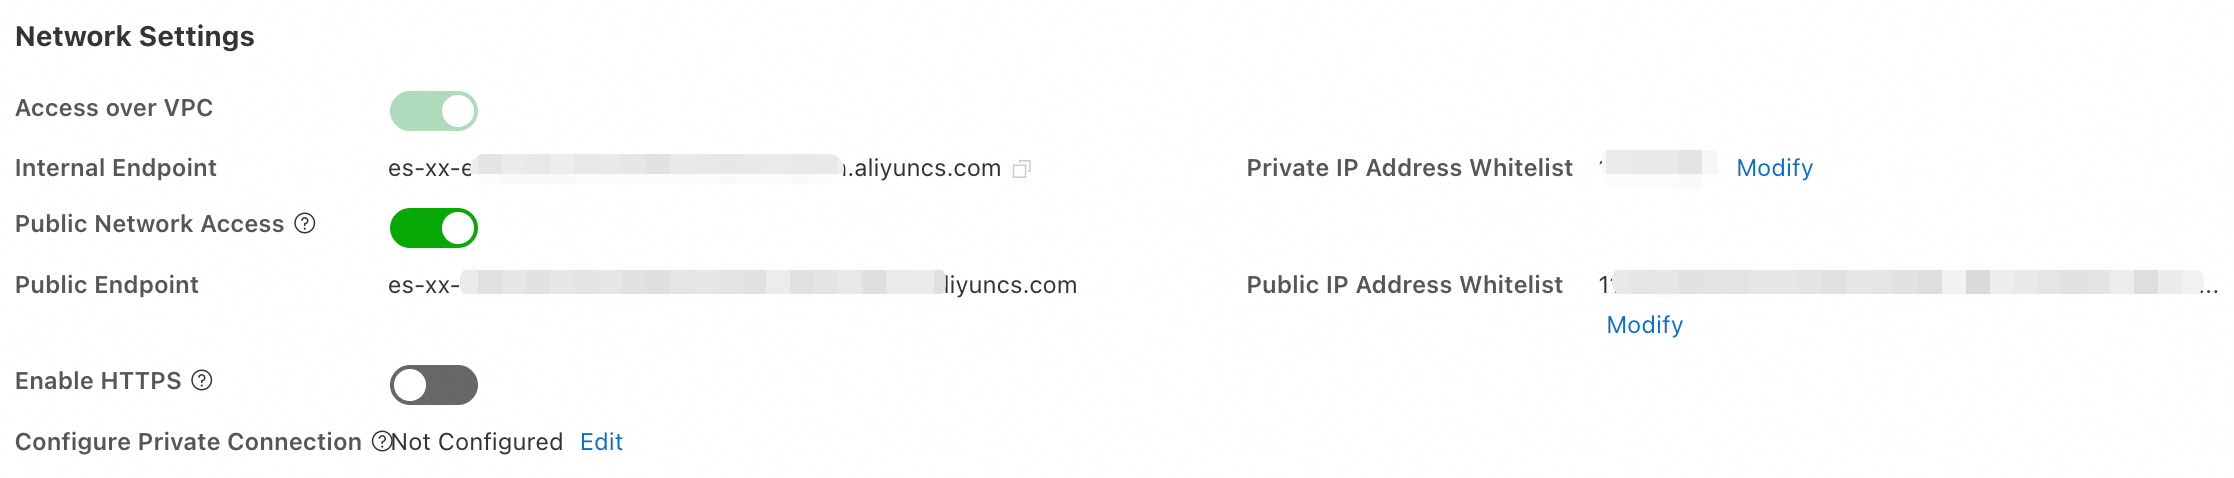
Step 2: Add the IP address to the whitelist
-
Log on to the Elasticsearch console and go to the Basic Information page of your cluster. In the navigation pane, choose Configuration and Management > Security Settings.
-
Click Modify to open the whitelist dialog box.
-
Click Configure to the right of the default group and add your IP addresses.
-
Separate multiple IP addresses or CIDR blocks with commas — no spaces before or after.
-
A single cluster supports up to 300 IP addresses or CIDR blocks.
-
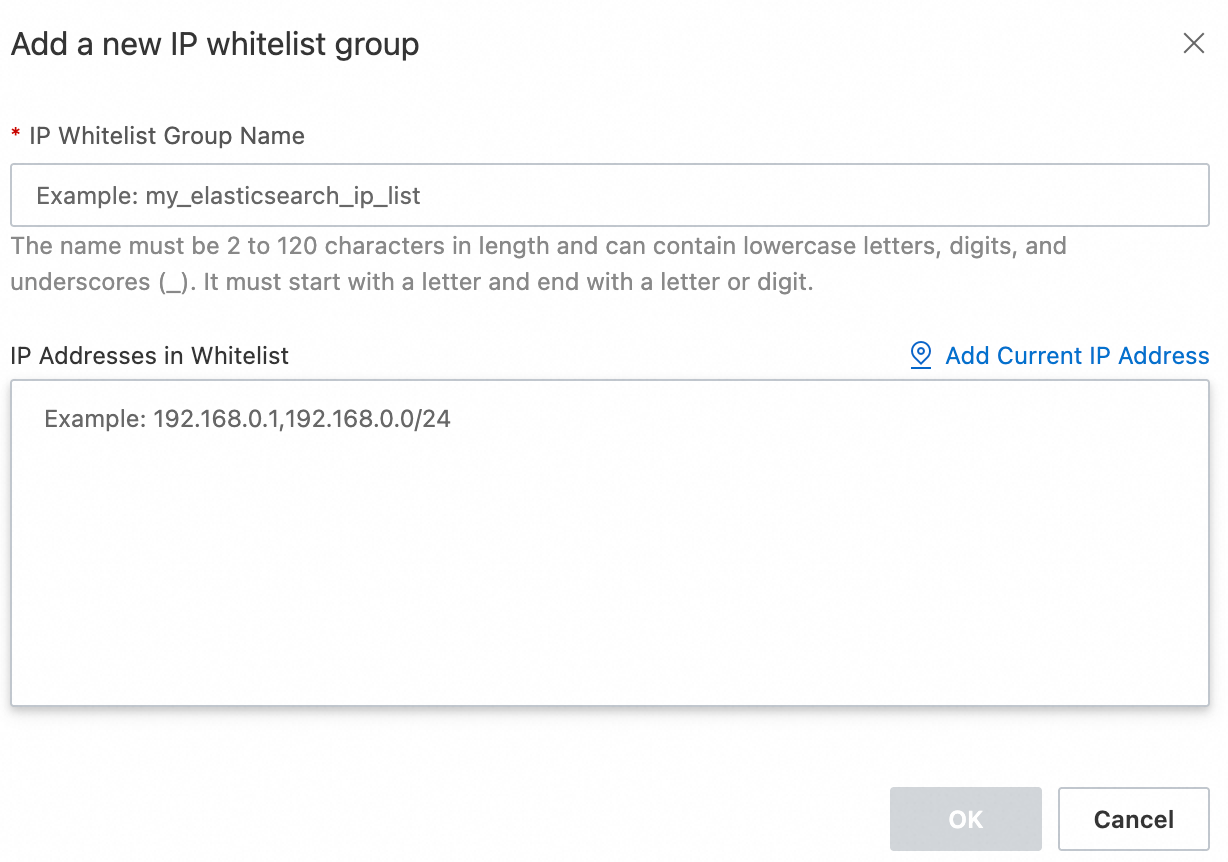
To create a separate group, click Add IP Whitelist Group. Groups are for IP address management only; all IPs across groups share the same access permissions.
ImportantDo not set the whitelist to
0.0.0.0/0or::/0. These configurations allow access from any IP address and pose a significant security risk. Some cluster versions (such as 7.16 and 8.5) and regions do not support these values. IPv6 whitelist support is limited to clusters using the v2 deployment architecture in the China (Hangzhou) region.Supported formats:
Type Format Example IPv4 single address A.B.C.D192.168.0.1IPv4 CIDR block A.B.C.D/N192.168.0.0/24IPv4 deny all — 127.0.0.1IPv4 allow all (high risk) — 0.0.0.0/0IPv6 single address — 2401:XXXX:1000:24::5IPv6 CIDR block — 2401:XXXX:1000::/48IPv6 deny all — ::1IPv6 allow all (high risk) — ::/0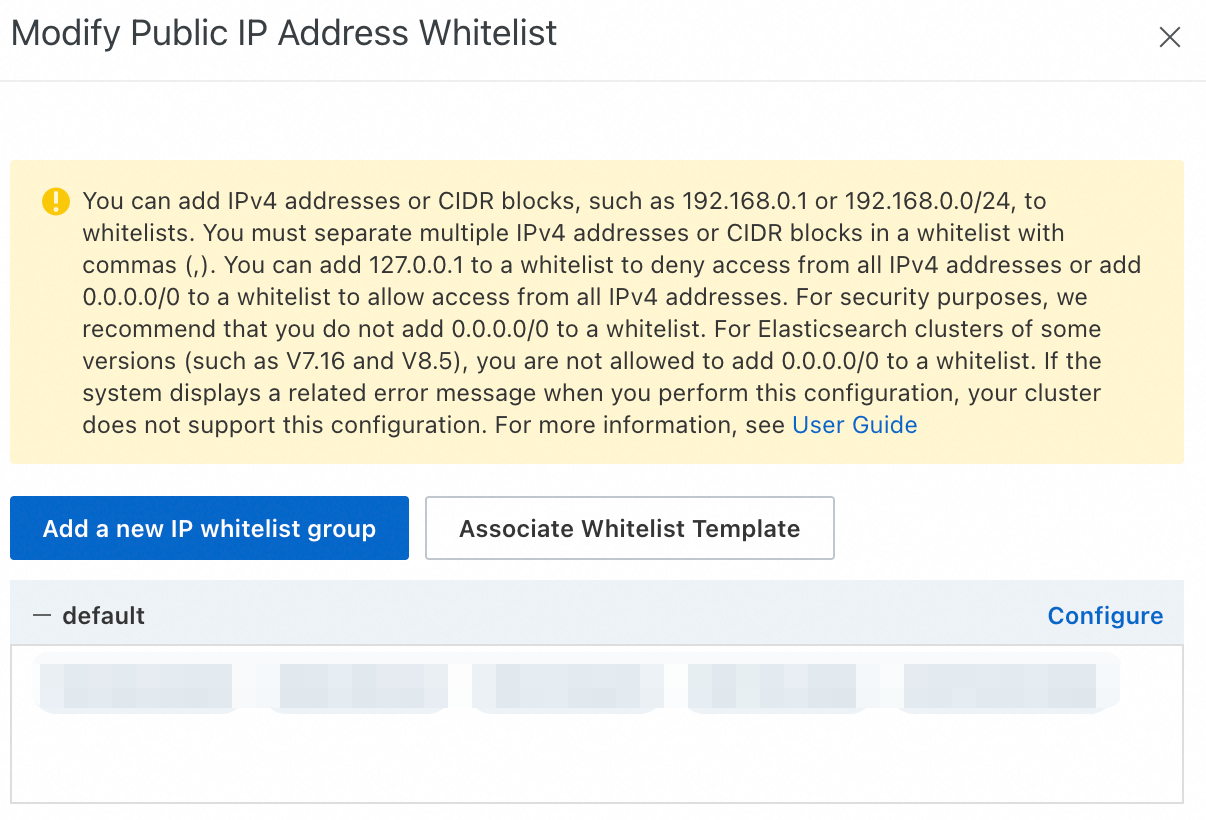
-
-
Click Confirm.
Install Cerebro and connect to the cluster
1. Install and configure Cerebro
Connect to your ECS instance. The following steps use a Linux system. See Connect to an ECS instance for connection instructions.
-
Install JDK 1.8 or later on the ECS instance. See Manually deploy OpenJDK.
-
Download and extract the Cerebro package.
This example uses v0.9.0. To use the latest version, check Cerebro releases and update the download URL accordingly.
# Download Cerebro v0.9.0 wget https://github.com/lmenezes/cerebro/releases/download/v0.9.0/cerebro-0.9.0.tgz # Extract the package tar -zxvf cerebro-0.9.0.tgz -
Open the Cerebro configuration file.
vim cerebro-0.9.0/conf/application.conf -
Configure the
hostsparameter to point Cerebro at your Elasticsearch cluster, then save the file.To connect Cerebro to multiple clusters, add multiple entries to the
hostsarray, separated by commas.Parameter Description hostThe cluster endpoint. Use http://<VPC private endpoint>:9200for private access orhttp://<public endpoint>:9200for public access. ES clusters have HTTP enabled by default. To encrypt traffic, enable HTTPS in Configuration and Management > Security Settings. Before enabling HTTPS, update your application code to support HTTPS connections — existing HTTP-based code will stop working.nameYour Elasticsearch cluster ID. Find it in the cluster list in the Elasticsearch console. usernameThe username for the cluster. The default is elastic, which has full cluster permissions. For production environments, create dedicated users with scoped permissions using Elasticsearch X-Pack role management instead.passwordThe password for the specified user. 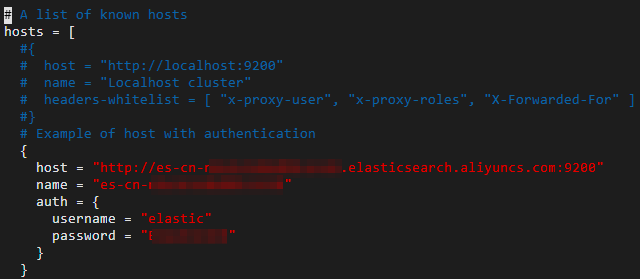
2. Start the Cerebro service
Start in the foreground (for debugging):
cd cerebro-0.9.0
bin/cerebro
When Cerebro starts successfully, the terminal displays a confirmation message.

Start in the background (for production environments):
cd cerebro-0.9.0
nohup bin/cerebro > cerebro.log 2>&1 &
To view logs: tail -f cerebro.log
To stop the service: pkill -f cerebro
3. Open Cerebro in a browser and connect to the cluster
-
In the ECS security group, open port 9000 for inbound traffic from the IP address of the device you want to access Cerebro from. See Add a security group rule for steps.

-
In a browser, go to
http://<Public IP address of the ECS instance>:9000. -
On the Cerebro login page, the clusters configured in
application.confappear. Click a cluster to connect.
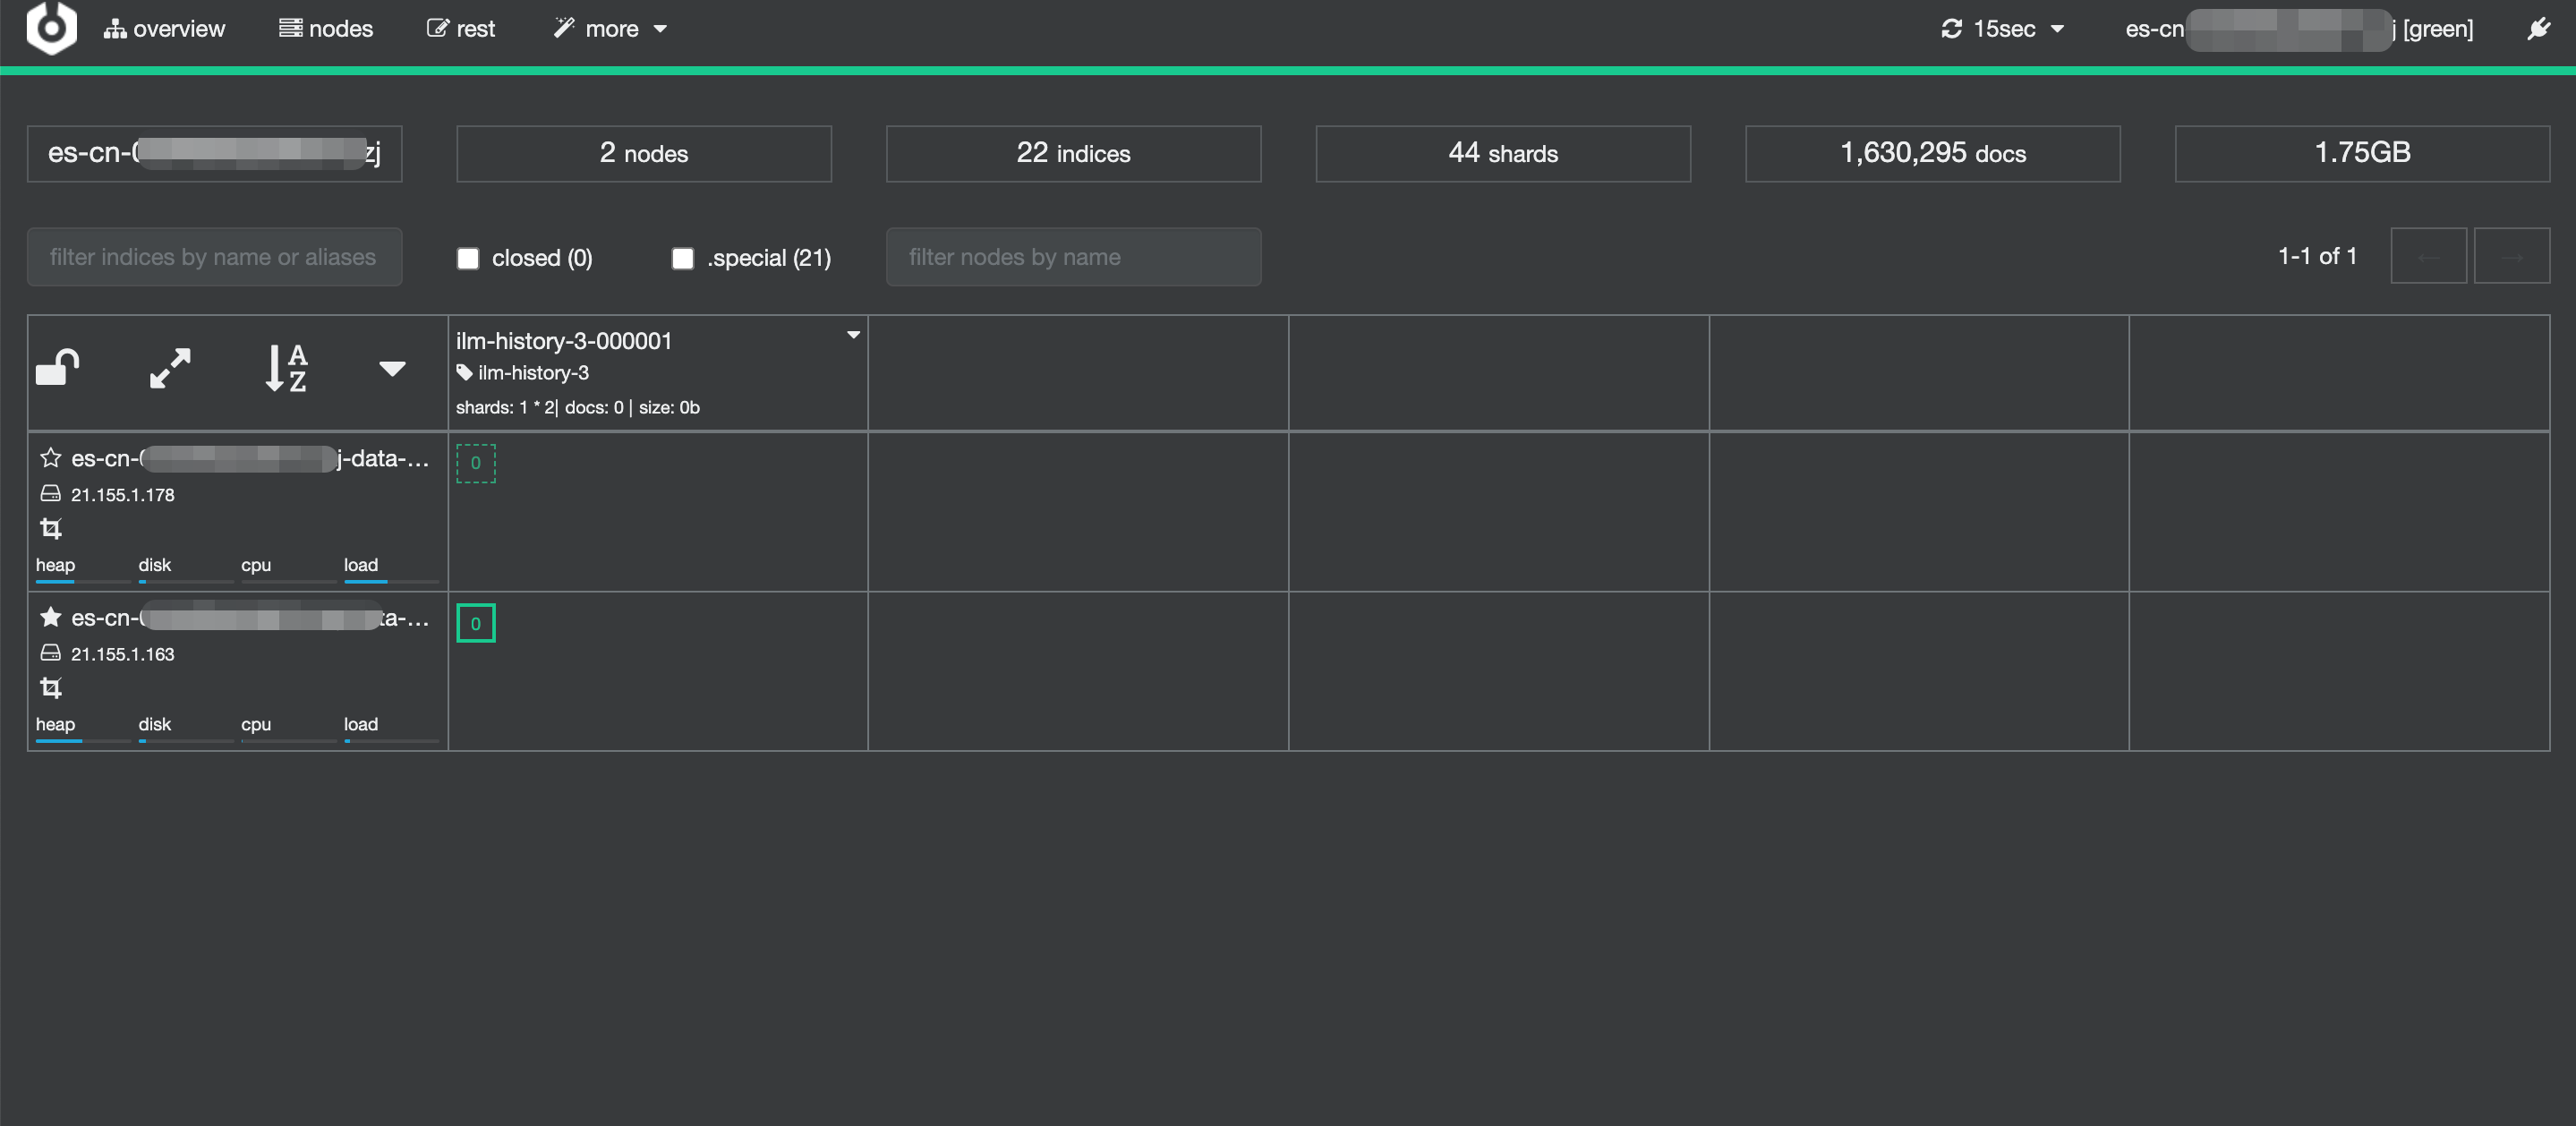
-
After connecting, the Cerebro console displays cluster health, indexes, and other management options.
For more information about using Cerebro, see the Cerebro documentation.
Troubleshooting
Cerebro fails to start
Check the following:
-
JDK not installed or version is earlier than 1.8. Run
java -versionto verify. If the version is below 1.8, install a compatible JDK. -
Port 9000 is already in use. Change the port by setting
http.portto a different value inapplication.conf. -
The startup script lacks execute permissions. Run
chmod +x bin/cerebroto add them.
Failed to connect to the Elasticsearch cluster
Check the following:
-
IP address whitelist not configured. Verify the IP address of the Cerebro host is added to the correct whitelist (VPC private or public) in the Elasticsearch console.
-
Incorrect endpoint or port in the configuration. Confirm the
hostvalue inapplication.confmatches the cluster endpoint and uses port 9200. -
ECS security group blocking traffic. Confirm the security group allows inbound traffic on port 9200 (Elasticsearch) and port 9000 (Cerebro).
-
Incorrect username or password. Verify the credentials in
application.confare correct.