This topic describes how to migrate full or incremental data from a self-managed Elasticsearch cluster to Alibaba Cloud Elasticsearch by deploying Logstash on an ECS instance and configuring a migration pipeline.
Considerations
-
The ECS instance that hosts Logstash must be in the same VPC as the Alibaba Cloud Elasticsearch cluster and must have network access to both the source and destination clusters.
-
If your application continuously writes or updates data, perform a full migration first, then an incremental migration based on a timestamp or another identifying field. Otherwise, old data may overwrite new data in the destination cluster. If the destination already has all existing data, only an incremental migration is needed.
Procedure
-
Step 1: Prepare the environment and instances
Create an Alibaba Cloud Elasticsearch cluster, deploy self-managed Elasticsearch and Logstash on an ECS instance, and prepare migration data.
-
Step 2 (Optional): Migrate index metadata (settings and mappings)
Run a Python script on the ECS instance to migrate index metadata.
-
Step 3: Perform a full data migration
Use Logstash to migrate all data from the self-managed cluster to Alibaba Cloud Elasticsearch.
Step 1: Prepare the environment and instances
-
Create an Alibaba Cloud Elasticsearch instance.
Create an Alibaba Cloud Elasticsearch instance. The test environment uses the following configuration.
Parameter
Description
Region
China (Hangzhou).
Edition
Standard Edition 7.10.0.
Instance specifications
Three zones, three data nodes. Each node has 4 vCPUs, 16 GB of memory, and a 100 GB enhanced SSD (ESSD).
-
Create an ECS instance for the self-managed Elasticsearch, Kibana, and Logstash instances.
Create an instance by using the wizard. The test environment uses the following configuration.
Parameter
Description
Region
China (Hangzhou).
Instance type
4 vCPUs, 16 GiB of memory.
Image
Public image, CentOS 7.9 64-bit.
Storage
System disk, 100 GiB enhanced SSD (ESSD).
Network
Select the same virtual private cloud (VPC) as your Alibaba Cloud Elasticsearch cluster. Select Assign Public IPv4 Addresses, set the billing method to pay-by-traffic, and set the peak bandwidth to 100 Mbit/s.
Security group
Add an inbound rule to allow access on port 5601 (default Kibana port). Set the authorization object to your client's IP address.
Important-
If your client is on a home or corporate network, use the network's public egress IP, not your computer's private IP. Find your public IP at https://www.whatismyip.com.
-
Setting 0.0.0.0/0 as the authorization object allows all IPv4 addresses but exposes your ECS instance to the public internet. Avoid this in production.
-
-
Deploy the self-managed Elasticsearch cluster.
This topic uses a self-managed Elasticsearch 7.6.2 cluster with one data node.
-
Connect to the ECS instance.
-
As the root user, create a new user named
elastic.useradd elastic -
Set the password for the
elasticuser.passwd elasticFollow the prompts to enter and confirm the new password.
-
Switch to the
elasticuser.su -l elastic -
Download and extract the Elasticsearch installation package.
wget https://artifacts.elastic.co/downloads/elasticsearch/elasticsearch-7.6.2-linux-x86_64.tar.gz tar -zvxf elasticsearch-7.6.2-linux-x86_64.tar.gz -
Start Elasticsearch.
Navigate to the Elasticsearch installation directory and start the service in the background.
cd elasticsearch-7.6.2 ./bin/elasticsearch -d -
Verify that the Elasticsearch service is running.
cd ~
curl localhost:9200
A successful response includes the Elasticsearch version number and the tagline
"You Know, for Search".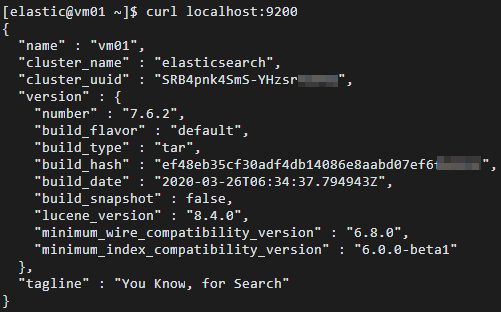
-
-
Deploy a self-managed Kibana instance and prepare sample data.
This topic uses a self-managed Kibana 7.6.2 instance.
-
Connect to the ECS instance.
Connect to a Linux instance by using Workbench.
NoteThe steps in this topic assume you are running commands as a non-root user unless otherwise specified.
-
Download and extract the Kibana installation package.
wget https://artifacts.elastic.co/downloads/kibana/kibana-7.6.2-linux-x86_64.tar.gz tar -zvxf kibana-7.6.2-linux-x86_64.tar.gz -
Edit the Kibana configuration file config/kibana.yml and add
server.host: "0.0.0.0"to enable remote access.Navigate to the Kibana installation directory and edit kibana.yml.
cd kibana-7.6.2-linux-x86_64
vi config/kibana.yml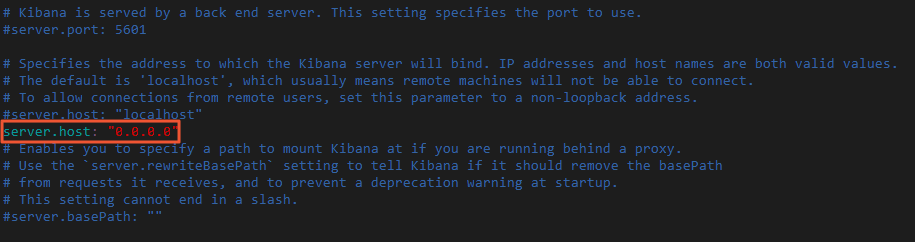
-
Start Kibana as a non-root user.
sudo nohup ./bin/kibana & -
Log on to the Kibana console and add sample data.
-
Access the Kibana console by using the public IP address of the ECS instance.
The URL is formatted as: http://<your_ecs_instance_public_ip>:5601/app/kibana#/home.
-
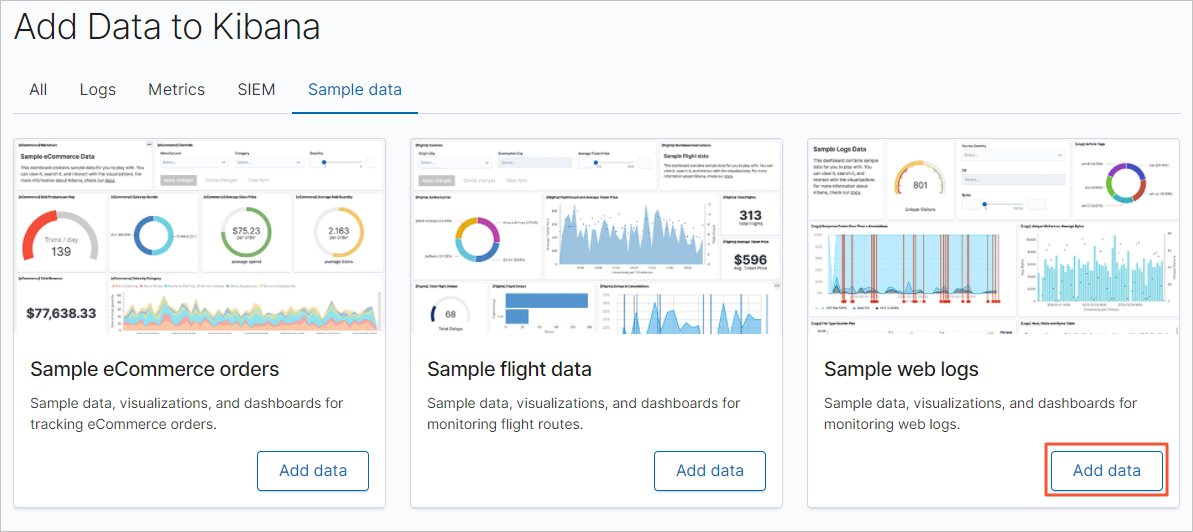
On the Kibana home page, click Try our sample data.
-
On the Sample data page, find the sample web logs card and click Add data.
-
-
-
Deploy a self-managed Logstash instance.
This topic uses a self-managed Logstash 7.10.0 instance with one node.
-
Connect to the ECS instance.
Connect to a Linux instance by using Workbench.
NoteThe steps in this topic assume you are running commands as a non-root user.
-
Return to the home directory, then download and extract the Logstash installation package.
cd ~ wget https://artifacts.elastic.co/downloads/logstash/logstash-7.10.0-linux-x86_64.tar.gz tar -zvxf logstash-7.10.0-linux-x86_64.tar.gz -
Adjust the Logstash heap size.
The default heap size is 1 GB. Adjust it based on your ECS instance specifications for better migration performance.
Navigate to the Logstash installation directory and edit
config/jvm.optionsto set both the initial and maximum heap size to 8 GB (-Xms8gand-Xmx8g).cd logstash-7.10.0 sudo vi config/jvm.options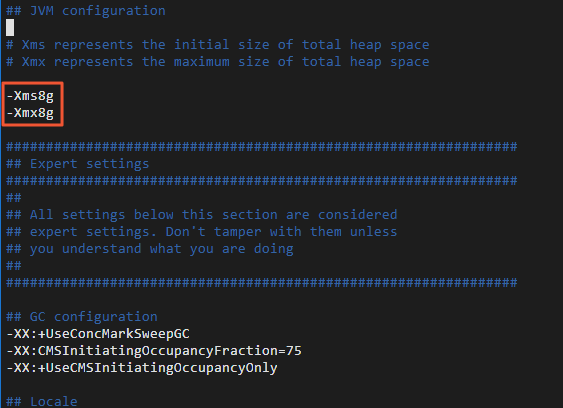
-
Modify the Logstash batch size.
Writing data in batches of 5 MB to 15 MB accelerates data migration.
Edit config/pipelines.yml and change the
pipeline.batch.sizefrom 125 to 5000.vi config/pipelines.yml
-
Verify that Logstash is functioning correctly.
-
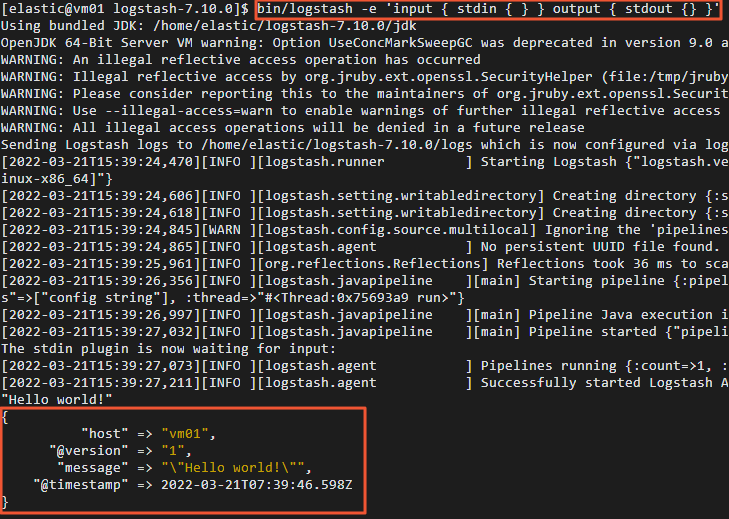
Run a simple pipeline that takes standard input and sends it to standard output.
bin/logstash -e 'input { stdin { } } output { stdout {} }' -
After the pipeline starts, type "Hello world!" and press Enter.
If Logstash is working, it prints a structured log message containing "Hello world!" to the console.
-
-
Step 2 (Optional): Migrate index metadata
Logstash automatically creates an index if one does not exist in the destination cluster, but the auto-created settings and mappings may differ from the source. To ensure consistent index structures, manually create the destination index before migration.
Use the following Python script to create the destination index.
-
Connect to the ECS instance.
Connect to a Linux instance by using Workbench.
NoteThe steps in this topic assume you are running commands as a non-root user.
-
Create and open a Python script file. This topic uses
indiceCreate.pyas the filename.sudo vi indiceCreate.py -
Copy the following code into the Python script file and replace the placeholder values for cluster endpoints, usernames, and passwords with your actual credentials.
#!/usr/bin/python # -*- coding: UTF-8 -*- # Filename: indiceCreate.py import sys import base64 import time import httplib import json ## Host of the source cluster. oldClusterHost = "localhost:9200" ## Username for the source cluster. Can be left empty. oldClusterUserName = "elastic" ## Password for the source cluster. Can be left empty. oldClusterPassword = "xxxxxx" ## Host of the destination cluster. You can find this on the Basic Information page of your Alibaba Cloud Elasticsearch instance. newClusterHost = "es-cn-zvp2m4bko0009****.elasticsearch.aliyuncs.com:9200" ## Username for the destination cluster. newClusterUser = "elastic" ## Password for the destination cluster. newClusterPassword = "xxxxxx" DEFAULT_REPLICAS = 0 def httpRequest(method, host, endpoint, params="", username="", password=""): conn = httplib.HTTPConnection(host) headers = {} if (username != "") : 'Hello {name}, your age is {age} !'.format(name = 'Tom', age = '20') base64string = base64.encodestring('{username}:{password}'.format(username = username, password = password)).replace('\n', '') headers["Authorization"] = "Basic %s" % base64string; if "GET" == method: headers["Content-Type"] = "application/x-www-form-urlencoded" conn.request(method=method, url=endpoint, headers=headers) else : headers["Content-Type"] = "application/json" conn.request(method=method, url=endpoint, body=params, headers=headers) response = conn.getresponse() res = response.read() return res def httpGet(host, endpoint, username="", password=""): return httpRequest("GET", host, endpoint, "", username, password) def httpPost(host, endpoint, params, username="", password=""): return httpRequest("POST", host, endpoint, params, username, password) def httpPut(host, endpoint, params, username="", password=""): return httpRequest("PUT", host, endpoint, params, username, password) def getIndices(host, username="", password=""): endpoint = "/_cat/indices" indicesResult = httpGet(oldClusterHost, endpoint, oldClusterUserName, oldClusterPassword) indicesList = indicesResult.split("\n") indexList = [] for indices in indicesList: if (indices.find("open") > 0): indexList.append(indices.split()[2]) return indexList def getSettings(index, host, username="", password=""): endpoint = "/" + index + "/_settings" indexSettings = httpGet(host, endpoint, username, password) print (index + " Original settings:\n" + indexSettings) settingsDict = json.loads(indexSettings) ## The number of shards defaults to matching the source index. number_of_shards = settingsDict[index]["settings"]["index"]["number_of_shards"] ## The default number of replicas is 0. number_of_replicas = DEFAULT_REPLICAS newSetting = "\"settings\": {\"number_of_shards\": %s, \"number_of_replicas\": %s}" % (number_of_shards, number_of_replicas) return newSetting def getMapping(index, host, username="", password=""): endpoint = "/" + index + "/_mapping" indexMapping = httpGet(host, endpoint, username, password) print (index + " Original mapping:\n" + indexMapping) mappingDict = json.loads(indexMapping) mappings = json.dumps(mappingDict[index]["mappings"]) newMapping = "\"mappings\" : " + mappings return newMapping def createIndexStatement(oldIndexName): settingStr = getSettings(oldIndexName, oldClusterHost, oldClusterUserName, oldClusterPassword) mappingStr = getMapping(oldIndexName, oldClusterHost, oldClusterUserName, oldClusterPassword) createstatement = "{\n" + str(settingStr) + ",\n" + str(mappingStr) + "\n}" return createstatement def createIndex(oldIndexName, newIndexName=""): if (newIndexName == "") : newIndexName = oldIndexName createstatement = createIndexStatement(oldIndexName) print ("Settings and mapping for the new index " + newIndexName + ":\n" + createstatement) endpoint = "/" + newIndexName createResult = httpPut(newClusterHost, endpoint, createstatement, newClusterUser, newClusterPassword) print ("Result of creating new index " + newIndexName + ": " + createResult) ## main indexList = getIndices(oldClusterHost, oldClusterUserName, oldClusterPassword) systemIndex = [] for index in indexList: if (index.startswith(".")): systemIndex.append(index) else : createIndex(index, index) if (len(systemIndex) > 0) : for index in systemIndex: print (index + " might be a system index and will not be recreated. If required, handle it separately.") -
Run the Python script to create the destination index.
sudo /usr/bin/python indiceCreate.py -
Log on to the Kibana console of the destination cluster and verify that the index was created.
GET /_cat/indices?v
Step 3: Migrate full data
-
Connect to the ECS instance.
-
In the config directory, create and open a Logstash configuration file.
cd logstash-7.10.0/config vi es2es_all.conf -
Add the following configuration to the file.
Note-
Logstash configuration parameters changed in version 8.5. This topic provides configuration examples for both version 7.10.0 and version 8.5.1.
-
To ensure data accuracy, create separate Logstash pipeline configuration files and migrate data in batches.
Version 7.10.0
input{
    elasticsearch{
        # Endpoints of the source Elasticsearch cluster.
        hosts =>  ["http://localhost:9200"]
        # Username and password for the source cluster.
        user => "xxxxxx"
        password => "xxxxxx"
        # List of indices to migrate. Separate multiple indices with commas (,).
        index => "kibana_sample_data_*"
        # The following three items can be left as default. They relate to the thread count, migration data size, and Logstash JVM configuration.
        docinfo=>true
        slices => 5
        size => 5000
    }
}

filter {
  # Remove metadata fields added by Logstash.
  mutate {
    remove_field => ["@timestamp", "@version"]
  }
}

output{
    elasticsearch{
        # Endpoints of the destination cluster. You can find this on the Basic Information page of your Alibaba Cloud Elasticsearch instance.
        hosts => ["http://es-cn-zvp2m4bko0009****.elasticsearch.aliyuncs.com:9200"]
        # Username and password for the destination cluster.
        user => "elastic"
        password => "xxxxxx"
        # Name of the destination index. This configuration keeps the index name the same as the source.
        index => "%{[@metadata][_index]}"
        # Type of the destination index. This configuration keeps the index type the same as the source.
        document_type => "%{[@metadata][_type]}"
        # The ID for the data in the destination cluster. To improve performance, you can remove this line if you do not need to preserve the original document IDs.
        document_id => "%{[@metadata][_id]}"
        ilm_enabled => false
        manage_template => false
    }
}
Version 8.5.1
input{
    elasticsearch{
        # Endpoints of the source Elasticsearch cluster.
        hosts =>  ["http://es-cn-uqm3811160002***.elasticsearch.aliyuncs.com:9200"]
        # Username and password for the source cluster.
        user => "elastic"
        password => ""
        # List of indices to migrate. Separate multiple indices with commas (,).
        index => "test_ecommerce"
        # The following items can be left as default. They relate to the thread count, migration data size, and Logstash JVM configuration.
        docinfo => true
        size => 10000
        docinfo_target => "[@metadata]"
    }
}

filter {
  # Remove metadata fields added by Logstash.
  mutate {
    remove_field => ["@timestamp","@version"]
  }
}

output{
    elasticsearch{
        # Endpoints of the destination cluster. You can find this on the Basic Information page of your Alibaba Cloud Elasticsearch instance.
        hosts => ["http://es-cn-nwy38aixp0001****.elasticsearch.aliyuncs.com:9200"]
        # Username and password for the destination cluster.
        user => "elastic"
        password => ""
        # Name of the destination index. This configuration keeps the index name the same as the source.
        index => "%{[@metadata][_index]}"
        # The ID for the data in the destination cluster. To improve performance, you can remove this line if you do not need to preserve the original document IDs.
        document_id => "%{[@metadata][_id]}"
        ilm_enabled => false
        manage_template => false
    }
}
The Elasticsearch input plugin stops after reading all data. In some environments, Logstash may restart automatically, causing duplicate writes. Use the
scheduleparameter with a cron expression to run the task at a specific time and prevent this (Scheduling).For example, to run the task at 1:20 PM on March 5:
schedule => "20 13 5 3 *" -
-
Navigate to the Logstash directory.
cd ~/logstash-7.10.0 -
Start the full data migration task.
nohup bin/logstash -f config/es2es_all.conf >/dev/null 2>&1 &
Step 4: Migrate incremental data
-
Connect to the ECS instance. In the config directory, create and open a new Logstash configuration file for incremental migration.
cd config vi es2es_kibana_sample_data_logs.confNoteThe steps in this topic assume you are running commands as a non-root user.
-
Add the following configuration to the file.
The following is a sample configuration for version 7.10.0.
Note-
For Logstash 8.5 and later, you must remove the
document_type => "%{[@metadata][_type]}"line because document types are deprecated. -
After configuring the file, starting the scheduled Logstash task triggers the incremental migration.
input{ elasticsearch{ # Endpoints of the source Elasticsearch cluster. hosts => ["http://localhost:9200"] # Username and password for the source cluster. user => "xxxxxx" password => "xxxxxx" # List of indices to migrate. Separate multiple indices with commas (,). index => "kibana_sample_data_logs" # Query incremental data within a time range. The following configuration queries data from the last five minutes. query => '{"query":{"range":{"@timestamp":{"gte":"now-5m","lte":"now/m"}}}}' # Scheduled task. The following configuration runs the task every minute. schedule => "* * * * *" scroll => "5m" docinfo=>true size => 5000 } } filter { # Remove metadata fields added by Logstash. mutate { remove_field => ["@timestamp", "@version"] } } output{ elasticsearch{ # Endpoints of the destination cluster. You can find this on the Basic Information page of your Alibaba Cloud Elasticsearch instance. hosts => ["http://es-cn-zvp2m4bko0009****.elasticsearch.aliyuncs.com:9200"] # Username and password for the destination cluster. user => "elastic" password => "xxxxxx" # Name of the destination index. This configuration keeps the index name the same as the source. index => "%{[@metadata][_index]}" # Type of the destination index. This configuration keeps the index type the same as the source. document_type => "%{[@metadata][_type]}" # The ID for the data in the destination cluster. To improve performance, you can remove this line if you do not need to preserve the original document IDs. document_id => "%{[@metadata][_id]}" ilm_enabled => false manage_template => false } }Important-
Logstash uses UTC timestamps. If your source data uses a different time zone, adjust the query range accordingly. The
now-5min the@timestampfield is based on the server's UTC clock. -
Your source index must contain a time field for incremental sync. If it does not, use an ingest pipeline with the
_ingest.timestampmetadata field to add@timestampto documents during indexing.
-
-
Navigate to the Logstash directory.
cd ~/logstash-7.10.0 -
Start the incremental data migration task.
sudo nohup bin/logstash -f config/es2es_kibana_sample_data_logs.conf >/dev/null 2>&1 & -
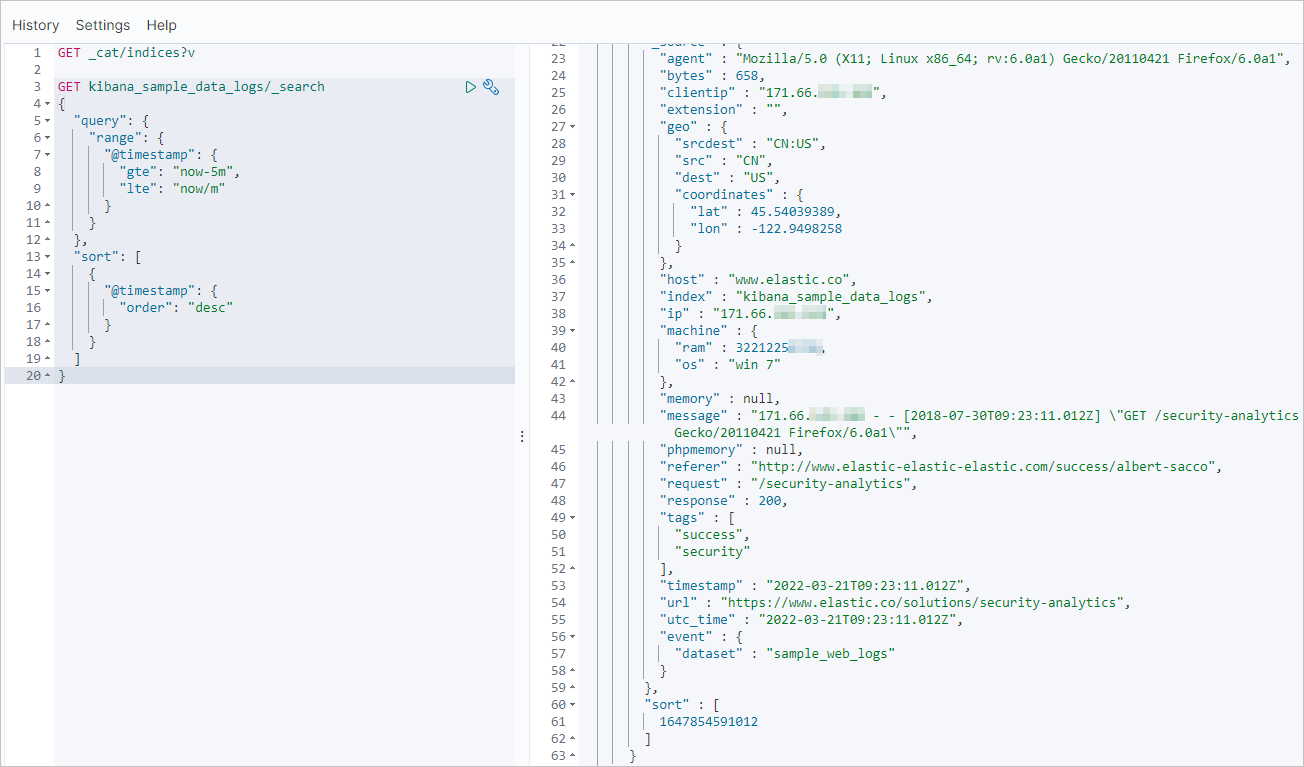
In the Kibana console of the destination Elasticsearch cluster, query for the latest records to verify that incremental data is synchronizing.
The following query finds records in the
kibana_sample_data_logsindex from the last five minutes.GET kibana_sample_data_logs/_search { "query": { "range": { "@timestamp": { "gte": "now-5m", "lte": "now/m" } } }, "sort": [ { "@timestamp": { "order": "desc" } } ] }
Step 5: Verify the migration results
-
Verify the full data migration.
-
Check the index and document count information in the self-managed source cluster.
GET _cat/indices?vThe following result is an example.

-
Check the index and document count in the Alibaba Cloud destination cluster before the migration.
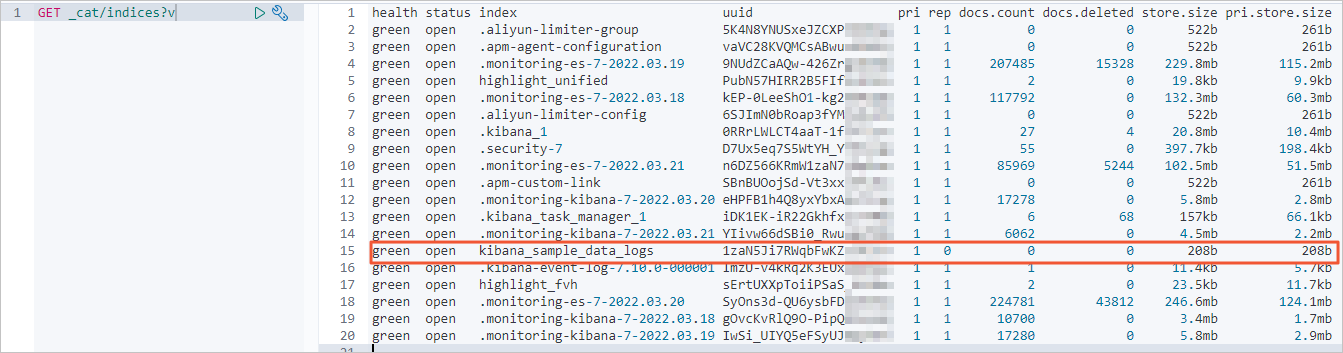
-
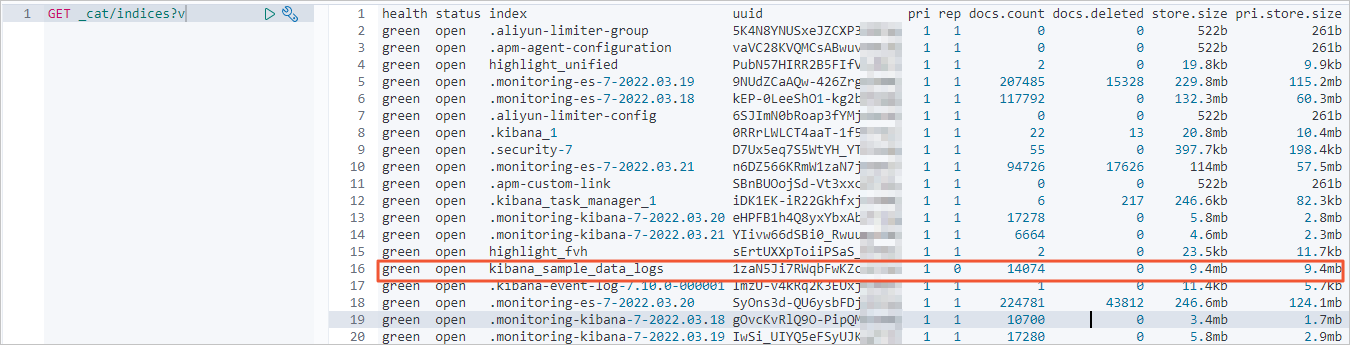
After the full data migration, check the index and document count information in the Alibaba Cloud destination cluster again.
The number of documents should match the source cluster count.
-
-
Verify the incremental data migration.
Check the most recent records in the self-managed source cluster.
GET kibana_sample_data_logs/_search { "query": { "range": { "@timestamp": { "gte": "now-5m", "lte": "now/m" } } }, "sort": [ { "@timestamp": { "order": "desc" } } ] }The following result is an example.
Run the same query in the destination cluster's Kibana console. Matching results confirm successful incremental synchronization.