The Maps page of the Kibana console of an Alibaba Cloud Elasticsearch cluster does not display the default map data of Elastic Maps. You can refer to this topic to add a map tile of AMAP on the Maps page of the Kibana console, and mark provincial administrative boundaries for the map tile. This way, AMAP is integrated into Kibana.
Background information
By default, Elastic Maps uses map data provided by openstreetmap.org. Alibaba Cloud Kibana does not support the display of the map data. However, Alibaba Cloud allows you to integrate AMAP into Kibana and present AMAP data on the Maps page of the Kibana console.
Prerequisites
An Alibaba Cloud Elasticsearch cluster is created. In this example, an Alibaba Cloud Elasticsearch V8.9 cluster is used.
Cross-origin resource sharing (CORS) is configured for your tile server. This ensures that tile requests in the Kibana origin have permissions to access your tile server origin.
Step 1: Configure an AMAP tile URL
Log on to the Kibana console of the Elasticsearch cluster from the Access over Internet entry. For more information, see Log on to the Kibana console.
NoteWhen you log on to the Kibana console by using a browser, make sure that your client can access the Internet.
By default, the Kibana console of Elasticsearch clusters of V8.5 or later is displayed in Chinese. For information about how to switch the language of the Kibana console to English, see Configure the language of the Kibana console.
In the upper-left corner of the homepage of the Kibana console, click the
 icon. In the left-side navigation pane that appears, choose .
 Optional. In the upper-right corner of the Maps page, click Create map.
In the upper-right corner of the Maps page, click Add layer.
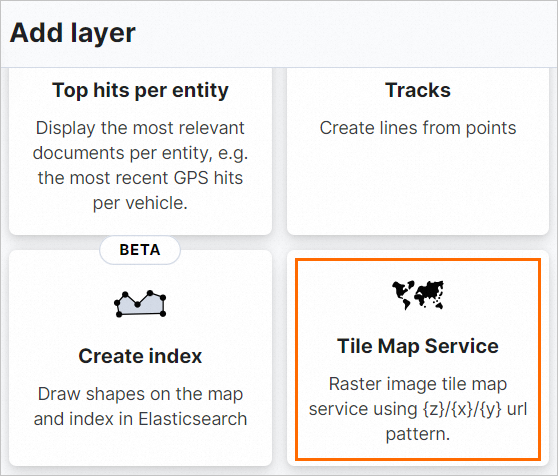
In the Add layer panel, click Tile Map Service.
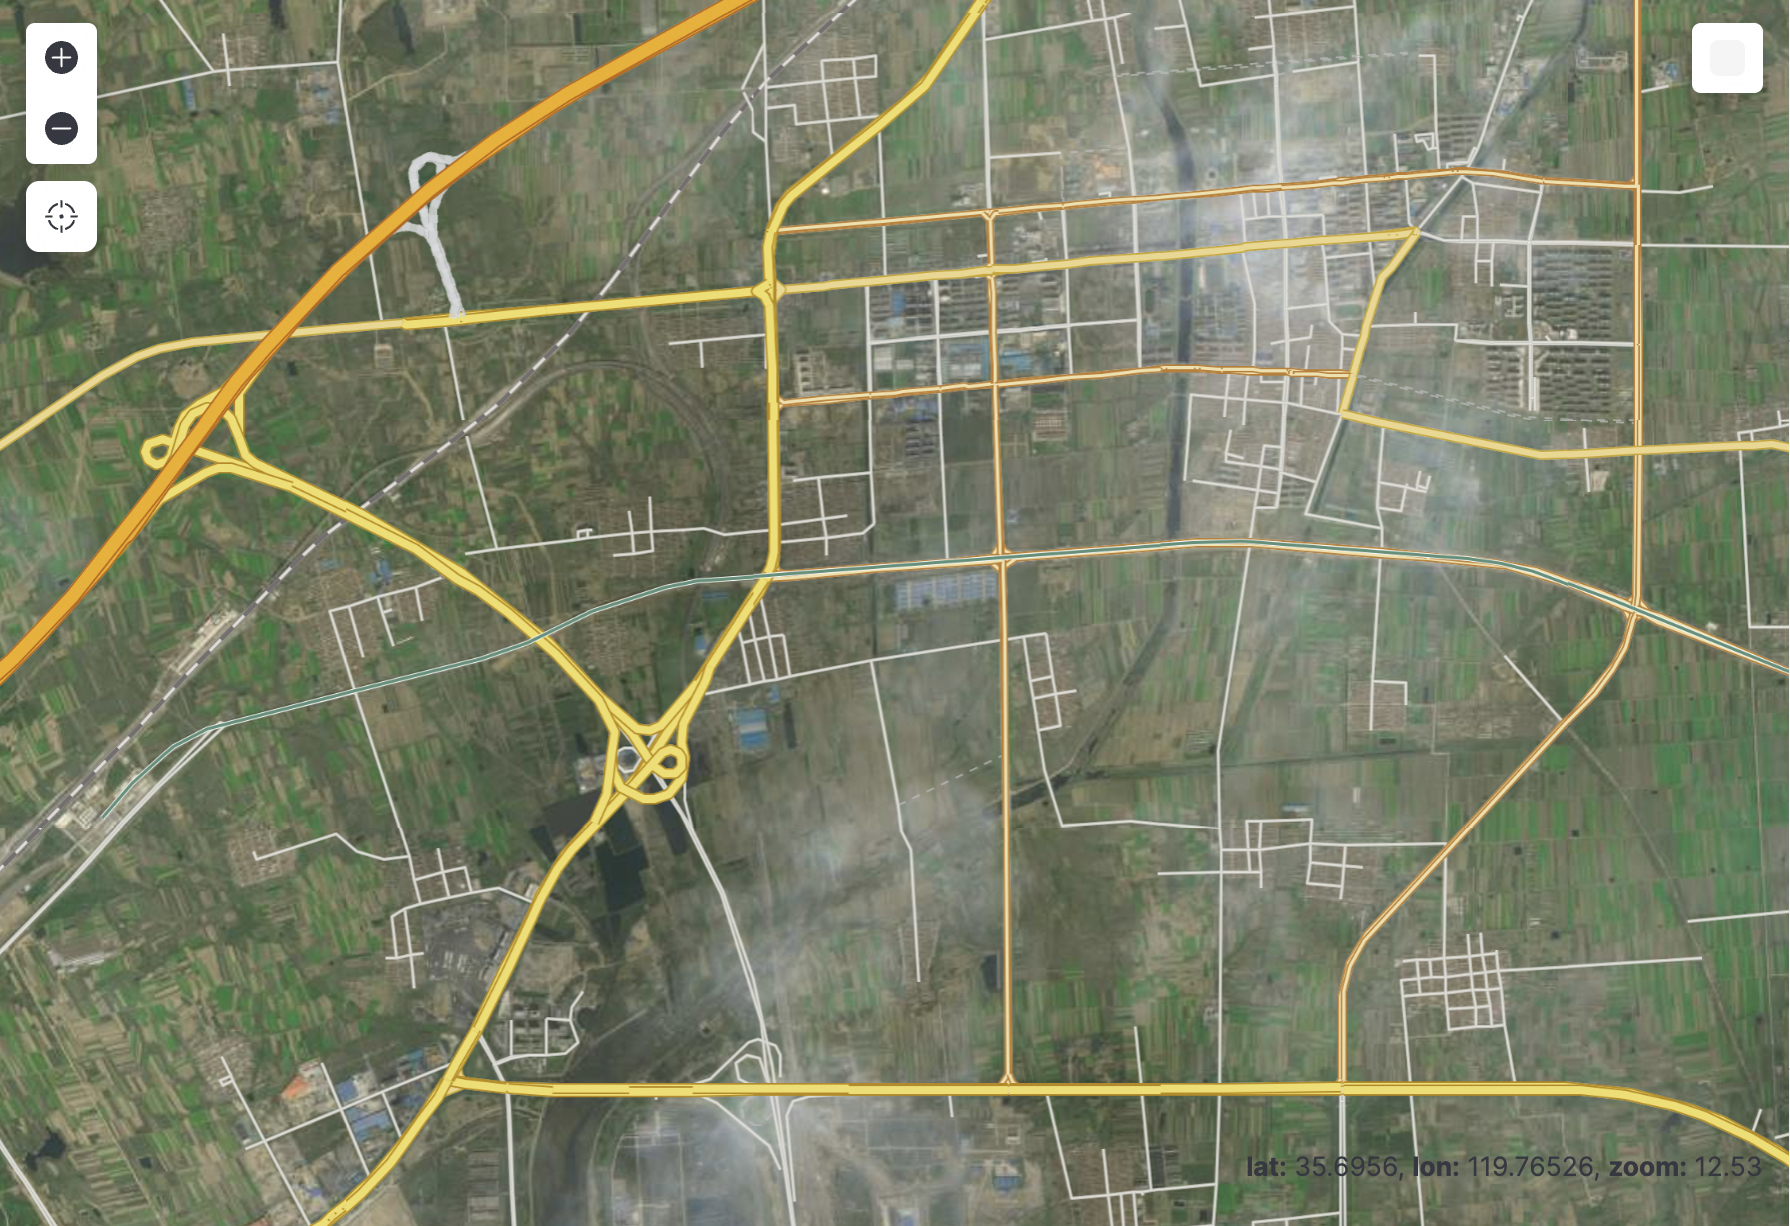
In the Url field, enter a tile URL of AMAP.
Alibaba Cloud Kibana requires a tile URL that uses HTTPS. The following table describes the common tile URL formats of AMAP. In this example, the tile URL
https://wprd03.is.autonavi.com/appmaptile?x={x}&y={y}&z={z}&lang=en&size=1&scl=1&style=7is used.Map type
AMAP tile URL format
Sample URL
Sample map
Vector basemap
https://wprd0{1,4}.is.autonavi.com/appmaptile?x={x}&y={y}&z={z}&lang=zh_cn&size=1&scl=1&style=7
https://wprd03.is.autonavi.com/appmaptile?x={x}&y={y}&z={z}&lang=zh_cn&size=1&scl=1&style=7

Imagery basemap
https://wprd0{{1,4}}.is.autonavi.com/appmaptile?x={x}&y={y}&z={z}&lang=zh_cn&size=1&scl=1&style=6
https://wprd03.is.autonavi.com/appmaptile?x={x}&y={y}&z={z}&lang=zh_cn&size=1&scl=2&style=6

Imagery road network
https://wprd0{1,4}.is.autonavi.com/appmaptile?x={x}&y={y}&z={z}&lang=zh_cn&size=1&scl=1&style=8
https://wprd03.is.autonavi.com/appmaptile?x={x}&y={y}&z={z}&lang=zh_cn&size=1&scl=1&style=8
{1,4} indicates that you can select a number from 1 to 4.
{x}, {y}, and {z} separately indicate the related layers.
lang=zh_cn indicates that the language of annotations is Chinese. lang=en indicates that the language of annotations is English.
In the lower part of the Add layer panel, click Add and close.
Step 2: Upload a geographical information dataset
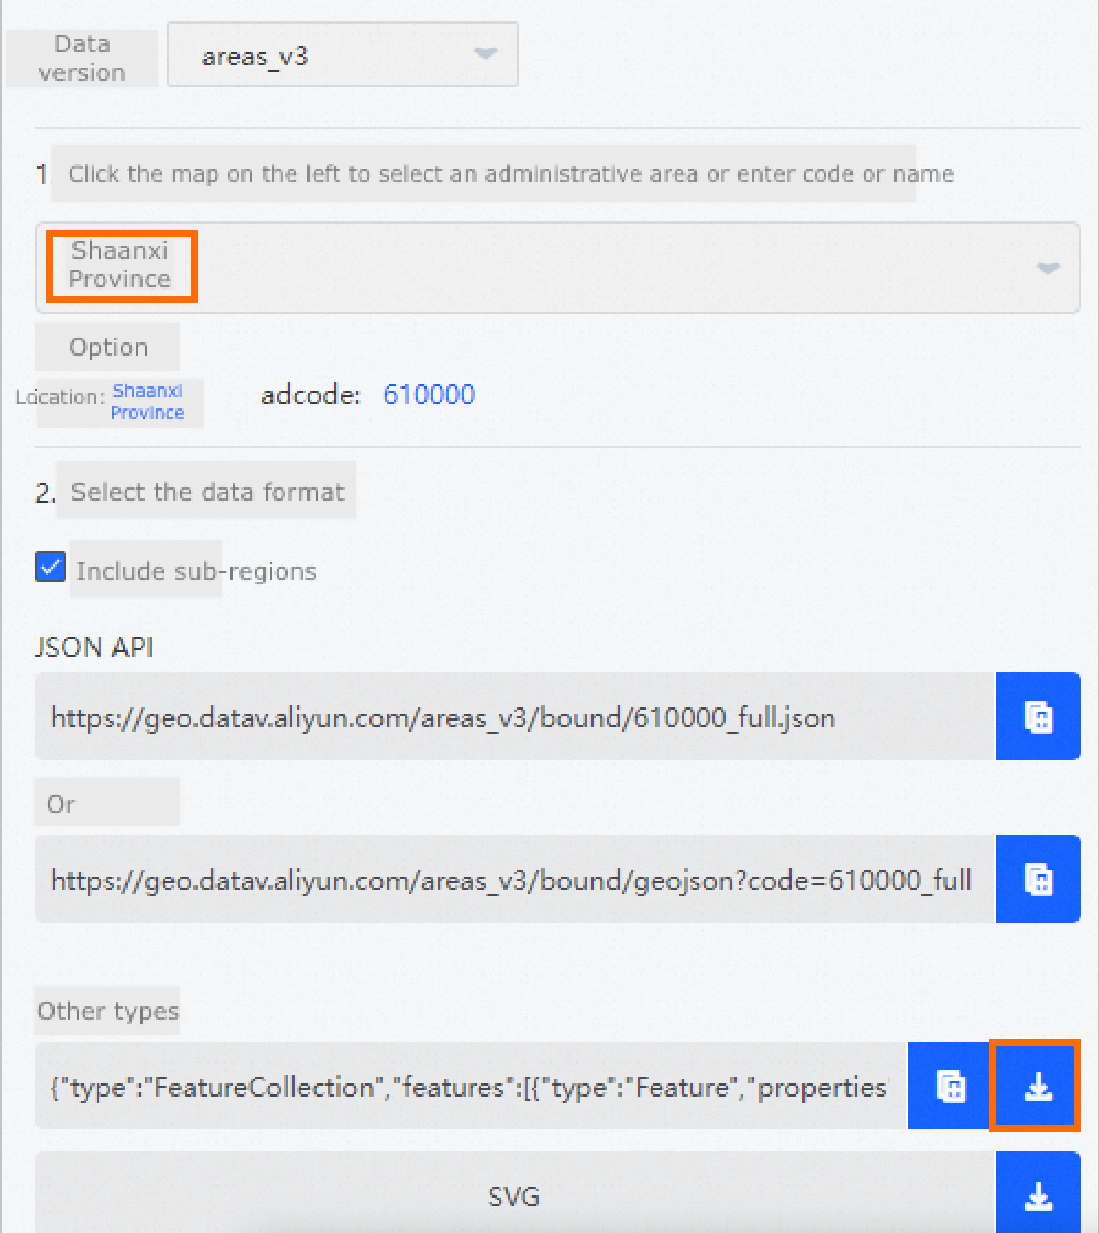
Prepare a geographical information dataset.
In this example, a provincial boundary dataset is used. For information about how to obtain the dataset, visit DataV Atlas to download the dataset.
In the upper-right corner of the Maps page, click Add layer.
In the Add layer panel, click Upload file.
Click Select or drag and drop a file and upload the dataset file that is prepared.
Files with the following file name extensions are supported:
.json,.geojson, and.shp.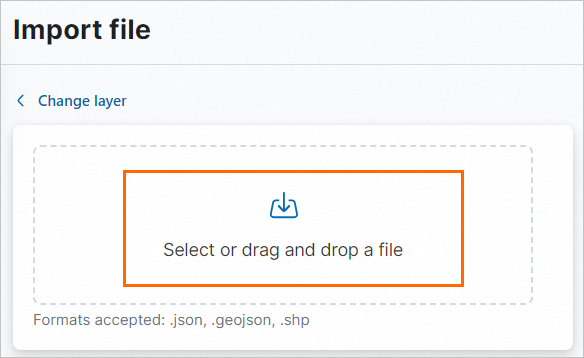
Click Import file.
Click Add as document layer.
In the Layer settings section, enter a name in the Name field and click Keep changes.
In the upper-right corner of the page, click Save.