When exceptions occur in an application, you can check logs of the application and the application instances to troubleshoot errors. In the Enterprise Distributed Application Service (EDAS) console, you can view, search for, and remove logs.
Add a log directory for online viewing
Log on to the EDAS console.
In the left-side navigation pane, choose . In the top navigation bar, select a region. In the upper part of the Applications page, select a microservices namespace from the Microservices Namespace drop-down list. Then, click the name of the application that you want to manage.
In the left-side navigation pane of the application details page, choose . On the Log Directory page, click + Add Online View.
In the Add Online View dialog box, enter the log directory of your application in the Application Log Directory field and click Add.
The log directory path that you enter must meet the following requirements:
The directory must be a subdirectory of /home/admin.
The full directory path must contain log or logs.
The directory path must end with a forward slash (/), which indicates that a folder is to be added.
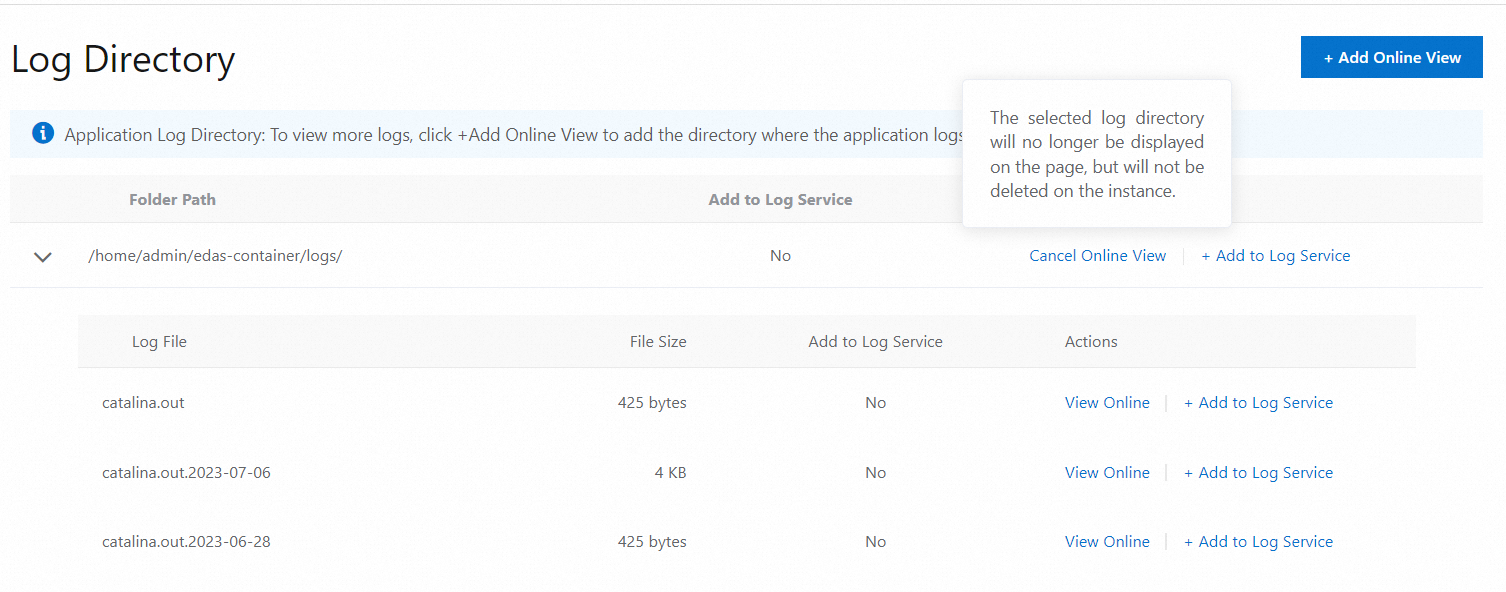
Cancel online viewing for a log directory
If you cancel online viewing for a log directory of an application, the log directory is removed. After the log directory is removed, it is no longer displayed on the Log Directory page. You can no longer view instance logs in the directory. However, the actual directory and files are not deleted.
You can also cancel online viewing for the default log directory.
View instance logs
After you add the log directory of an application for online viewing, you can view logs of the application and the application instances.
In the left-side navigation pane of the application details page, choose .
On the Log Directory page, find the log directory that you want to manage and click the > icon on the left side. In the log file list that expands, find the log file that you want to view and click View Online in the Actions column.
 Note
NoteOn the Real-time Logs page, select an instance from the ECS Instance ID/Name/IP drop-down list to view the log details of the instance.
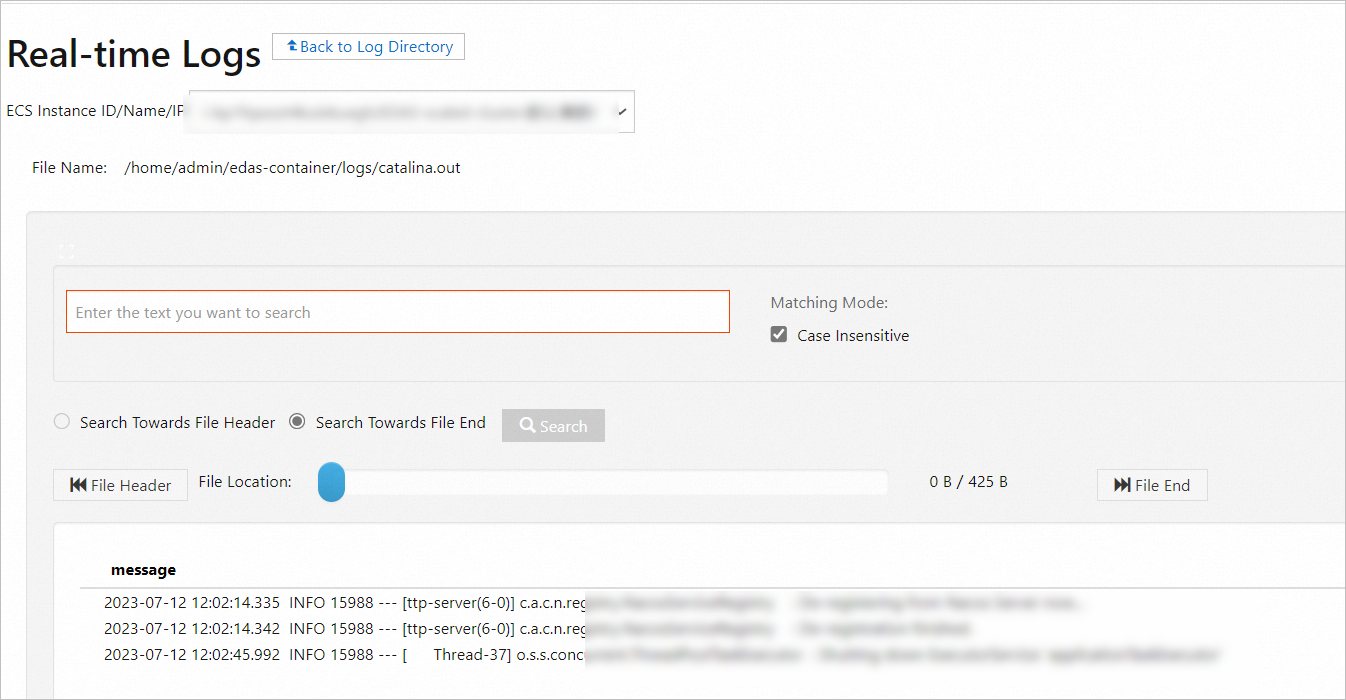
In the lower-right corner of the page, click Enable Real-time Additions to load the latest appended content of the file. This feature is similar to the
tailfcommand.
Add a log directory or file to Simple Log Service
Simple Log Service allows you to view and search for the logs of applications. After you add log directories or files of an application to Simple Log Service, you can view and search for the logs of the application in the EDAS console.
When you add a log directory or file to Simple Log Service, you can specify a project and a Logstore. For more information, see Project and Logstore.
If you have created a project and a Logstore in Simple Log Service, you can use the existing project and Logstore.
If you have not created a project or a Logstore in Simple Log Service, you must create a project and a Logstore in EDAS. EDAS creates a Logstore in the format of
edas-logstore-<Absolute path of the log file>. Example of an absolute path:a-homeadminlogs.NoteIf you want to use a Resource Access Management (RAM) user, make sure that you have granted the required permissions to the RAM user by using your Alibaba Cloud account. For more information, see Authorize a RAM user to use Simple Log Service.
In the Add to Log Service dialog box, confirm the log directory, configure the following parameters, and then click Add.
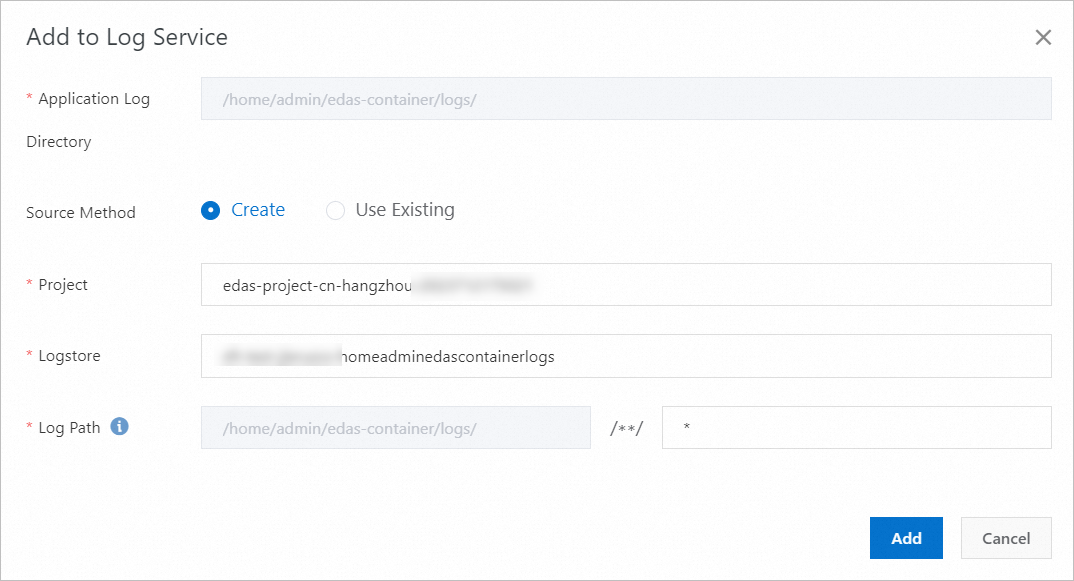
Application Log Directory: the selected log directory, which cannot be modified.
If you set Source Method to Create, the following parameters appear:
Project: Enter a project name. We recommend that you specify the name in the format of
edas-project-<region-id-timestamp>, such asedas-project-cn-qingdao-.Logstore: EDAS automatically creates a Logstore whose name is in the format of
edas-logstore-<Absolute path of the log file>. Example of an absolute path:a-homeadminlogs.Log Path: If you need to specify a specific log file in the directory, enter a keyword of the file name or the complete file name. You can enter a complete file name or part of the name that contains wildcards.
If you set Source Method to Use Existing, the following parameters appear:
Project: Select an existing project from the drop-down list.
Logstore: Select an existing Logstore from the drop-down list.
Log Path: If you need to specify a specific log file in the directory, enter a keyword of the file name or the complete file name. You can enter a complete file name or part of the name that contains wildcards.
Remove a log directory or file from Simple Log Service
You can remove a log directory or file from Simple Log Service. The directory or file is removed only from Simple Log Service but is not deleted. When you remove a log directory or file, you can use one of the following methods:
Remove a log directory or file from the collection rules of Simple Log Service: After the log directory or file is removed, Simple Log Service no longer collects new data.
Remove a log directory or file from the collection rules of Simple Log Service and delete the associated project and Logstore from Simple Log Service: After the log directory or file is removed, Simple Log Service no longer collects new data. When the associated project and Logstore of the log directory are no longer used by other applications, the project and Logstore are deleted from Simple Log Service. If you use this method, the data in the Logstore is deleted and cannot be rolled back.
The default log directory cannot be removed from Simple Log Service.
View and perform distributed search for application logs
After you add the log directory of an application for online viewing and add the directory or file to Simple Log Service, you can view and perform distributed search for the application logs.
If you want to use a RAM user, make sure that you have granted the required permissions to the RAM user by using your Alibaba Cloud account. For more information, see Authorize a RAM user to use Simple Log Service.
In the left-side navigation pane of the application details page, choose Logs > Search Logs.
If a log file is added to Simple Log Service, you can find the log file that you want to view in the Log Directory page, and click Search in the Actions column.
On the Search Logs page, select a log directory or file that you want to view from the Log File drop-down list.
View the logs of the application.
Enter a keyword to perform distributed search in the application logs.
Authorize a RAM user to use Simple Log Service
If you want to use Simple Log Service features as a RAM user, make sure that you have granted the required permissions to the RAM user by using your Alibaba Cloud account. The features include adding log directories or files to Simple Log Service, viewing application logs, or performing distributed search. To grant the required permission to a RAM user, perform the following operations:
Log on to the RAM console with your Alibaba Cloud account.
In the left-side navigation pane, choose Identities > Users. On the Users page, find the RAM user to which you want to grant the required permission. For example, find the RAM user whose name is doctest. In the Actions column of the RAM user, click Add Permissions.
The Add Permissions panel appears. In the field below System Policy, enter log. Find and click AliyunLogReadOnlyAccess to add the permission to the Selected section on the right side. Then, click OK.
NoteThe Principal parameter is autopopulated. You do not need to specify this parameter. If you want to grant the permission to multiple RAM users, enter keywords in the Principal field to search for the RAM users, and add the RAM users to the Principal field.
On the authorization result page, view and confirm the RAM user and the granted permission, and click Complete.