Auto scaling adjusts the number of task nodes in your E-MapReduce (EMR) cluster automatically based on workload demand.
Prerequisites
Before you begin, ensure that you have:
-
Completed the auto scaling configuration. For more information, see Configure auto scaling (only for Hadoop clusters).
When to enable or disable
| Situation | Action |
|---|---|
| Workloads fluctuate unpredictably | Enable auto scaling so the cluster scales task nodes up or down automatically |
| Workloads are stable | Disable auto scaling to avoid unintended scaling activity |
| You need to modify instance configurations | Disable auto scaling before making changes |
Enable or disable auto scaling
To disable auto scaling for an auto scaling group, the group must have zero nodes. If the group still has nodes, configure a scale-in rule or set the maximum number of nodes to 0 first. After all nodes are removed, you can disable auto scaling.
-
Log on to the EMR console. In the left-side navigation pane, click EMR on ECS.
-
In the top navigation bar, select the region where your cluster resides and select a resource group.
-
On the EMR on ECS page, click the cluster name.
-
Click the Auto Scaling tab.
-
On the Configure Scaling tab, enable or disable auto scaling for the target auto scaling group:
-
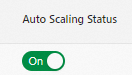
Enable: Turn on the switch in the Auto Scaling Status column.
-
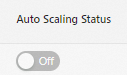
Disable: Turn off the switch in the Auto Scaling Status column.
-
After you enable auto scaling, if you modify the basic information or trigger rules, click Apply Latest Configuration in the Actions column on the Configure Scaling tab for the changes to take effect.