This guide describes how to configure Active Directory (AD) authentication for an Alibaba Cloud Elasticsearch cluster. By following these steps, you can enable users from your AD domain to log on to Kibana and access Elasticsearch data based on assigned roles.
Prerequisites
Alibaba Cloud Elasticsearch cluster: Created and running (this guide uses V7.10).
AD Domain Environment: A Windows Server (e.g., 2012) hosted in the same VPC as the Elasticsearch cluster. See Build an AD domain on a Windows instance.
Example domain:
ccy.comExample user:
ccy1
Kibana Access: Ensure you can access the Kibana console using the default
elasticaccount to perform initial configurations.
Network architecture & limitations
Alibaba Cloud Elasticsearch adjusted its Elasticsearch network architecture in October 2020. Your configuration method depends on your architecture:
Old network architecture: Supports AD authentication only for single-zone instances. You may need SNAT or an Nginx proxy for connectivity.
New network architecture (Post-Oct 2020): You must use PrivateLink to establish a private connection between the Elasticsearch VPC and your AD VPC. See Create private connections with PrivateLink and SLB.
Procedure
Step 1: Establish private connectivity (new architecture only)
Elasticsearch clusters created in October 2020 or later are deployed in the new network architecture. These Elasticsearch clusters reside in the VPC of the Elasticsearch service account. If your Elasticsearch cluster is deployed in the new network architecture, you need to use the PrivateLink service to establish a private connection between the VPC and your VPC. Then, obtain the domain name of the related endpoint for future use. To obtain the domain name of an endpoint, perform the following steps:
- Create a Classic Load Balancer (CLB) instance that supports the PrivateLink service and resides in the same VPC as the created Elasticsearch cluster.
For more information, see Step 1: Create and configure an CLB instance.
Configure the CLB instance.
Specify the server that hosts the Lightweight Directory Access Protocol (LDAP) service as the backend server and set the listening port to 389.
For more information, see Create private connections with PrivateLink and SLB.
- Create an endpoint service.
For more information, see Step 2: Create an endpoint service.
- Configure a private connection to the Elasticsearch cluster.
For more information, see Step 3: Configure a private connection for the Alibaba Cloud Elasticsearch cluster.
- Obtain the domain name of the endpoint that is used to access the endpoint service.
For more information, see Create private connections with PrivateLink and SLB.
Note Record the obtained domain name, which will be used in subsequent configurations.
Step 2: Configure AD authentication
Modify the Elasticsearch YML configuration to define the AD "realm." See Active Directory user authentication in Elasticsearch documentation for details.
Log on to the Alibaba Cloud Elasticsearch console.
Navigate to Cluster Configuration > Modify Configuration.
Add the following snippet (adjust values to match your environment):
xpack.security.authc.realms.active_directory.my_ad.order: 2
xpack.security.authc.realms.active_directory.my_ad.domain_name: ccy.com
xpack.security.authc.realms.active_directory.my_ad.url: ldap://ep-bp1i321219*********-cn-hangzhou-h.epsrv-bp15571d5ps*********.cn-hangzhou.privatelink.aliyuncs.com:389
xpack.security.authc.realms.active_directory.my_ad.bind_dn: cc**@ccy.com
xpack.security.authc.realms.active_directory.my_ad.bind_password: your_password
Parameter details:
order: The priority of this realm. Use
2(the native realm is usually1).url: Use the domain name obtained in Step 1.
bind_dn: A service account or admin account used to search the AD directory.
bind_password: The password for the
bind_dnaccount.
Step 3: Map AD domain users to Elasticsearch roles
Log on to the Kibana console of your Elasticsearch cluster.
Go to Dev Tools > Console.
Run the following command to map the AD user ccy1 to the
superuserrole:PUT /_security/role_mapping/basic_users { "roles": [ "superuser" ], "enabled": true, "rules": { "any": [ { "field": { "groups": "cn=ali,dc=ccy,dc=com" } }, { "field": { "dn": "cn=ccy1,cn=ali,dc=ccy,dc=com" } } ] } }
Step 4: Verify the results
Log on to the Kibana console of your Elasticsearch cluster as the authorized ccy1 user.
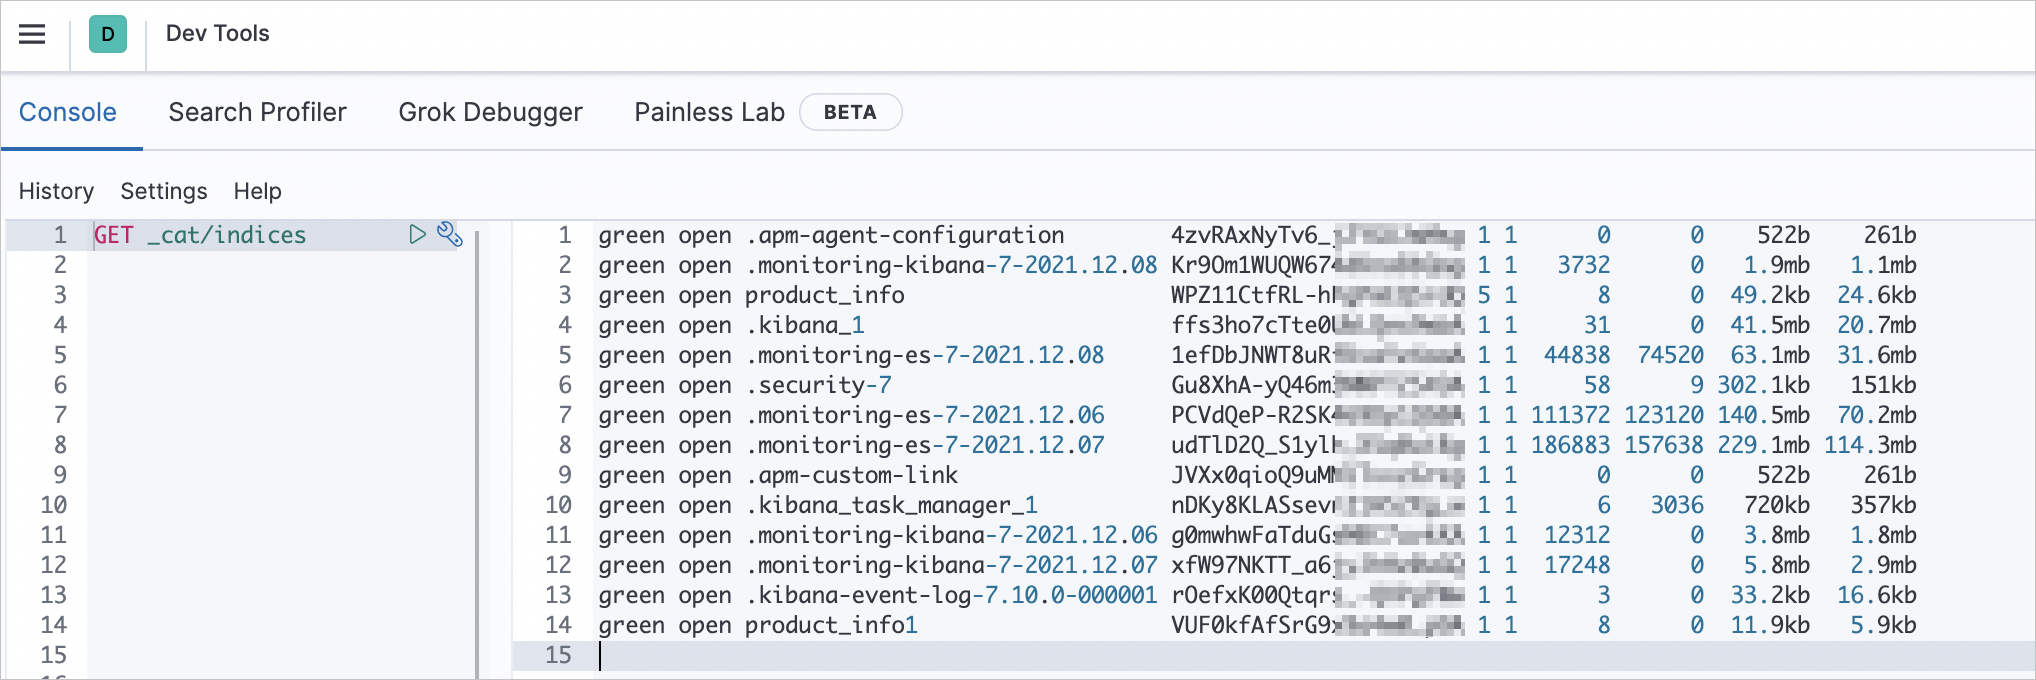
On the Kibana homepage, go to Dev Tools> Console and run:
GET _cat/indicesIf you receive a list of indices, the AD authentication and role mapping are working correctly.
FAQ & troubleshooting
Connection timeout: Ensure the CLB listening port (389) is open and that the security group of the AD server allows traffic from the CLB.
Invalid credentials: Double-check the
bind_dnandbind_passwordin the YML file. Thebind_dnoften requires the full user principal name (e.g.,user@domain.com).Cluster not restarting: If YML changes fail to apply via the console, submit a support ticket to have technical support manually verify the networking path between the ES VPC and your PrivateLink endpoint.