As the number of cloud resources increases, managing resources becomes more difficult. You may be unable to batch manage the costs of cloud resources or batch monitor the cloud resources. To manage your resources in a fine-grained manner, you can use tags to categorize the resources. Tags are an important grouping tool that help you in the horizontal management of personnel, finances, and materials.
For more information, see What is Tag?
Scenarios
As the number of Elastic Compute Service (ECS) instances that you create increases, you can use tags to manage, group, and categorize the instances to facilitate instance search and batch operations. Common scenarios of tags include:
Management of application publishing procedures
Resource tracking and tag-based group search and management
Tag-based and group-based automated O&M by using Alibaba Cloud services, such as CloudOps Orchestration Service (OOS), Resource Orchestration Service (ROS), Auto Scaling, and Cloud Assistant
Tag-based cost management and cost allocation
Resource-based or role-based access control
This topic describes the following scenarios. For more information, see What is Tag?
Scenario 1: Optimize the management of ECS resources or automate O&M on ECS resources
You can add different tags to different environments (such as production environments and test environments), operating systems (such as Windows and Linux), or client platforms (such as iOS and Android). For example, create a tag named Test:Server-Windows and attach the tag to all ECS instances in the test environment. You can easily find these instances based on the tag.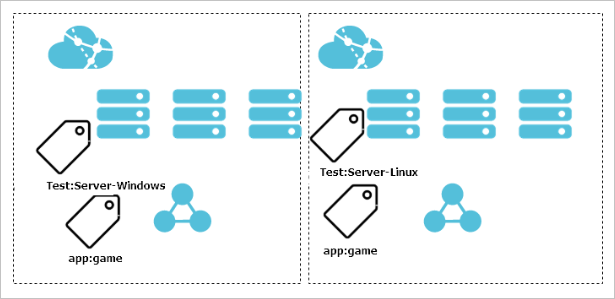 Examples of batch operations:
Replace images to deploy applications.
Upgrade patches.
Create security group rules to control network access.
For more information, see Query ECS instances with a specific tag and add the ECS instances to security groups with the same tag.
Use CloudOps Orchestration Service to batch start, stop, or restart ECS instances.
For information about how to batch start ECS instances by using OOS based on tags, see Use OOS to start multiple ECS instances with specific tags at a time.
Use Cloud Assistant to run O&M scripts on multiple ECS instances.
For information about how to run a Cloud Assistant command on ECS instances that have specific tags added, see Manage the usage of Cloud Assistant commands by using tags.
Scenario 2: Manage teams or projects
When you manage teams or projects, you can add tags, such as CostCenter:aliyun to categorize groups, projects, or departments. This way, you can implement itemized billing and cross-authorization based on tags in the Expenses and Costs console.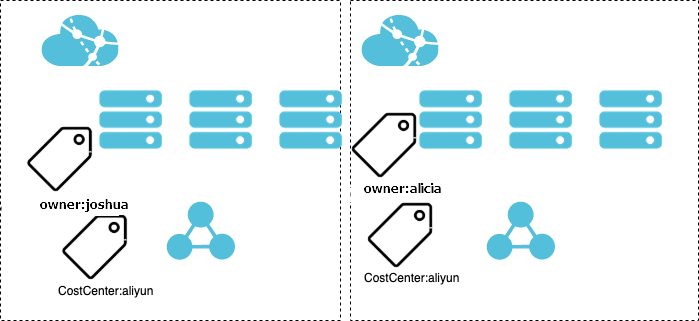
For more information, see the following topics:
Instructions
Each tag consists of a key and a value. Each tag key must be unique in a resource.
Before you use tags, make sure that you understand the limits and quotas of tags. For more information, see the Limits section of the "What is Tag" topic.
Create tags and add tags to resources
Before you create a tag, see the Principles section of the "Best practices for tag design" topic. To create tags and add tags to resources, perform the following steps.
You can add up to 20 tags to a cluster. If the number of tags that are added to a resource reaches the upper limit, you must remove some of the tags before you add new tags.
Go to ECS console - Tag.
In the top navigation bar, select the region and resource group of the resource that you want to manage.

On the Custom Tags tab, click Create Custom Tag.
In the Create Custom Tag dialog box, perform the following steps.
When you create custom tags, you must add the tags to resources. If you want to create tags but do not want to add the tags to resources, create the tags as predefined tags. For more information, see Create a preset tag.
Create or select tags.
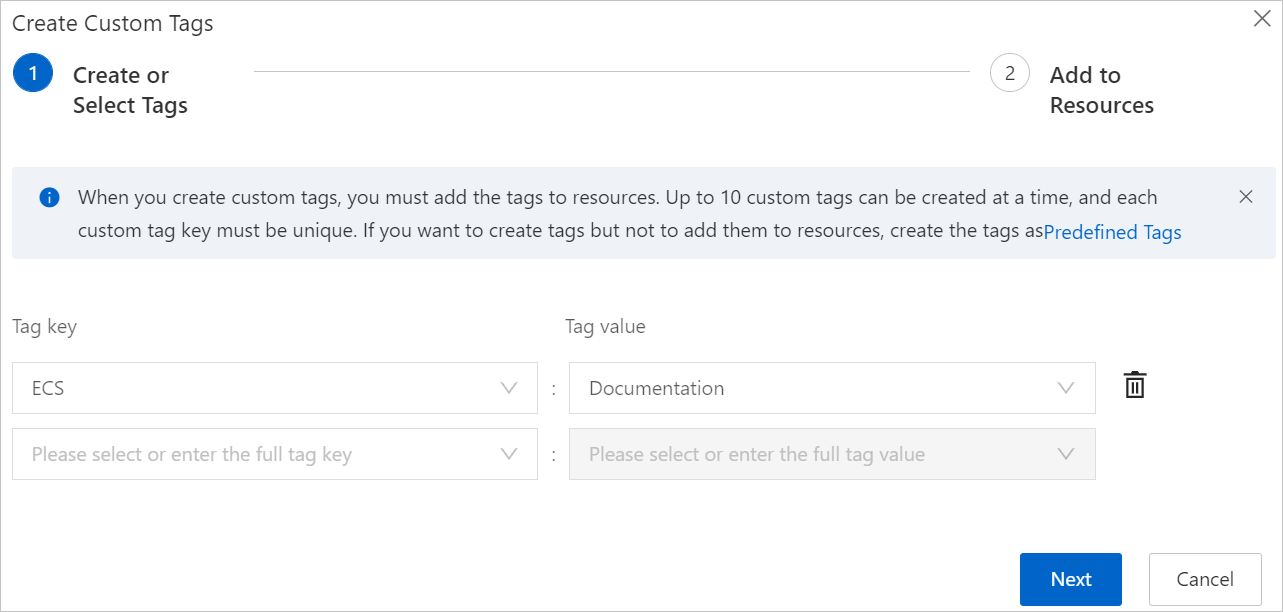
Configure the parameters described in the following table.
Parameter
Required
Description
Tag key
Yes
Enter a new tag key or select an existing tag key.
The tag key can be up to 128 characters in length and cannot contain http:// or https://. The tag key cannot start with acs: or aliyun.
If you want to select an existing tag key, search for the tag key. Fuzzy search is supported.
Tag value
No
Enter a new tag value.
The tag value can be up to 128 characters in length and cannot contain http:// or https://.
NoteA tag key can correspond to multiple tag values. You can select an existing tag key and enter a new tag value to create a tag.
Click Next.
Add the tags to resources.
Configure the parameters described in the following table.
Parameter
Description
Example
Method to Specify Resources
Valid values:
Select from Resource List: You can select one or more resources to which you want to add tags from the resource list.
Enter Resource IDs: You can enter resource IDs in the Resource ID field.
NoteYou can enter multiple resource IDs. Separate the IDs with commas (,) or enter the IDs on different lines.
You can add up to 20 tags to resources at a time.
Enter Resource IDs
Service
Select a resource type. Example: Instance, Disk, or Snapshot.
Elastic Compute Service:Instance
Resource ID
Enter the IDs of ECS instances in the Resource ID field.
i-bp12d03u8usvakpo****
Click OK.
(Optional) View the associated resources of the tags.
After the tags are created and added to resources, click the
 icon above the tag list on the Custom Tags tab, find the tags that you created, and then click View Resources in the Actions column that corresponds to each tag. On the page that appears, you can view the resources to which a tag is added.
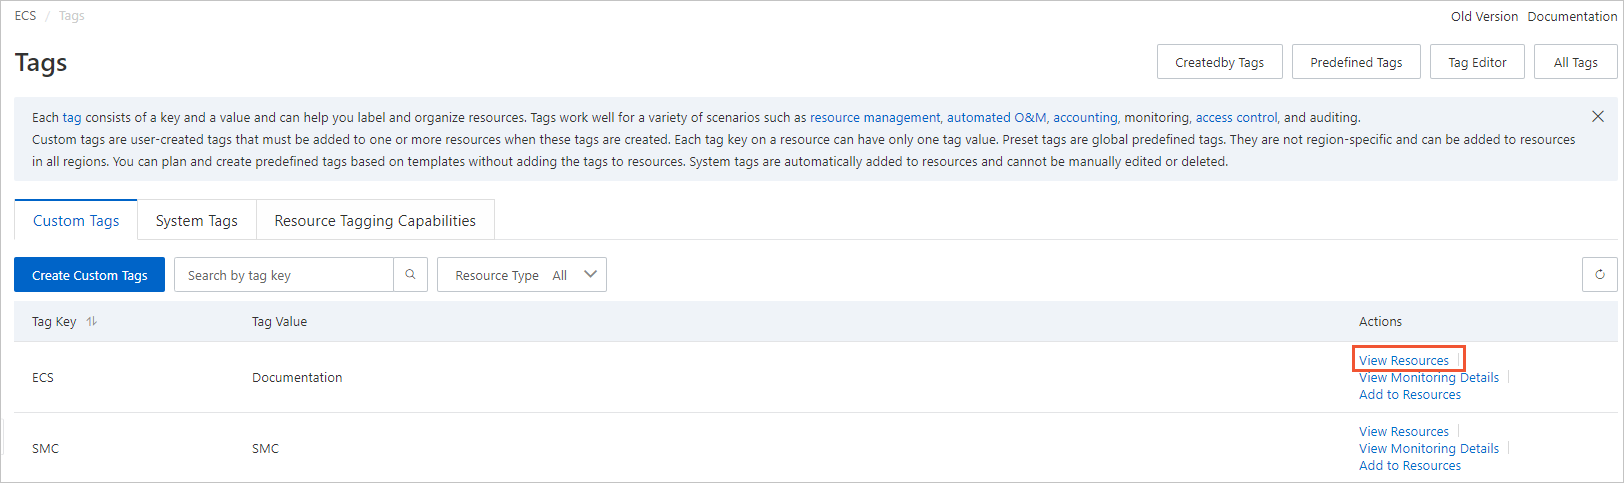
Remove or delete tags
If you no longer require a tag, you can remove the tag from the resources. The following section provides an example on how to remove the ECS:Documentation tag from the Elastic Compute Service:Instance resource type. The tag key is ECS and the tag value is Documentation.
You can remove up to 20 tags at a time.
If you remove a tag from all resources, the tag is automatically deleted within 24 hours.
On the Custom Tags tab, select Instance from the Resource Type drop-down list.
In the tag list, find the ECS:Documentation tag that you want to remove. Go to the Resources tab by using one of the following methods.
Method 1: Click the ECS tag key, and then click View Resources in the Actions column that corresponds to the Documentation tag value.
Method 2: In the Actions column that corresponds to the ECS tag key, click View Resources.
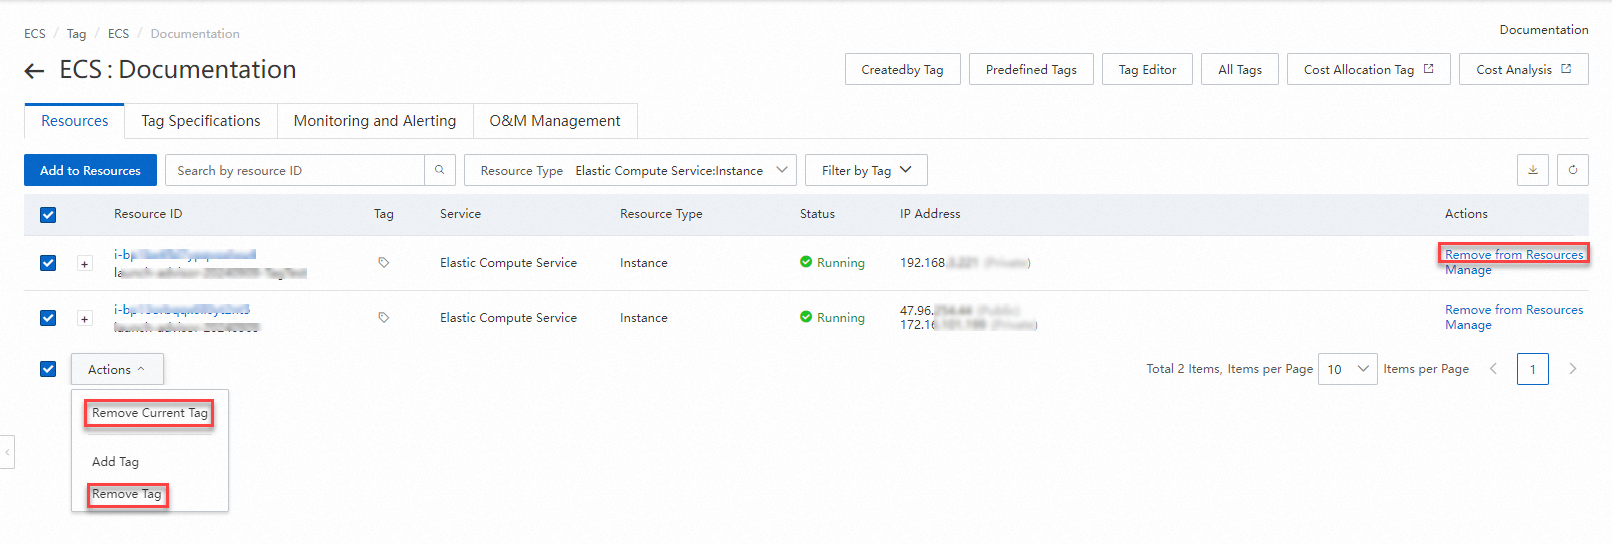
On the Resources tab, remove the tag from one or more resources.
To remove the tag from a single resource, find the resource and click Remove from Resources in the Actions column.
To remove the tag from multiple resources at a time, select the resources and click Remove Current Tag or Remove Tag from the Actions drop-down list in the lower part of the tab.
In the Remove Current Tag message, click Remove.
After the tag is removed from one or more resources, click the
 icon on the Resources tab. The resources from which the tag is removed are no longer displayed on the tab.
Best practices for tags
You can use tags to manage resources in a fine-grained manner. In most cases, tags are used for the following purposes and to perform the following operations.
Search for or export resources
Use the tag editor to edit the tags of resources and export resource information. For more information, see Tag editor.
Search for resources based on tags by using exact search or fuzzy search. For more information, see Use tags to query resources.
Use tags to control access to resources
Use tags to grant Resource Access Management (RAM) users the permissions to access ECS instances by group. This way, RAM users in different groups can view and manage only specific resources based on tags. For more information, see Use tags to grant access to ECS instances by group.
Specify the tags of ECS instances in custom RAM policies and attach the policies to RAM users. This way, RAM users can view and manage only specific ECS instances based on tags. For more information, see Use tags to enable RAM users to manage only authorized ECS instances.
Automate O&M
Use OOS to batch start multiple ECS instances that have specific tags added. For more information, see Use OOS to start multiple ECS instances with specific tags at a time.
Create an execution by using a public template provided by OOS to enable the disks, ENIs, elastic IP addresses (EIPs), snapshots, and custom images of multiple ECS instances to inherit tags from the ECS instances at a time. For more information, see Use OOS to inherit tags from ECS instances for the resources of the ECS instances at a time.
Create an execution by using a public template provided by OOS to obtain ECS instances to which specific tags are added and add the obtained ECS instances to security groups to which the same tags are added. For more information, see Query ECS instances with a specific tag and add the ECS instances to security groups with the same tag.
Add the same tag to multiple ECS instances, and configure an application group rule in CloudMonitor based on the tag to automatically add instances that have the same tag to a specific application group for automatic monitoring. For more information, see Use tags to enable ECS instances to be automatically added to CloudMonitor application groups.
Batch run multiple Cloud Assistant commands on ECS instances that have specific tags added or upload files by using Cloud Assistant. For more information, see Use tags to control the running of Cloud Assistant commands.
References
You can use resource groups to group your resources based on usage, permissions, and regions. Then, you can manage the resources in a hierarchical manner for various users and projects. For more information, see What is Resource Group? or Resource groups.
For information about how to create and add tags to ECS resources, see TagResources.
For information about how to query the tags that are added to ECS resources, see ListTagResources.
For information about how to remove tags from ECS resources, see UntagResources.
For information about how to add an ECS resource or service to a resource group, see JoinResourceGroup.