Identify and control access from mainstream AI crawlers to your site by configuring block or monitor policies to protect your content.
Prerequisites
-
You have added a domain name to ESA. For more information, see Add a domain name to ESA.
-
Your site must have a paid subscription (Pro, Premium, or Enterprise).
Step 1: Enable AI crawler management
-
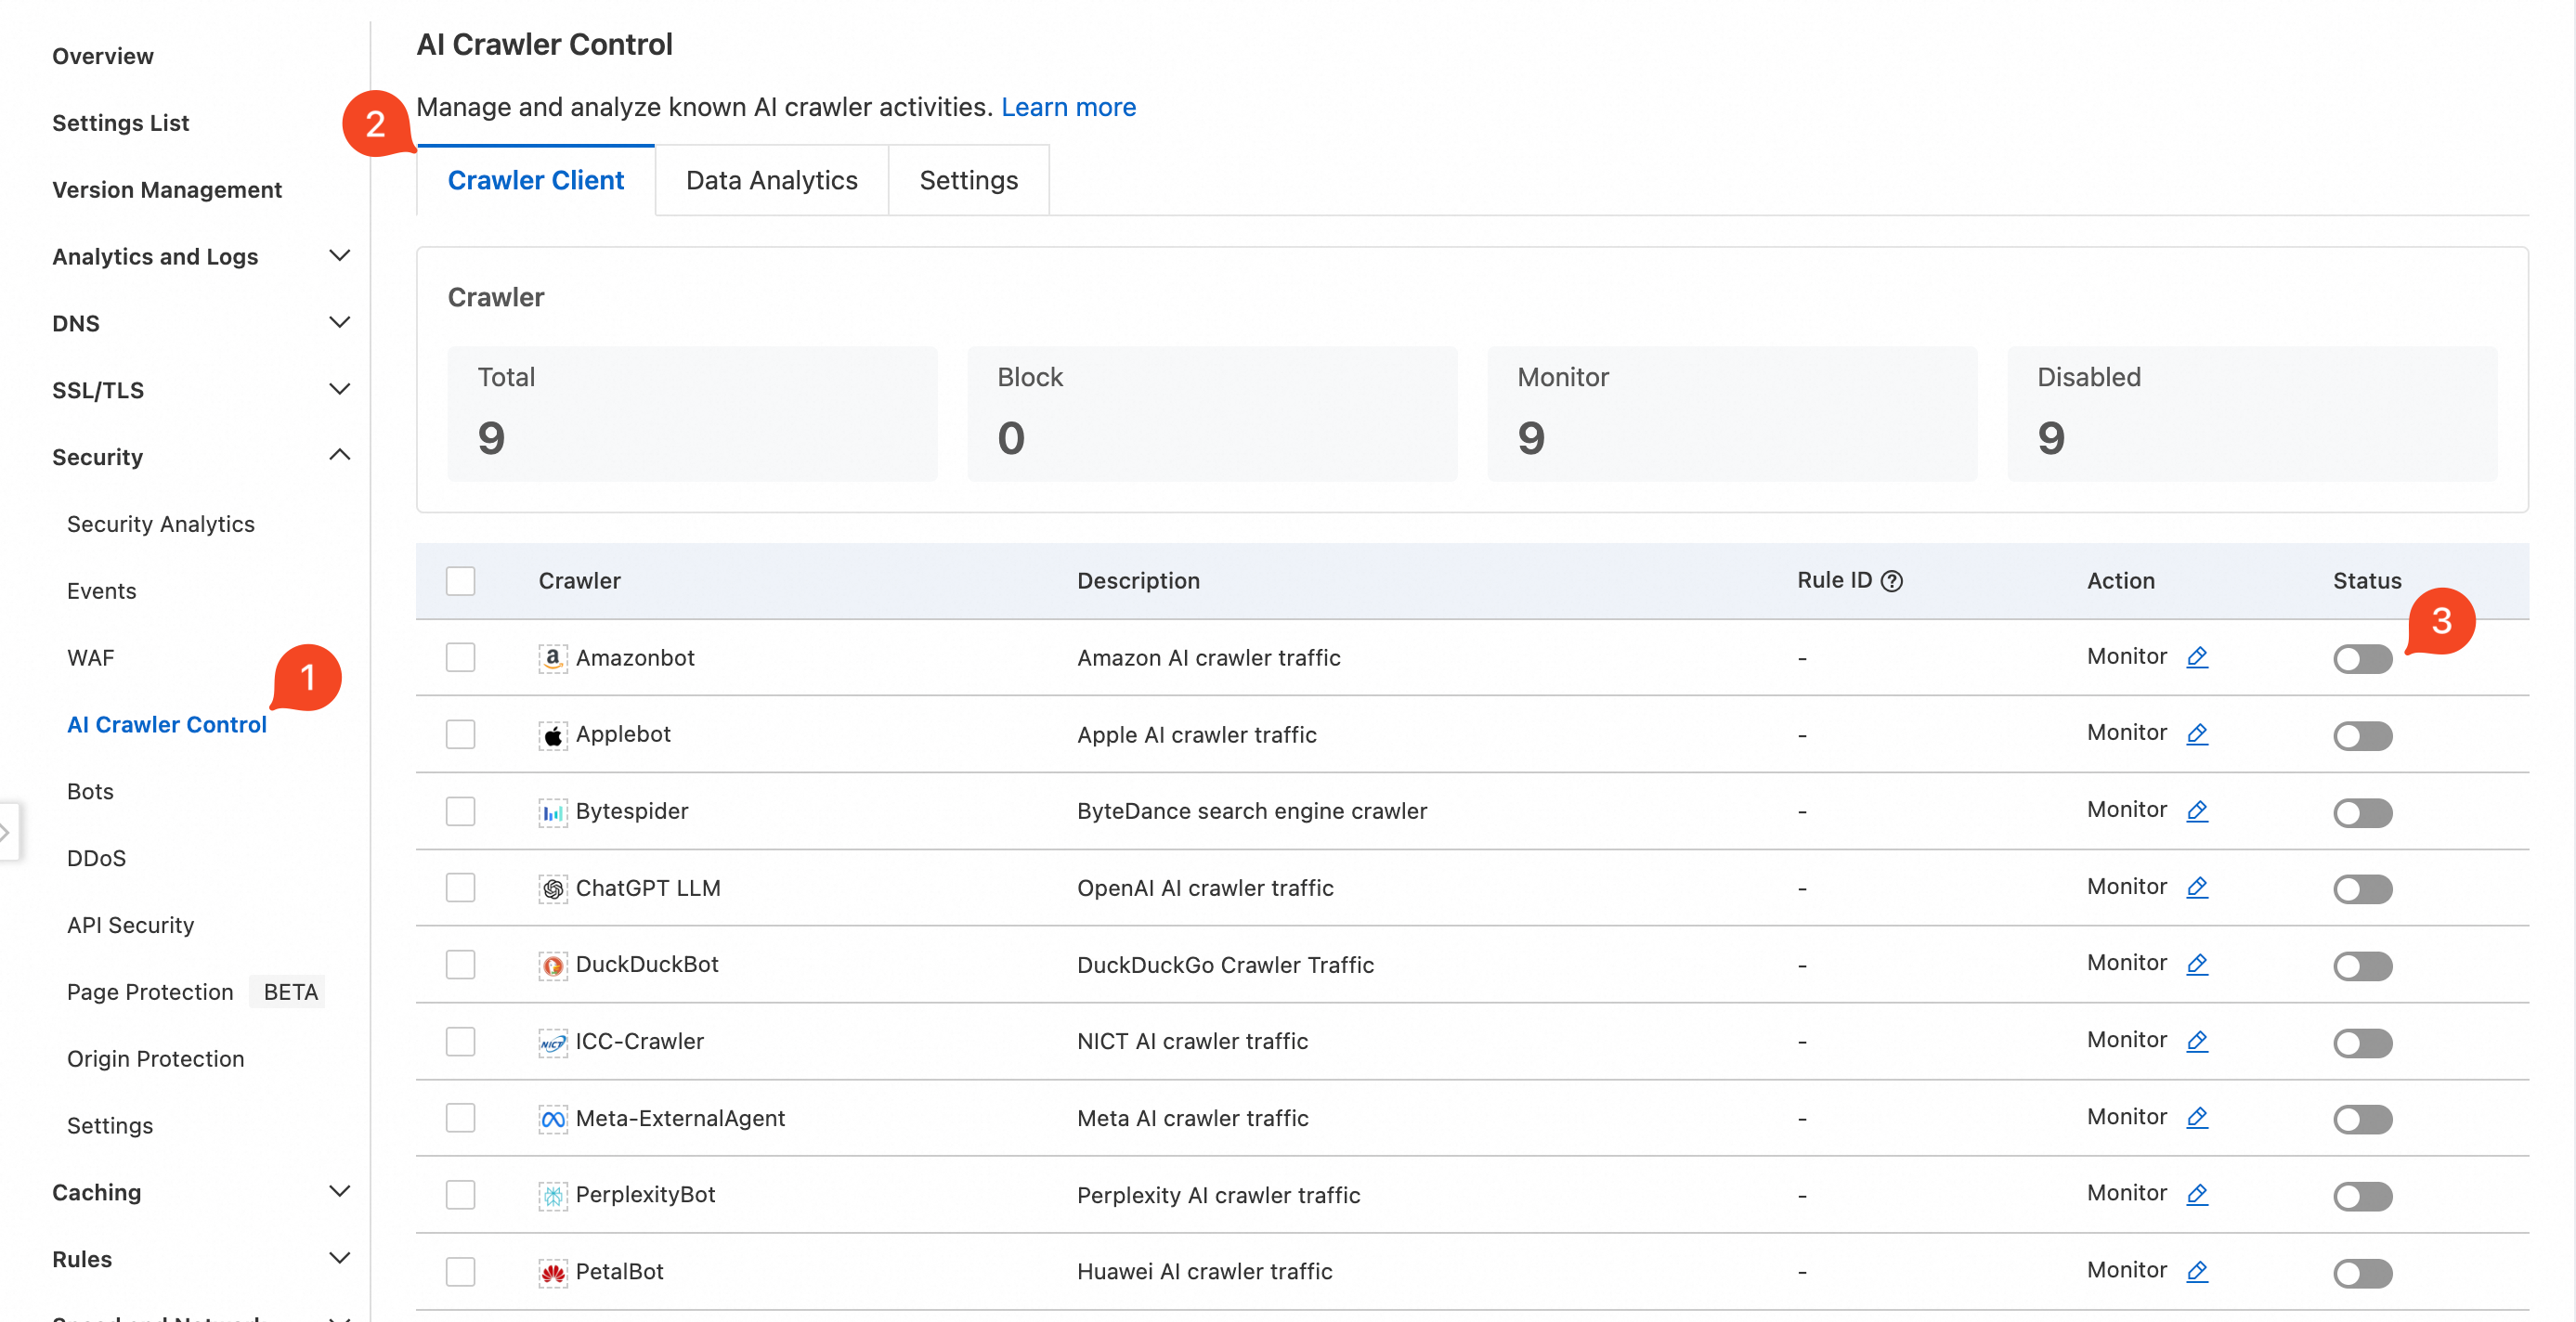
In the ESA console, select Websites, and in the Website column, click the target site.
-
Turn on the Status switch for the desired crawler. After you confirm the action, ESA automatically creates a dedicated protection rule and enforces the specified Action.
NoteAfter you enable this feature, the system automatically identifies and logs AI crawler access data without affecting your service traffic.
Step 2: View the crawler access overview
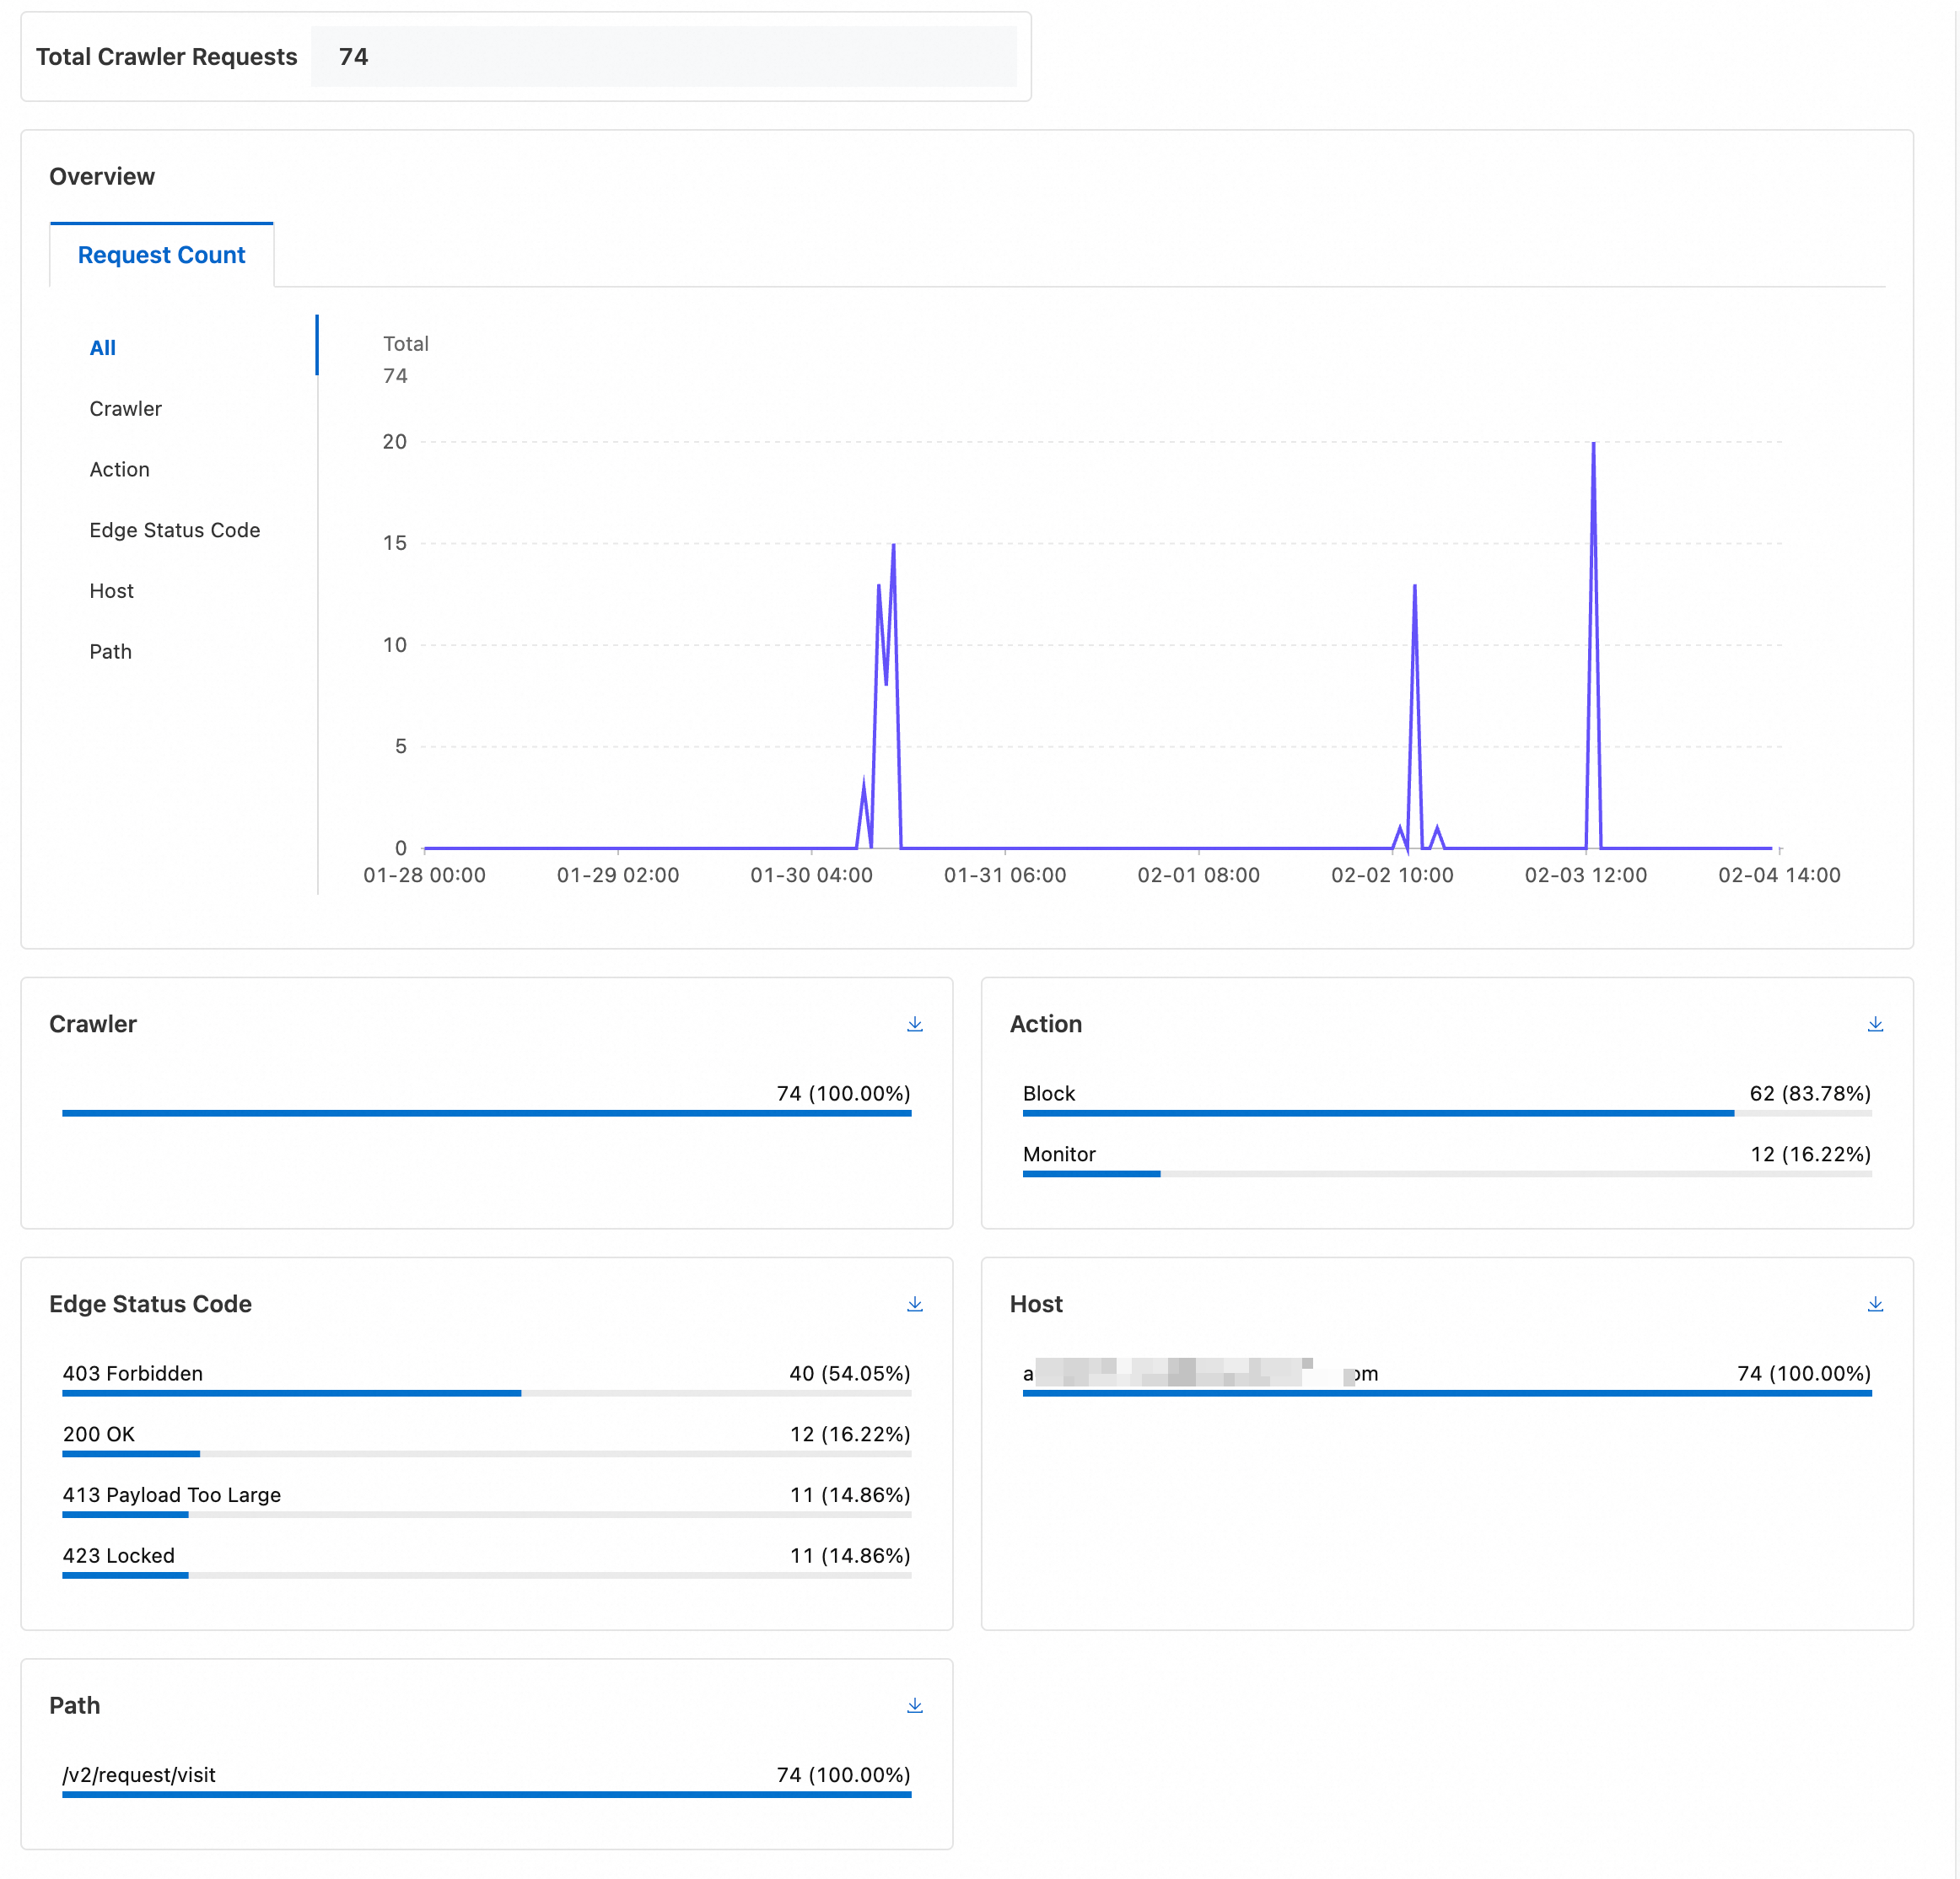
After you enable crawler management, view AI crawler access data and trends on the Data Analytics tab.
-
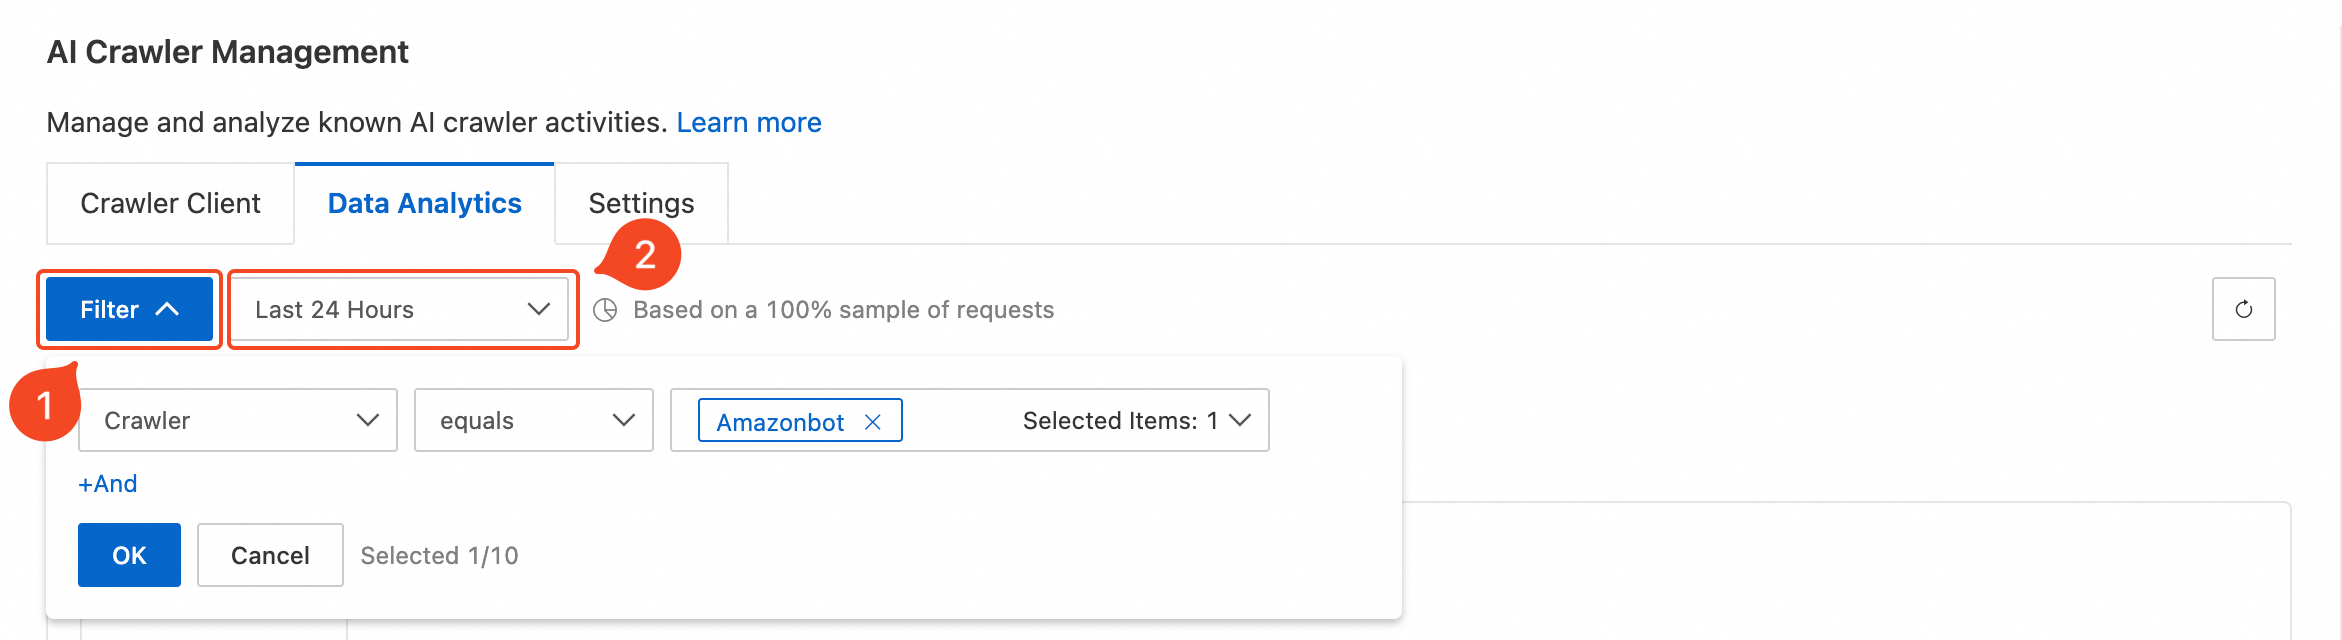
On the AI Crawler Control page, select the Data Analytics tab.
-
Configure the Filter based on your business needs and select an appropriate time range for analysis.
NoteData collection may be delayed by 5 to 10 minutes. If you just enabled the feature, wait for data to populate before viewing the analytics.
Step 3: Configure access control rules
-
On the AI Crawler Control page, select the Crawler Client tab.
-
In the Action column, click the
 icon, select an action, and then click OK:
-
Block: Blocks all requests from the crawler and returns the configured response code and content.
-
Monitor: Logs access data without blocking requests.
NoteThis method is a quick way to control a single crawler. You can also select multiple crawlers and use Batch Edit Action.
-
-
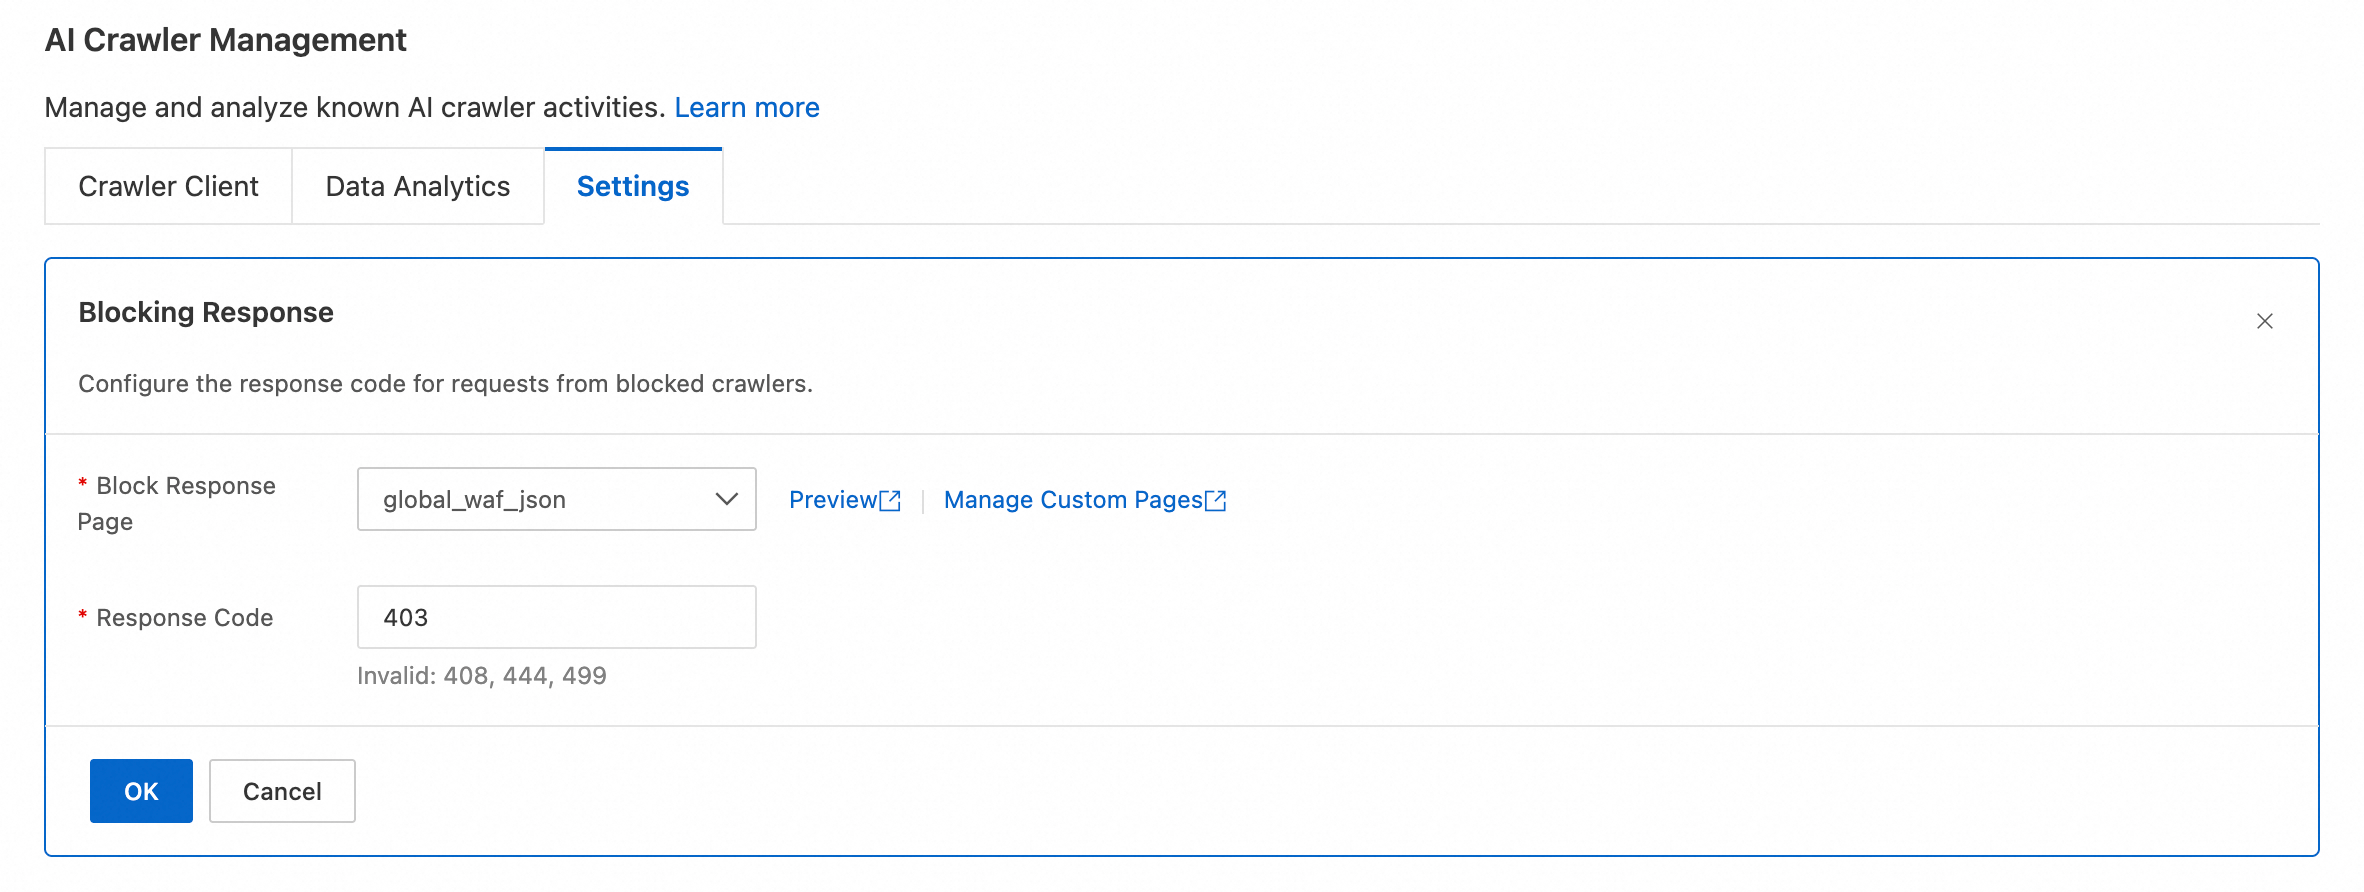
Go to the Settings tab and click Blocking Response in the Configure section to customize the response for blocked crawlers:
-
Block Response Page: Select the block page to display to blocked crawlers. You can customize the page by following the instructions in Configure a custom page.
-
Response Code: Enter the response code returned to blocked crawlers. The default value is 403. The response codes 408, 444, and 499 are not supported.
-