When you need to deploy a PHP web application without building container images manually, Enterprise Distributed Application Service (EDAS) can build directly from your Git repository and deploy to a Container Service for Kubernetes (ACK) cluster. After deployment, EDAS handles scaling, monitoring and alerting, load balancing, and throttling and degradation for the application.
The procedure for ACK clusters and ACK Serverless clusters is similar. This topic uses an ACK cluster as the example.
Prerequisites
Before you begin, ensure that you have:
ACK default roles assigned to your account
Step 1: Create an ACK cluster
Log on to the ACK console and create a managed Kubernetes cluster. For details, see Create a managed Kubernetes cluster.
For ACK Serverless clusters: Set VPC to Create VPC and Service Discovery to PrivateZone so that the cluster can use Alibaba Cloud Service Mesh (ASM) after import to EDAS. If you set VPC to Select Existing VPC, verify that the cluster has VPC and vSwitch resources after creation. For details, see Create an ACK Serverless cluster.
Step 2: Import the ACK cluster into EDAS
EDAS automatically installs the following components during import:
| Component | Purpose |
|---|---|
| ack-ahas-sentinel-pilot | Throttling and degradation (Application High Availability Service) |
| ack-arms-pilot | Application Real-Time Monitoring Service (ARMS) agent |
| ack-arms-prometheus | Prometheus monitoring |
To import a cluster:
Log on to the EDAS console. In the left-side navigation pane, choose Resource Management > Container Service Kubernetes Clusters.
In the top navigation bar, select the region where your ACK cluster resides, then click Synchronize Container Service Kubernetes Cluster.
Find the target cluster and click Import in the Actions column.
In the Precheck for Import dialog box, click Continue.
In the Import Kubernetes Cluster dialog box, select a microservice namespace from the Microservice Namespace drop-down list, toggle Service Mesh on or off based on your needs, and click Import.
The import is complete when Cluster Status shows Running and Import Status shows Imported.
Step 3: Deploy the PHP application
Configure basic information
Log on to the EDAS console.
In the left-side navigation pane, choose Application Management > Applications. Select a region and a microservices namespace, then click Create Application.
In the Basic Information step, configure the following settings and click Next.
Setting Value Cluster Type Select Kubernetes Clusters. Application Runtime Environment Select PHP. The EDAS-built image provides PHP 7.3 with Apache 2.4 and commonly used PHP extensions pre-installed.
Configure the deployment
In the Configurations step, configure the following settings and click Next.
Environment and namespace
Parameter Description Microservice Namespace The namespace for the ACK cluster. Defaults to Default if none is selected. To create one, click Create Microservice Namespace. For details, see the "Create a namespace" section of Manage microservice namespaces. Cluster Select the imported ACK cluster. If the cluster has not been imported, select the checkbox to import it during application creation. This consumes a certain amount of time. After selecting the checkbox, verify that Alibaba Cloud Service Mesh is activated. NoteThe cluster does not need to belong to the same microservice namespace as the application.
K8s Namespace The Kubernetes namespace for the application. Options: default, kube-system, kube-public. Select default for most use cases. To create a custom namespace, click Create Kubernetes Namespace and enter a name (1-63 characters: lowercase letters, digits, and hyphens; must start and end with a letter or digit). Application settings
Parameter Description Application Name 1-36 characters: letters, digits, and hyphens. Must start with a letter. Application Description 1-128 characters. Source of Deployment Package Fixed to Source Code. Version Specify a custom version number or click Use Timestamp as Version Number. Source code settings
Parameter Description Code Repository URL The Git repository URL (HTTPS or Git protocol). Authentication Method Required for private repositories. Choose Username and Password (create or select a secret) or SSH Key (use the public key provided by EDAS). For SSH setup, see Configure an SSH public key. Branch or Tag The branch or tag to deploy from. Resource and advanced source settings
Parameter Description Total Pods Number of pods to deploy. Single-pod resource quota CPU and memory limits per pod. The default value 0means no limit.Advanced Configuration (Optional) Toggle to configure: Clone Submodule (include Git submodules), Working Directory (set the Git working directory), and Output Path (specify where build output is stored). 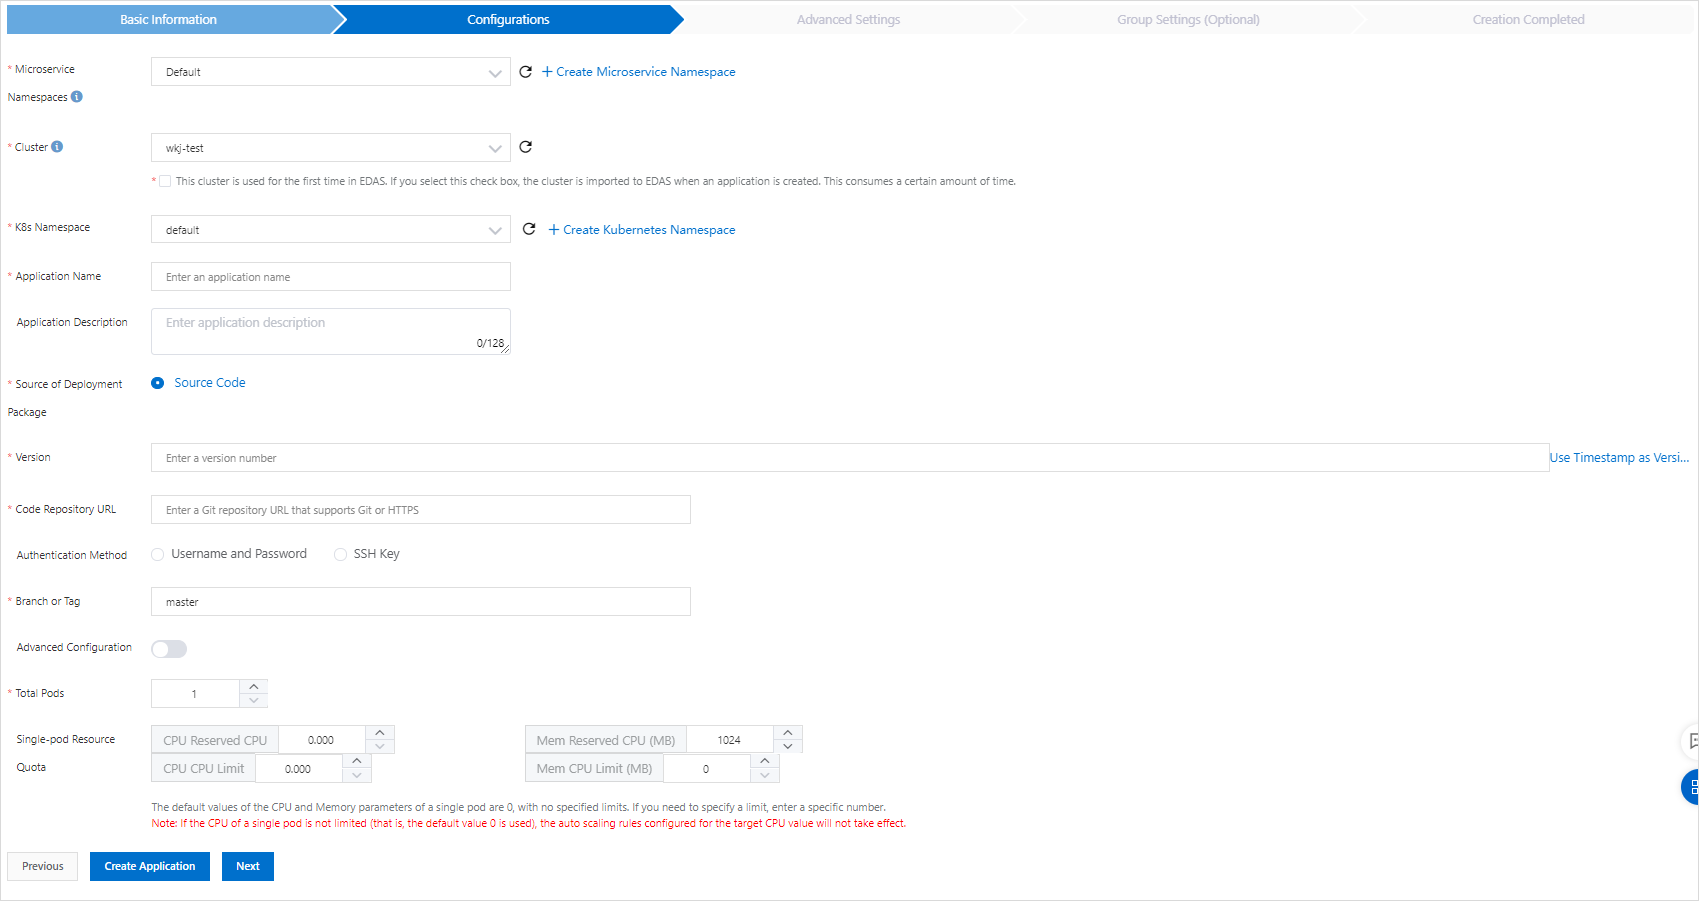
(Optional) Configure advanced settings
Configure any of the following advanced settings, then click Create Application. Environment variables Environment variables are passed to the container at creation time. For MySQL-based images: For other images, configure environment variables as needed. Persistent storage Native Kubernetes volumes are ephemeral and share the pod lifecycle. To persist data across instance updates and migrations, mount a File Storage NAS volume.
NoteActivate File Storage NAS for your Alibaba Cloud account before configuring persistent storage. Make sure your account has a sufficient balance or uses pay-as-you-go billing.
NotePVCs configured through YAML files do not appear in the Select PVC drop-down list but remain active during deployment. Configure PVC mounts through the EDAS console for visibility.
Variable Required Description MYSQL_ROOT_PASSWORDYes Root password for MySQL MYSQL_USER/MYSQL_PASSWORDNo Additional user account credentials MYSQL_DATABASENo Database to create on container startup Parameter Description PVC Mount Mount persistent volume claims (PVCs) backed by Elastic Block Storage (EBS), NAS, Cloud Paralleled File System (CPFS), Object Storage Service (OSS), or local disks. Create a persistent volume (PV) first. For details, see NAS volume overview, OSS volume overview, and Local storage volumes overview. Select PVC Choose a PVC from the drop-down list, or create a PVC. Mount Configuration Set the Mount Directory and Mount Mode. Lifecycle hooks and health probes
Parameter Description PostStart Runs immediately after a container starts. If the handler fails, the container is killed and restarted according to its restart policy. See Container Lifecycle Hooks. PreStop Runs before a container is terminated. The handler must complete before the delete request is sent. The Docker daemon then sends a SIGTERM signal to stop the container. See Container Lifecycle Hooks. Liveness Checks whether the application is healthy. Unhealthy containers are killed and re-created. See Pod Lifecycle. Readiness Checks whether the application has started and is running as expected. If the application is not running as expected, the container status is updated. See Pod Lifecycle.
Verify the deployment
In the Creation Completed step, click Create Application. The deployment takes a few minutes. Track progress on the Change List page.
After the deployment finishes, go to Application Overview and check the pod status. A Running pod means the application is live. Click the pod status to view details such as Deployment, Pod, and Startup Command settings.
FAQ
How do I view deployment error logs?
If a deployment fails, check the error log on the Change List page. For details, see View application changes.
What to do next
Expose your application by binding a Classic Load Balancer (CLB) instance:
Public access: Add an internet-facing CLB instance. See Bind CLB instances.
Internal access: Add an internal-facing CLB instance so that nodes in the same VPC can reach your application. See Reuse a CLB instance.