The edas-jenkins-plugin integrates Enterprise Distributed Application Service (EDAS) with Jenkins, enabling continuous deployment to Elastic Compute Service (ECS) clusters and Container Service for Kubernetes (ACK) clusters directly from your CI/CD pipeline.
Three deployment approaches are available:
Freestyle project -- configure deployment through the Jenkins GUI without scripting.
Pipeline script -- generate a deployment step with the built-in Snippet Generator and embed it in a Jenkins Pipeline.
Job DSL -- define reusable deployment templates programmatically.
Prerequisites
Before you begin, make sure that you have:
The Job DSL plug-in installed in Jenkins (required only for Job DSL deployments)
An Alibaba Cloud account with EDAS activated
An AccessKey pair for your Alibaba Cloud account
Install the edas-jenkins-plugin
Download the edas-jenkins-plugin.hpi file.
In Jenkins, go to Manage Jenkins > Manage Plugins.
On the Plugin Manager page, select the Advanced tab.
In the Upload Plugin section, click Select file, choose the downloaded
.hpifile, and click Upload.Wait for the installation to complete on the Installing Plugins/Upgrades page.
Configure EDAS credentials
After installing the plug-in, add your Alibaba Cloud credentials so Jenkins can authenticate with EDAS.
In Jenkins, go to Manage Jenkins > Configure System.
Scroll to the Deploy to EDAS section and configure the account information. Click Add, then click Advanced to enter region information.
Parameter Description EDAS credentials name A descriptive name for this credential set, such as prod-edasorstaging-edas.EDAS Access Key ID The AccessKey ID of your Alibaba Cloud account. For more information, see Create an AccessKey pair. EDAS Access Key Secret The AccessKey secret of your Alibaba Cloud account. EDAS Region The region ID where your application is deployed, such as cn-hangzhou.Endpoint (Apsara Stack only) The EDAS endpoint. Contact EDAS technical support for this value. Leave blank for Alibaba Cloud. Click Add to save the credential configuration. To add more region or account configurations, click Add again.
Click Ping EDAS to verify connectivity. A
successmessage confirms that the credentials are valid.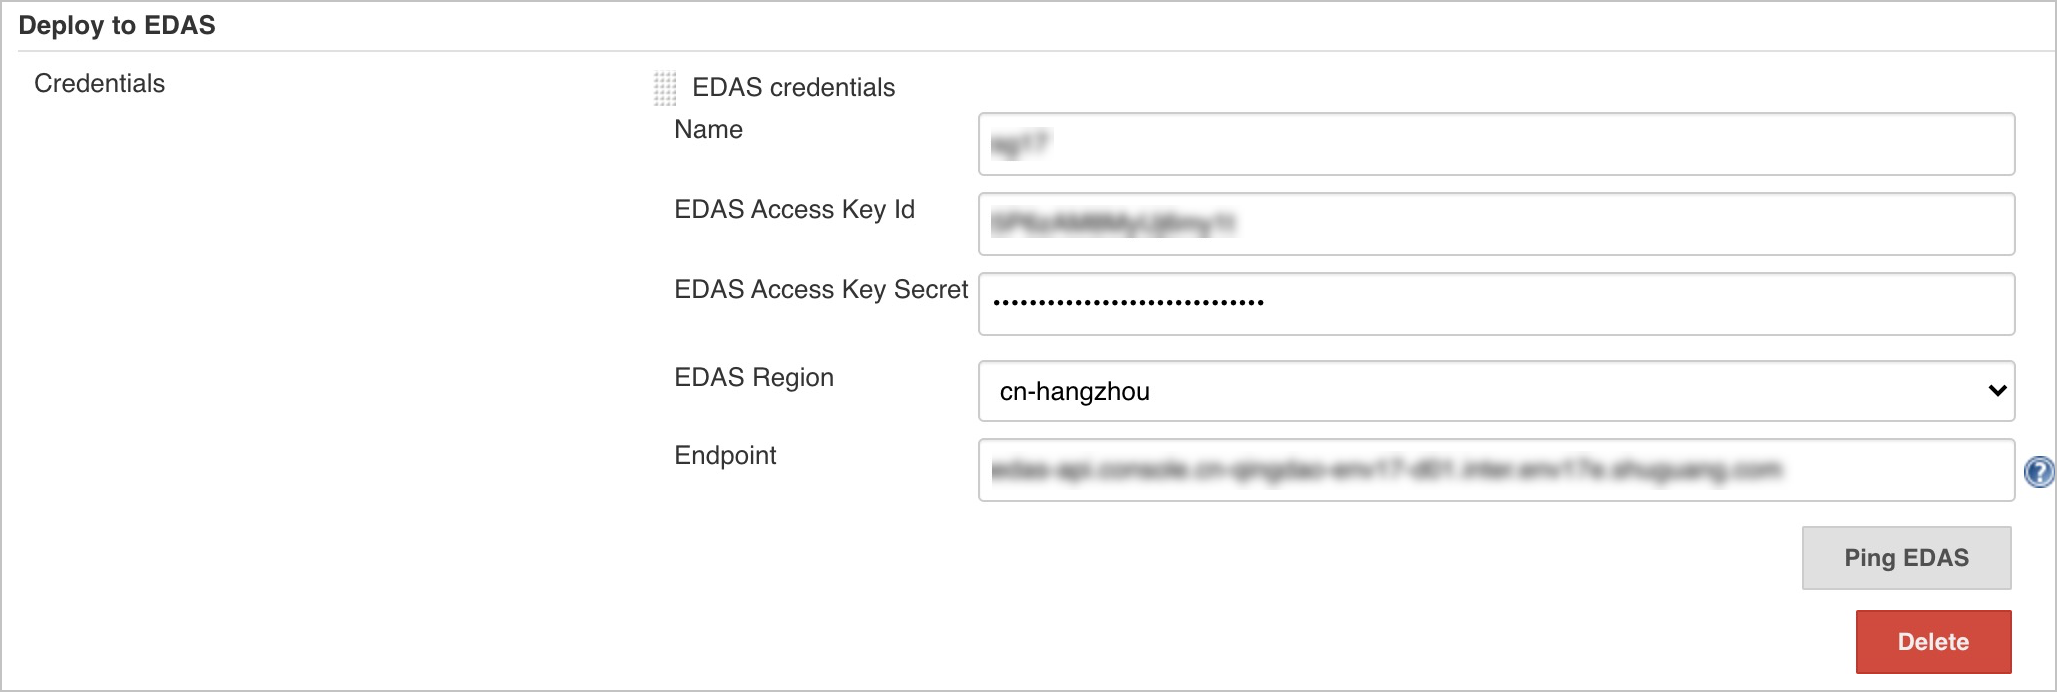
Deploy with a freestyle project
Use a freestyle project for GUI-based deployments without scripting.
On the Jenkins home page, click New Item.
Enter a project name, select Freestyle project, and click OK.
In the Post-build Actions section, click Add post-build actions and select Deploy to EDAS.
In the Deploy to EDAS section, click Add and select a deployment mode:
Deployment mode Use case EDAS ECS Application Update an existing application in an ECS cluster. See ECS deployment parameters. Create EDAS ECS Application Create and deploy a new application in an ECS cluster. See ECS creation parameters. EDAS K8s Application Update an existing application in a Container Service for Kubernetes cluster. See K8s deployment parameters. Create EDAS K8s Application Create and deploy a new application in a Container Service for Kubernetes cluster. See K8s creation parameters. 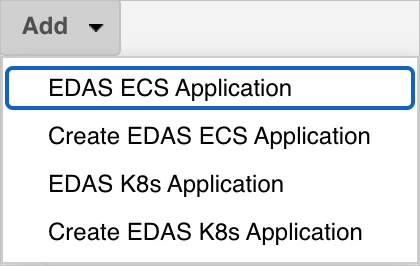
Click Save or Apply.
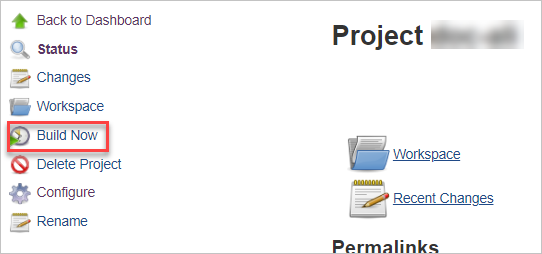
In the left-side navigation pane, click Build Now to trigger the deployment.
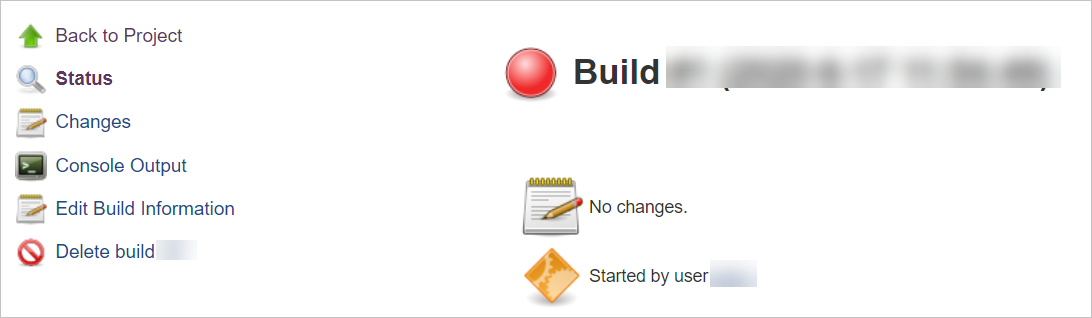
Verify the build result
After the build completes, a new entry appears in the Build History section. Click a build number to view the deployment status and logs.
Deploy with a pipeline script
Use a Jenkins Pipeline to define deployment as code. The plug-in supports the built-in Snippet Generator, which produces the deployment step for you.
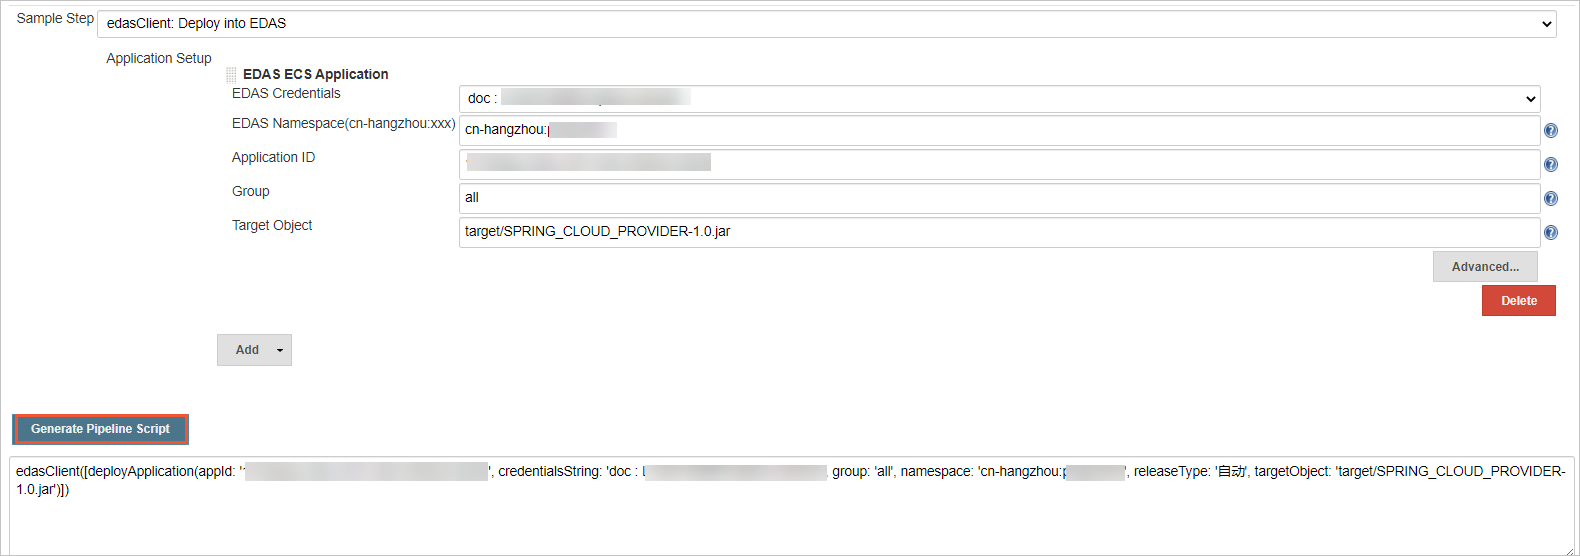
Generate the pipeline script
On the Jenkins home page, click New Item.
Enter a project name, select Pipeline, and click OK.
In the Pipeline section, click Pipeline Syntax to open the Snippet Generator.
Note For an existing pipeline, click the pipeline name in the project list, then click Pipeline Syntax in the left-side navigation pane.From the Sample Step drop-down list, select edasClient: Deploy into EDAS.
Click Add next to Application Setup and select a deployment mode based on your cluster type (ECS or K8s) and whether you are updating or creating an application.
Configure the deployment parameters. For details, see Configure deployment parameters.
Click Generate Pipeline Script and copy the generated script.
Add the script to the pipeline
Return to the pipeline configuration page. In the left-side navigation pane, click Back, then click Configure.
In the Pipeline section, paste the generated script into the script editor. Replace the deployment step placeholder with the script generated in the previous step.
Note In the following figure, replace the content in the highlighted area with the script generated in the preceding step.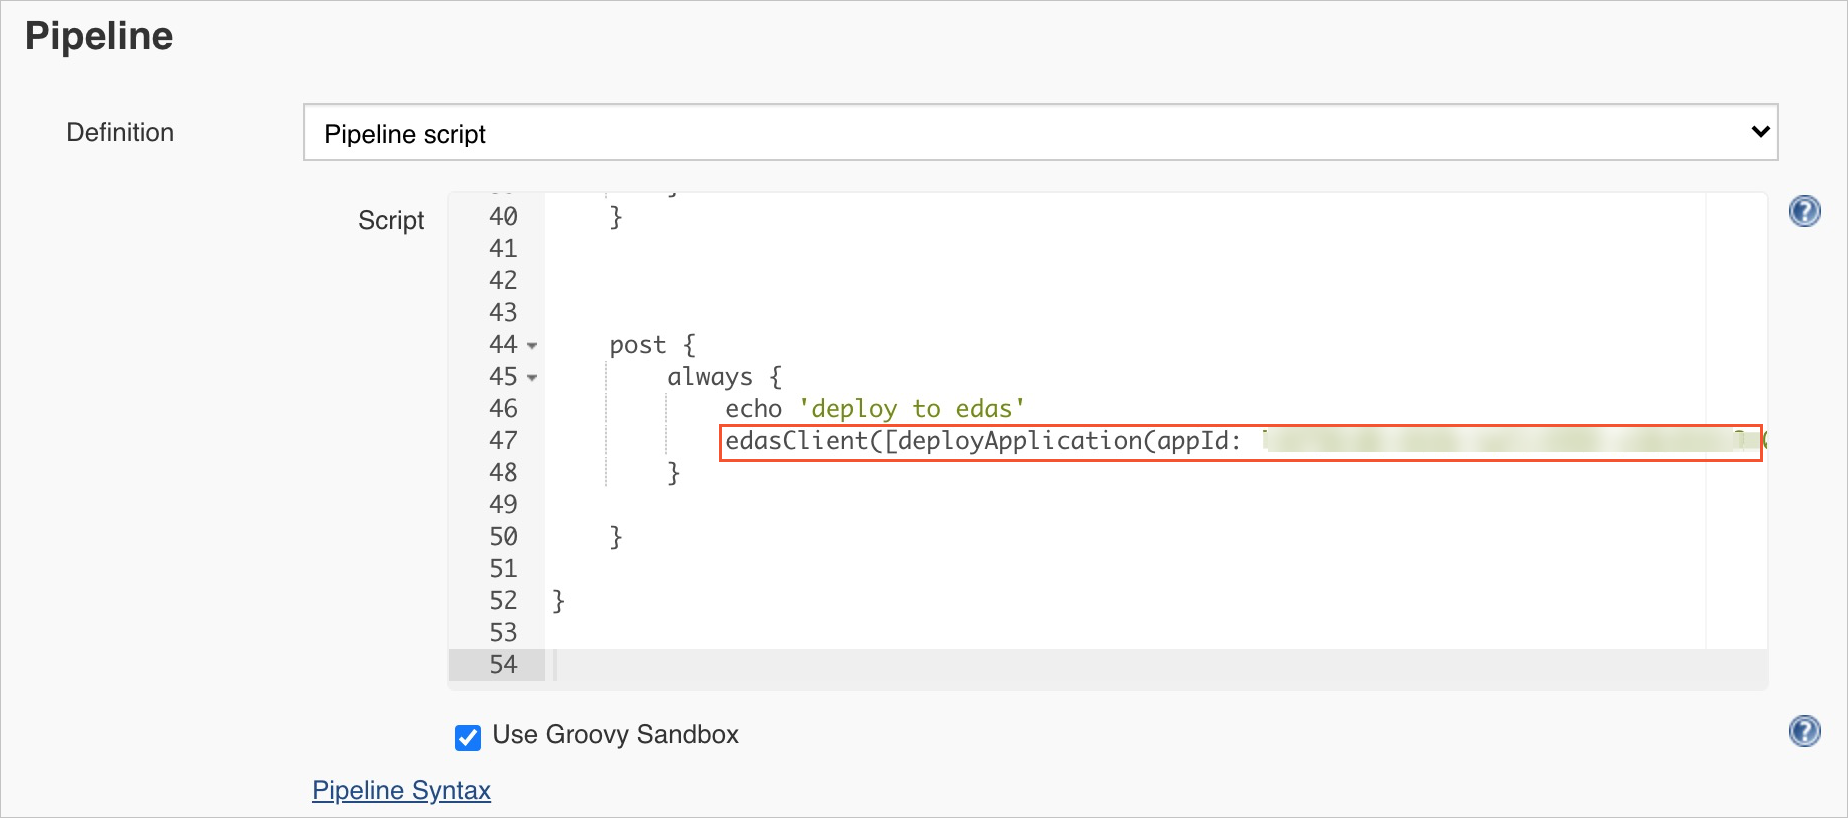
Click Save or Apply.
In the left-side navigation pane, click Build Now to trigger the pipeline.
After the build completes, check the Build History section for deployment results.
Deploy with Job DSL
Use Job DSL to define deployment jobs as code templates. This approach is useful when you manage many similar deployment jobs and want to generate them programmatically.
On the Jenkins home page, click New Item.
Enter a project name, select Freestyle project, and click OK.
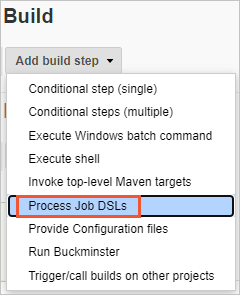
In the Build section, click Add build step and select Process Job DSLs.
Select Use the provided DSL script and enter the Job DSL script in the DSL Script field. The following example creates a deployment job:
   job('edas') {                              // The name of the job to build
       publishers {                           // The type of the EDAS plug-in
           edasClient {                       // The client that calls the EDAS plug-in
               deployApplication(
                   '',                        // namespace
                   '',                        // credentialsString
                   '',                        // group
                   '',                        // appId
                   ''                         // targetObject
               )
           }
       }
   }
Click Save or Apply.
In the left-side navigation pane, click Build Now to generate the deployment job.
After the build completes, the generated job appears on the Jenkins home page. Run the generated job to deploy your application.
Job DSL API reference
The plug-in exposes the following methods for Job DSL. Each method has a compact form (required parameters only) and an extended form (all parameters).
ECS cluster methods
Deploy to an ECS cluster (update an existing application):
// Compact form
void deployApplication(
    String namespace,          // EDAS namespace ID
    String credentialsString,  // Credential name
    String group,              // Deployment group
    String appId,              // EDAS application ID
    String targetObject        // Path to deployment artifact (WAR/JAR)
)

// Extended form
void deployApplication(
    String namespace,
    String credentialsString,
    String group,
    String appId,
    String targetObject,
    String versionLabelFormat,          // Version label pattern
    String versionDescriptionFormat,    // Version description pattern
    String batch,                       // Number of deployment batches
    String batchWaitTime,               // Wait time between batches (seconds)
    String releaseType                  // Release type
)
Create and deploy to an ECS cluster (create a new application):
// Compact form
void insertApplication(
    String namespace,
    String credentialsString,
    String applicationName,    // Application name
    String packageType,        // WAR or JAR
    String clusterId,          // Target ECS cluster ID
    String targetObject,
    String ecuInfo             // ECS instance IDs
)

// Extended form
void insertApplication(
    String namespace,
    String credentialsString,
    String applicationName,
    String packageType,
    String clusterId,
    String targetObject,
    String ecuInfo,
    String versionLabelFormat,
    String versionDescriptionFormat,
    String buildPackId,        // Build pack ID for the runtime
    String healthCheckUrl      // Health check URL
)
Kubernetes cluster methods
Deploy to a Kubernetes cluster (update an existing application):
// Compact form
void deployK8sApplication(
    String namespace,
    String credentialsString,
    String appId,
    String targetObject,
    Boolean image              // true: deploy a container image; false: deploy a WAR/JAR
)

// Extended form
void deployK8sApplication(
    String namespace,
    String credentialsString,
    String appId,
    String targetObject,
    Boolean image,
    String edasContainerVersion,  // EDAS container version
    String webContainer,          // Web container type (e.g., Apache Tomcat)
    String jdk,                   // JDK version
    String versionLabelFormat,
    String envs,                  // Environment variables (JSON)
    String startupCommand,
    String args,                  // Startup arguments
    String cpuLimit,              // CPU limit (cores)
    String memoryLimit,           // Memory limit (MiB)
    String cpuRequest,            // CPU request (cores)
    String memoryRequest,         // Memory request (MiB)
    String replicas,              // Number of pod replicas
    String postStart,             // Post-start hook command
    String preStop,               // Pre-stop hook command
    String readiness,             // Readiness probe configuration
    String liveness,              // Liveness probe configuration
    String updateStrategy         // Update strategy (JSON)
)
Create and deploy to a Kubernetes cluster (create a new application):
// Compact form
void insertK8sApplication(
    String namespace,
    String credentialsString,
    String applicationName,
    String packageType,
    String clusterId,
    String targetObject,
    String k8sNamespace,       // Kubernetes namespace
    String jdk
)

// Extended form
void insertK8sApplication(
    String namespace,
    String credentialsString,
    String applicationName,
    String packageType,
    String clusterId,
    String targetObject,
    String k8sNamespace,
    String jdk,
    String descFormat,                // Description format
    String edasContainerVersion,
    String webContainer,
    String versionLabelFormat,
    String envs,
    String startupCommand,
    String args,
    String cpuLimit,
    String memoryLimit,
    String cpuRequest,
    String memoryRequest,
    String replicas,
    String postStart,
    String preStop,
    String readiness,
    String liveness
)
What's next
Configure deployment parameters -- detailed parameter descriptions for all four deployment modes