Spot instances may be interrupted and reclaimed at any time due to pricing or inventory factors. We recommend that you use external storage, such as File Storage NAS and Object Storage Service (OSS), to store data for spot instances. If a spot instance stores important data or configurations, you can retain the data or configurations by using one of the following methods: Enable the economical mode for the instance, configure the system disk and data disks attached to the instance to not be released together with the instance, and create snapshots or custom images from the instance.
Data retention and restoration methods

Method 1: Enable the economical mode for a spot instance
When you create a spot instance, set the Instance Interruption Mode parameter to Stop in Economical Mode. After the interruption and reclamation of the spot instance are triggered, the system stops the instance in economical mode. You can restart the instance to restore the instance data. Before you use this method, take note of the following items:
You can configure the Instance Interruption Mode parameter only when you create the spot instance. After the spot instance is created, you cannot modify the parameter.
After the spot instance is stopped in economical mode, the instance may fail to restart due to pricing or inventory factors.
After the spot instance starts from the economical mode, the static public IP address of the instance may change.
The instance may fail to restart from the economical mode due to pricing or inventory factors. If you want to immediately restore the instance data, you can restore the data from a snapshot or a custom image.
Method 2: Configure the system disk and data disks attached to a spot instance to not be released together with the instance
Before a spot instance is interrupted and reclaimed, configure the system disk and data disks attached to the instance to not be released together with the instance. After the instance is interrupted and reclaimed, attach the system disk and data disks of the instance to a different instance to restore data. Before you use this method, take note of the following items:
The system disk is retained and can be attached to a different instance only as a data disk.
The disks and the instance to which you want to attach the disks must reside in the same zone.
Method 3: Create snapshots or custom images from a spot instance
You can create snapshots or custom images from a spot instance after the instance is created. After the instance is interrupted and reclaimed, you can create a new instance by using a custom image to restore data. Before you use this method, take note of the following items:
You can use only system disk snapshots to create custom images. You cannot use data disk snapshots to create custom images.
The new instance that you create must reside in the same region as the custom image that you use to create the instance. To create a new instance in a different region, you must copy the custom image to the destination region. For more information, see Copy a custom image.
Procedure for data retention and restoration
Enable the economical mode for a spot instance
Flowchart

Retain data
Procedure
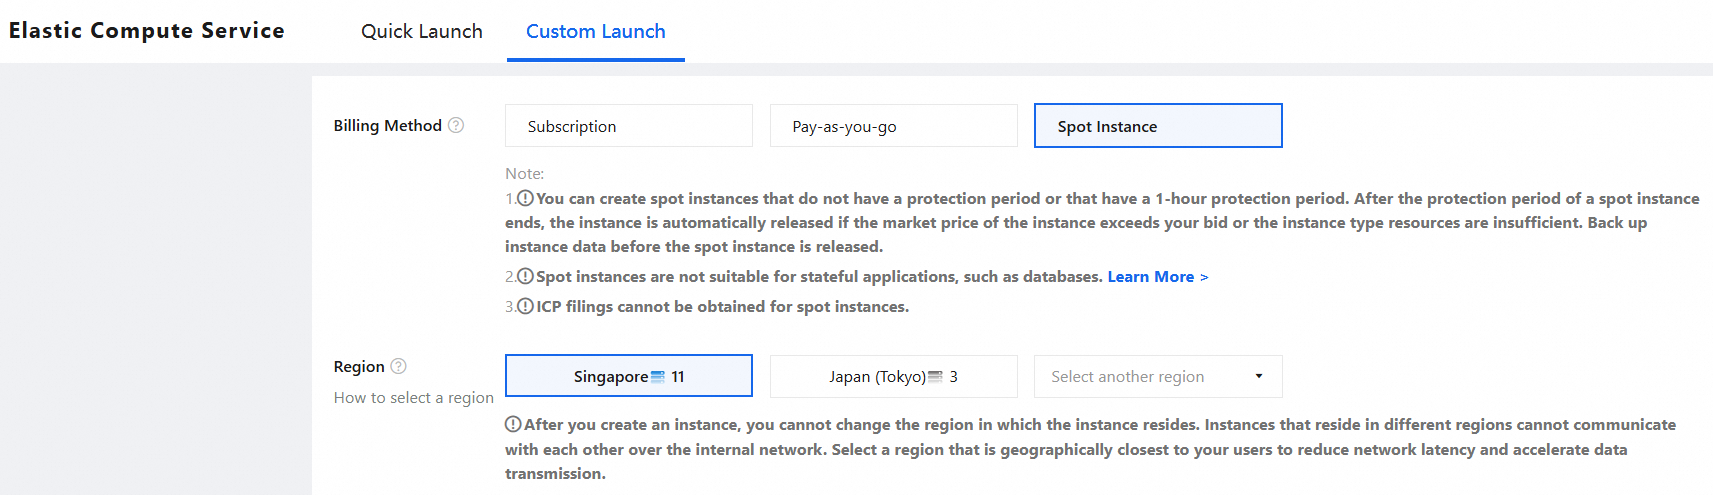
Log on to the ECS console, go to the instance buy page, and then click the Custom Launch tab.
Follow the on-screen instructions to configure the instance parameters based on your business requirements. Take note of the following parameters. For information about other parameters, see Custom launch.
Billing Method: Select Spot Instance.
Instance Interruption Mode: Select Stop in Economical Mode.
NoteAfter a spot instance is stopped in economical mode, the computing resources (vCPUs, GPUs, and memory), static public IP address, and public bandwidth associated with the static public IP address of the instance are reclaimed and no longer billed. The billing for other resources of the spot instance continues, such as the cloud disks (system disk and data disks), elastic IP addresses (if any), and snapshots.
If you call the RunInstances operation to create spot instances, set the
SpotInterruptionBehaviorparameter to Stop to enable the economical mode for the instances.
Restore data
Procedure
After you receive an interruption and reclamation notification for a spot instance, the instance is stopped in economical mode in 5 minutes. You can view the status of the spot instance on the ECS console - Instances page.

After the spot instance is stopped in economical mode, start the instance when the market price does not exceed the bid price and the inventory is sufficient. You can also call the StartInstance or StartInstances operation to start the instance.
 Note
NoteTo query the market price, go to the instance buy page, select the instance type of the spot instance, and then view the price history of the instance type. You can also call the DescribeSpotPriceHistory operation to view the price history of the instance type.
To query the inventory, go to the instance buy page and select the spot instance type. If you can create a new spot instance, the instance type is in stock. You can also call the DescribeAvailableResource operation to query the inventory.
Configure the system disk and data disks attached to a spot instance to not be released together with the instance
Flowchart

Retain data
Procedure
When you create a spot instance, configure the system disk or data disks to not be released together with the instance. Perform the following steps:
Log on to the ECS console, go to the instance buy page, and then click the Custom Launch tab.
Follow the on-screen instructions to configure the instance parameters based on your business requirements. Take note of the following parameters. For information about other parameters, see Custom launch.
Set the Billing Method parameter to Spot Instance.
In the Storage section, clear the Release with Instance option for the system disk or data disks.

If you do not clear the Release with Instance option for the system disk or data disks when you create the instance, you can change the disk release mode on the Instance Details or Block Storage page.
If you call the RunInstances operation to create spot instances, set the DeleteWithInstance parameter to false to prevent the system disk or data disks from being released together with the instance. You can also call the ModifyDiskAttribute operation and set the DeleteWithInstance parameter to false.
Restore data
Considerations
The disks that you want to attach to a new instance are in the Unattached (Available) state.
The instance to which you want to attach the disks is in the Running (Running) or Stopped (Stopped) state and not in the Locked (Locked) state.
Procedure
You can call the AttachDisk operation to attach a disk to an instance.
Create snapshots or custom images from a spot instance
Flowchart

Retain data
Procedure
This section describes how to create a snapshot for a cloud disk on the Instance page in the ECS console. You can also create a snapshot for a cloud disk on the Snapshots or Block Storage page.
Go to the ECS console - Instances.
In the top navigation bar, select the region and resource group of the resource that you want to manage.

Click the ID of the instance from which you want to create a snapshot. Select the Snapshots tab and then click Create Disk Snapshot.
In the Create Snapshot dialog box, configure the parameters and click OK.
Parameter
Description
Resource Type
Default value: Cloud Disk, which allows you to create a snapshot for a cloud disk.
NoteYou can also set this parameter to Instance and select one or more ECS instances to create a snapshot-consistent group. Then, select the cloud disks for which you want to create snapshots from the ECS instances to ensure disk data consistency. For more information, see Create a snapshot-consistent group.
Cloud Disk
Select the disk for which you want to create a snapshot. You can select a system disk or a data disk.
Snapshot Name
Specify a name for the snapshot.
Retention Period
Specify the retention period of the snapshot. Valid values: Permanently (Until Deleted) and Retained for.
Permanently (Until Deleted): The snapshot is permanently retained and does not expire. After the maximum number of snapshots is reached, new snapshots cannot be created.
Retained for: Specify a retention period in days for the snapshot. After the retention period of the snapshot ends, the snapshot expires and is automatically deleted.
NoteFor the quotas on manual snapshots, see Snapshot overview.
If you specify a retention period for a snapshot, Released After xx Days is highlighted in the Retention Period column on the Disk Snapshots tab when the snapshot is a few days, such as 3 days, away from expiration. You can extend the retention period of a snapshot before the snapshot expires. For more information, see Extend the retention period of a snapshot.
To prevent unnecessary costs, we recommend that you delete unneeded snapshots at the earliest opportunity, regardless of whether the snapshots are retained permanently or for a specific number of days. For more information, see Delete a snapshot.
Advanced Settings
Instant Access
By default, the instant access feature is enabled for Enterprise SSD (ESSD) series disks (ESSDs, ESSD AutoPL disks, ESSD Entry disks, and Regional ESSDs)and is disabled for cloud disks of other categories.
NoteThe instant access feature allows you to use snapshots for operations, such as rolling back cloud disks, creating cloud disks, or sharing snapshots, within seconds after the snapshots are created, instead of after the snapshots are uploaded to OSS. For more information, see Snapshot instant access.
Tag
Specify tag key-value pairs for the snapshot to facilitate management.
Resource Group
Specify a resource group to which to assign the snapshot. You can use resource groups to manage snapshots at different levels.
(Optional) View the creation progress of the snapshot on the Disk Snapshots tab.

In the Progress column, view the upload progress of the snapshot to OSS. When you move your pointer over Progress of Upload to OSS: xx%, the system displays the estimated remaining time for the upload.
NoteThe estimated remaining time to upload a snapshot to OSS dynamically varies based on multiple factors. For more information, see the Considerations section of the "Create a snapshot" topic.
You can call the DeleteSnapshot operation to cancel an ongoing snapshot creation task.
If Progress of Upload to OSS: 100% is displayed, the snapshot is uploaded to OSS. The disk data is backed up.
Click the ID of the spot instance to go to the instance details page. In the upper-right corner of the page, click All Actions. In the pane that appears, search for and click Create Custom Image.
In the Create Custom Image dialog box, configure the parameters and click OK.
The time required to create an image varies based on the disk size. You must wait until the snapshot of each disk is created before you can use the image.
You can also create a snapshot by calling the CreateSnapshot operation and create a custom image by calling the CreateImage operation.
Restore data
Procedure
Go to the ECS console - Images page.
In the top navigation bar, select the region and resource group of the resource that you want to manage.
Find the image that you want to use and click Create Instance in the Actions column.

On the Custom Launch tab, click the Custom Images tab in the Image section. Verify that the custom image created from the spot instance in the previous step is selected. For information about other parameters, see Custom launch.

You can also call the RunInstances operation with the ImageId parameter specified to create an instance from a custom image.