Deploy distributed or pseudo-distributed Hadoop clusters on ECS Linux instances for big data storage and processing.
Background
Apache Hadoop is a framework for distributed processing of large-scale datasets across computer clusters. It scales from a single server to thousands of machines, each providing local computation and storage. Hadoop detects and handles failures at the application layer, delivering high availability without relying on hardware redundancy.
The core components of Hadoop are Hadoop Distributed File System (HDFS) and MapReduce:
-
HDFS: A distributed file system for storing and reading application data.
-
MapReduce: A distributed computing framework that splits tasks into Map and Reduce phases and uses a task scheduler (JobTracker) to execute them across cluster nodes.
|
Feature |
Pseudo-distributed mode |
Fully-distributed mode |
|
Number of nodes |
Single node. All services run on one machine. |
Multiple nodes. Services are distributed across multiple machines. |
|
Resource utilization |
Uses a single machine's resources. |
Leverages computing and storage resources across multiple machines. |
|
Fault tolerance |
Low. A single point of failure makes the entire cluster unavailable. |
High. Supports data replication and high availability configurations. |
|
Scenarios |
|
|
Quick deployment
Click Run Now to open Terraform Explorer, where you can view and run Terraform code to automatically build a Hadoop environment on an ECS instance.
Prerequisites
Your ECS instances must meet the following requirements:
|
Environment |
Requirement |
|
|
Instance |
Pseudo-distributed |
1 instance |
|
Distributed |
3 or more instances Note
Add the instances to a deployment set that uses the High Availability strategy to improve availability and simplify cluster management. |
|
|
Operating system |
Linux |
|
|
Public IP address |
The instance is assigned a public IP address or associated with an Elastic IP Address (EIP). |
|
|
Instance security group |
Allow inbound traffic on ports 22, 443, 8088 (Hadoop YARN web UI), and 9870 (Hadoop NameNode web UI). Note
For distributed deployments, also allow traffic on port 9868 (Hadoop Secondary NameNode web UI). |
|
|
Java Development Kit (JDK) This topic uses Hadoop 3.2.4 and Java 8. For other versions, see Hadoop Java Versions. |
Hadoop version |
Java version |
|
Hadoop 3.3 |
Java 8 and Java 11 |
|
|
Hadoop 3.0.x~3.2.x |
Java 8 |
|
|
Hadoop 2.7.x~2.10.x |
Java 7 and Java 8 |
|
Procedure
Distributed
Plan the nodes before deploying Hadoop. This example uses three instances: hadoop001 is the master node, and hadoop002 and hadoop003 are worker nodes.
|
Functional component |
hadoop001 |
hadoop002 |
hadoop003 |
|
HDFS |
|
DataNode |
|
|
YARN |
NodeManager |
|
NodeManager |
Step 1: Install the JDK
Install JDK on all nodes.
-
Connect to the ECS instance as a regular user.
See Connect to a Linux instance using Workbench.
ImportantThe Hadoop community does not recommend running Hadoop as the root user due to security and permission issues. Use a non-root user such as
ecs-user. -
Download the JDK 1.8 installation package.
wget https://download.java.net/openjdk/jdk8u41/ri/openjdk-8u41-b04-linux-x64-14_jan_2020.tar.gz -
Decompress the JDK 1.8 installation package.
tar -zxvf openjdk-8u41-b04-linux-x64-14_jan_2020.tar.gz -
Move and rename the JDK installation folder.
This example renames the JDK installation folder to
java8. You can use a different name.sudo mv java-se-8u41-ri/ /usr/java8 -
Configure the Java environment variables.
If you renamed the JDK installation folder, replace
java8in the following commands with the actual name.sudo sh -c "echo 'export JAVA_HOME=/usr/java8' >> /etc/profile" sudo sh -c 'echo "export PATH=\$PATH:\$JAVA_HOME/bin" >> /etc/profile' source /etc/profile -
Verify that the JDK is installed.
java -versionThe following output indicates a successful installation.

Step 2: Configure passwordless SSH logon
Perform this operation on all instances.
Set up passwordless SSH logon so nodes can connect without password authentication, simplifying cluster management.
-
Configure hostnames and host resolution.
sudo vim /etc/hostsAdd the
<Primary private IP address> <Hostname>information for all instances to the/etc/hostsfile. For example:<Primary private IP address> hadoop001 <Primary private IP address> hadoop002 <Primary private IP address> hadoop003 -
Create a public key and a private key.
ssh-keygen -t rsa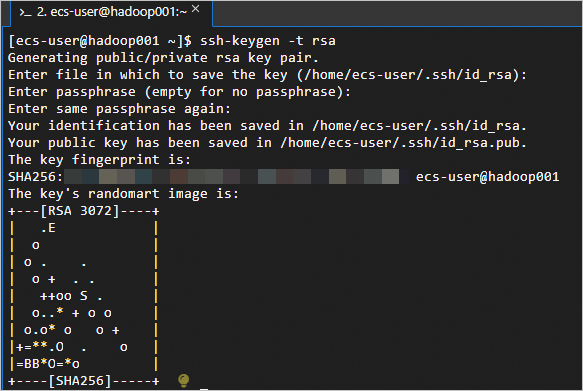
-
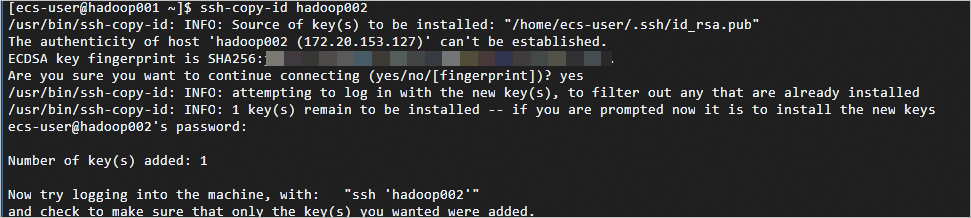
Run
ssh-copy-id <Hostname>, and replace the hostname with the correct name. For example:On
hadoop001, runssh-copy-id hadoop001,ssh-copy-id hadoop002, andssh-copy-id hadoop003. After each command, enter yes and the password for the corresponding instance.ssh-copy-id hadoop001 ssh-copy-id hadoop002 ssh-copy-id hadoop003Passwordless logon is configured when the output matches the following.
Step 3: Install Hadoop
Run the following commands on all instances.
-
Download the Hadoop installation package.
wget http://mirrors.cloud.aliyuncs.com/apache/hadoop/common/hadoop-3.2.4/hadoop-3.2.4.tar.gz -
Decompress the Hadoop installation package to
/opt/hadoop.sudo tar -zxvf hadoop-3.2.4.tar.gz -C /opt/ sudo mv /opt/hadoop-3.2.4 /opt/hadoop -
Configure the Hadoop environment variables.
sudo sh -c "echo 'export HADOOP_HOME=/opt/hadoop' >> /etc/profile" sudo sh -c "echo 'export PATH=\$PATH:/opt/hadoop/bin' >> /etc/profile" sudo sh -c "echo 'export PATH=\$PATH:/opt/hadoop/sbin' >> /etc/profile" source /etc/profile -
Modify the
yarn-env.shandhadoop-env.shconfiguration files.sudo sh -c 'echo "export JAVA_HOME=/usr/java8" >> /opt/hadoop/etc/hadoop/yarn-env.sh' sudo sh -c 'echo "export JAVA_HOME=/usr/java8" >> /opt/hadoop/etc/hadoop/hadoop-env.sh' -
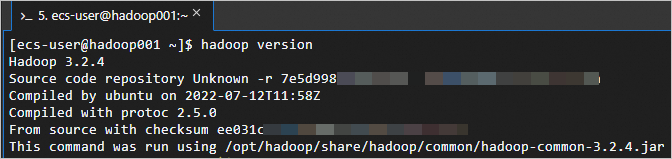
Verify that Hadoop is installed.
hadoop versionThe following output indicates a successful installation.
Step 4: Configure Hadoop
Modify Hadoop configuration files on all nodes.
-
Modify the Hadoop configuration file
core-site.xml.-
Open the file for editing.
sudo vim /opt/hadoop/etc/hadoop/core-site.xml -
In the
<configuration></configuration>node, insert the following content.<!--Specify the NameNode address--> <property> <name>fs.defaultFS</name> <value>hdfs://hadoop001:8020</value> </property> <!--Specify the directory to store files generated by Hadoop--> <property> <name>hadoop.tmp.dir</name> <value>/opt/hadoop/data</value> </property> <!--Configure the static user for HDFS web logon as hadoop--> <property> <name>hadoop.http.staticuser.user</name> <value>hadoop</value> </property>
-
-
Modify the Hadoop configuration file
hdfs-site.xml.-
Open the file for editing.
sudo vim /opt/hadoop/etc/hadoop/hdfs-site.xml -
In the
<configuration></configuration>node, insert the following content.<!-- NameNode web endpoint --> <property> <name>dfs.namenode.http-address</name> <value>hadoop001:9870</value> </property> <!-- Secondary NameNode web endpoint --> <property> <name>dfs.namenode.secondary.http-address</name> <value>hadoop003:9868</value> </property>
-
-
Modify the Hadoop configuration file
yarn-site.xml.-
Open the file for editing.
sudo vim /opt/hadoop/etc/hadoop/yarn-site.xml -
In the
<configuration></configuration>node, insert the following content.<!--The method for NodeManager to obtain data is shuffle--> <property> <name>yarn.nodemanager.aux-services</name> <value>mapreduce_shuffle</value> </property> <!--Specify the YARN (ResourceManager) address--> <property> <name>yarn.resourcemanager.hostname</name> <value>hadoop002</value> </property> <!--Specify the whitelist of environment variables that NodeManager can pass to containers--> <property> <name>yarn.nodemanager.env-whitelist</name> <value>JAVA_HOME,HADOOP_COMMON_HOME,HADOOP_HDFS_HOME,HADOOP_CONF_DIR,CLASSPATH_PREPEND_DISTCACHE,HADOOP_YARN_HOME,HADOOP_MAPRED_HOME</value> </property>
-
-
Modify the Hadoop configuration file
mapred-site.xml.-
Open the file for editing.
sudo vim /opt/hadoop/etc/hadoop/mapred-site.xml -
In the
<configuration></configuration>node, insert the following content.<!--Tell Hadoop to run MapReduce (MR) on YARN--> <property> <name>mapreduce.framework.name</name> <value>yarn</value> </property>
-
-
Modify the Hadoop configuration file
workers.-
Open the file for editing.
sudo vim /opt/hadoop/etc/hadoop/workers -
In the
workersfile, insert the instance information.hadoop001 hadoop002 hadoop003
-
Step 5: Start Hadoop
-
Initialize the
namenode.WarningInitialize
namenodeon all three instances only during first startup.hadoop namenode -format -
Start Hadoop.
Important-
The Hadoop community does not recommend running Hadoop as the root user due to security and permission issues. Use a non-root user such as
ecs-user. -
If you must run Hadoop as root, understand the access control model and associated risks before modifying the following configuration files.
Note: Running Hadoop as root introduces serious security risks, including but not limited to data breaches, increased vulnerability to malware that can obtain root privileges, and unexpected permission issues. See the official Hadoop documentation.
The following configuration files are typically in the
/opt/hadoop/sbindirectory.-
In the
start-dfs.shandstop-dfs.shfiles, add the following parameters.HDFS_DATANODE_USER=root HADOOP_SECURE_DN_USER=hdfs HDFS_NAMENODE_USER=root HDFS_SECONDARYNAMENODE_USER=root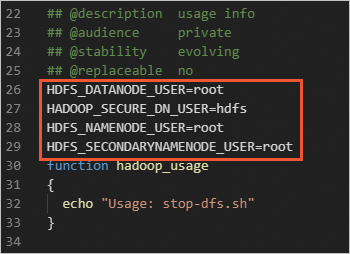
-
In the
start-yarn.shandstop-yarn.shfiles, add the following parameters.YARN_RESOURCEMANAGER_USER=root HADOOP_SECURE_DN_USER=yarn YARN_NODEMANAGER_USER=root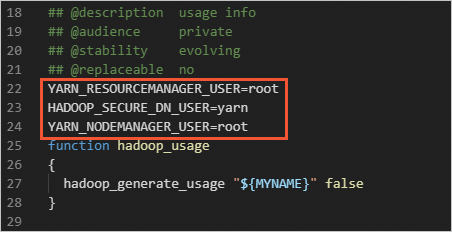
-
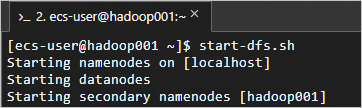
On
hadoop001, runstart-dfs.shto start the HDFS service.This script starts NameNode, SecondaryNameNode, and DataNode.
start-dfs.shHDFS is running when the
jpsoutput matches the following.
-
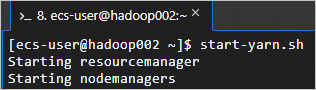
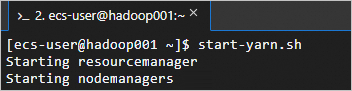
On
hadoop002, runstart-yarn.shto start the YARN service.This script starts ResourceManager and NodeManager.
start-yarn.shYARN is running when the output matches the following.
-
-
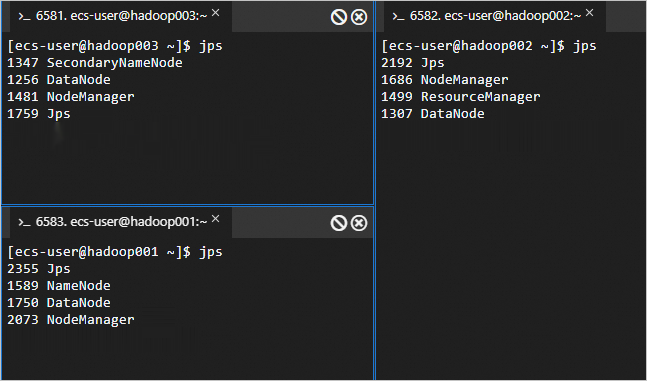
View the started processes on all three nodes.
jpsThe started processes are as follows.
-
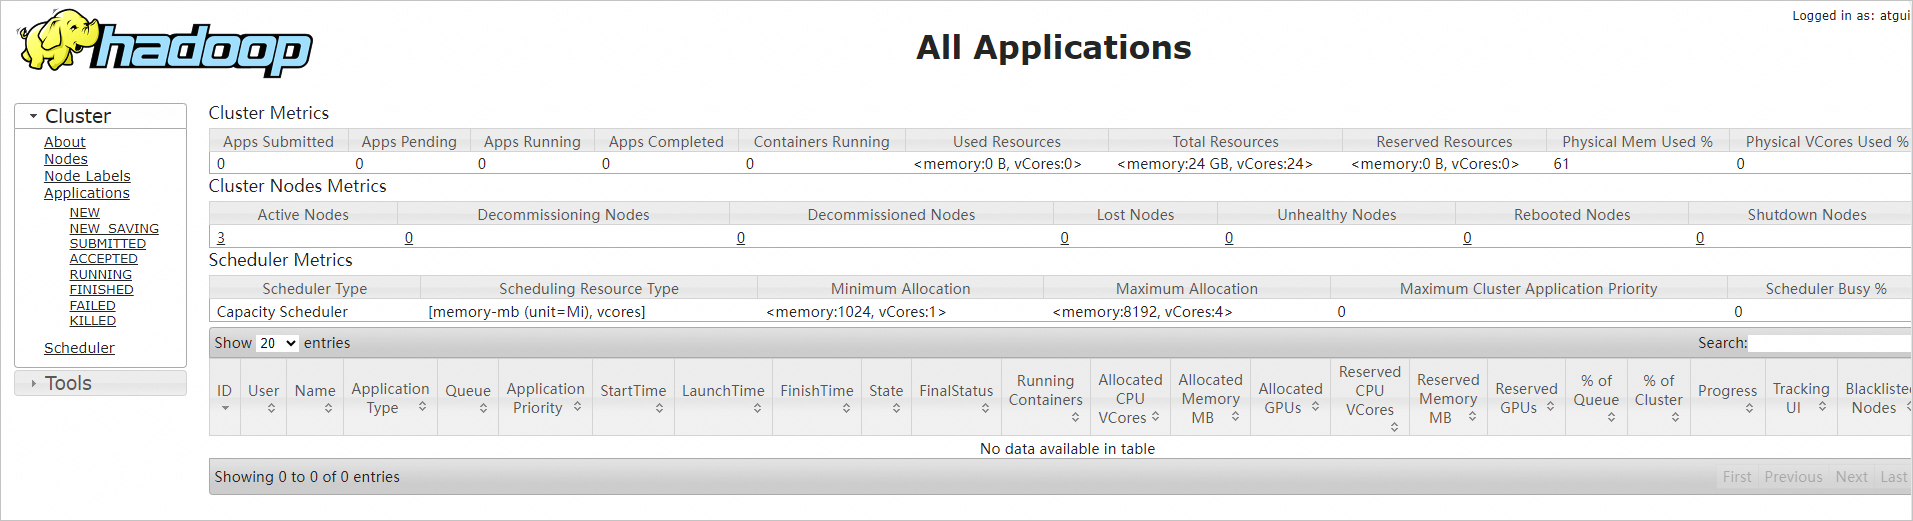
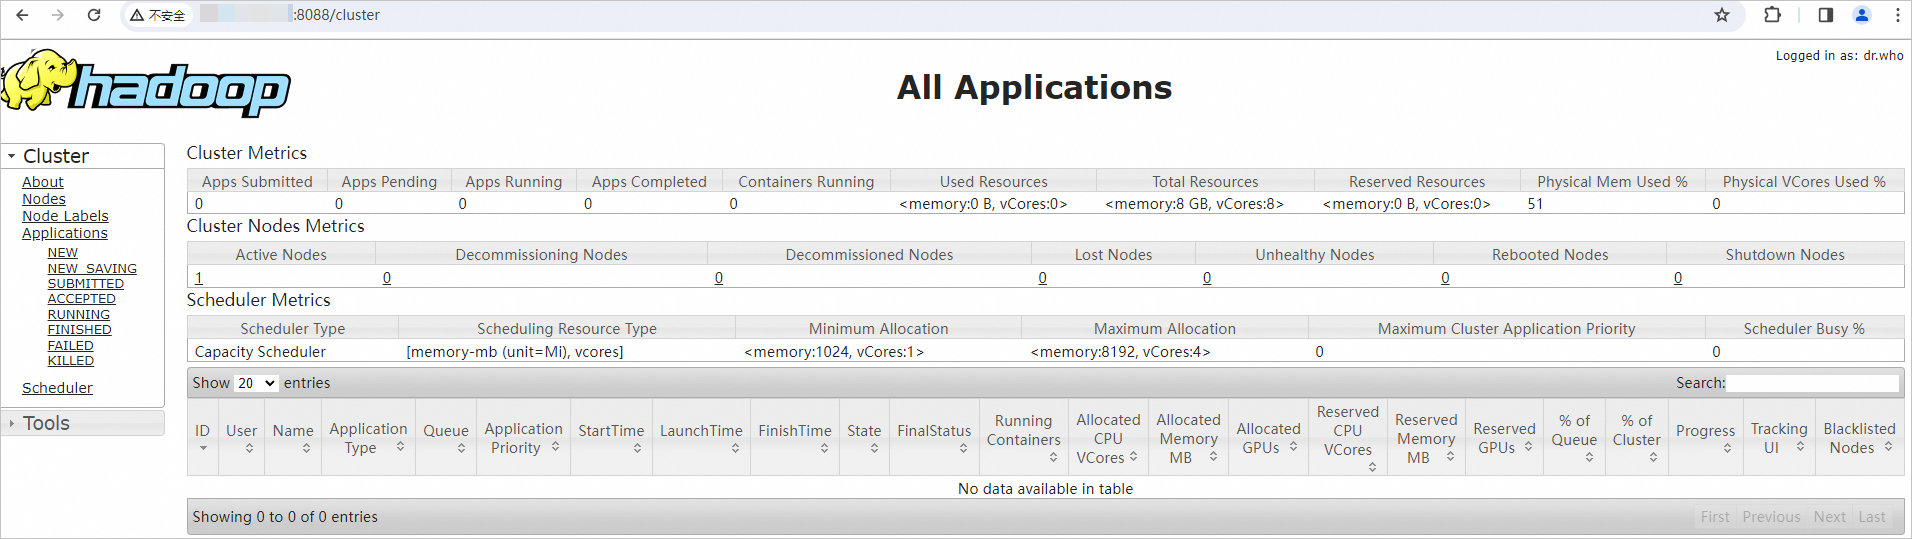
In your browser, enter
http://<Public IP address of hadoop002 ECS instance>:8088to access the YARN web UI.View cluster resource usage, MapReduce job status, and queue information.
ImportantAllow inbound traffic on port 8088 in the security group. Otherwise, the web UI is inaccessible. See Add a security group rule.
-
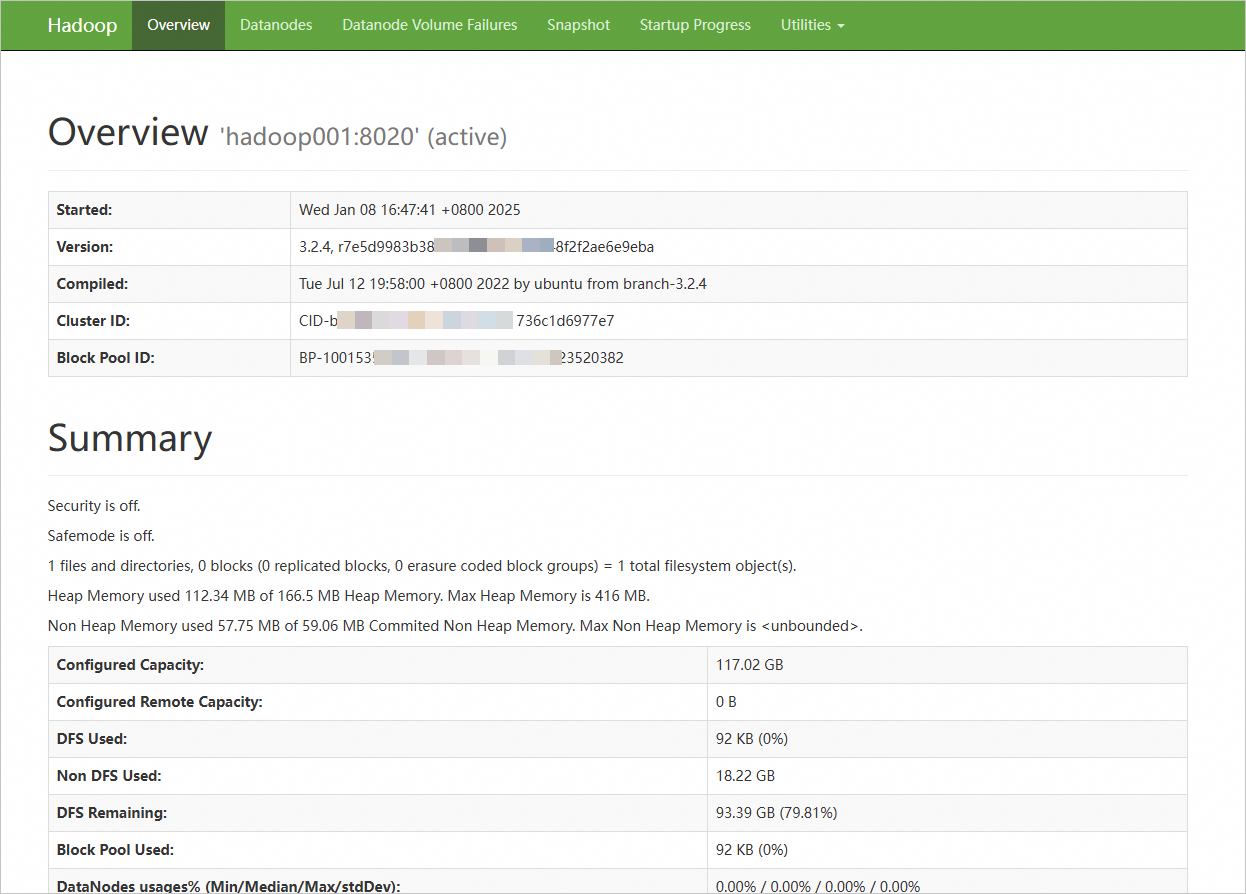
In your browser, enter
http://<Public IP address of hadoop001 ECS instance>:9870to access the NameNode web UI. Enterhttp://<Public IP address of hadoop003 ECS instance>:9868to access the SecondaryNameNode web UI.View HDFS status, cluster health, active nodes, and NameNode logs.
The following page indicates that the distributed environment is built.
ImportantAllow inbound traffic on port 9870 in the security group. Otherwise, the web UI is inaccessible. See Add a security group rule.
Pseudo-distributed
Step 1: Install the JDK
-
Connect to the ECS instance as a regular user.
See Connect to a Linux instance using Workbench.
ImportantThe Hadoop community does not recommend running Hadoop as the root user due to security and permission issues. Use a non-root user such as
ecs-user. -
Download the JDK 1.8 installation package.
wget https://download.java.net/openjdk/jdk8u41/ri/openjdk-8u41-b04-linux-x64-14_jan_2020.tar.gz -
Decompress the JDK 1.8 installation package.
tar -zxvf openjdk-8u41-b04-linux-x64-14_jan_2020.tar.gz -
Move and rename the JDK installation folder.
This example renames the JDK installation folder to
java8. You can use a different name.sudo mv java-se-8u41-ri/ /usr/java8 -
Configure the Java environment variables.
If you renamed the JDK installation folder, replace
java8in the following commands with the actual name.sudo sh -c "echo 'export JAVA_HOME=/usr/java8' >> /etc/profile" sudo sh -c 'echo "export PATH=\$PATH:\$JAVA_HOME/bin" >> /etc/profile' source /etc/profile -
Verify that the JDK is installed.
java -versionThe following output indicates a successful installation.
Step 2: Configure passwordless SSH logon
A single node also requires passwordless SSH logon. Otherwise, starting NameNode and DataNode fails with a permission denied error.
-
Create a public key and a private key.
ssh-keygen -t rsa -
Add the public key to the
authorized_keysfile.cd .ssh cat id_rsa.pub >> authorized_keys
Step 3: Install Hadoop
-
Download the Hadoop installation package.
wget http://mirrors.cloud.aliyuncs.com/apache/hadoop/common/hadoop-3.2.4/hadoop-3.2.4.tar.gz -
Decompress the Hadoop installation package to
/opt/hadoop.sudo tar -zxvf hadoop-3.2.4.tar.gz -C /opt/ sudo mv /opt/hadoop-3.2.4 /opt/hadoop -
Configure the Hadoop environment variables.
sudo sh -c "echo 'export HADOOP_HOME=/opt/hadoop' >> /etc/profile" sudo sh -c "echo 'export PATH=\$PATH:/opt/hadoop/bin' >> /etc/profile" sudo sh -c "echo 'export PATH=\$PATH:/opt/hadoop/sbin' >> /etc/profile" source /etc/profile -
Modify the
yarn-env.shandhadoop-env.shconfiguration files.sudo sh -c 'echo "export JAVA_HOME=/usr/java8" >> /opt/hadoop/etc/hadoop/yarn-env.sh' sudo sh -c 'echo "export JAVA_HOME=/usr/java8" >> /opt/hadoop/etc/hadoop/hadoop-env.sh' -
Verify that Hadoop is installed.
hadoop versionThe following output indicates a successful installation.

Step 4: Configure Hadoop
-
Modify the Hadoop configuration file
core-site.xml.-
Open the file for editing.
sudo vim /opt/hadoop/etc/hadoop/core-site.xml -
In the
<configuration></configuration>node, insert the following content.<property> <name>hadoop.tmp.dir</name> <value>file:/opt/hadoop/tmp</value> <description>location to store temporary files</description> </property> <property> <name>fs.defaultFS</name> <value>hdfs://localhost:9000</value> </property>
-
-
Modify the Hadoop configuration file
hdfs-site.xml.-
Open the file for editing.
sudo vim /opt/hadoop/etc/hadoop/hdfs-site.xml -
In the
<configuration></configuration>node, insert the following content.<property> <name>dfs.replication</name> <value>1</value> </property> <property> <name>dfs.namenode.name.dir</name> <value>file:/opt/hadoop/tmp/dfs/name</value> </property> <property> <name>dfs.datanode.data.dir</name> <value>file:/opt/hadoop/tmp/dfs/data</value> </property>
-
Step 5: Start Hadoop
-
Initialize the
namenode.hadoop namenode -format -
Start Hadoop.
Important-
The Hadoop community does not recommend running Hadoop as the root user due to security and permission issues. Use a non-root user such as
ecs-user. -
If you must run Hadoop as root, understand the access control model and associated risks before modifying the following configuration files.
Note: Running Hadoop as root introduces serious security risks, including but not limited to data breaches, increased vulnerability to malware that can obtain root privileges, and unexpected permission issues. See the official Hadoop documentation.
The following configuration files are typically in the
/opt/hadoop/sbindirectory.-
In the
start-dfs.shandstop-dfs.shfiles, add the following parameters.HDFS_DATANODE_USER=root HADOOP_SECURE_DN_USER=hdfs HDFS_NAMENODE_USER=root HDFS_SECONDARYNAMENODE_USER=root -
In the
start-yarn.shandstop-yarn.shfiles, add the following parameters.YARN_RESOURCEMANAGER_USER=root HADOOP_SECURE_DN_USER=yarn YARN_NODEMANAGER_USER=root
-
Start the HDFS service.
This script starts NameNode, SecondaryNameNode, and DataNode.
start-dfs.shHDFS is running when the output matches the following.
-
Start the YARN service.
This script starts ResourceManager, NodeManager, and ApplicationHistoryServer.
start-yarn.shYARN is running when the output matches the following.
-
-
View the started processes.
jpsThe started processes are as follows.

-
In your browser, enter
http://<Public IP address of the ECS instance>:8088to access the YARN web UI.View cluster resource usage, MapReduce job status, and queue information.
ImportantAllow inbound traffic on port 8088 in the security group. Otherwise, the web UI is inaccessible. See Add a security group rule.
-
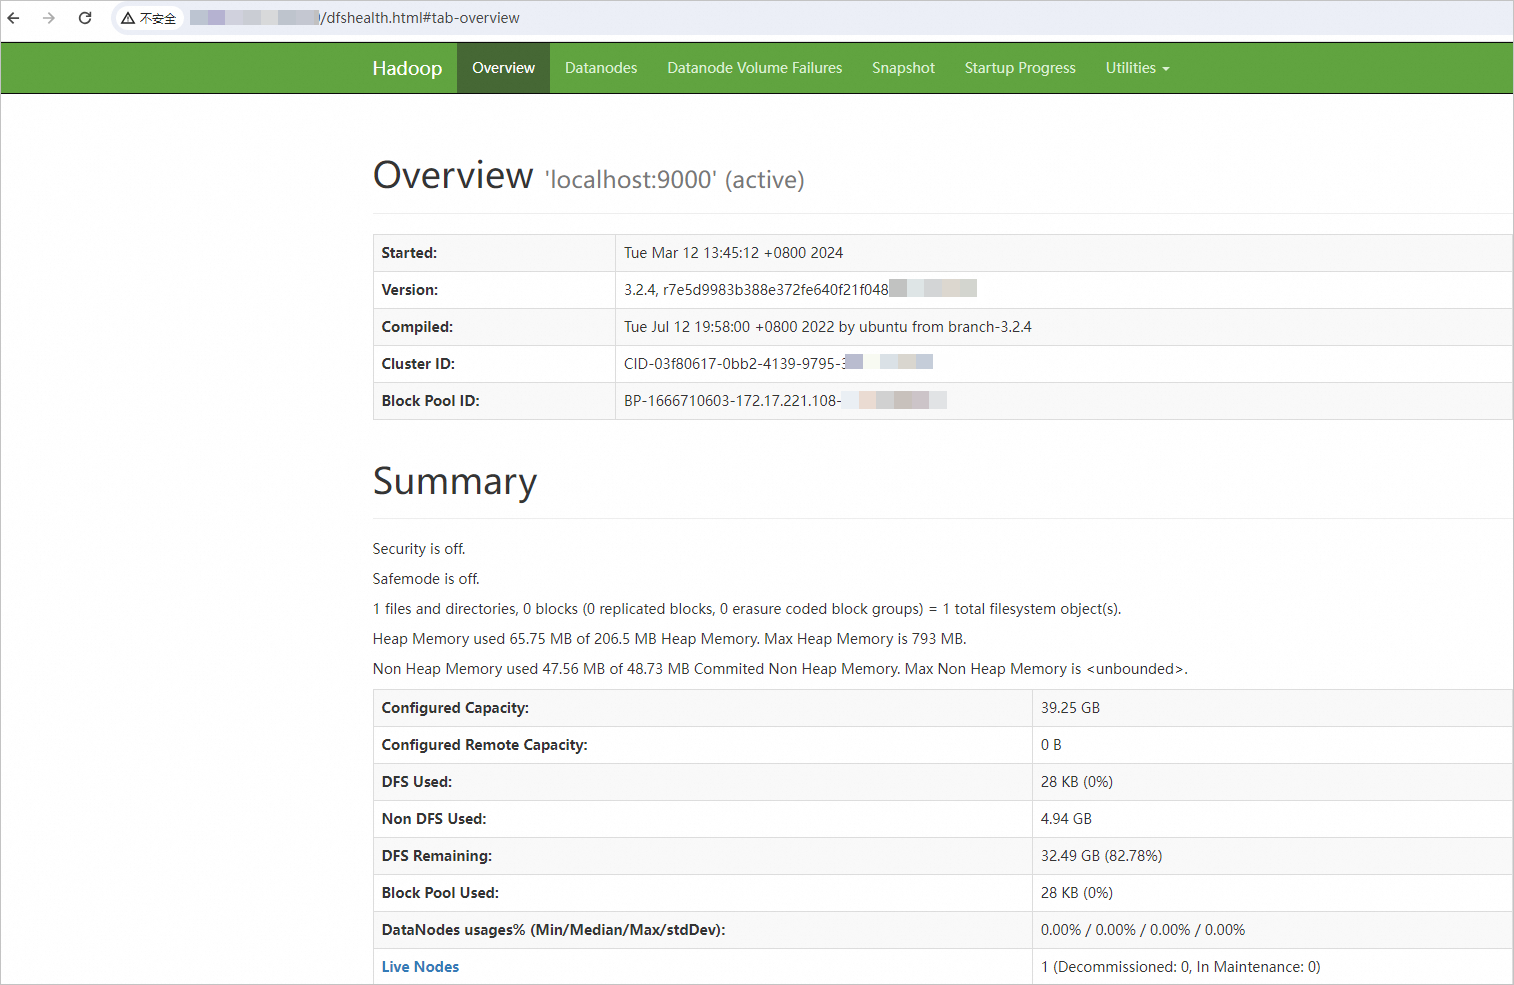
In your browser, enter
http://<Public IP address of the ECS instance>:9870to access the NameNode web UI.View HDFS status, cluster health, active nodes, and NameNode logs.
The following page indicates that the pseudo-distributed environment is built.
ImportantAllow inbound traffic on port 9870 in the security group. Otherwise, the web UI is inaccessible. See Add a security group rule.
More operations
Create a snapshot-consistent group
For distributed Hadoop, use a snapshot-consistent group to ensure data consistency across the cluster. See Create a snapshot-consistent group.
Hadoop-related operations
For HDFS operations, see Common HDFS commands.
References
-
To use Alibaba Cloud's integrated big data environment on ECS, see Quickly create and use a Data Lake Analytics cluster.
-
To use a data lake development and governance environment, see Advanced: Analyze best-selling product categories from order data.