When you troubleshoot disks, partitions or data on data disks may be lost. This topic describes the issue that data disk partitions are lost on a Linux Elastic Compute Service (ECS) instance and how to use tools to resolve the issue.
Prerequisites
A snapshot is created for the data disk that lost partitions. If errors occur during data restoration, you can use the snapshot to roll back the data disk to the state before restoration. For more information, see Create a snapshot and Roll back a disk by using a snapshot.
Background information
The following table describes the tools that you can use to restore data.
Tool name | Default installation | Tool description |
fdisk | Yes | A partition management tool provided in Linux. |
testdisk | No | A tool used to restore disk partitions or data in Linux. |
partprobe | Yes | A tool used to allow the kernel to reread disk partition information without the need to restart the system. |
Restore disk partitions or data
If the disk partition table is corrupted or data is unexpectedly lost due to accidental operations, program anomalies, or viruses on the Linux instance, use one of the following methods to restore the partitions or data.
(Optional) Check disk information
Run the following command to check the current disk information:
sudo fdisk -luThe following command output is returned:
Disk /dev/vda: 145 GiB, 155692564480 bytes, 304087040 sectors
Units: sectors of 1 * 512 = 512 bytes
Sector size (logical/physical): 512 bytes / 512 bytes
I/O size (minimum/optimal): 512 bytes / 512 bytes
Disklabel type: gpt
Disk identifier: F51132A7-xxxx-xxxx-xxxx-FD0DE6E1210C
In this example, the /dev/vda disk is displayed. The Device field does not appear, which indicates that the partition table is corrupted.
Use fdisk to restore partitions
In most cases, when you partition a data disk, the start and end sectors use default values. Run the fdisk command to re-create partitions on the data disk.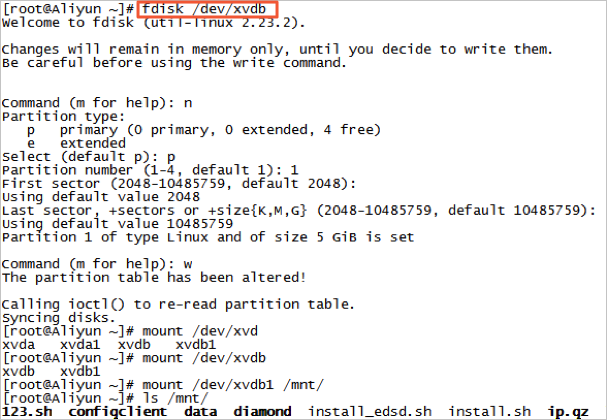
If you cannot mount a partition after you run the fdisk command to restore the partition, or if you can mount the partition but cannot view the files on the partition, you can use testdisk to restore partitions or use testdisk to restore data.
Use testdisk to restore partitions
In this example, the /dev/xvdb disk is used. To use testdisk to restore partitions on the /dev/xvdb disk, perform the following steps:
Run the following command to install
testdisk.Alibaba Cloud Linux 3, Alibaba Cloud Linux 2, CentOS 6, CentOS 7, or CentOS 8
sudo yum install -y testdiskUbuntu or Debian
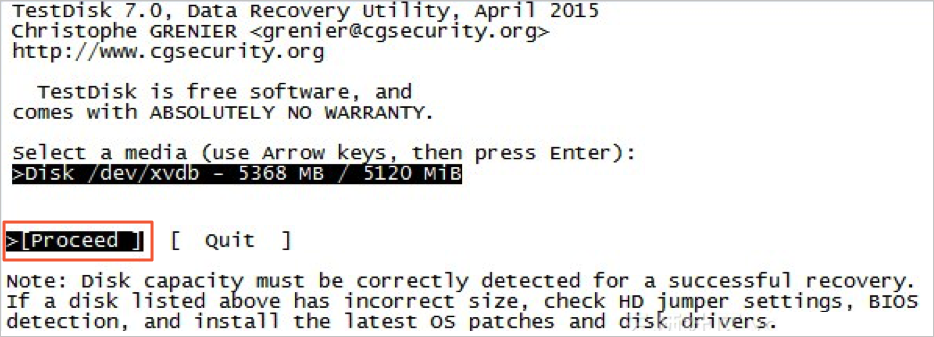
sudo apt install -y testdiskRun the testdisk /dev/xvdb command. Replace /dev/xvdb with the actual device name of your data disk. Then, select Proceed (default) and press the Enter key.
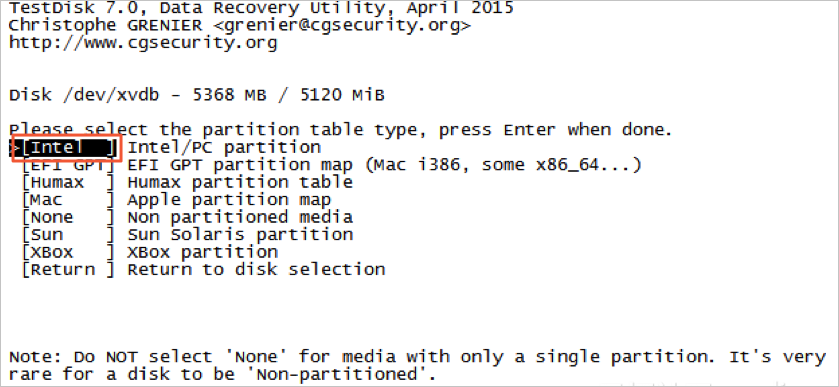
Select the partition table style for scanning. In most cases, the default Intel value is selected. If your data disk uses the GUID Partition Table (GPT) style, select EFI GPT.
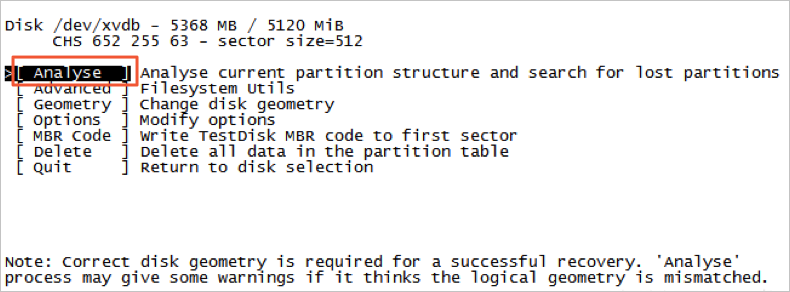
Select Analyse and press the Enter key.
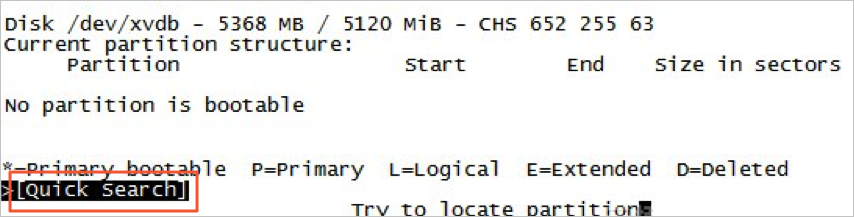
If partition information is not displayed, select Quick Search and press the Enter key.
Partition information is displayed in the command output, as shown in the following figure.
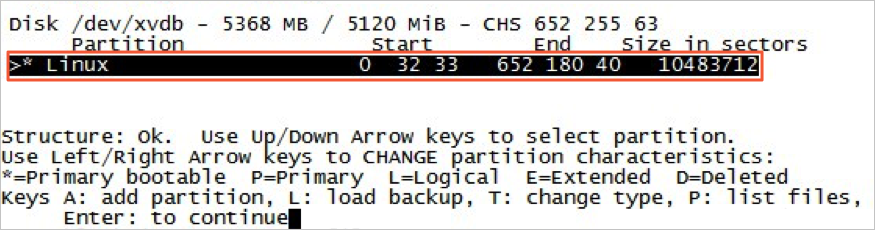
Select a partition and press the Enter key.
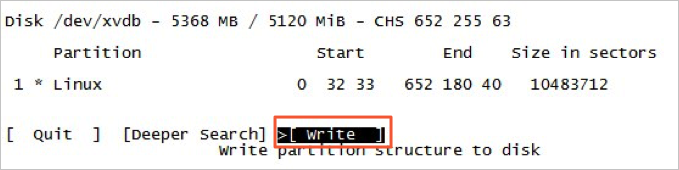
Select Write to save the partition.
NoteIf the expected partition is not listed, select Deeper Search to continue to search for the partition.
Press the Y key to save the partition.

Run the partprobe /dev/xvdb command to refresh the partition table. Replace /dev/xvdb with the actual device name of your data disk.
Remount the partition and view data on the data disk.

Use testdisk to restore data
In specific scenarios, you can use testdisk to scan for a disk partition but cannot save the partition. In this case, you can restore files on the partition. Perform the following steps:
Scan for a disk partition by using testdisk. For more information, see Step 1 to Step 5 of the Use testdisk to restore partitions section of this topic.
Press the P key to display files.
Files are displayed in the command output, as shown in the following figure.
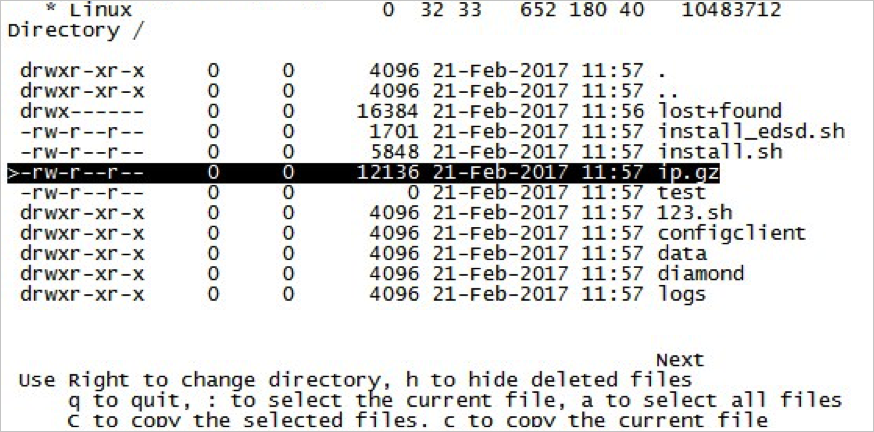
Select a file that you want to restore and press the C key.
Select a destination directory. In this example, you want to restore a file to the /home directory.
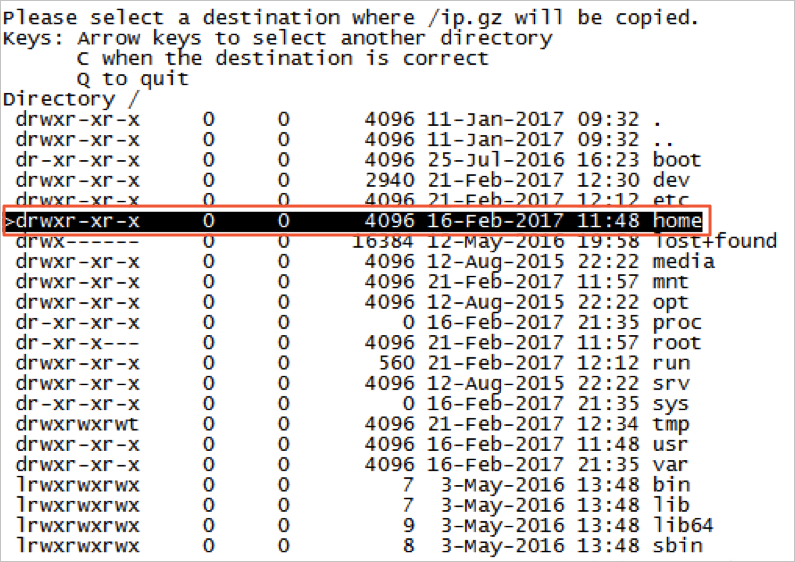
If a message similar to
Copy done! 1 ok, 0 failedappears as shown in the following figure, the file is copied as expected.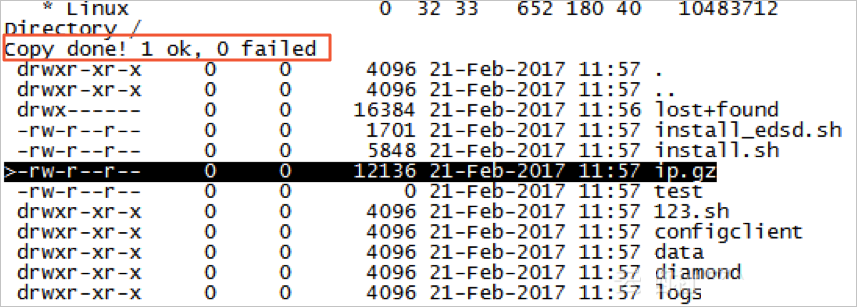
Switch to the /home directory to check whether the file is restored.
The file is displayed in the /home directory as shown in the following figure, which indicates that the file is restored as expected.

Common misunderstandings and best practices
Data is the core asset of users. A large number of users build websites and create self-managed MySQL, MongoDB, or Redis databases on ECS instances. Data loss may cause huge risks to business. The following section describes the common misunderstandings and best practices in data security:
Common misunderstandings
The underlying storage of Alibaba Cloud is based on the triplicate storage technology. As such, specific users consider that no risk of data loss exists in the operating system. This is a misunderstanding. The triplicate storage technology protects data on data disks at the physical layer. However, logical issues, such as viruses, accidental deletions, or file system corruption, can cause data loss. To mitigate the risks, you must use related technologies, such as snapshots and geo-redundancy, to improve data security. For more information, see Triplicate storage.
Best practices
Data disk partition restoration and data restoration can be used to address data loss. However, the solutions may be unable to restore data as expected. We recommend that you follow the best practices to create automatic or manual snapshots for data and use different backup methods to maximize your data security.
Apply automatic snapshot policies
You can apply automatic snapshot policies to system disks or data disks to create automatic snapshots for the disks.
ImportantWhen a system disk is replaced, an instance expires, or a disk is manually released, the associated automatic snapshots may be released. If you want automatic snapshots of a disk to be released along with the disk, you can select Delete Automatic Snapshots While Releasing Disk in the Modify Attributes dialog box in the ECS console. If you want to retain the automatic snapshots when the disk is released, clear this option. For more information, see Snapshot FAQ and Create an automatic snapshot policy.
Create manual snapshots
Before you perform the following important or high-risk operations, you must manually create snapshots for disks:
Update the kernel.
Upgrade or change applications.
Restore data on disks.
Before you restore a disk, you must create a snapshot for the disk. Then, perform the corresponding operations after the snapshot is complete.
Object Storage Service (OSS) backup, offline backup, and geo-redundancy
You can back up important data by using OSS backup, offline backup, or geo-redundancy based on your business requirements.
Reference
For more information about how to restore data on Linux instances, see Best practices for restoring data on Linux instances.