If system policies cannot meet your requirements, you can create custom policies to implement the principle of least privilege. Custom policies allow you to achieve fine-grained control over permissions and improve resource access security. This topic describes the scenarios in which custom policies for Domain are used and provides examples.
What is a custom policy?
Resource Access Management (RAM) policies are classified into system policies and custom policies. You can manage custom policies based on your business requirements.
After you create a custom policy, you must attach the policy to a RAM user, RAM user group, or RAM role. This way, the permissions that are specified in the policy can be granted to the principal.
You can delete a RAM policy that is not attached to a principal. If the RAM policy is attached to a principal, you must detach the RAM policy from the principal before you can delete the RAM policy.
Custom policies support version control. You can manage custom policy versions based on the version management mechanism provided by RAM.
References
Grant the read-only permissions to a RAM user by creating a custom policy
You can create a custom policy in the RAM console to grant the read-only permissions to a RAM user. The authorized RAM user can view domain names within the Alibaba Cloud account but cannot manage these domain names. Perform the following steps:
You can go to the Create Policy page by using one of the following methods:
Method 1:
In the left-side navigation pane of the RAM console, choose .
On the Policies page, click Create Policy.
Method 2:
In the left-side navigation pane of the RAM console, choose .
On the Users page, find the RAM user to which you want to grant permissions in the User Logon Name/Display Name column. Click Add Permissions in the Actions column.
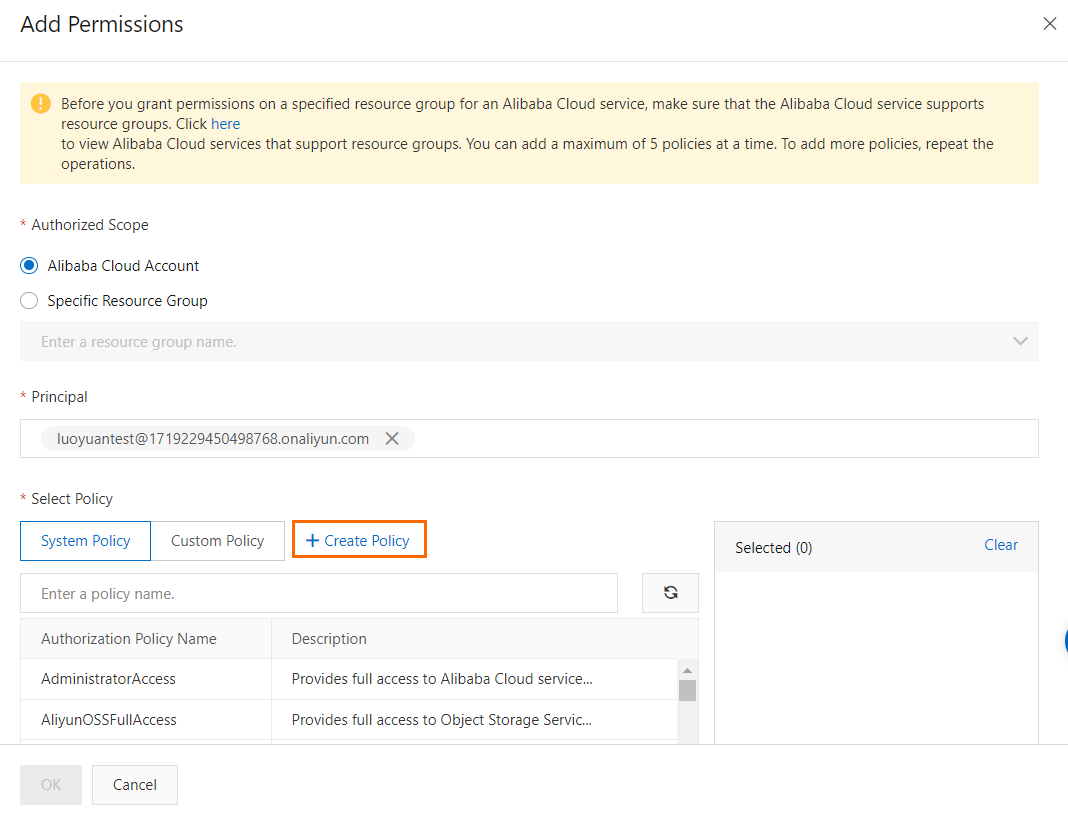
In the Add Permissions panel, click Create Policy.
On the Create Policy page, click the JSON tab.
Enter the following script in the code editor. Click Next to edit policy information.
{
   "Version": "1",
   "Statement": [
     {
       "Action": [
         "domain:Query*"
       ],
       "Resource": "acs:domain:*:*:*",
       "Effect": "Allow"
     }
    ]
}
Enter a name and a description in the Name and Description fields in the Basic information section. The Description parameter is optional.

For more information, see the Create a custom policy on the JSON tab section of the "Create a custom policy" topic.
Click OK.
You can use one of the following methods to view the created custom policy:
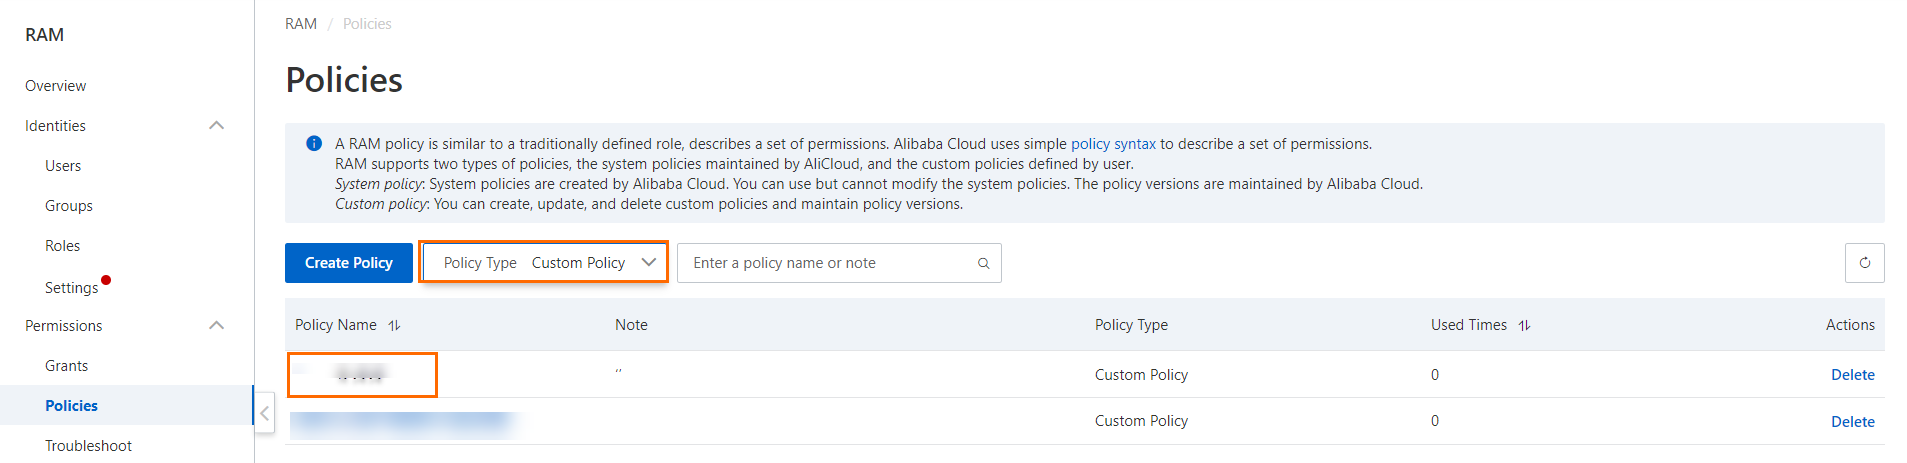
Method 1: On the Policies page, select Custom Policy from the Policy Type drop-down list and find the created custom policy.
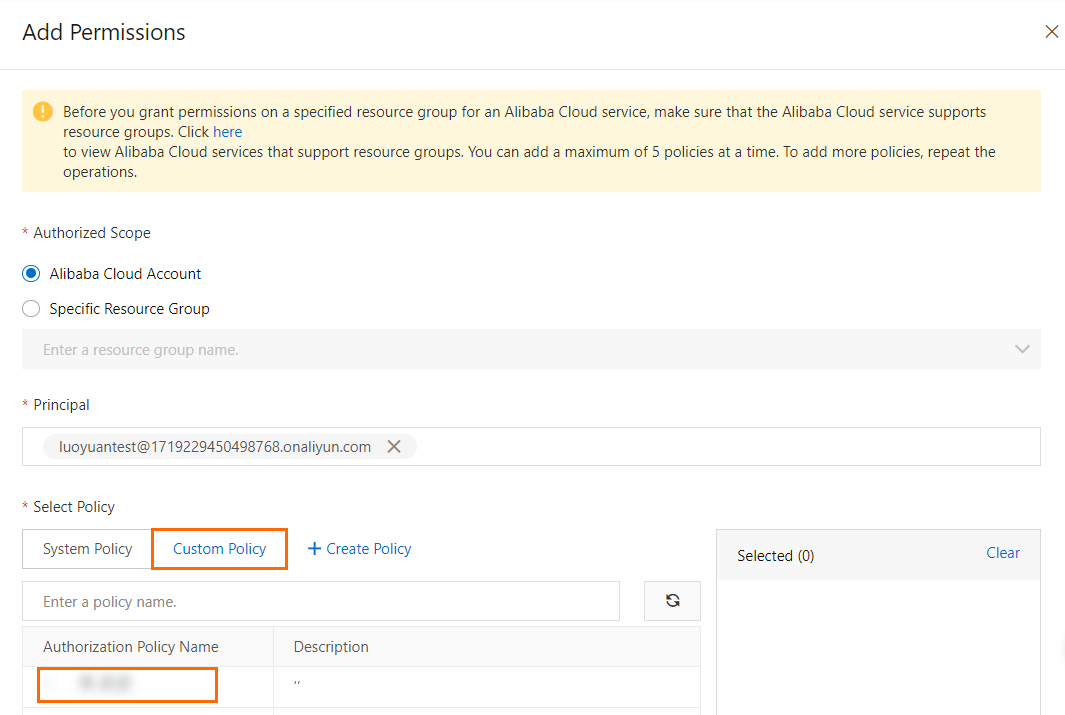
Method 2: In the Add Permissions panel, set the Select Policy parameter to Custom Policy and find the created custom policy.
Authorize a RAM user to manage a single domain name by creating a custom policy
You can create a custom policy in the RAM console to authorize a RAM user to manage a single domain name. The authorized RAM user can only manage the resources of the specified domain name. For example, you can authorize a RAM user to manage the example.com domain. Perform the following steps:
Only some of the operations on a domain name can be authorized. For more information about the authorization rules of each operation, see Authentication rules for the Domains API.
After you attach the custom policy to a RAM user, the RAM user can log on to the Alibaba Cloud Domains console to view all the domain names within the Alibaba Cloud account. However, the RAM user can manage only the domain name specified in the custom policy.
You can go to the Create Policy page by using one of the following methods:
Method 1:
In the left-side navigation pane of the RAM console, choose .
On the Policies page, click Create Policy.
Method 2:
In the left-side navigation pane of the RAM console, choose .
On the Users page, find the RAM user to which you want to grant permissions in the User Logon Name/Display Name column. Click Add Permissions in the Actions column.
In the Add Permissions panel, click Create Policy.
On the Create Policy page, click the JSON tab.
Enter the following script in the code editor and replace
example.comwith the domain name that you want to authorize the RAM user to manage. Then, click Next to edit policy information.{ "Version": "1", "Statement": [ { "Action": [ "domain:DnsModification", "domain:SecuritySetting", "domain:RealNameVerificationOperation", "domain:DnsHostModification", "domain:CreateOrderActivate", "domain:CreateOrderRenew", "domain:CreateOrderRedeem", "domain:CreateOrderTransfer", "domain:DomainTransferInOperation", "domain:DomainTransferOutOperation", "domain:QualificationAuditOperation", "domain:EnsSetting", "domain:DnsSecSetting", "domain:SaveArtExtension", "domain:CreateOrderPendingDelete" ], "Resource": "acs:domain:*:*:domain/example.com", "Effect": "Allow" }, { "Action": [ "domain:Query*" ], "Resource": "acs:domain:*:*:*", "Effect": "Allow" } ] }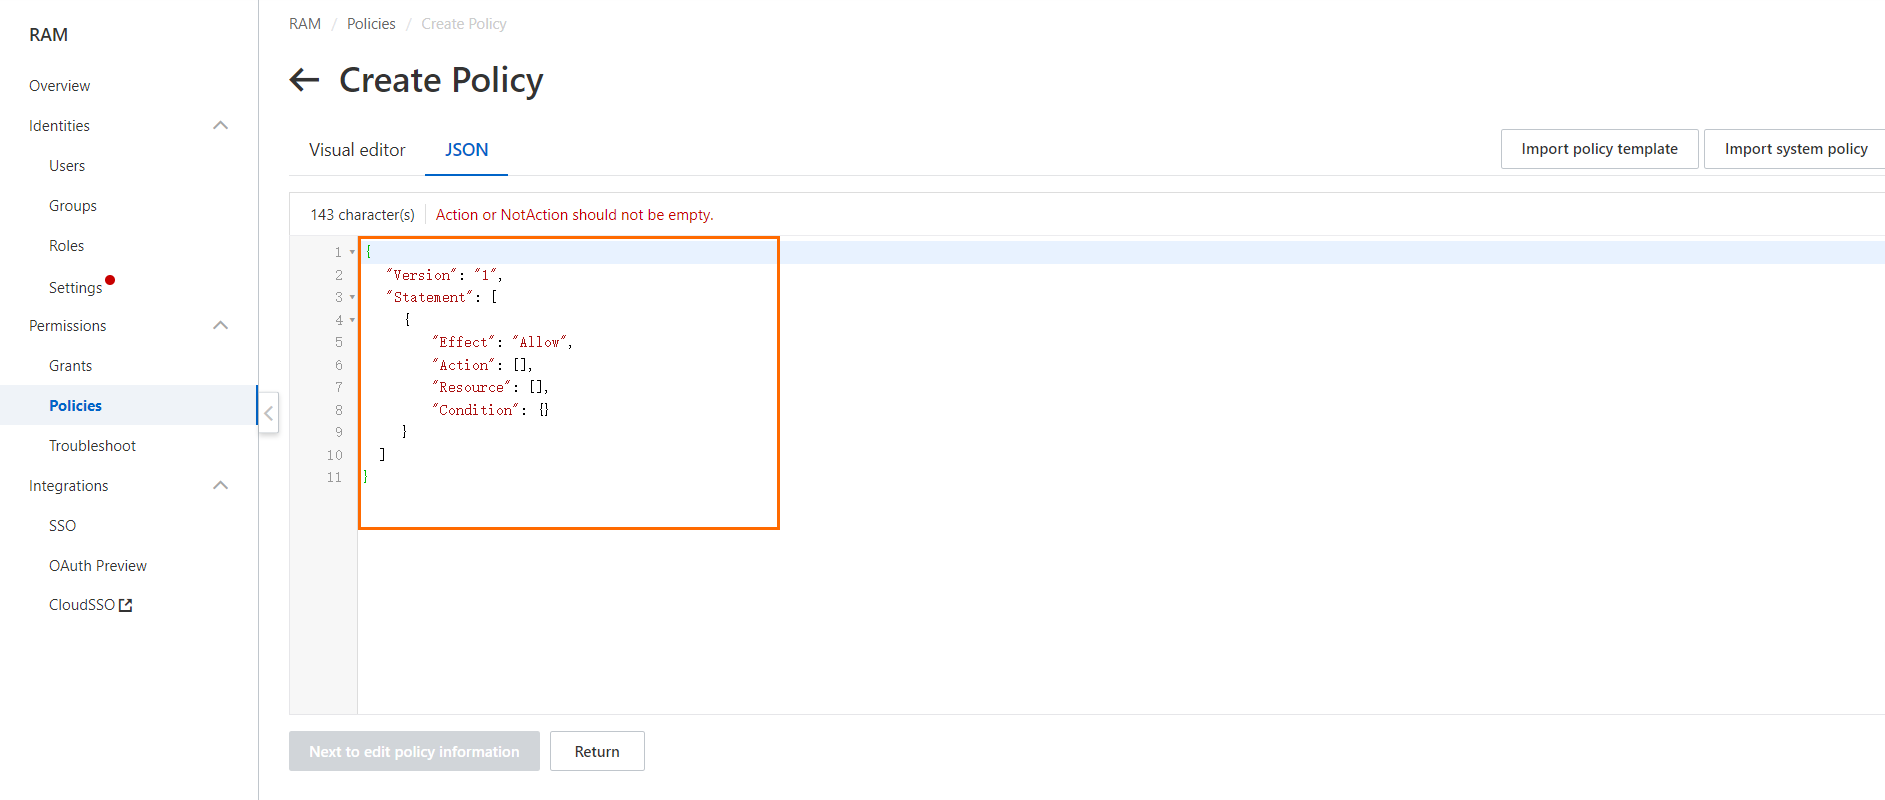
Enter a name and a description in the Name and Description fields in the Basic information section. The Description parameter is optional.
For more information, see the Create a custom policy on the JSON tab section of the "Create a custom policy" topic.
Click OK.
You can use one of the following methods to view the created custom policy:
Method 1: On the Policies page, select Custom Policy from the Policy Type drop-down list and find the created custom policy.
Method 2: In the Add Permissions panel, set the Select Policy parameter to Custom Policy and find the created custom policy.