Collect, visualize, and alert on Kubernetes events such as pod configuration changes and component exceptions in real time.
Prerequisites
Background
Kubernetes generates events on state transitions: normal events for healthy transitions and warning events for abnormal transitions.
ACK provides out-of-the-box event monitoring with node-problem-detector and kube-eventer.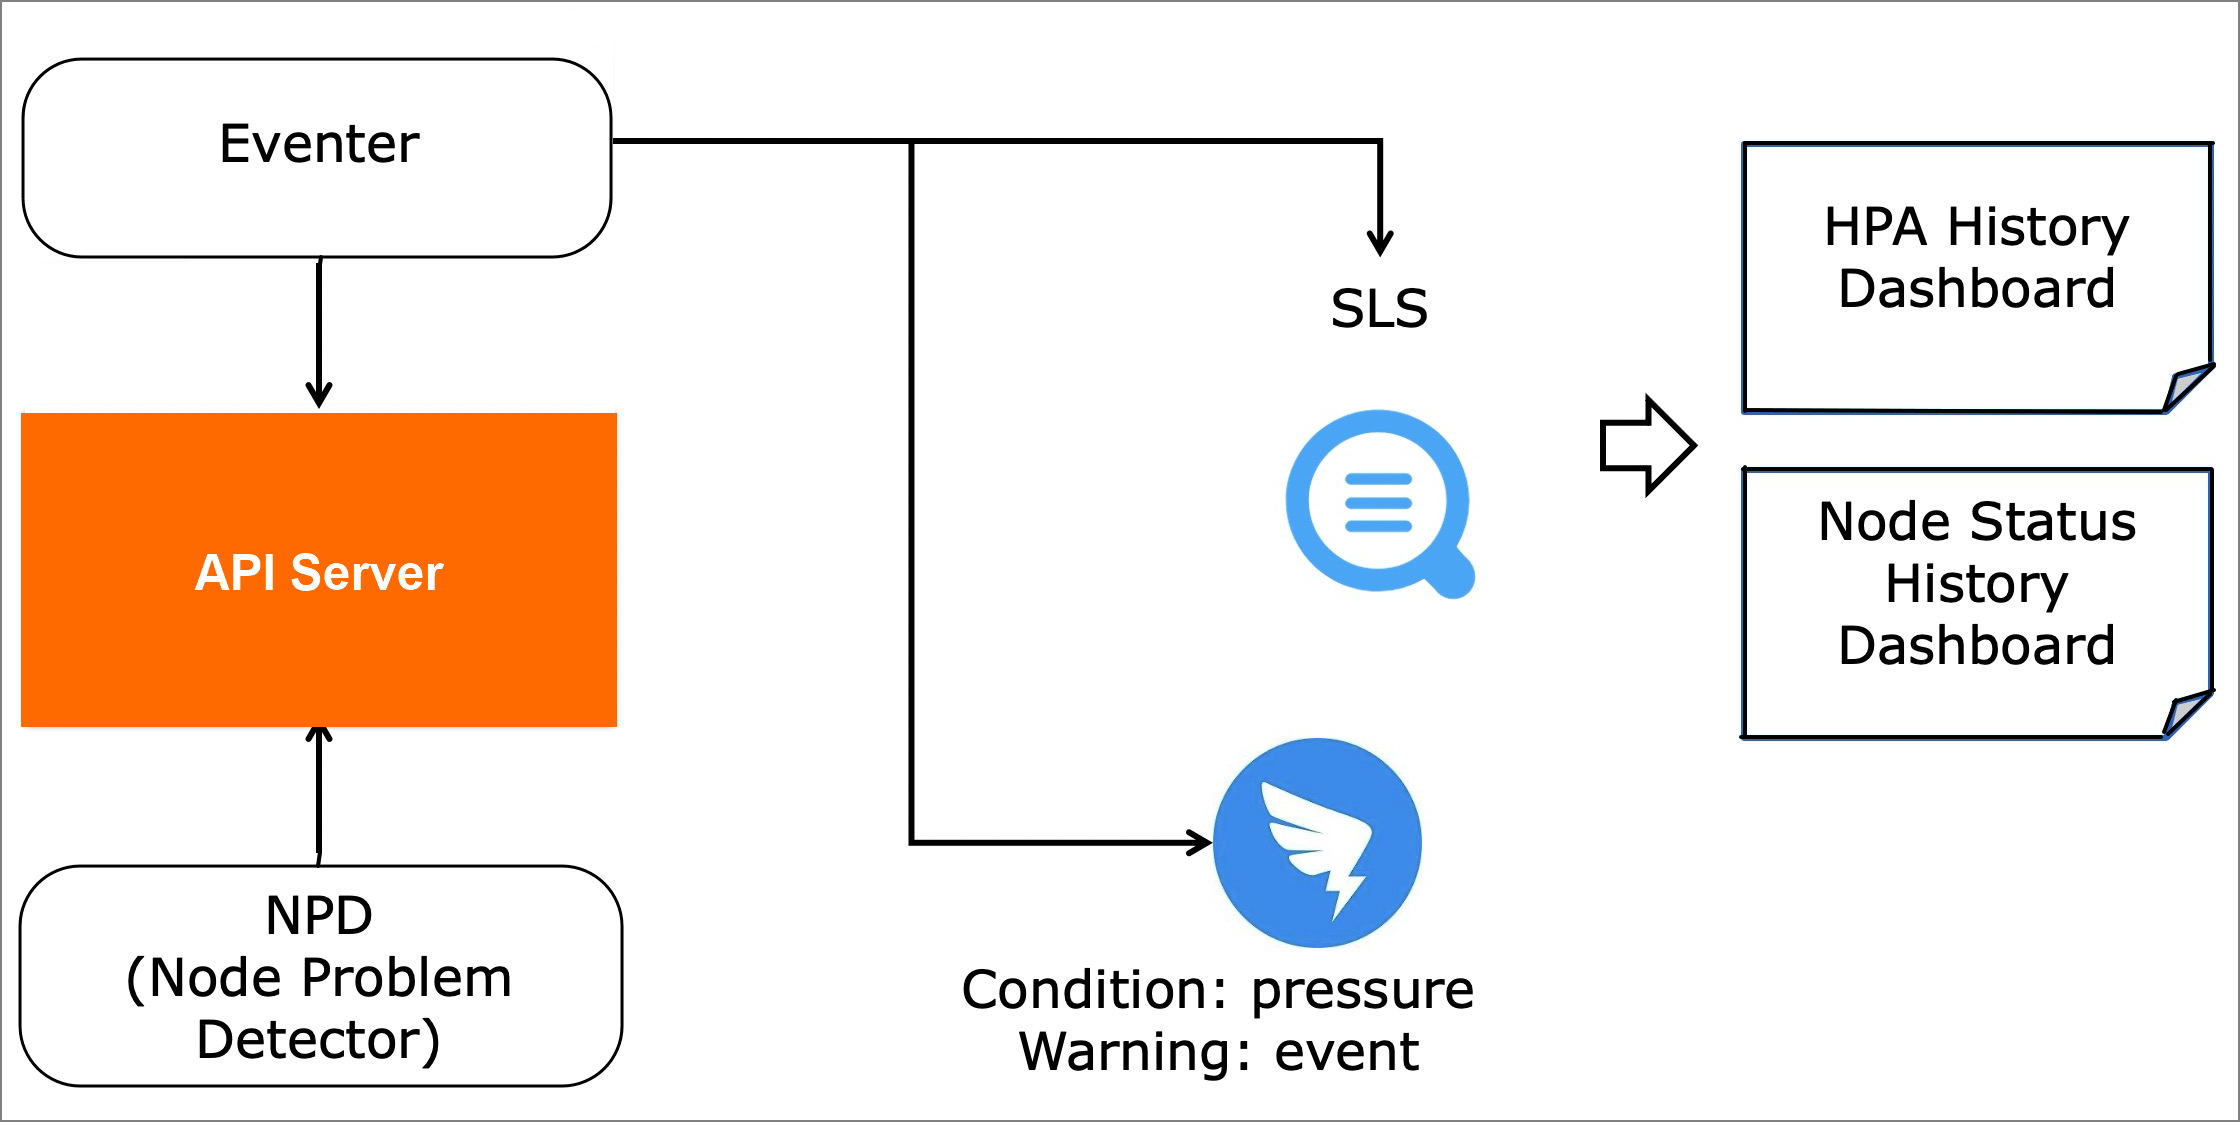
-
node-problem-detector diagnoses Kubernetes nodes and generates events for exceptions such as Docker engine hangs, Linux kernel hangs, outbound traffic issues, and file descriptor errors. It works with kube-eventer to trigger alerts. See NPD.
-
kube-eventer, an open-source event emitter maintained by ACK, sends Kubernetes events to sinks such as DingTalk, Log Service, and EventBridge. It supports level-based filtering, real-time collection, alerting, and asynchronous archiving. See kube-eventer.
Step 1: Grant RAM permissions to the event center component
Use onectl
-
Install and configure onectl on your local machine. For more information, see Manage registered clusters using onectl.
-
Grant RAM permissions to the event center component:
onectl ram-user grant --addon ack-node-problem-detectorExpected output:
Ram policy ack-one-registered-cluster-policy-ack-node-problem-detector granted to ram user ack-one-user-ce313528c3 successfully.
Use the console
To grant the registered cluster access to Alibaba Cloud resources, create a RAM user, attach the required policy, and generate an AccessKey pair.
-
-
Attach the policy to the RAM user.
Use the custom policy above or select the AliyunECIFullAccess policy.
-
Create an AccessKey for the RAM user.
WarningFor enhanced security, configure a network access control policy for the AccessKey to restrict access to trusted network environments and improve security. For more information, see AccessKey-based network access restriction policies.
-
Use the AccessKey pair to create a Secret named
alibaba-addon-secretin the registered cluster.The event center components use this AccessKey pair to access cloud resources.
Create a Secret for the event center:
kubectl -n kube-system create secret generic alibaba-addon-secret --from-literal='access-key-id=<your AccessKey ID>' --from-literal='access-key-secret=<your AccessKey Secret>'NoteReplace
<your AccessKey ID>and<your AccessKey Secret>with your actual AccessKey pair.
Step 2: Install the Kubernetes event center
Use onectl
Install the event center component:
onectl addon install ack-node-problem-detectorExpected output:
Addon ack-node-problem-detector, version xxx installed.Use the console
-
Log on to the ACK console. In the left navigation pane, click Clusters.
-
On the Clusters page, click the name of your cluster. In the left navigation pane, click .
-
On the Event Center page, click the Events Overview tab.
If the console prompts The ack-node-problem-detector component is not installed, click Install.
The event center provides event overviews, event details, pod lifecycle tracking, custom queries, and alert configuration.
Result
After setup, see Create and use a Kubernetes event center for detailed usage.
Use the event center to monitor events, track pod lifecycles, configure alerts, and run custom queries.