This topic uses a private domain name as an example to describe how to configure Private Zone.
Overall procedure

Preparations
Create a virtual private cloud (VPC). For example, you can set the VPC CIDR block to
192.168.0.0/16and the vSwitch CIDR block to192.168.0.0/24. For more information, see Create or delete a VPC and a vSwitch.Create a demo service in the VPC and obtain its private IP address, such as 192.168.0.83. This allows machines in the VPC, such as
vpc-hangzhou, to access the demo service usingdemo.example.com. For more information about how to create a demo service, see Purchase and use a custom ECS instance on the console.
Procedure
1. Add a User Defined Zones
Log on to the Alibaba Cloud DNS console for Private DNS.
Click Authoritative Zone > User Defined Zones > Add Zone.
Enter an authoritative domain name and complete the form.
Authoritative Zone:
example.comRecursive Resolution Proxy for Subdomain Names: Keep the default setting, which is enabled.
Leave the other fields empty for now.
ImportantYou can change the scope of the domain name at any time. However, you must set the scope after you add a DNS record.
If you set the scope before you add a DNS record, DNS resolution for the domain name fails because queries within the scope are not recursively sent to public DNS servers.
2. Add a DNS record
Go to the Alibaba Cloud DNS console for Private DNS.
Click Authoritative Zone > User Defined Zones. Then, find the target domain name and click the Settings button in the Actions column.
On the Settings tab, click Add Record and complete the form.
Record Type: A
Hostname:
demoRecord Value:
192.168.0.83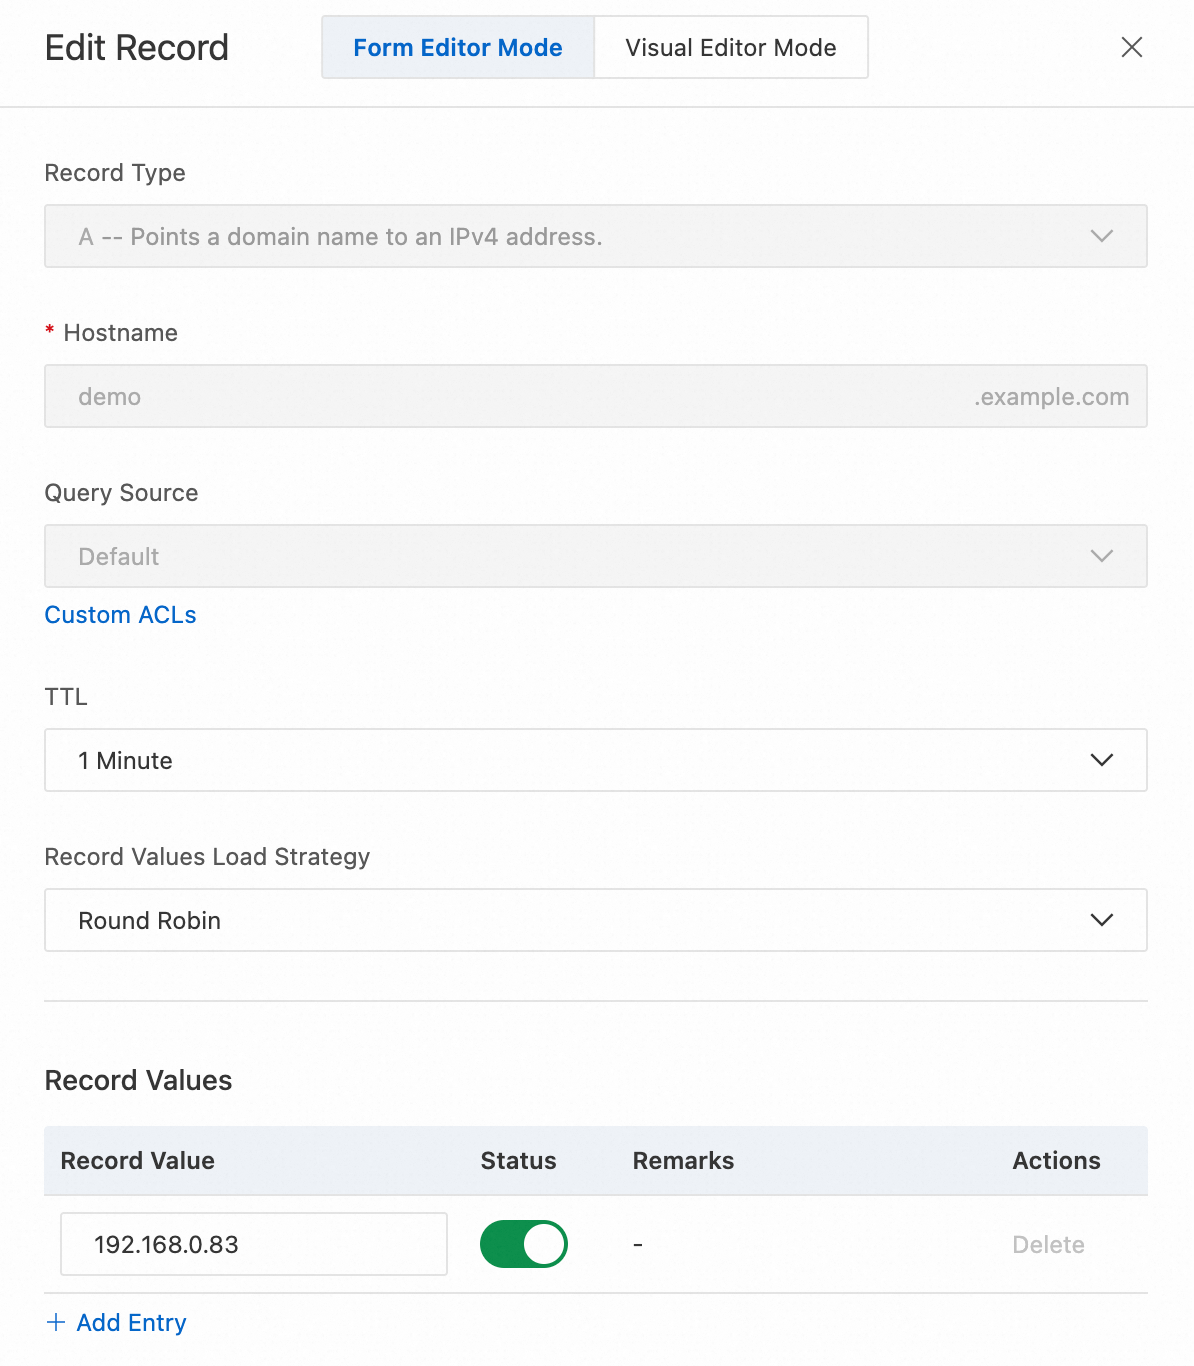
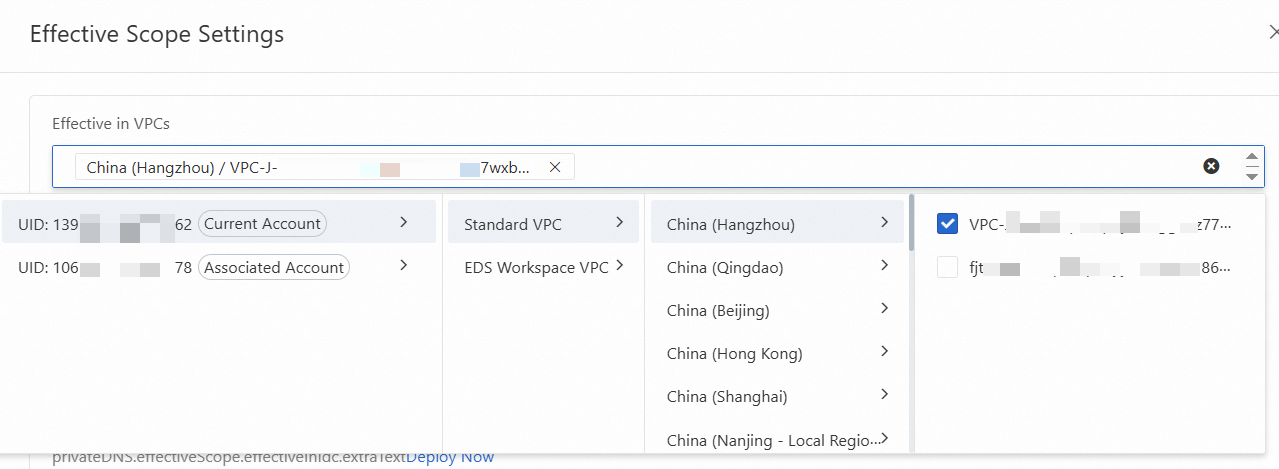
3. Set the scope of the domain name
Go to the Alibaba Cloud DNS console for Private DNS.
Click Authoritative Zone > User Defined Zones. Then, find the target domain name and click Effective Scope.
In the Effective Scope panel, select the VPC in which you want the DNS rule to take effect.
4. Verify the configuration
Create another Elastic Compute Service (ECS) instance in the same VPC. For more information, see Purchase and use a custom ECS instance on the console.
Log on to the new ECS instance and run the following command:
curl demo.example.com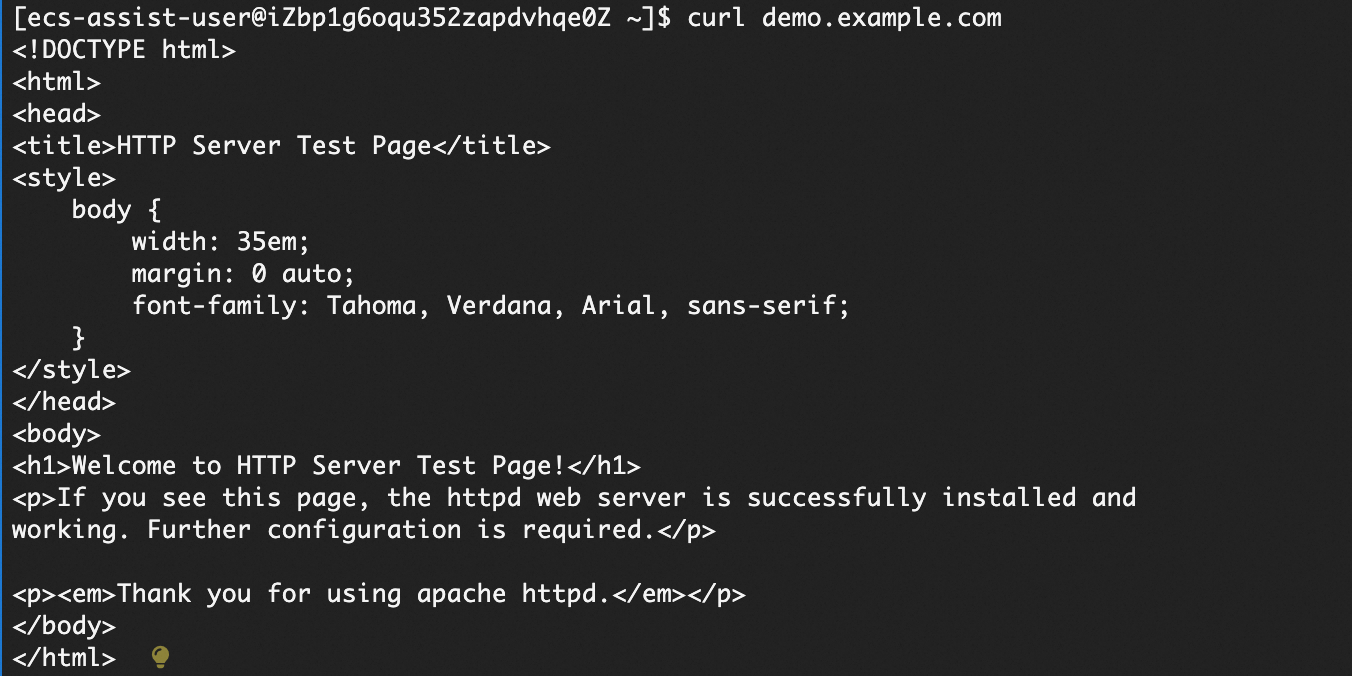
The correct IP address is returned, which indicates that the configuration is successful.
If no service is running on the destination server, you can run the
ping demo.example.comcommand.