DMS MLflow is a managed MLflow experiment tracking service running inside your virtual private cloud (VPC). It handles lifecycle management and operations and maintenance (O&M) of the underlying infrastructure, so you can focus on training and comparing models. Metadata—parameters and metrics—is stored by DMS MLflow. Model files and other artifacts are stored in your own Object Storage Service (OSS) bucket.
DMS MLflow is available in China (Beijing), China (Shanghai), and China (Hangzhou). It is currently in grayscale release. Availability depends on whether the feature appears in the DMS console.
How it works
Managed service: DMS provisions and maintains the underlying compute and database resources for your MLflow instance.
VPC-native integration: MLflow is exposed inside your VPC through an Application Load Balancer (ALB), ensuring network isolation.
Pay-as-you-go: Seamlessly integrates with environments such as DMS Notebook and charges based on actual compute resource consumption.
Split storage model: DMS MLflow records only metadata (parameters, metrics, artifact locations). Artifacts such as model files and datasets are stored in your OSS bucket. You must configure an OSS bucket before creating an instance.
Prerequisites
Before you begin, ensure that you have:
A VPC and at least two vSwitches in different zones within that VPC (required for high availability)
A security group to control inbound access to the MLflow service
An OSS bucket to store model artifacts
A DMS workspace
To create these resources, see:
Create a Notebook session
Log on to the DMS console V5.0.
In the top menu bar, choose Data + AI > Workspace. In simple mode, click the
 icon in the upper-left corner, then choose All Features > Data + AI > Workspace.
On the workspace list page, find your target workspace and click its ID to enter it.
Go to the Notebook session management page.
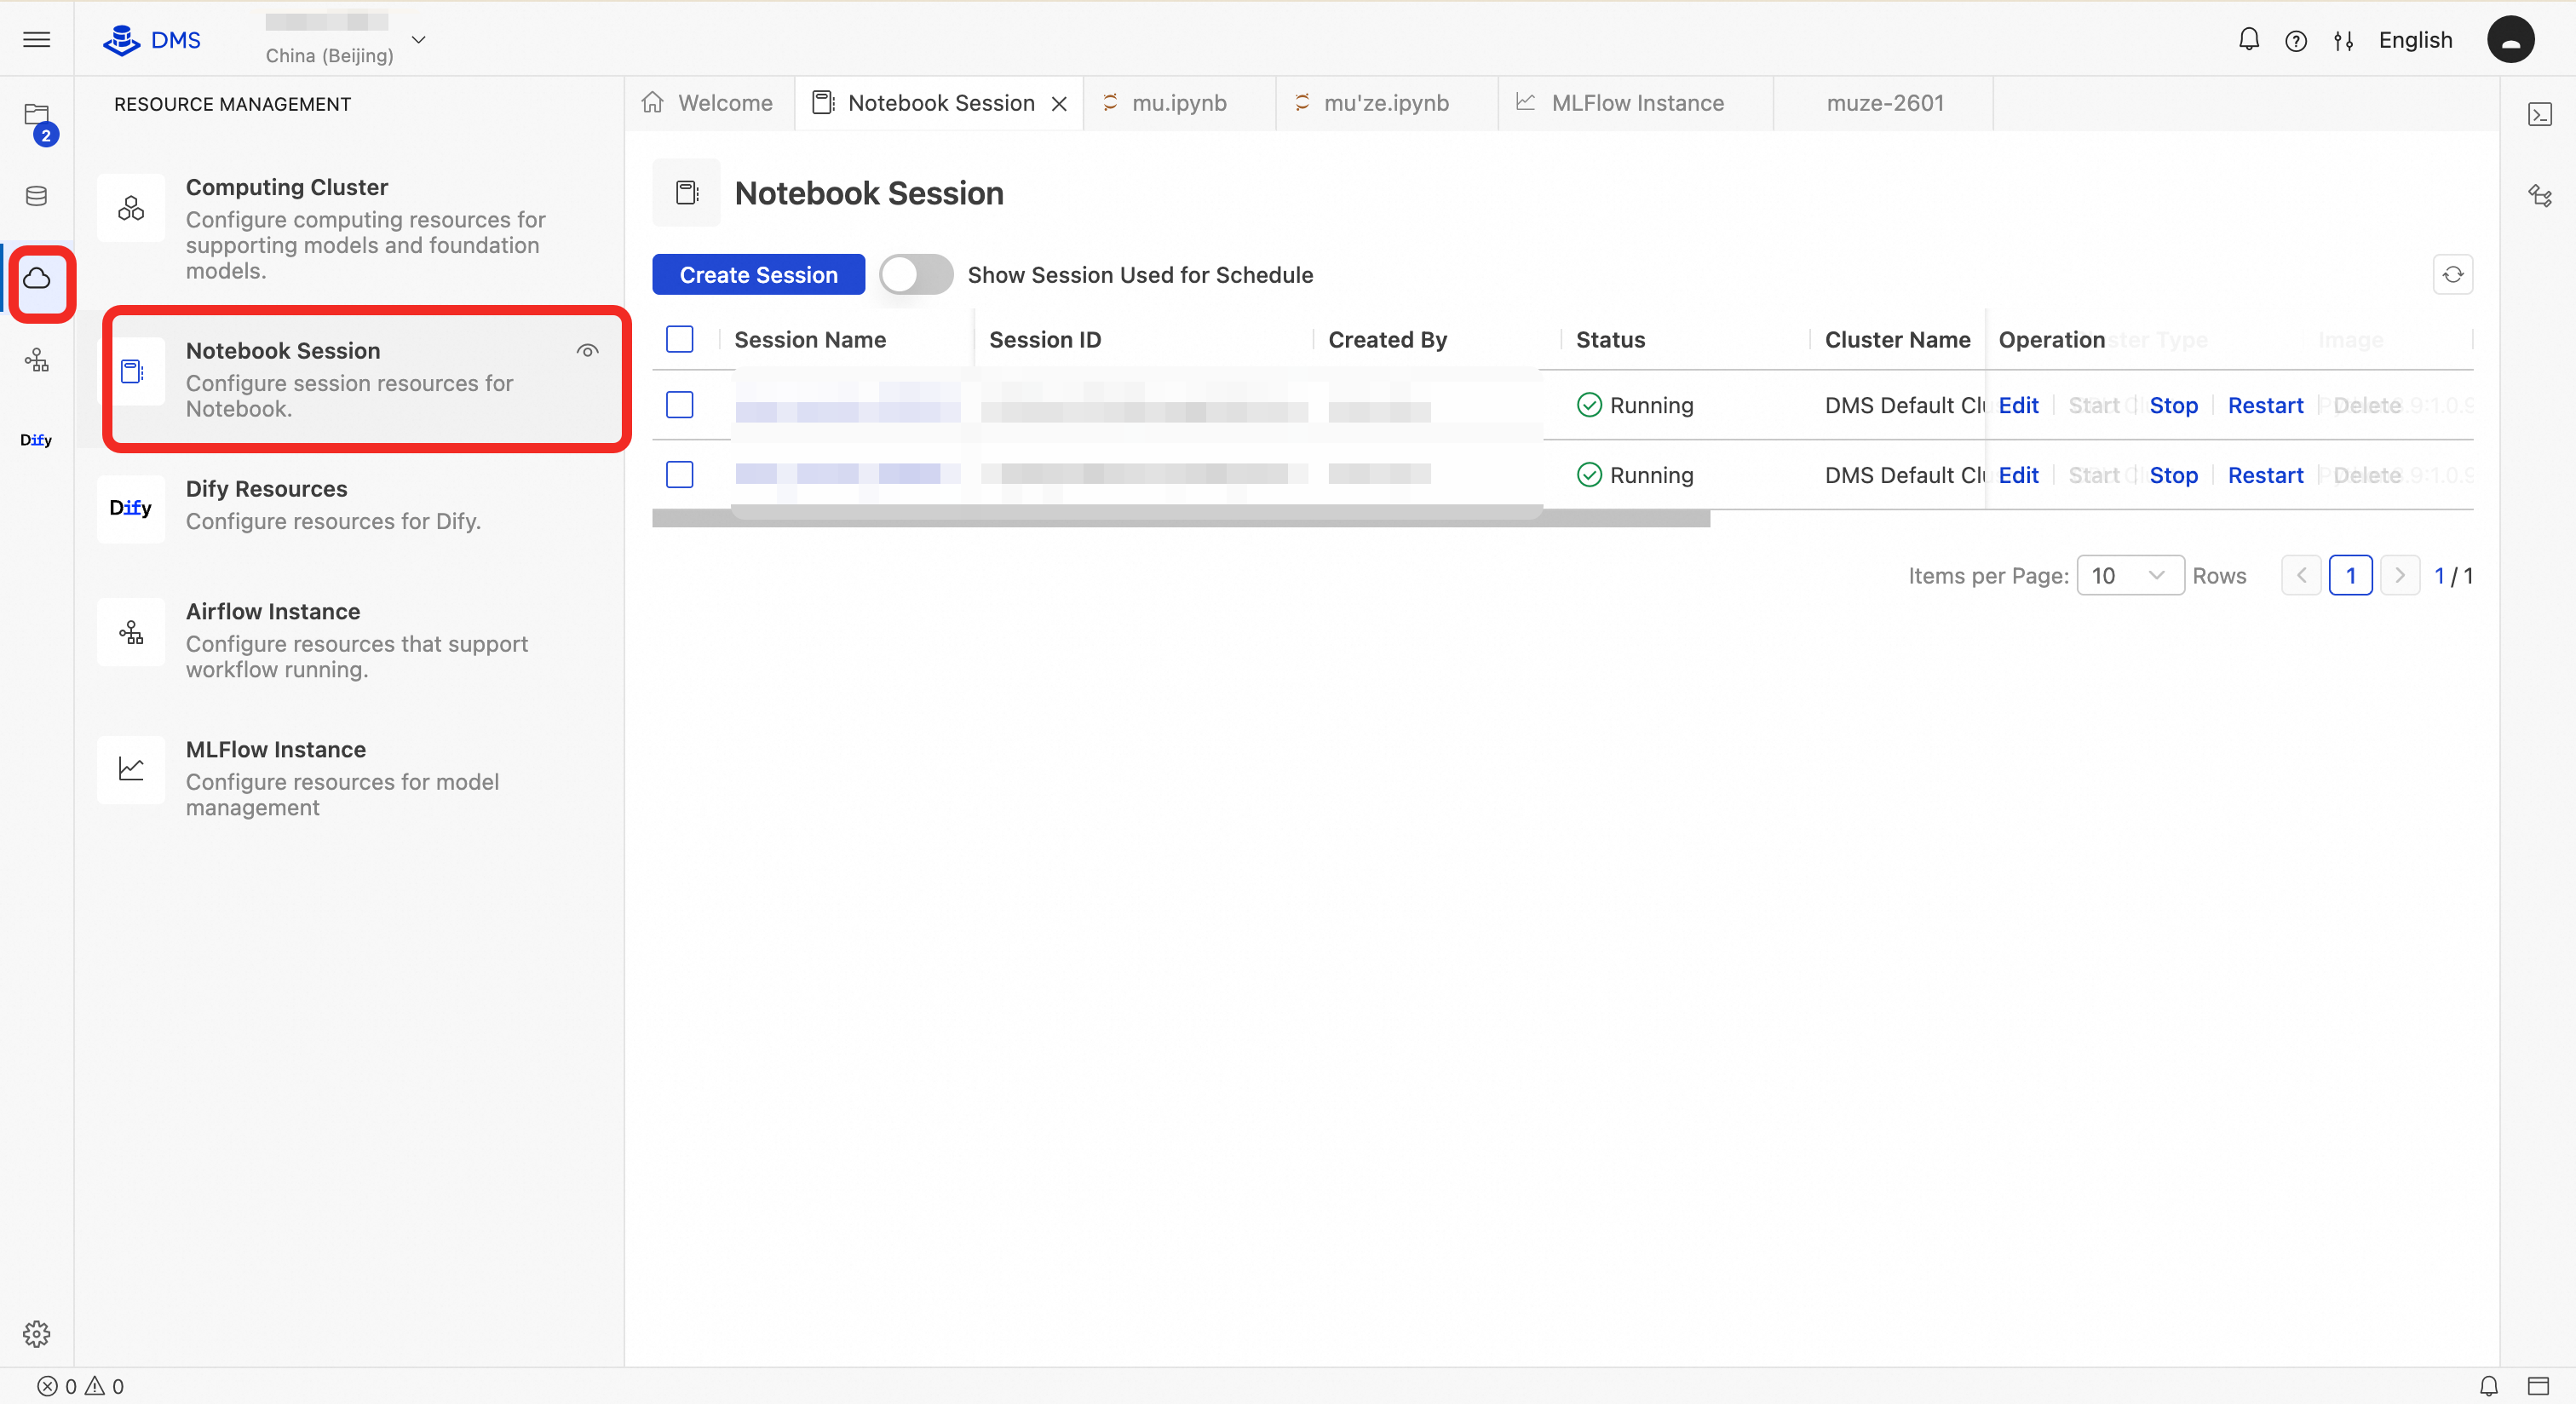
Click Create Session. In the dialog box, fill in the required information and click Finish and Create.
Parameter Description Example Session name A unique identifier for the Notebook session. Use letters, digits, and underscores. Maximum 64 characters. new_session_20250401Cluster The compute cluster that runs the Notebook. DMS uses a shared cluster by default. You can also select an authorized dedicated cluster. DMS Default ClusterContainer image The base container image for the runtime environment. Includes a preinstalled Python version and common AI/data science libraries such as pandas, numpy, and dashscope. Python3.9:1.0.9Specification Compute resources allocated to the Notebook instance. Format: CPU cores + memory size. 1C4G(1 CPU core, 4 GB memory)Development mode Enables debugging and interactive enhancements such as auto-save and hot reload. Increases resource usage slightly. Enable for development only; disable in production. Disabled/EnabledConfiguration A preset runtime configuration template that may include network policies, mount targets, and security contexts. default_profileis the system's default secure configuration.default_profileResource release Idle timeout in minutes before automatic resource release. Unsaved data may be lost after timeout. 1440(24 hours)Data storage Whether to mount a persistent volume (PV). Select None to store data in a temporary container (data is lost on restart). For persistence, bind to OSS or NAS. None/oss://my-bucket/notebookPyPI packages Additional Python packages to install via pip. Separate multiple packages with commas. Specify versions if needed. dashscope, pandas==2.1.0Environment variables Custom runtime environment variables. Format: KEY=VALUE. Separate multiple entries with line breaks or semicolons.DASHSCOPE_API_KEY=sk-xxx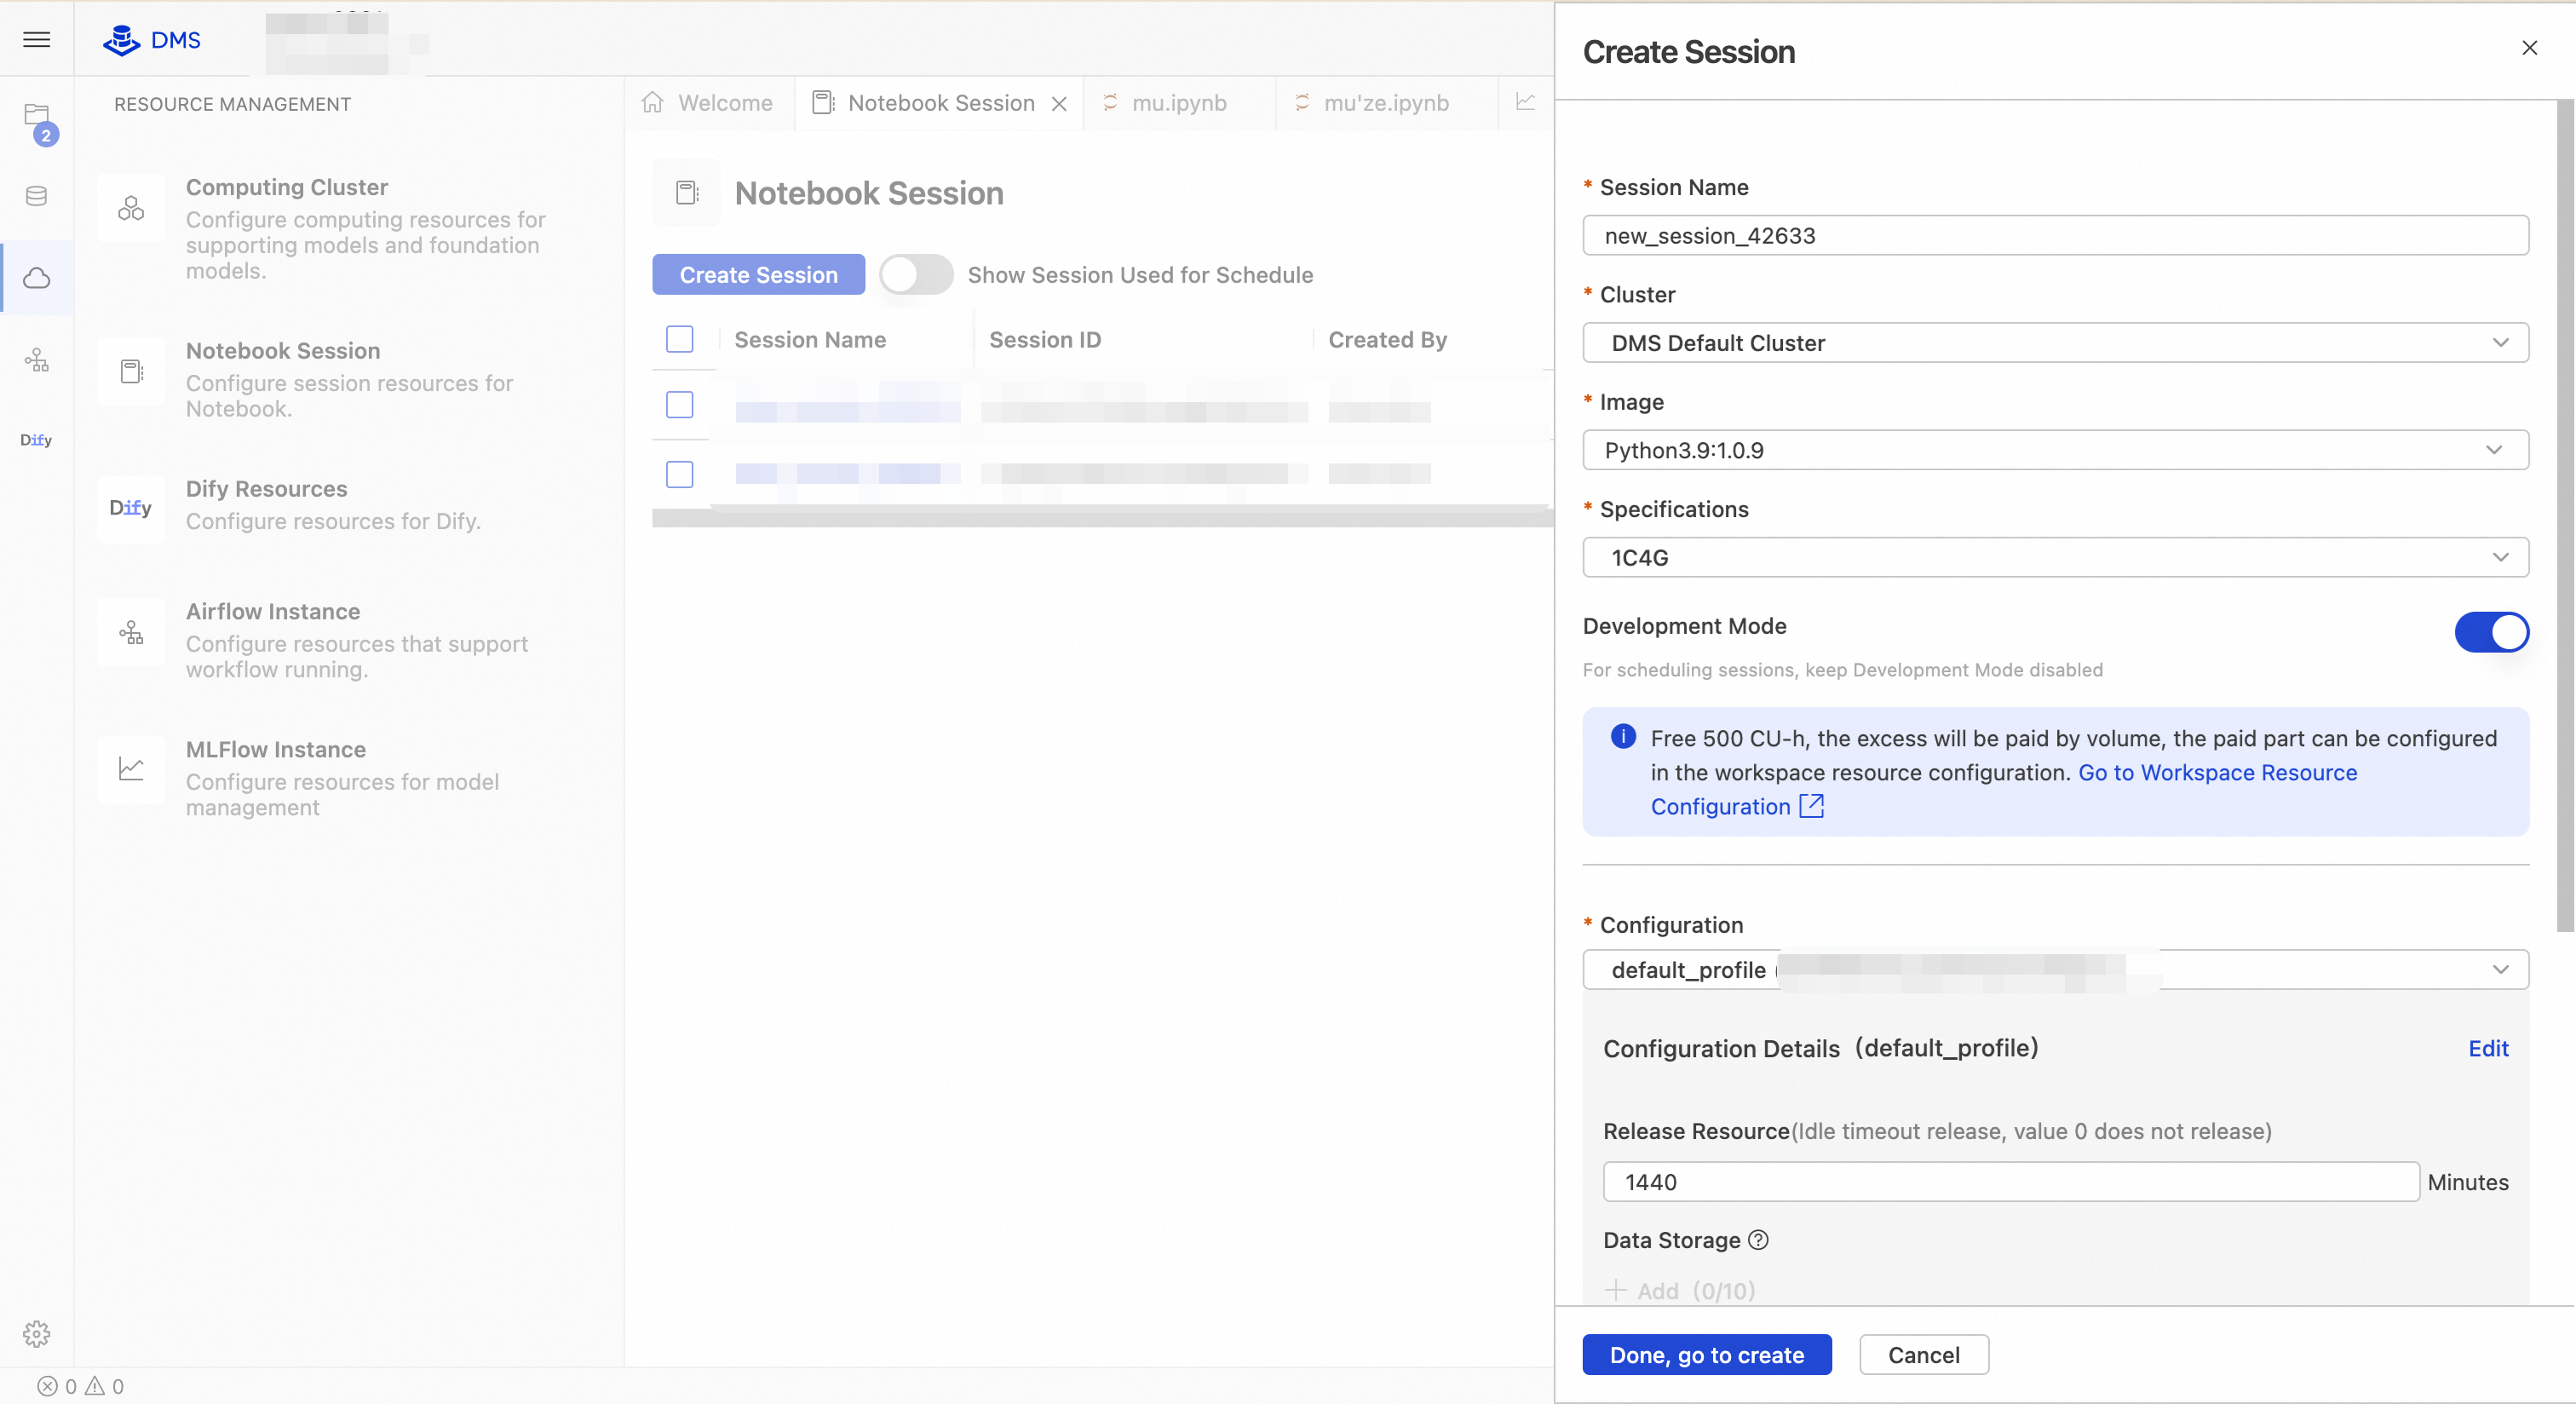
On the Notebook Sessions list, click Start in the Operation column to start the session.
Create an MLflow instance
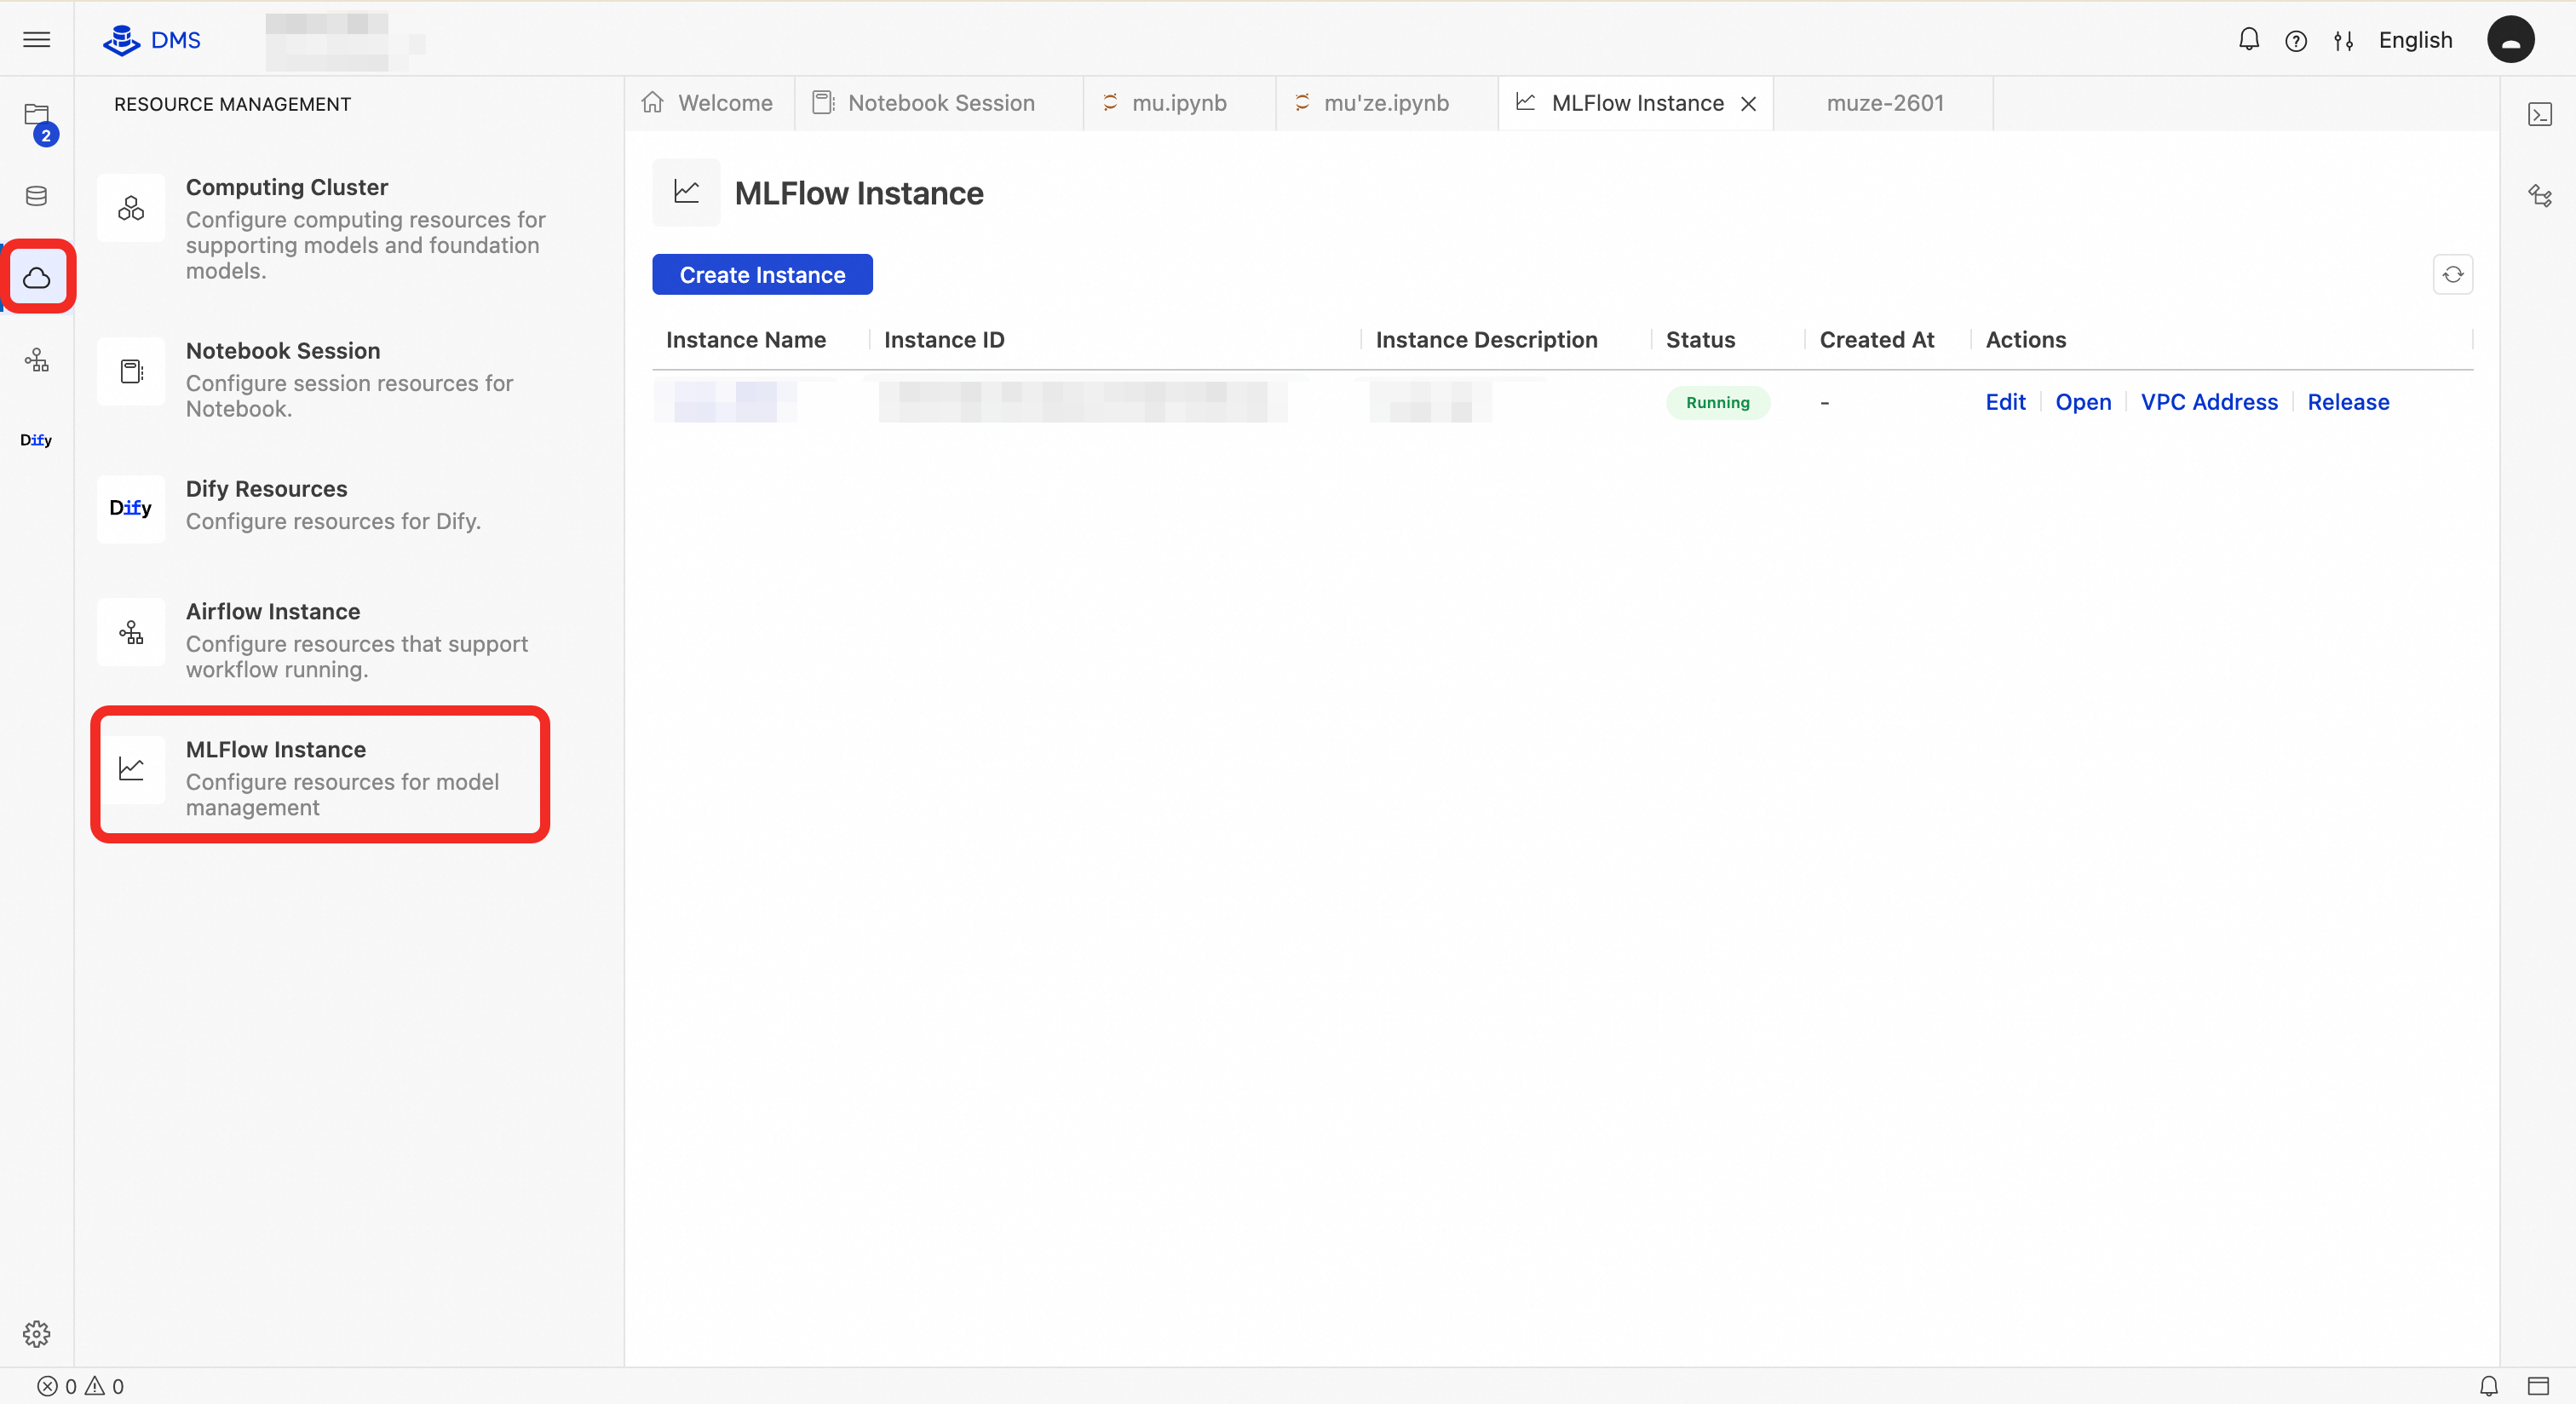
In your DMS workspace, go to the MLflow management page.
Click Create Instance. In the configuration wizard, fill in the following information:
Parameter Description Example Instance name Name of the MLflow instance. my-mlflowInstance description Description of the MLflow instance. Description of my MLflow.VPC The VPC to use. Defaults to the VPC of your current workspace. Notebook and MLflow instances in different VPCs cannot communicate. vpc-fs******4avSwitch The primary vSwitch. MLflow and its load balancer each consume one IP address from this vSwitch. vsw-sg******7hSecondary vSwitch A secondary vSwitch to enable high availability for the load balancer. Must be in a different zone than the primary vSwitch. If both vSwitches are in the same zone, instance creation fails. vsw-hq******v9Security group Controls user-side network access to MLflow. Make sure inbound rules allow traffic from your source IP (such as your Notebook IP). Only basic security groups are supported—using a managed security group causes instance creation to fail. sg-zb******iqOSS bucket Name of your OSS bucket. If you do not specify an Artifact Root when creating an experiment, DMS MLflow uses oss://<OSS Bucket>/<OSS Path>as the default Artifact Root.my-bucketOSS path Path within your OSS bucket. Forms the default Artifact Root together with the bucket name. mlflow-root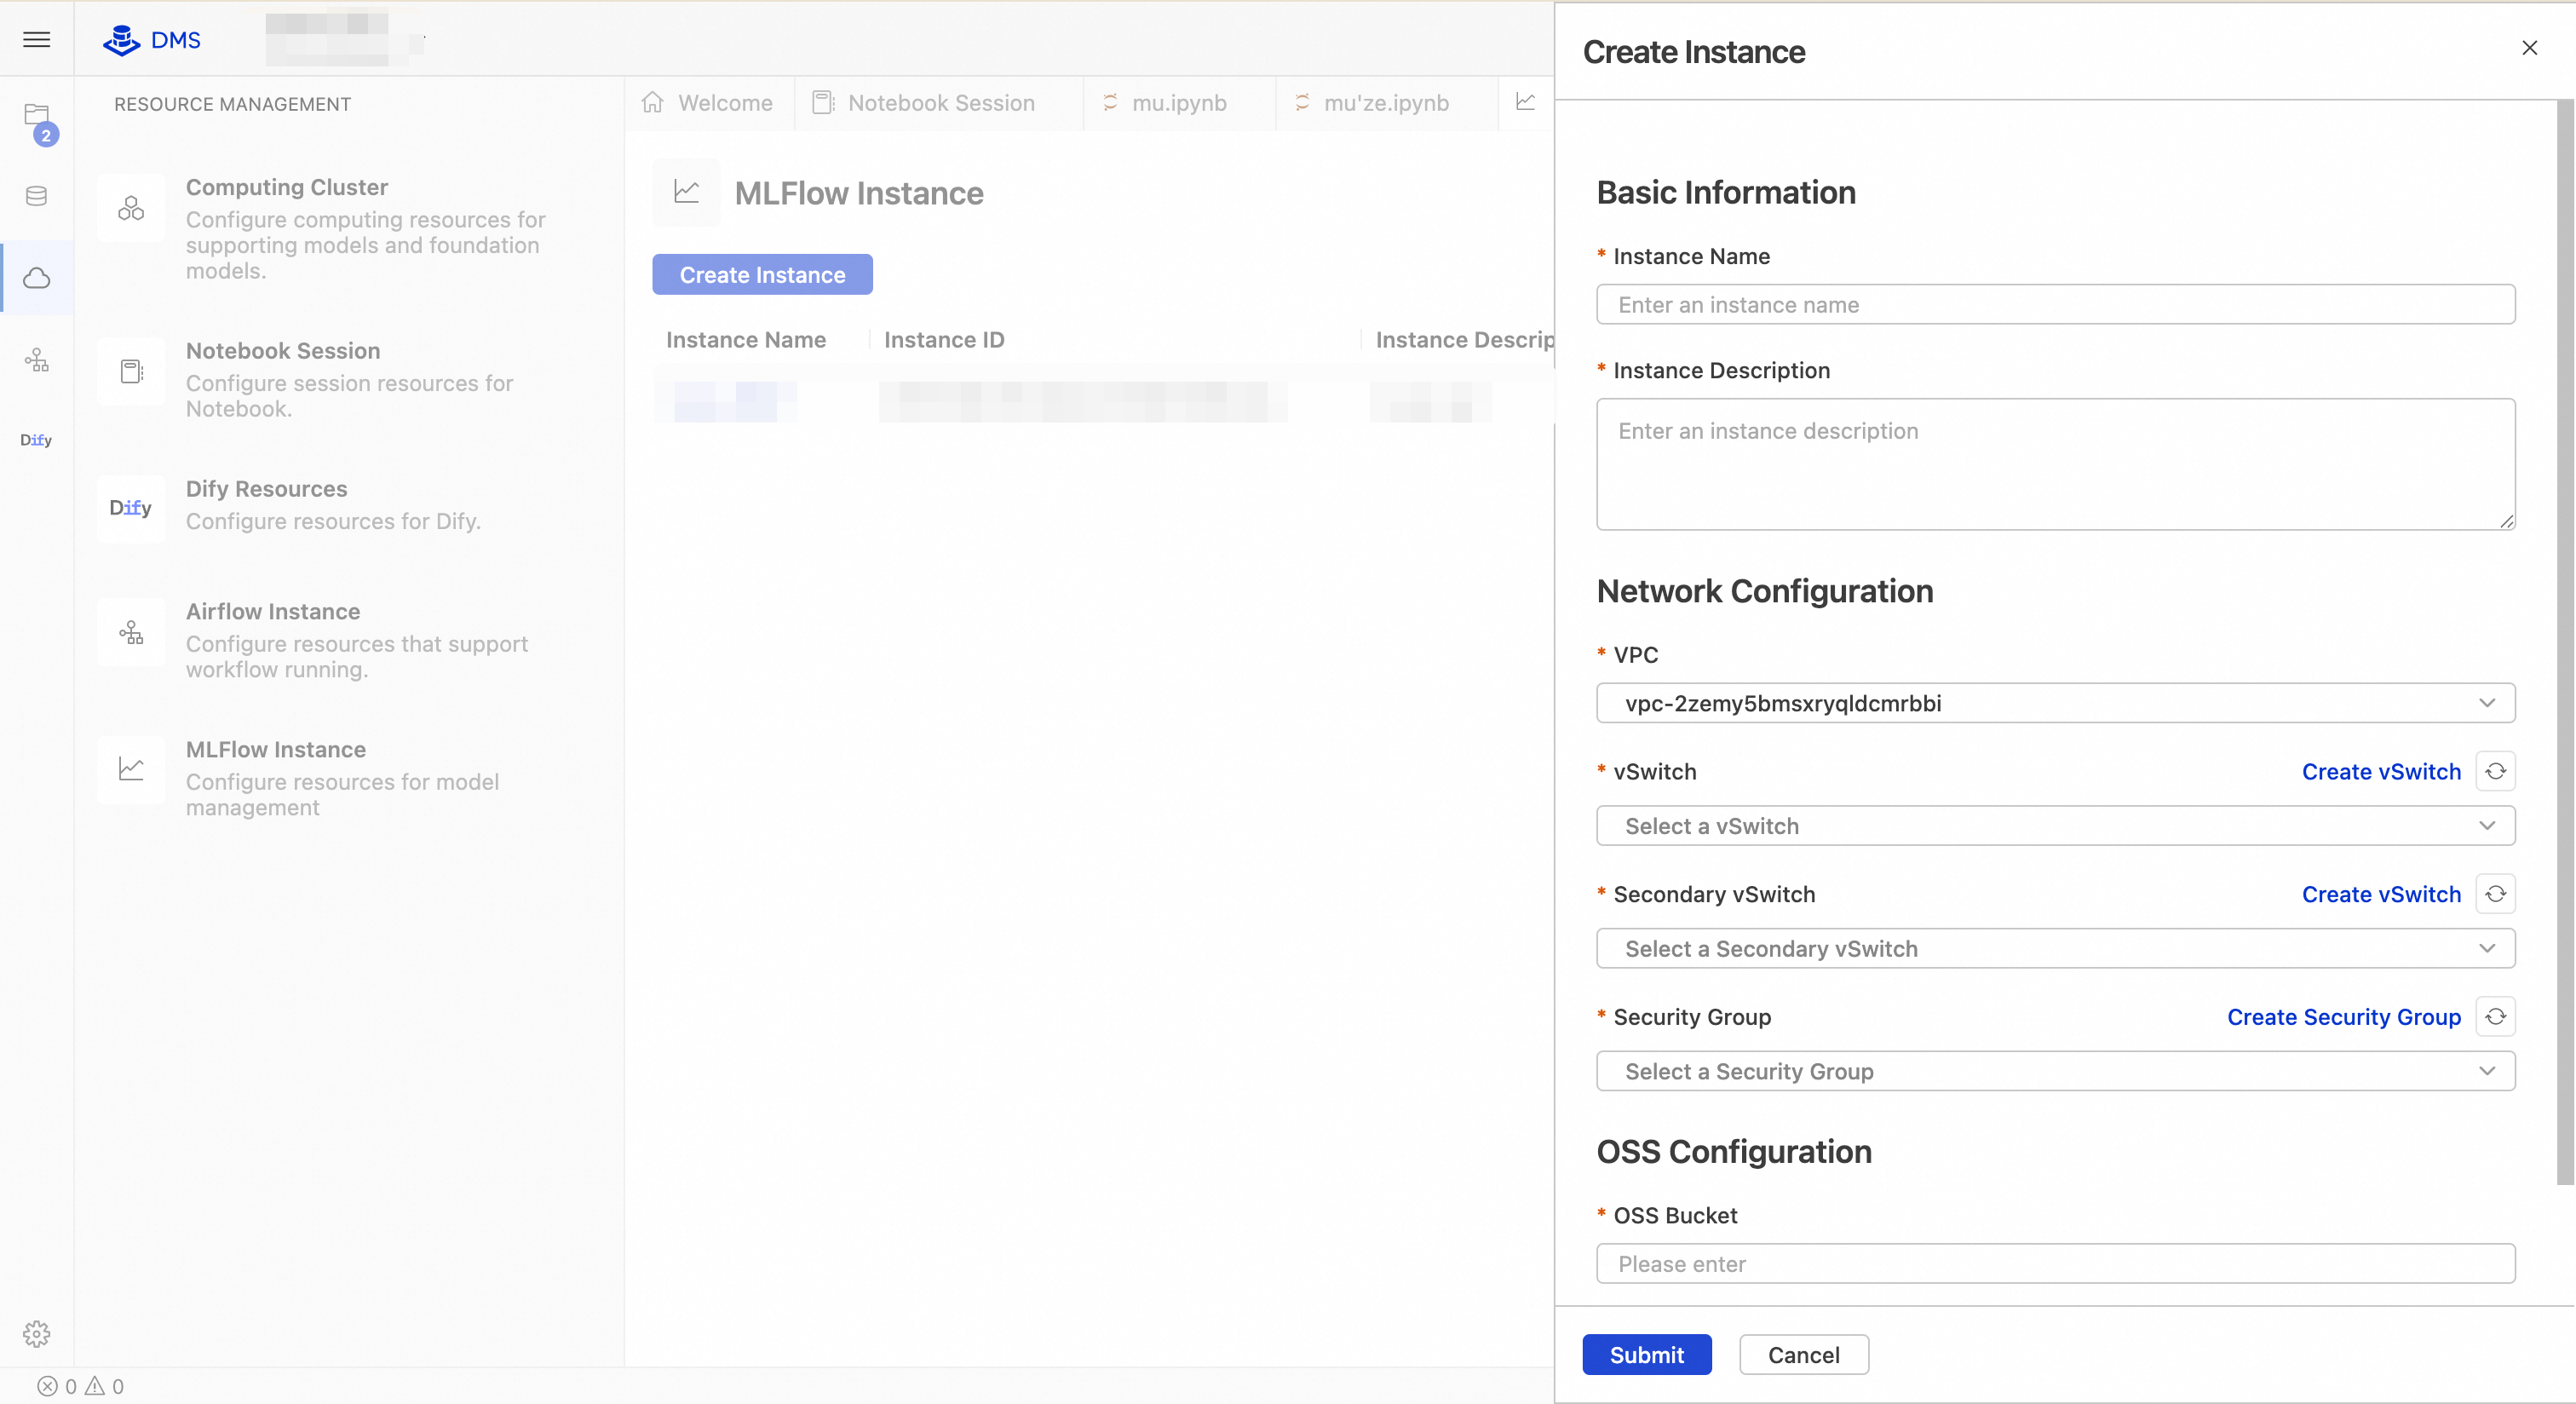
Click OK. Creation takes a few minutes. Wait until the Status changes to Running.
The Operation column for each instance provides the following actions:
| Action | Description |
|---|---|
| Edit | Modify the instance name or description. |
| Open | View the MLflow UI in an embedded page. 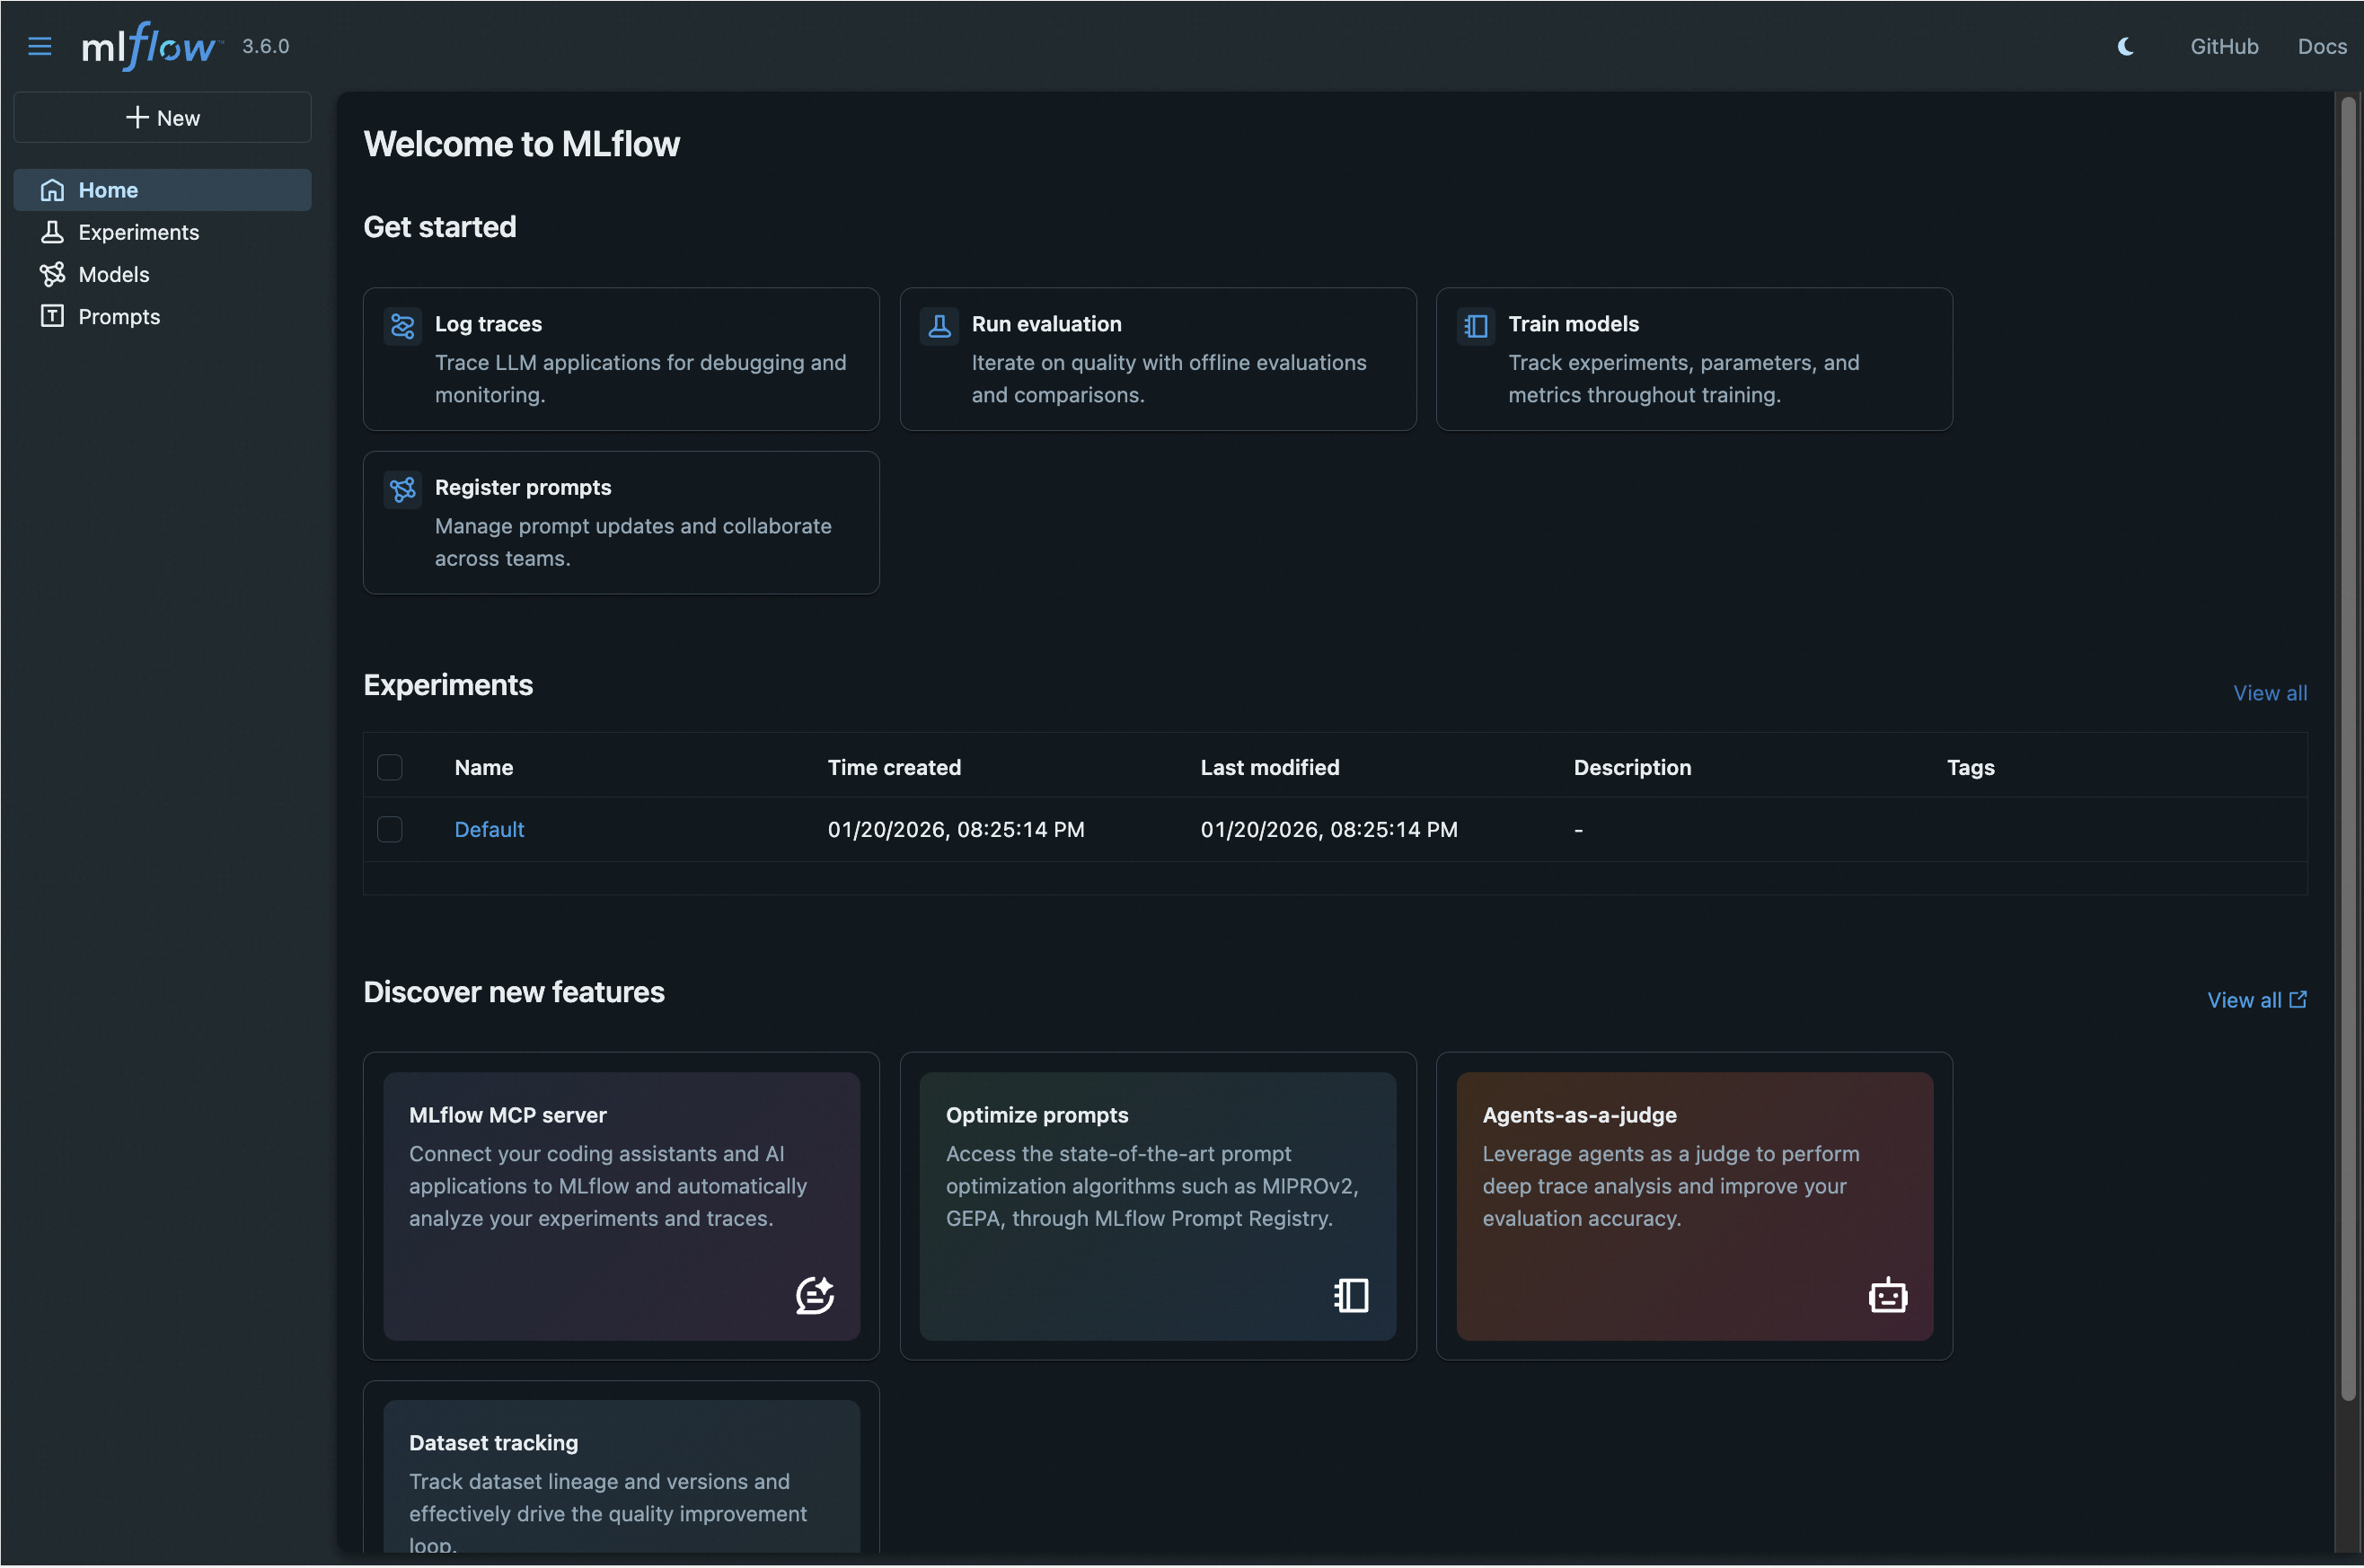 |
| VPC Address | A stable IP provided by ALB inside your VPC, accessible on port 80 from any resource in the same VPC. Either address can serve as the MLflow backend server on port 80. Click the copy icon to copy the address. |
| Redeploy | Not currently supported. |
| Release | Destroys the associated database and MLflow compute instance. |
Configure ALB access control
The ALB associated with your MLflow instance denies all traffic by default. This step opens port 80 to your Notebook subnet, so your Notebook can reach the MLflow service.
On the MLflow instance details page, copy the instance ID.
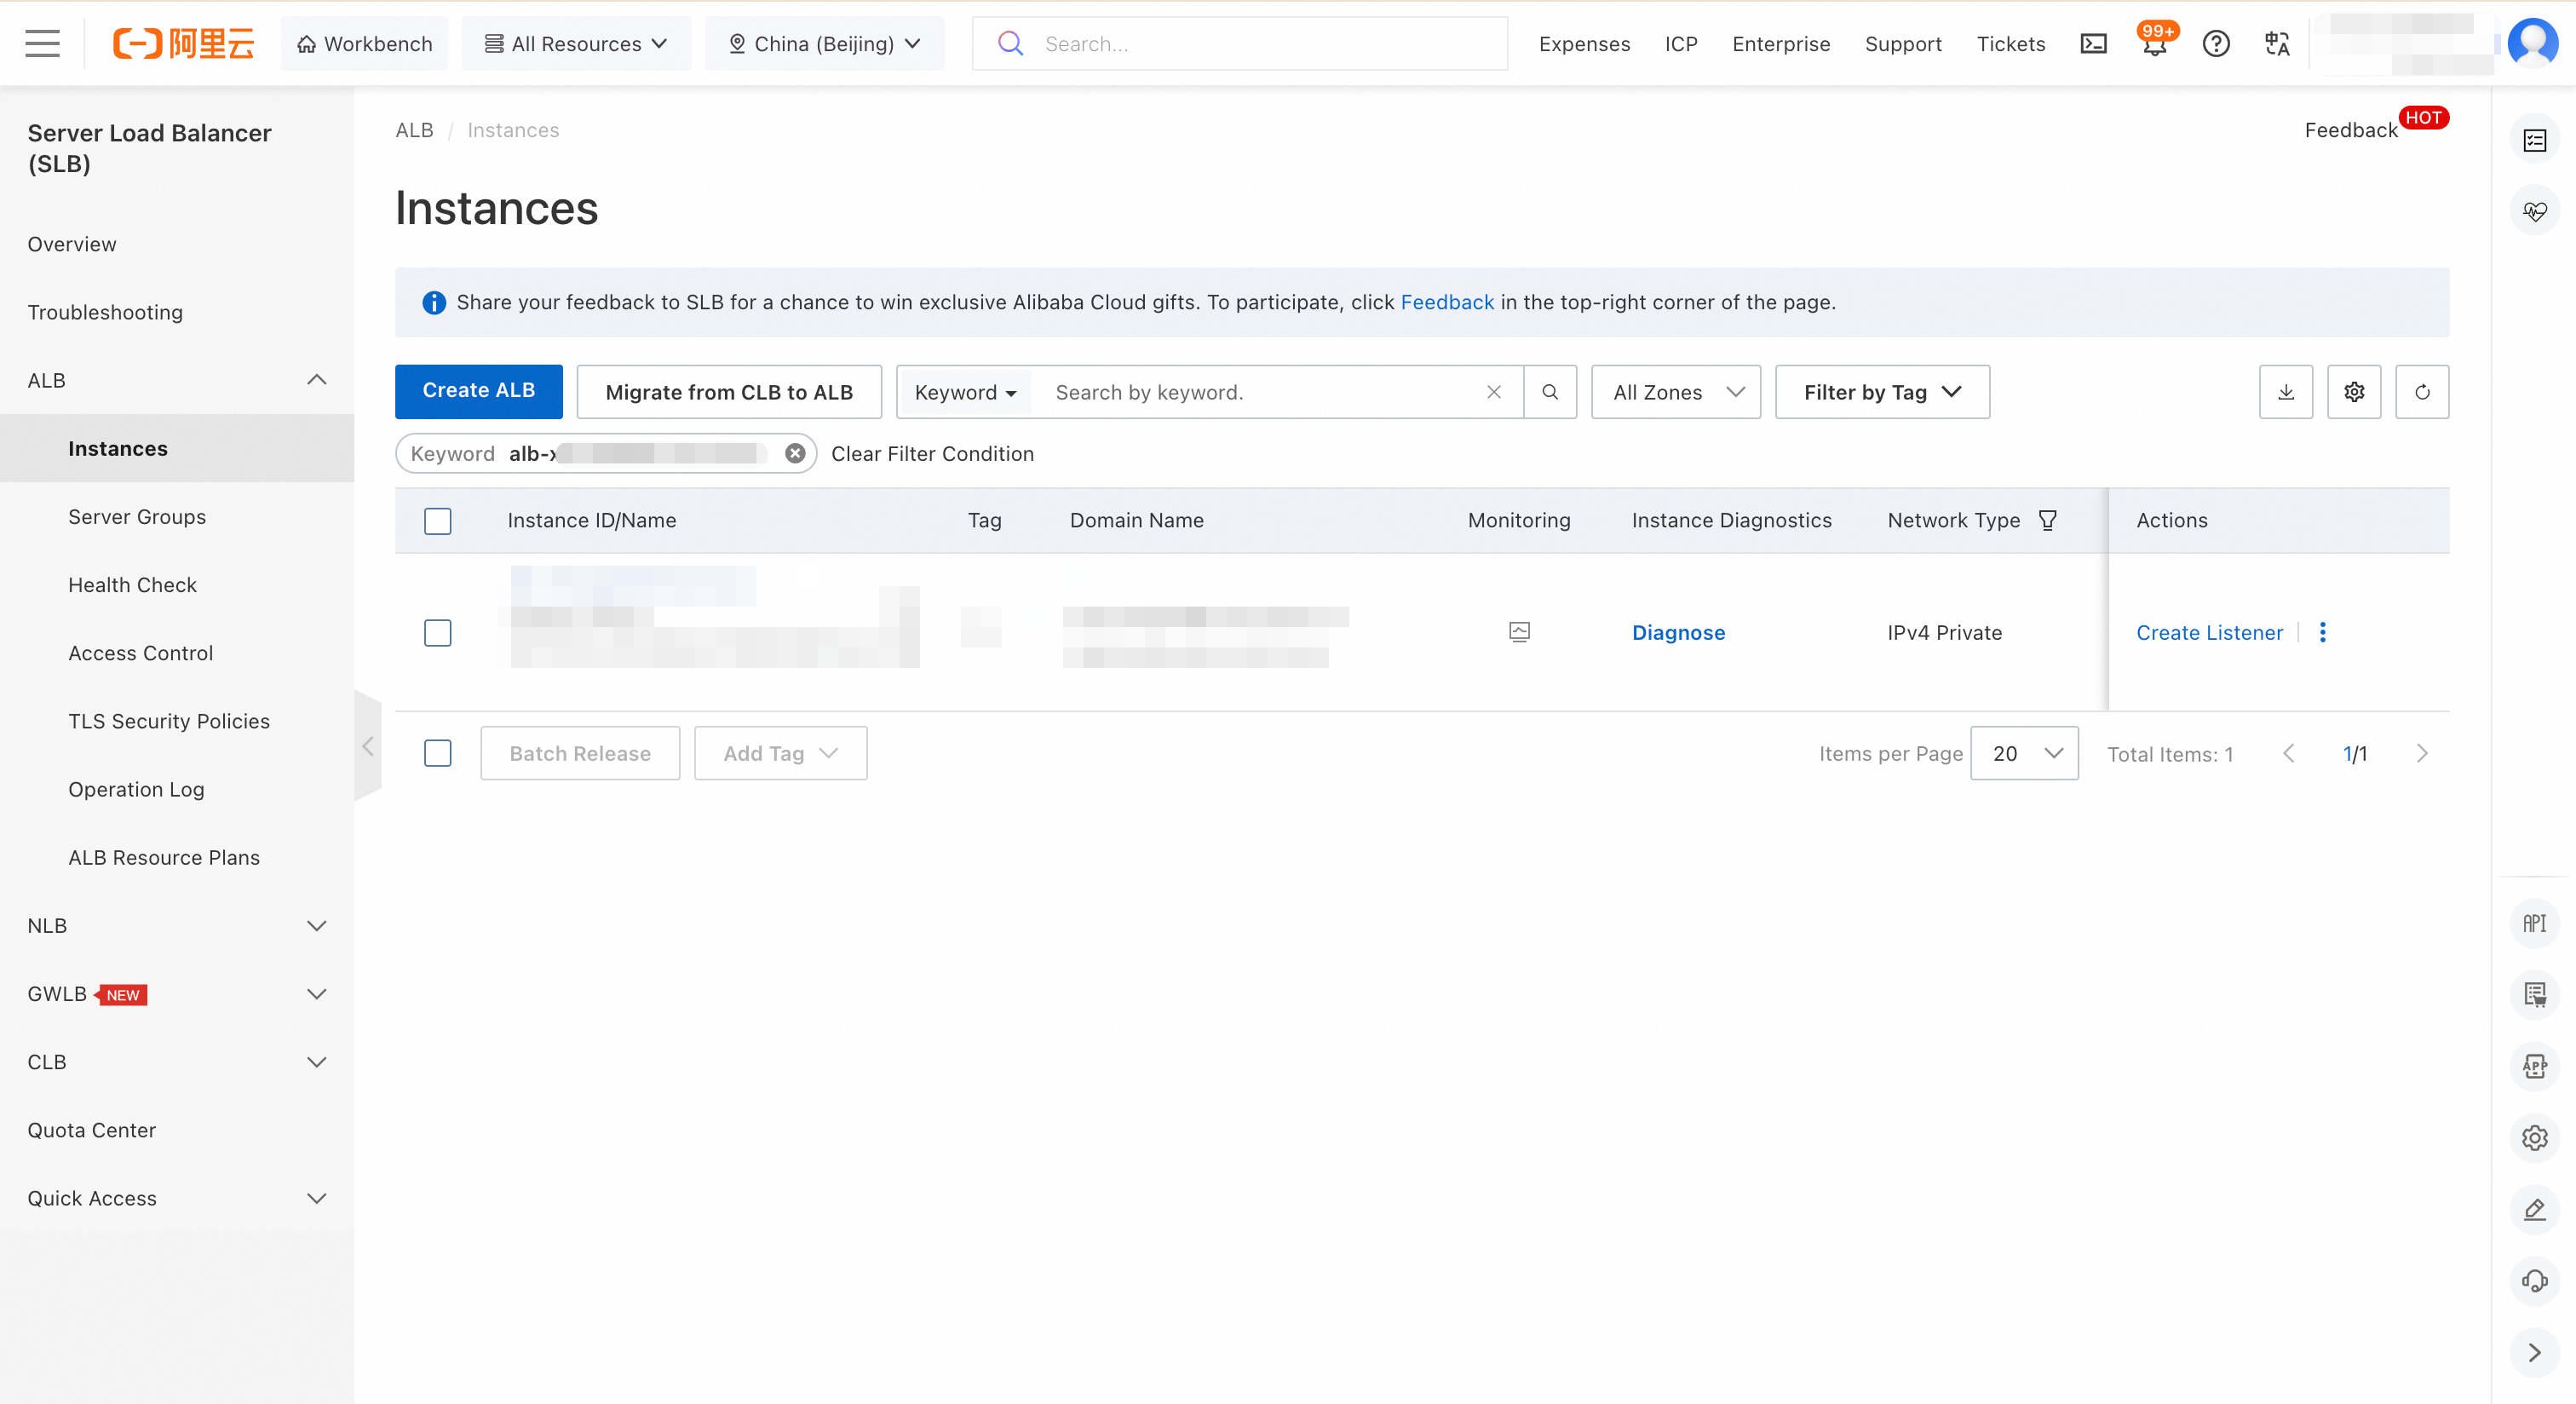
Go to the ALB console. Select the same region as your MLflow instance. In the left navigation pane, click Instances.
On the Instances page, search for your ALB instance using the MLflow instance ID as the keyword.
Click the ALB instance ID to open the Instance Details page, then click the Listener tab.
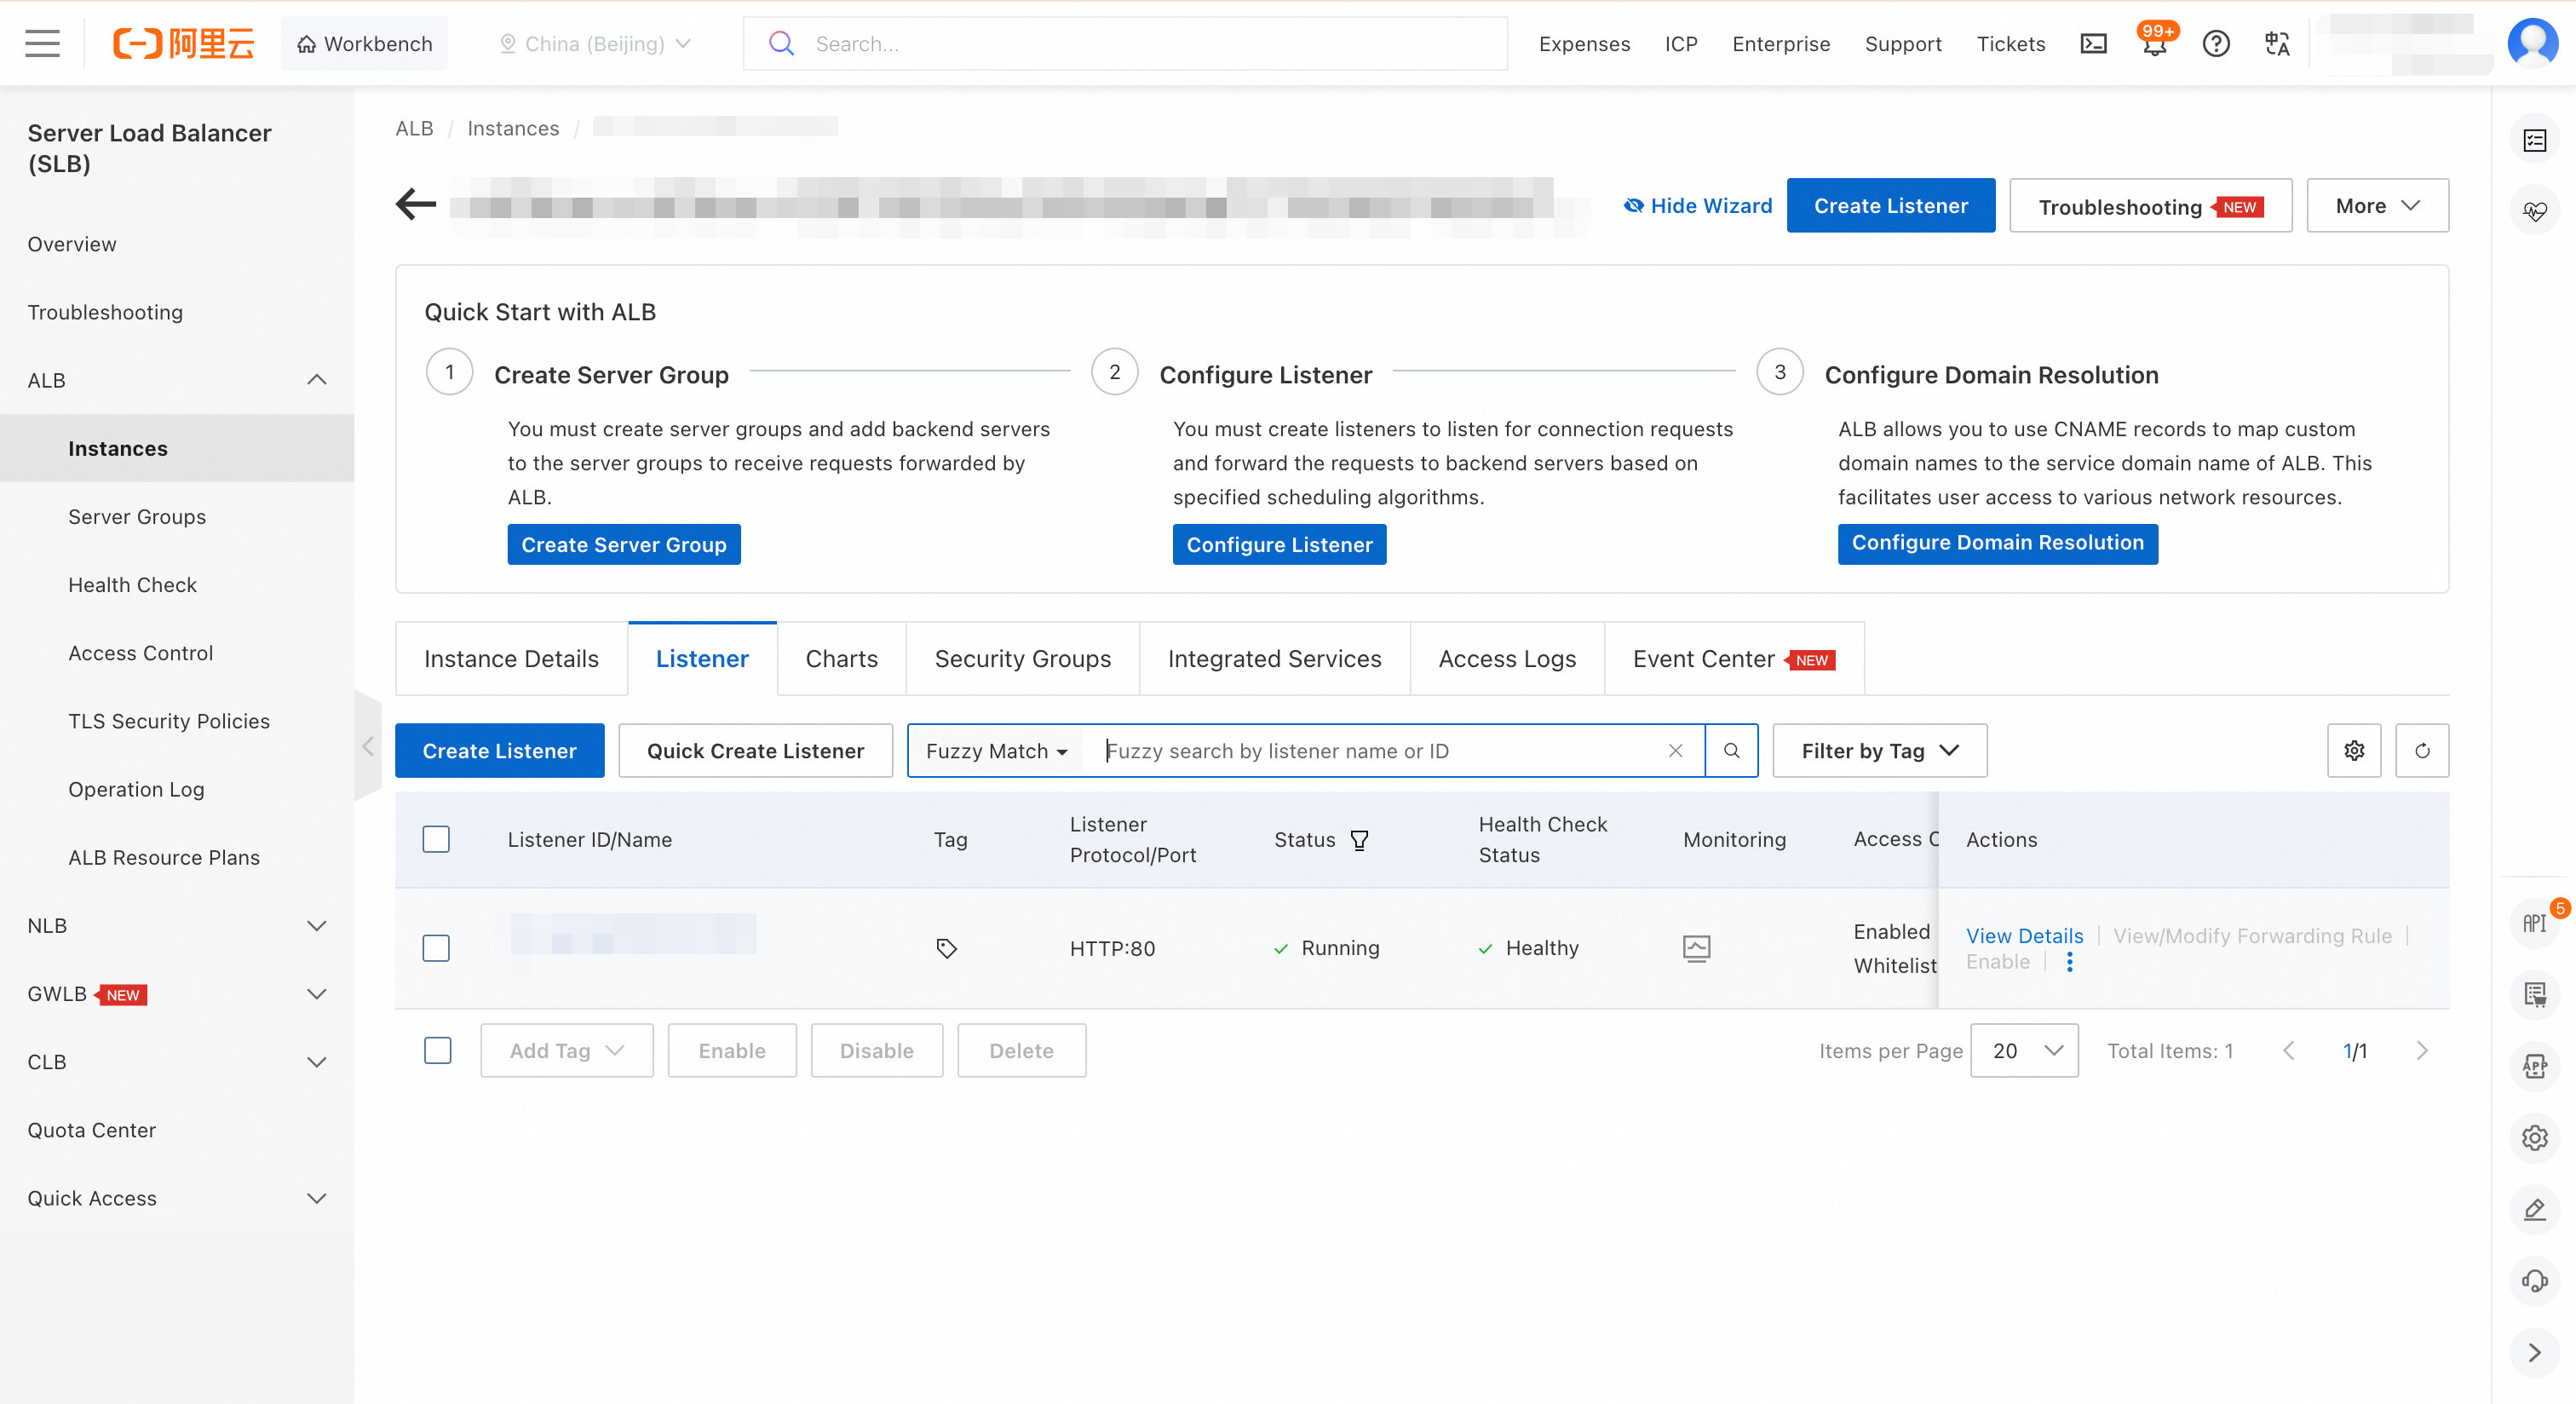
Find the listener for port 80. In the Actions column, click View Details.
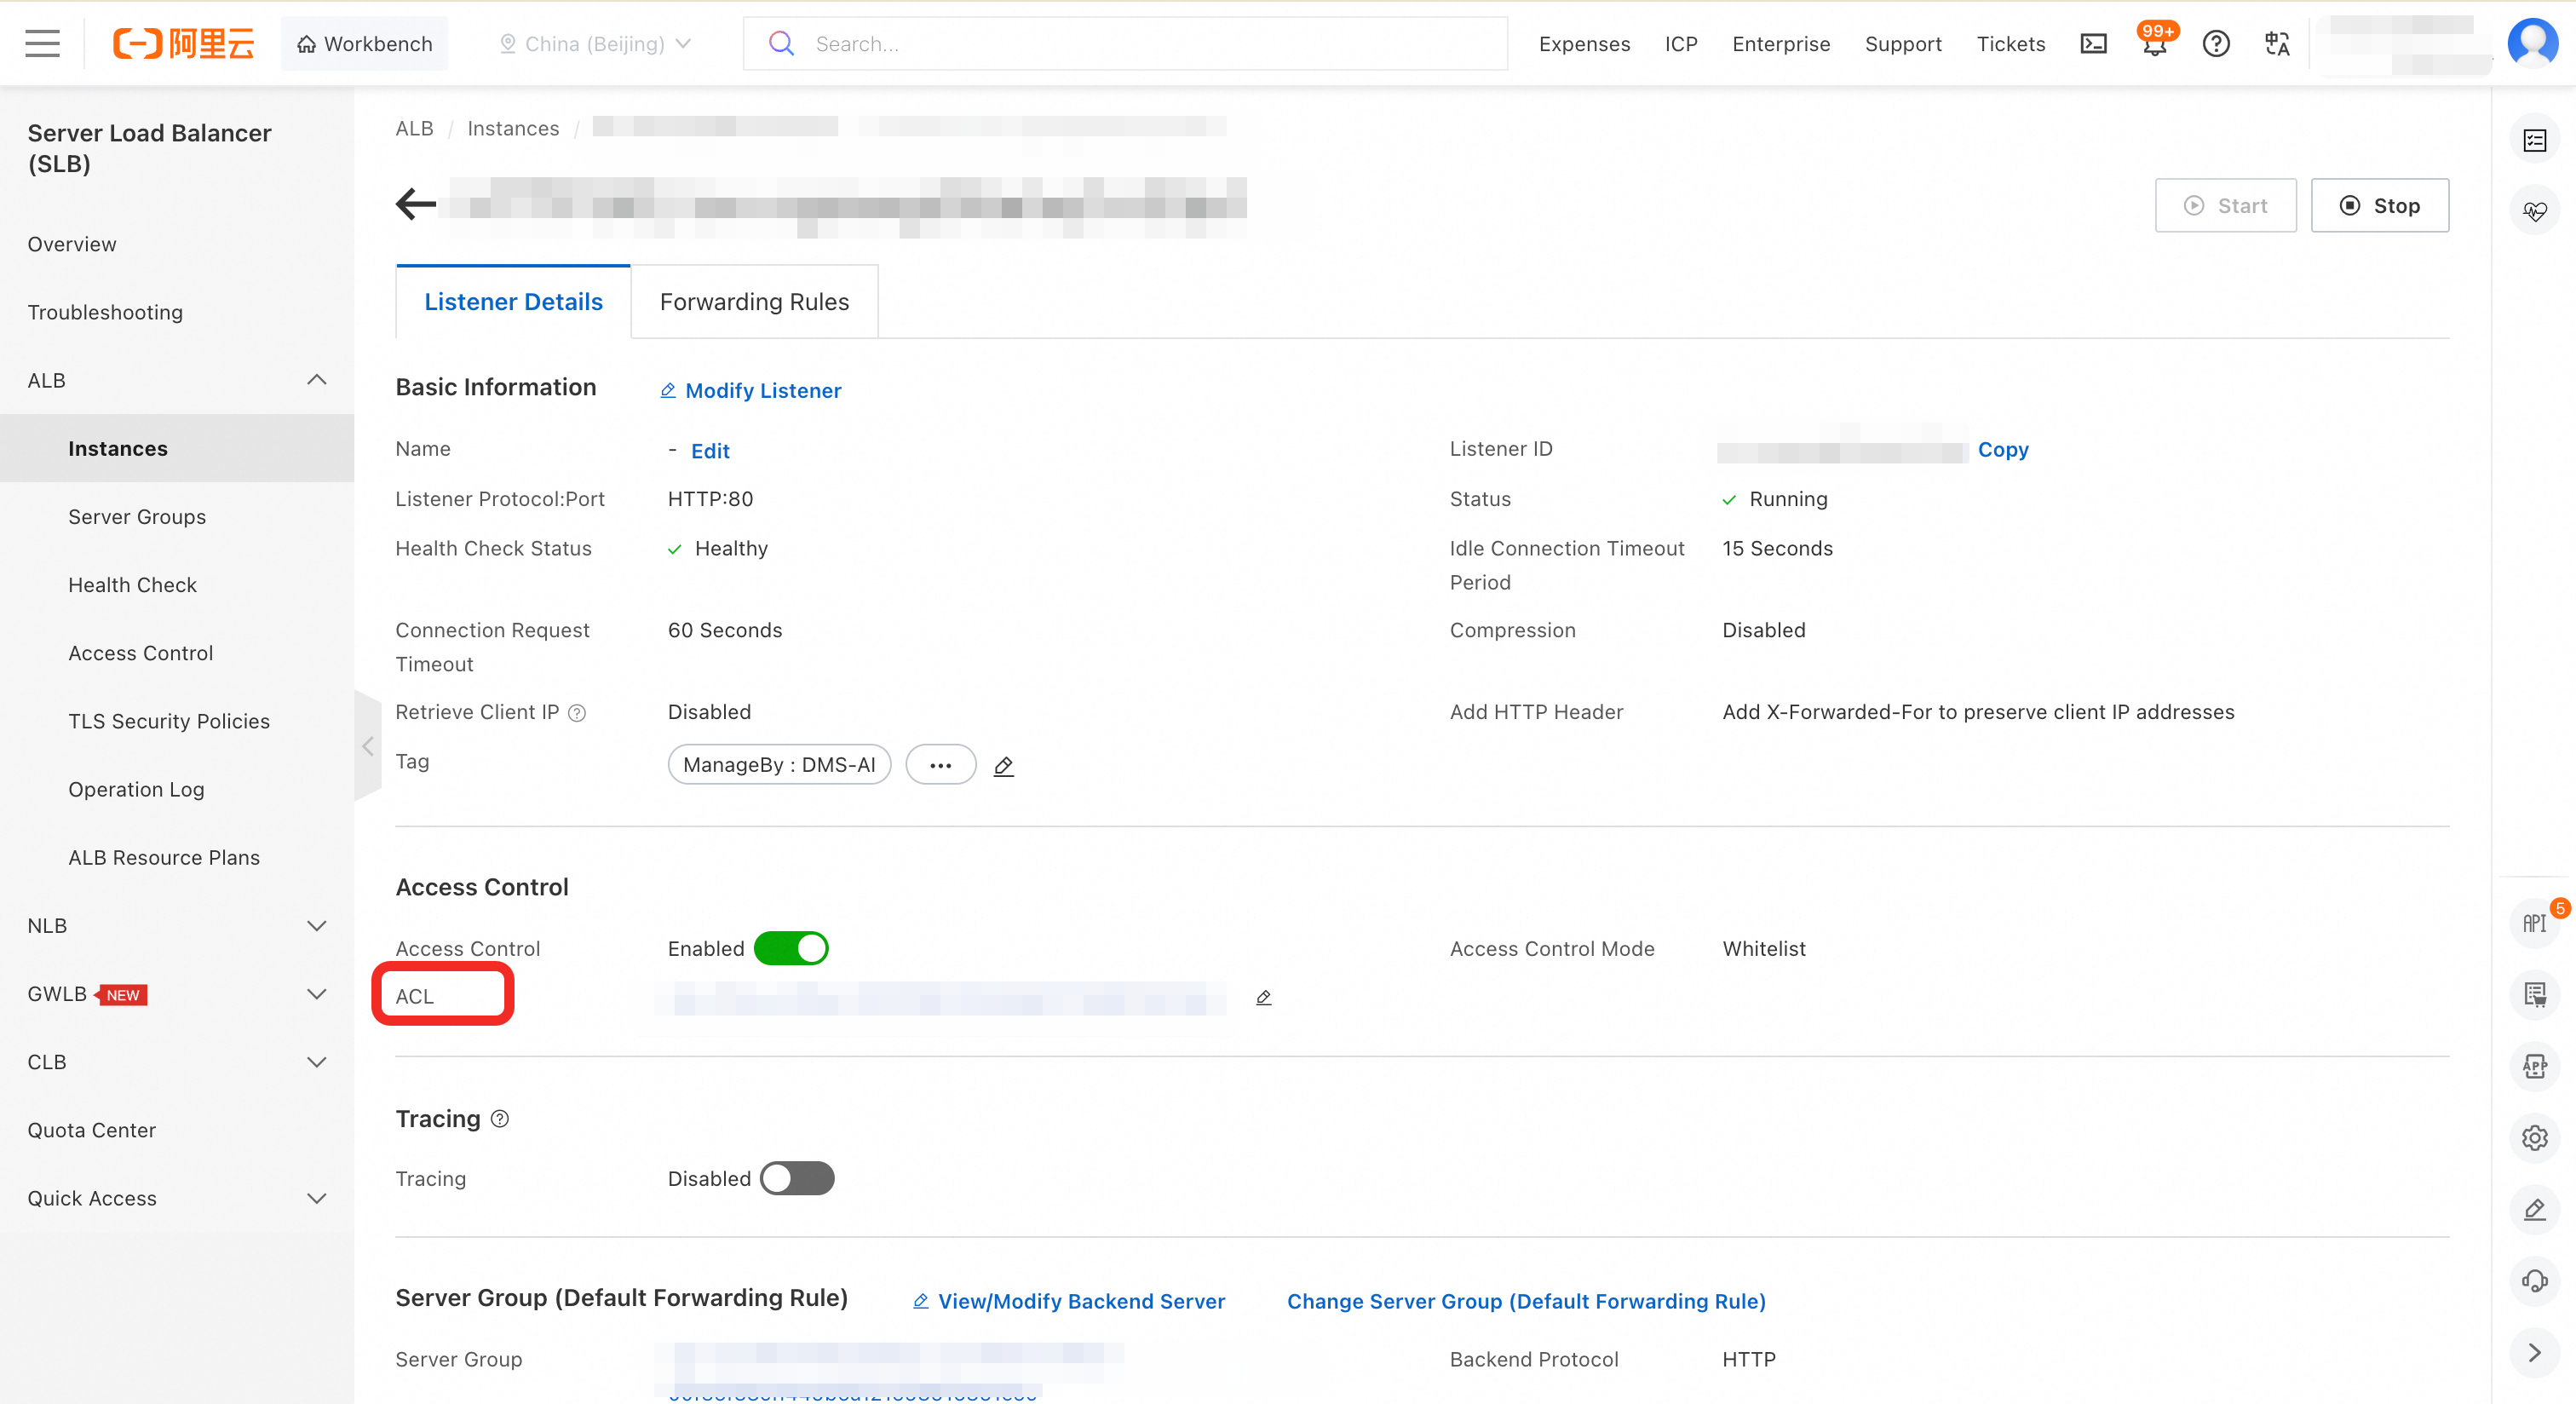
On the Listener Details tab, in the Access Control section, click the access control list (ACL) ID.
On the Entry tab, click Add Entry. Add the allowed source. Allow your entire VPC CIDR block (for example,
192.168.0.0/16) or, more precisely, the subnet where your Notebook runs.
Connect MLflow from a Notebook
Before connecting, confirm that your MLflow instance status is Running and that the ALB access control policy allows traffic from your Notebook environment.
Minimal connection example
All MLflow tracking calls require two setup lines: a tracking URI pointing to your instance and an experiment name.
import mlflow

mlflow.set_tracking_uri("<VPC_ADDRESS>")   # Replace with the VPC Address from instance details
mlflow.set_experiment("my-experiment")
Replace <VPC_ADDRESS> with the VPC Address copied from the MLflow instance details page.
Full training example
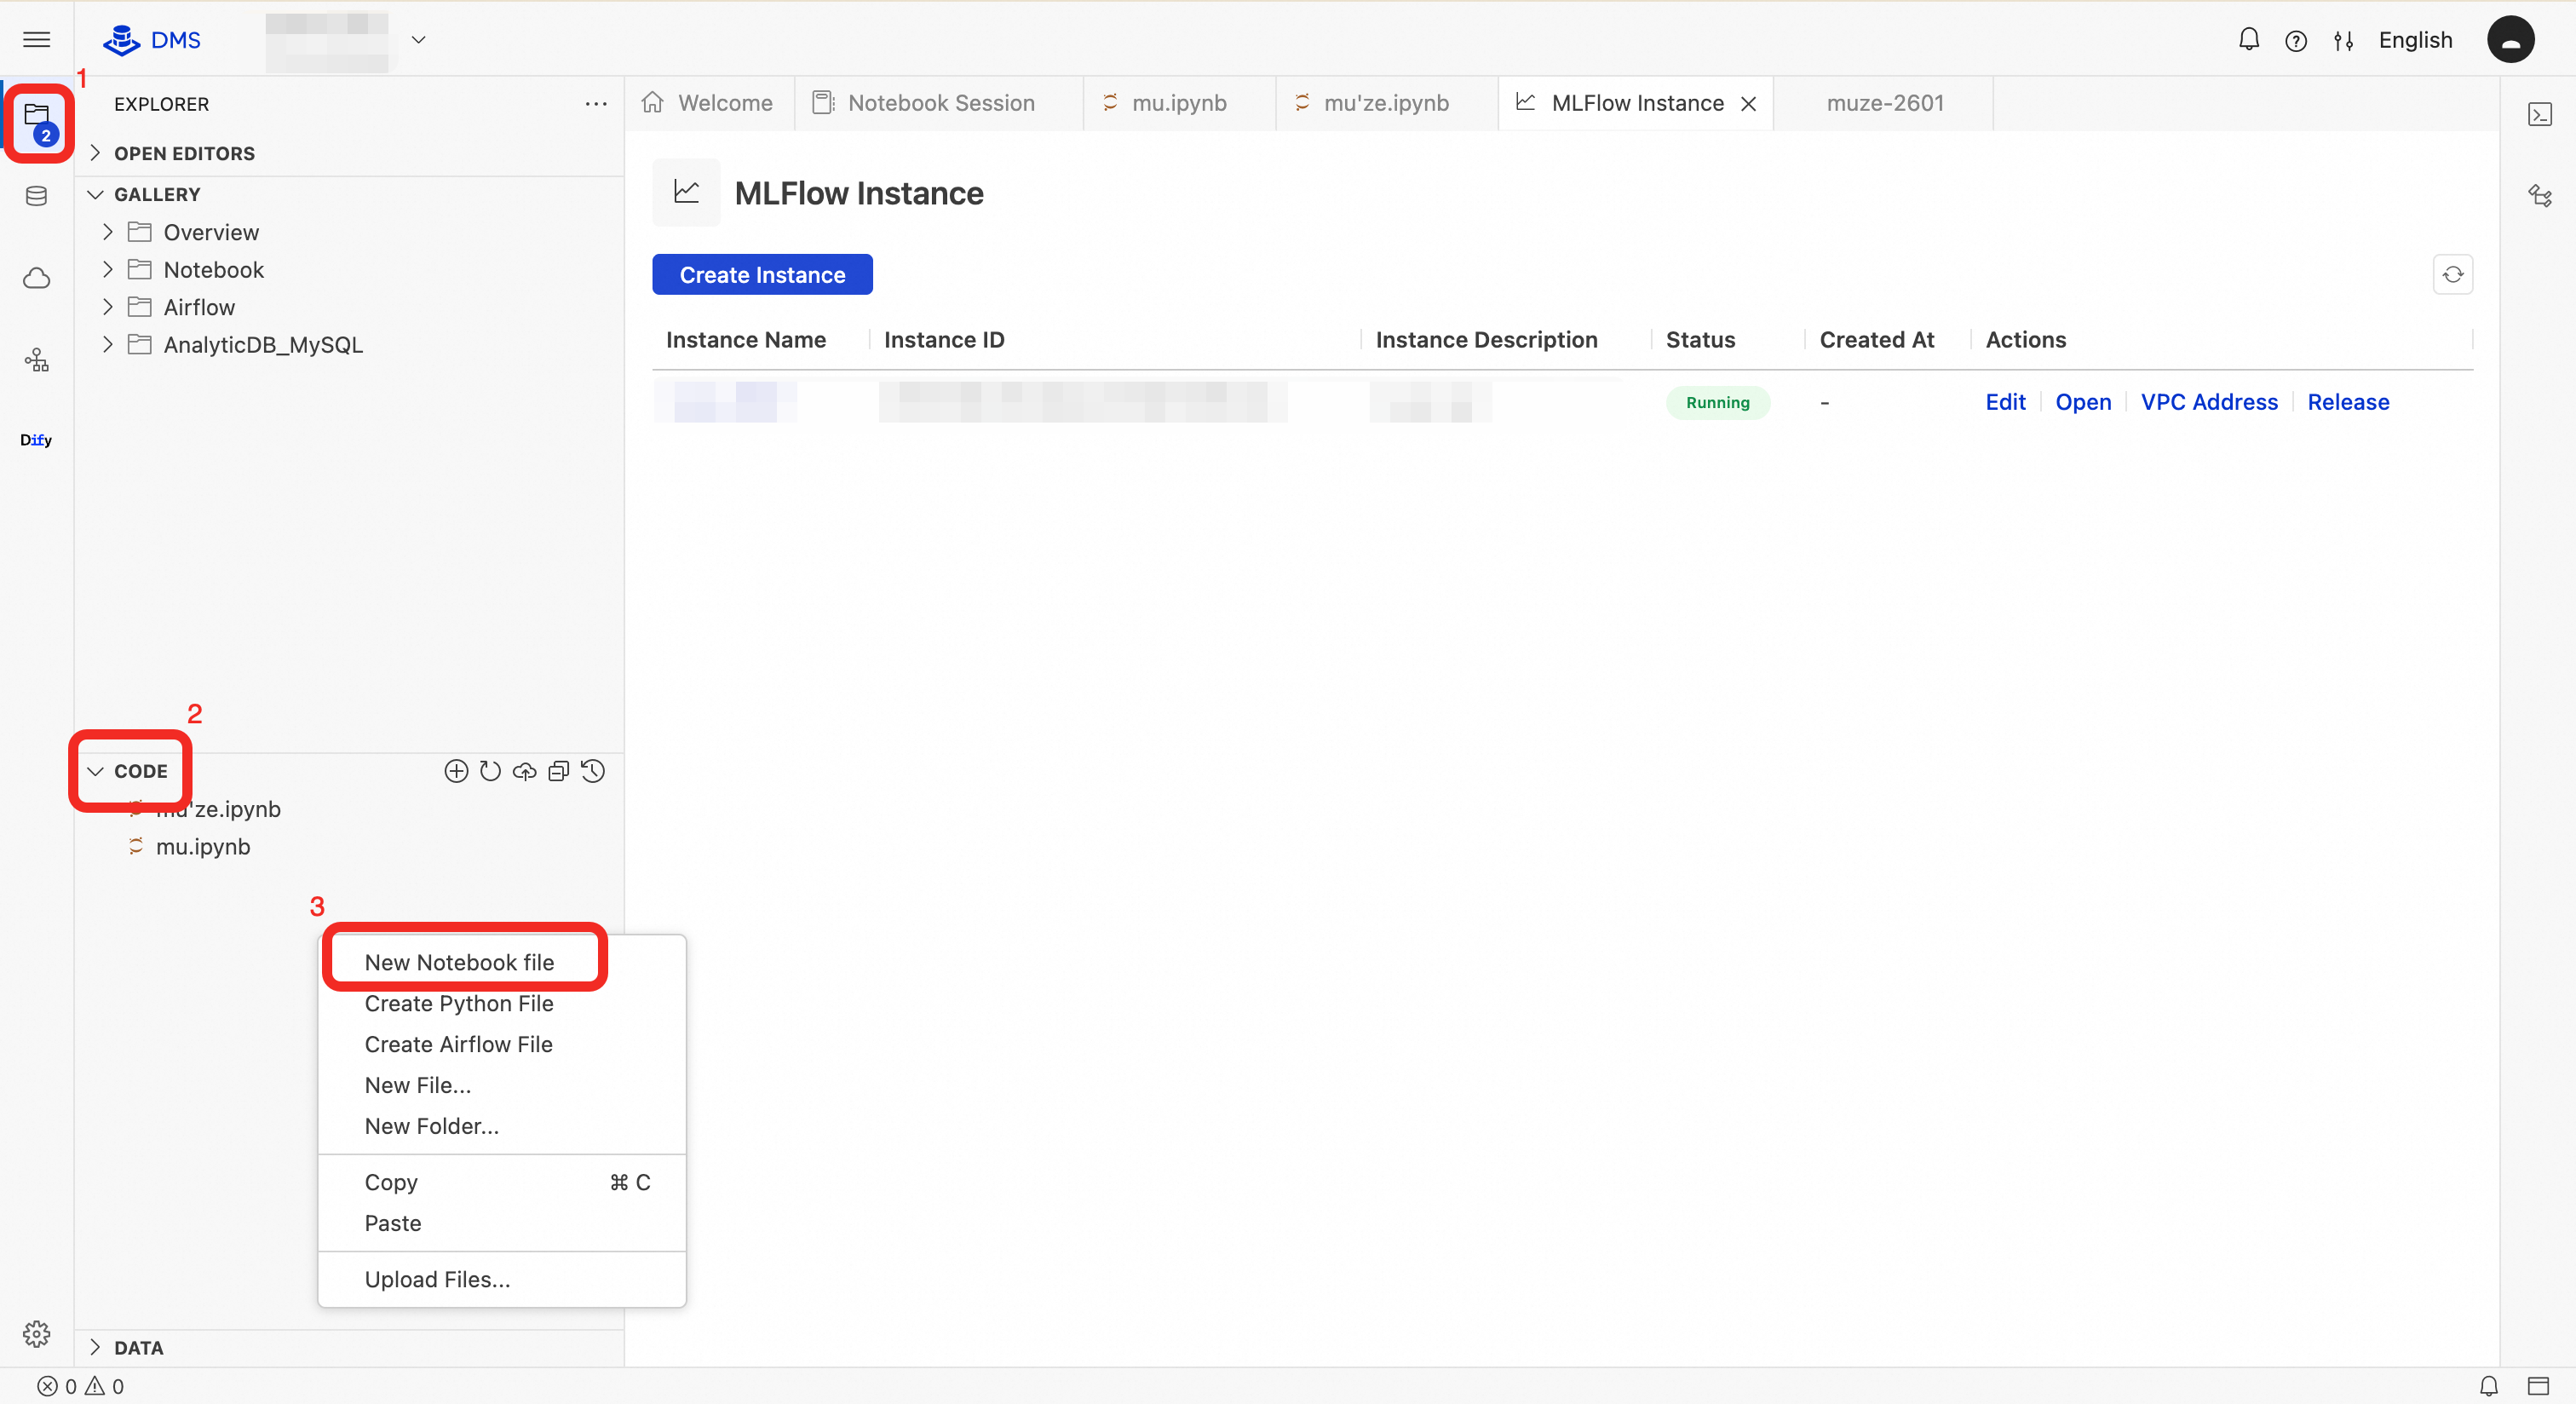
In the Explorer pane, right-click in the CODE area and select New Notebook File.
In a new cell, install the MLflow Python SDK:
!pip install mlflow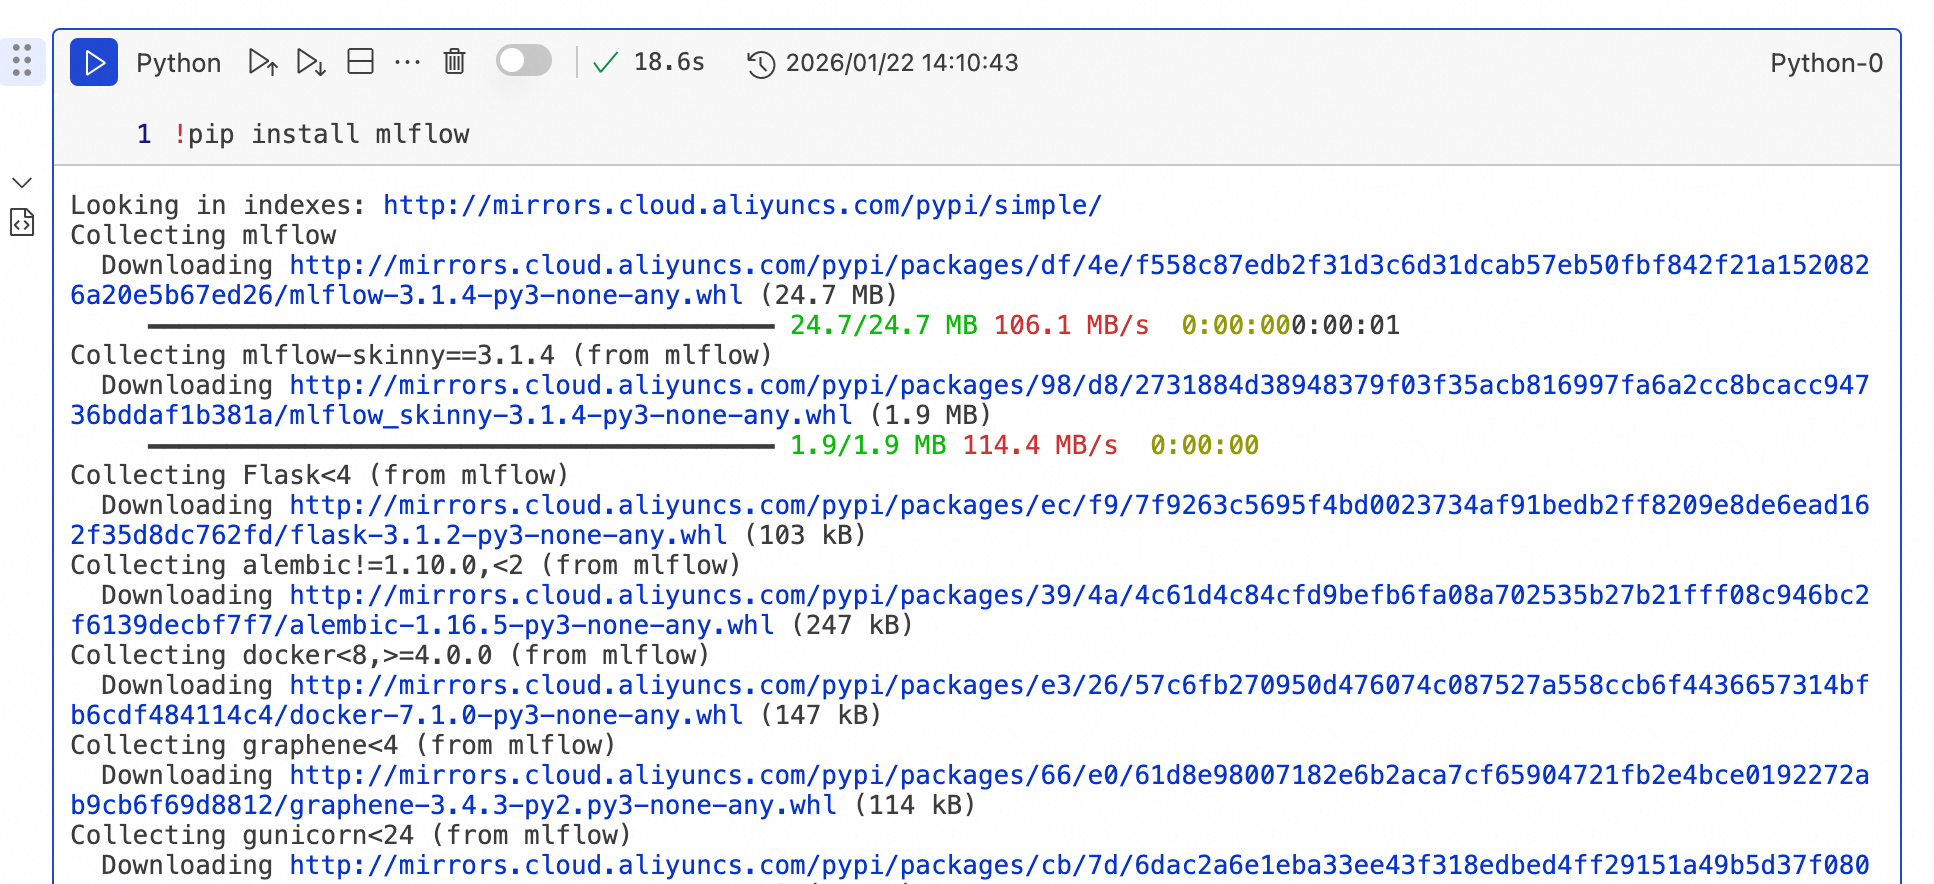
Run the following training code. Replace
<VPC_ADDRESS>with the VPC Address from the instance details page.import mlflow import mlflow.sklearn from sklearn import datasets from sklearn.model_selection import train_test_split from sklearn.ensemble import RandomForestClassifier from sklearn.metrics import accuracy_score, precision_score, recall_score, f1_score def main(): # Point to your DMS MLflow instance mlflow.set_tracking_uri("<VPC_ADDRESS>") mlflow.set_experiment("Iris Classification") # Load dataset iris = datasets.load_iris() X, y = iris.data, iris.target feature_names = iris.feature_names target_names = iris.target_names # Split into training and test sets X_train, X_test, y_train, y_test = train_test_split( X, y, test_size=0.2, random_state=42, stratify=y ) # Define hyperparameters n_estimators = 100 max_depth = 3 random_state = 42 with mlflow.start_run(run_name="RandomForest_Iris"): # Log hyperparameters mlflow.log_param("n_estimators", n_estimators) mlflow.log_param("max_depth", max_depth) mlflow.log_param("random_state", random_state) mlflow.log_param("test_size", 0.2) # Train the model model = RandomForestClassifier( n_estimators=n_estimators, max_depth=max_depth, random_state=random_state ) model.fit(X_train, y_train) # Evaluate y_pred = model.predict(X_test) accuracy = accuracy_score(y_test, y_pred) precision = precision_score(y_test, y_pred, average='weighted') recall = recall_score(y_test, y_pred, average='weighted') f1 = f1_score(y_test, y_pred, average='weighted') # Log metrics mlflow.log_metric("accuracy", accuracy) mlflow.log_metric("precision", precision) mlflow.log_metric("recall", recall) mlflow.log_metric("f1_score", f1) # Log tags mlflow.set_tag("features", ", ".join(feature_names)) mlflow.set_tag("targets", ", ".join(target_names)) mlflow.set_tag("algorithm", "RandomForestClassifier") print(f"Accuracy: {accuracy:.4f}") print(f"Precision: {precision:.4f}") print(f"Recall: {recall:.4f}") print(f"F1 Score: {f1:.4f}") # Log the model as an artifact mlflow.sklearn.log_model(model, "iris_model") # Print run metadata run_id = mlflow.active_run().info.run_id experiment_id = mlflow.active_run().info.experiment_id print(f"Run ID: {run_id}") print(f"Experiment ID: {experiment_id}") if __name__ == "__main__": main()
FAQ
Why can't I access DMS MLflow using its IP address?
Check these layers in order:
ALB access control: Verify that the ACL entry allows traffic from your device or Notebook subnet.
Security group: Verify that the inbound rule for your MLflow instance's security group allows port 80 from your source IP.
Network connectivity: Verify that your access environment (local PC or ECS instance) has connectivity to the VPC where MLflow runs, for example via VPN or Cloud Enterprise Network.
Where are trained model files stored?
DMS MLflow stores only metadata—it does not store model files or other binary artifacts. The OSS bucket and path you configured when creating the instance become the default Artifact Root (oss://<bucket>/<path>). When creating an experiment, you can also set a custom Artifact Root.
To upload artifacts to OSS, configure the required credentials. For OSS artifact storage with MLflow, see the MLflow storage plugins documentation.