In DataWorks, you can use the string replacement component in single-table, real-time data integration tasks to replace strings in specified fields.
Step 1: Configure a data integration task
Create a data source. For more information, see Data source management.
Create a Data Integration task. For more information, see Configure a single-table real-time synchronization task.
NoteFor single-table real-time Data Integration tasks, you can add a data processing component between the source and destination components. For more information, see Supported data sources and synchronization solutions.
Step 2: Add a string replacement component
In the single-table real-time synchronization task, enable the Data Processing switch, click +Add Node, and select the Replace String component.
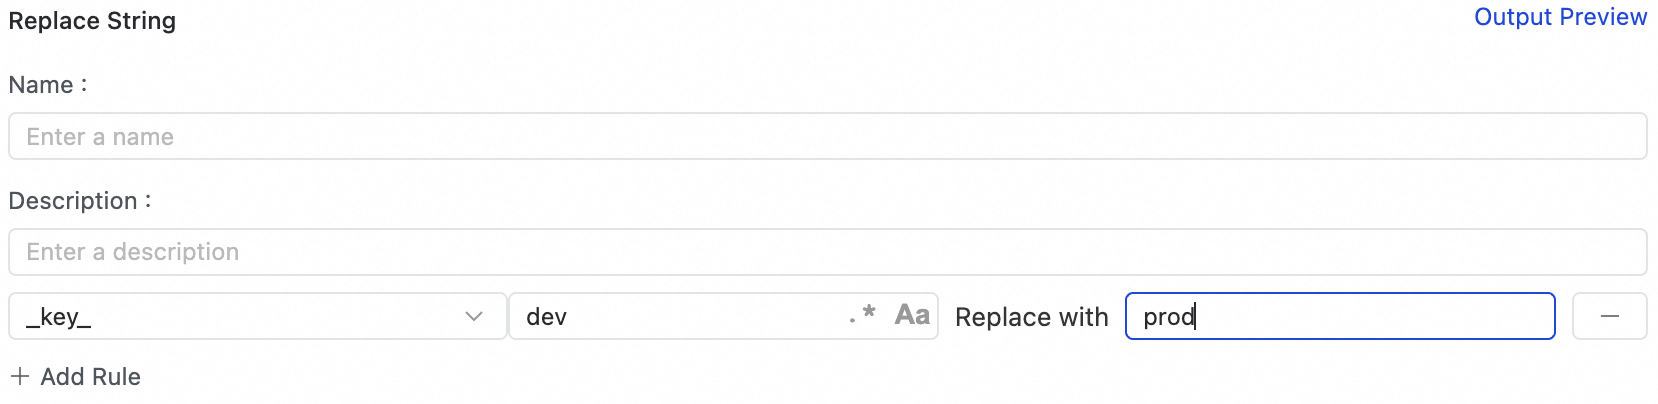
Configure rules.
Click Add Rule to configure one or more rules by using the following parameters.
Field name: Select a text field from the upstream node.
Original string: The string to be replaced. When regular matching is disabled, Java escape characters such as
\t(tab character),\n(line feed), and\u0001(Unicode character) are supported.New string: The replacement string. When regular matching is disabled, Java escape characters such as
\t(tab character),\n(line feed), and\u0001(Unicode character) are supported.
NoteRegular matching: Enables matching by using a regular expression. If you enable this option, the original string supports regular expression rules as defined in Class Pattern. The new string can then reference capture groups from the expression by using
$followed by a number. For example, if a field containsno.9526, you can set the Original string tono.([0-9]+)and the New string to$1. The field's content is then changed to9526.Case Sensitive: Enable to make the search for the original string case-sensitive.
Next step
After configuring the Data Source and string replacement components, click Preview Data Output to view the node's data output and verify that it meets your requirements.