During real-time single-table synchronization, the records written to your destination often need to carry additional context that does not exist in the source — such as the source table name, a processing timestamp, or a version tag. The Edit Field and Assign Value component lets you add new fields inline during synchronization and write them to the destination, without modifying the source schema. You can populate new fields using constants, built-in metadata variables, or built-in functions.
Prerequisites
Before you begin, ensure that you have:
A configured data source. For details, see Data source management.
A Data Integration task with the synchronization type set to Single-table Real-time. For details, see Configure a real-time sync task in Data Integration.
The Edit Field and Assign Value component is only available between the Source and Destination components in a single-table real-time synchronization task. For supported data sources, see Supported data sources and synchronization solutions.
Add and configure the component
In the real-time single-table synchronization task configuration, turn on the Data Processing switch.
Click +Add Node and select Edit Field and Assign Value.
Configure the component.
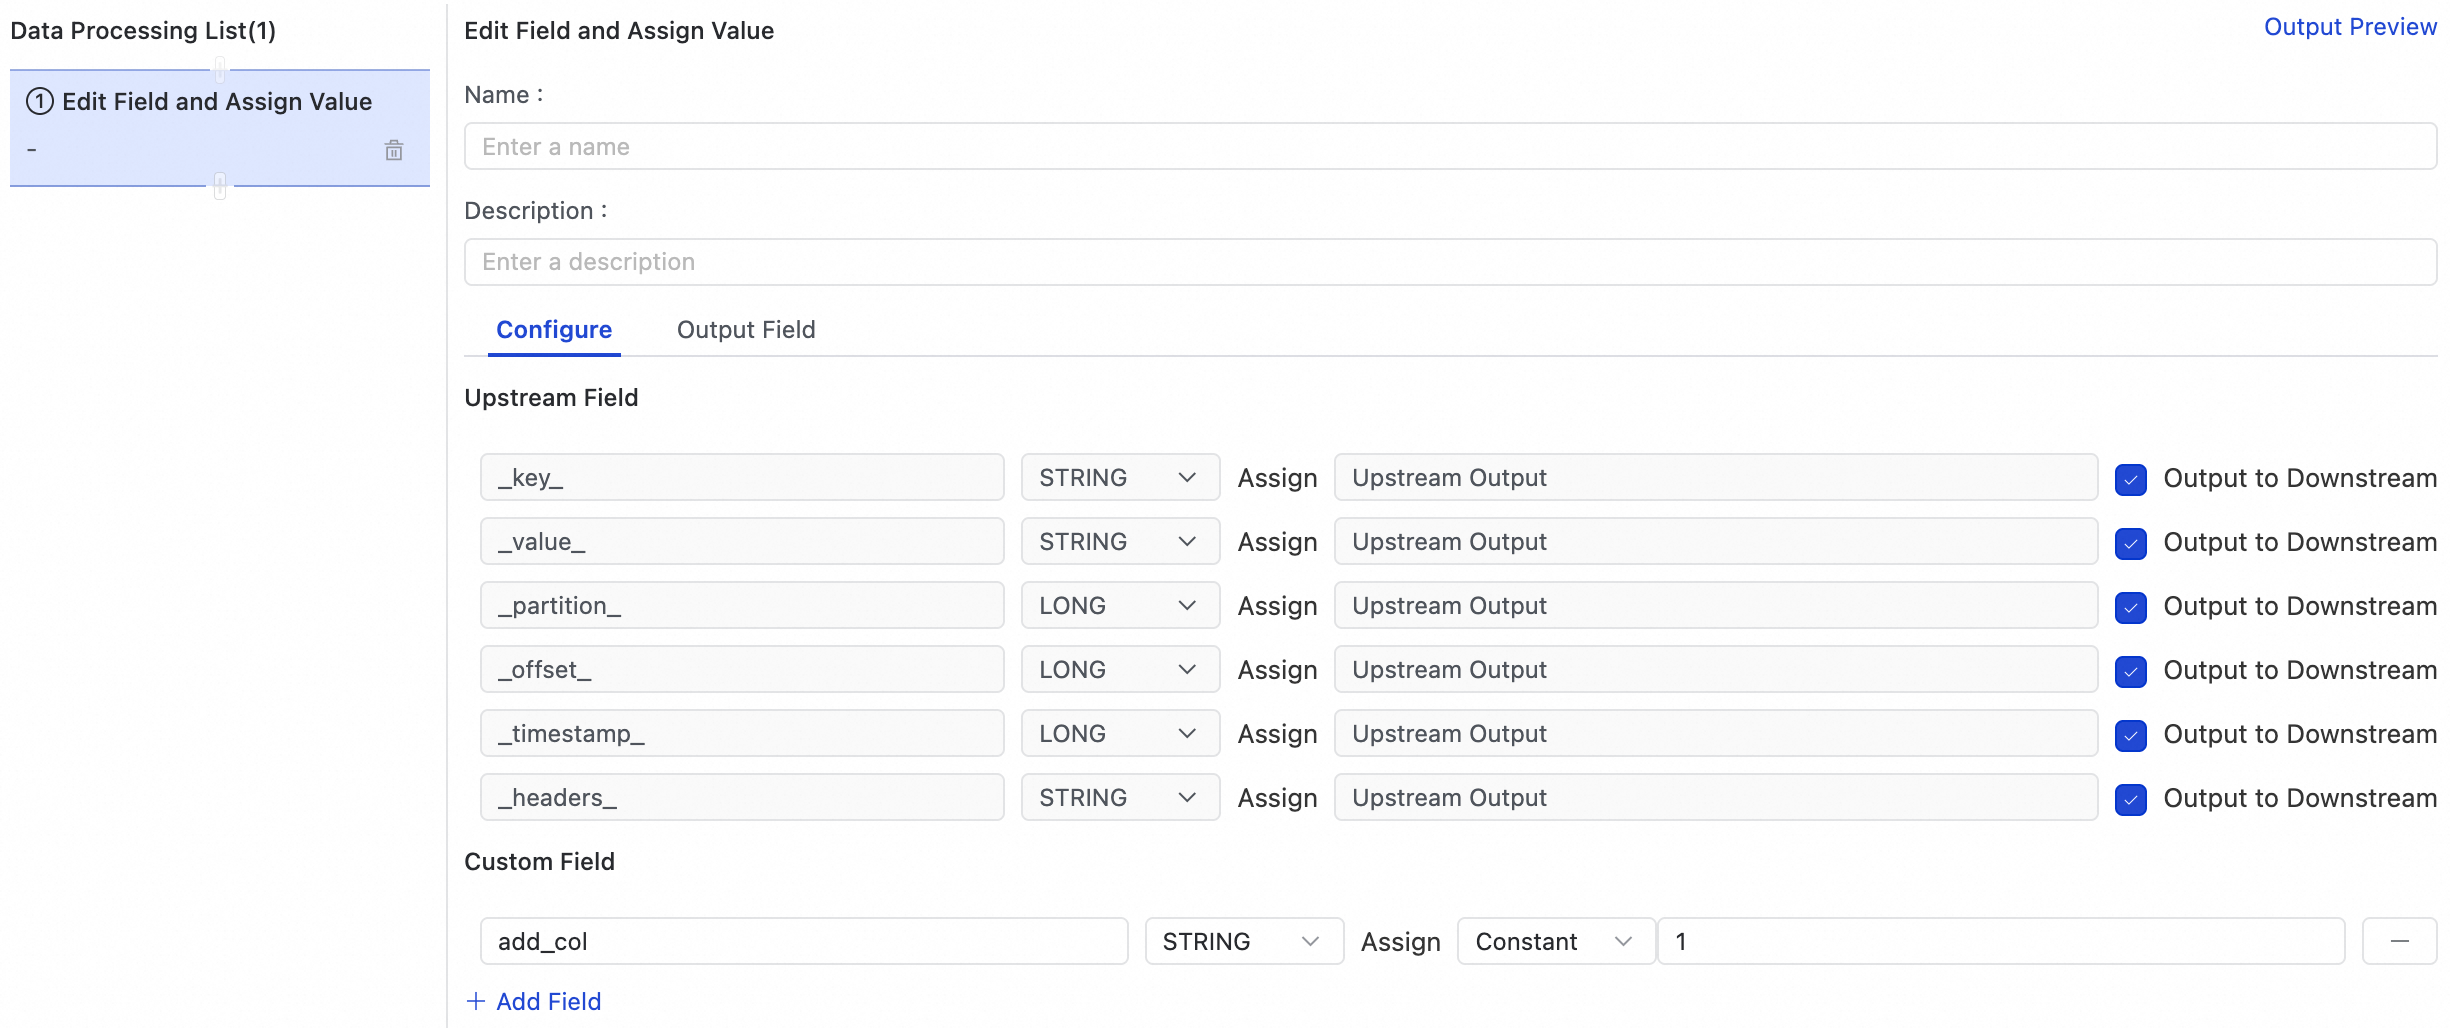
Upstream fields
The Upstream fields section lists all fields from the upstream output. Each field has four columns:
| Column | Description |
|---|---|
| Field name | The name of the field from the upstream output. |
| Type | The data type of the field from the upstream output. |
| Value | For existing upstream fields, values are inherited from the upstream output. For new fields, specify how the value is generated. |
| Actions | Determines whether to pass the field to the downstream component. |
Add a custom field
Click Add field in the lower-left corner of the Edit Field and Assign Value page to add a new field. For each new field, choose one of three value generation methods:
Assignment
Assigns a constant you enter to the new field. The constant is converted to the specified data type.
When to use: Use Assignment when the new field always holds the same value — for example, a data version tag (v2), an environment label (prod), or a fixed region code.
DATE_FORMAT
Converts a timestamp to a formatted date string.
| Parameter | Description |
|---|---|
| Parameter 1 | An upstream field of a numeric type: a 10-digit UNIX timestamp or a 13-digit millisecond timestamp. |
| Parameter 2 | The timestamp type: unix for a 10-digit UNIX timestamp, or millis for a 13-digit millisecond timestamp. |
| Parameter 3 | The time zone for the conversion, for example, Asia/Shanghai. |
| Parameter 4 | The target date string format, for example, yyyy-MM-dd HH:mm:ss. Format tokens: yyyy (year), MM (month), dd (day), HH (hour, 24-hour format), mm (minute), ss (second), SSS (millisecond), ZZ (time zone). |
Example: DATE_FORMAT(ts_field, "millis", "Asia/Shanghai", "yyyy-MM-dd HH:mm:ss") converts the millisecond timestamp 1711411200000 to 2024-03-26 08:00:00.
TO_TIMESTAMP
Converts a formatted date string to a timestamp.
| Parameter | Description |
|---|---|
| Parameter 1 | An upstream field of a text type representing a time string. |
| Parameter 2 | The target timestamp type: unix for a 10-digit UNIX timestamp, or millis for a 13-digit millisecond timestamp. |
| Parameter 3 | The time zone for the conversion, for example, Asia/Shanghai. |
| Parameter 4 | The time string format, for example, yyyy-MM-dd HH:mm:ss. Format tokens follow the same convention as DATE_FORMAT. |
Example: TO_TIMESTAMP(date_str, "millis", "Asia/Shanghai", "yyyy-MM-dd HH:mm:ss") converts the string 2024-03-26 08:00:00 to 1711411200000.
SUBSTRING
Extracts a substring from a text field.
| Parameter | Description |
|---|---|
| Parameter 1 | An upstream field of a text type. |
| Parameter 2 | The starting position of the substring (inclusive). The minimum value is 0. |
| Parameter 3 | The length of the substring. If the value is 0 or negative, the substring extends from the starting position to the end of the string. |
Example: SUBSTRING(code_field, 0, 3) extracts the first three characters from a field value such as CN-PROD-001, returning CN-.
What's next
After configuring the component:
Click Data Output Preview to verify that the output data meets your requirements.
Map new fields to destination table fields in the field mapping. New fields are written to the destination only after this mapping is configured.