This topic describes the publish and snapshot features in the toolbar.
Prerequisites
You have logged on to the DataV console.
You are on the canvas editor page.
Publish a data dashboard
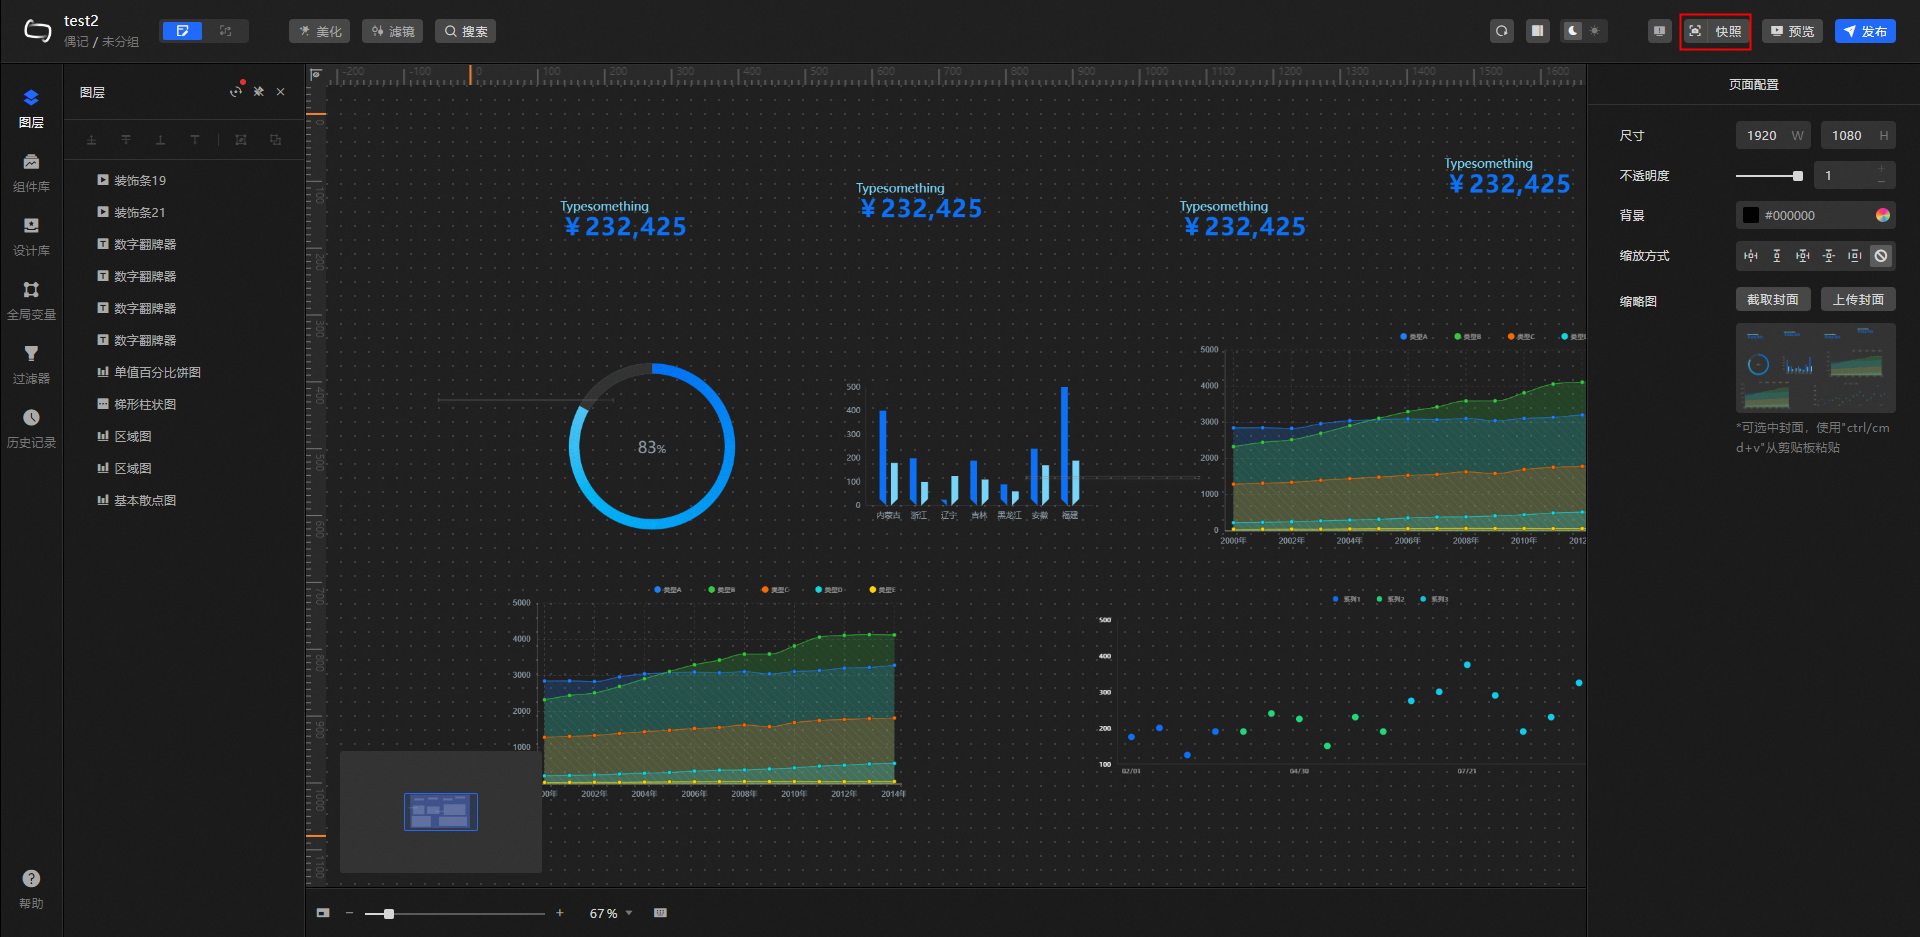
Click Publish in the upper-right corner of the Canvas Editor page to navigate to the publishing page.
In the Publish dialog box, select Publish Screen.
NoteAfter publishing, the content of the publish page will be locked. You can quickly synchronize the published content through Snapshot Management.
On the publish page, you can distribute a QR Code or Share Link to allow third parties to access the current data dashboard. Additionally, you have the option to release the dashboard as a snapshot. For detailed instructions on managing snapshots, see Snapshot Management.
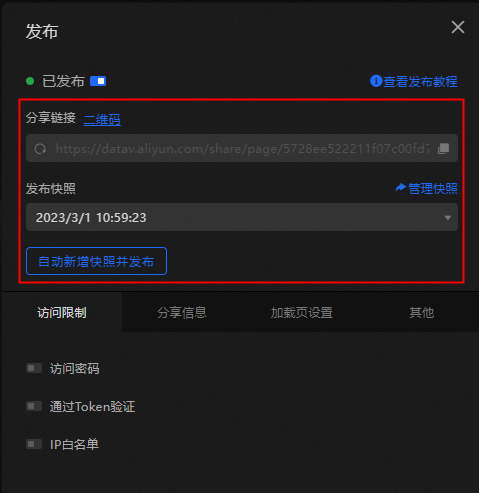
Optionally, once the data dashboard has been successfully shared, you may configure the Publish Snapshot parameters. Additionally, settings for Access Restrictions, Share Information, and Loading Page Settings can also be configured.
Access restrictions
Access Password
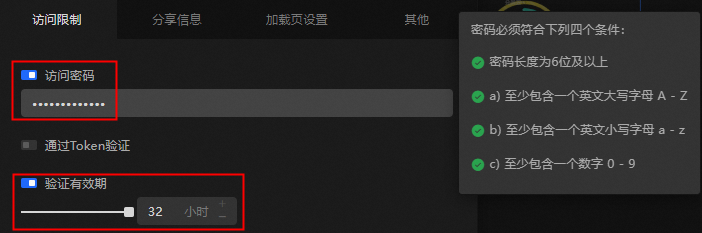
In the Publish dialog box, enable the Access Password option.
Enter your authentication password in the Access Password field.
The password must be at least 6 characters long and meet the following criteria:
Include at least one uppercase letter A–Z.
Include at least one lowercase letter a–z.
Include at least one number 0–9.
NoteOnce the password has been successfully established, the system will display a prompt indicating Access Restriction Set.
Optional: Set the Verification Validity Period.
ImportantYou can configure the Verification Validity Period only after successfully setting the password or enabling Token verification.
Choose Verification Validity Period to establish the duration for which the password remains valid, with a maximum of 32 hours. Once a visitor initially enters the password and gains access to the visualization application, they can continue to access it during this period without re-entering the password.
To require a password each time you access, deselect the Verification Validity Period option.
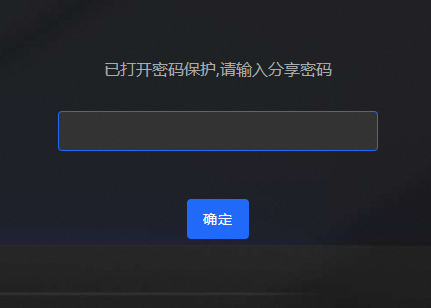
After setting the password, when you revisit the share link of the visualization application, the system will prompt you to enter the password.
Token Verification: Integrate the access privileges of the visualization application with your permission system through Token verification.
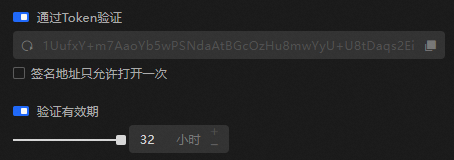
In the Publish dialog box, activate the Token Verification feature.
Copy the Token link and save it. You can also click the refresh icon
 to reset the Token.
Choose Verification Validity Period to establish the duration for which the password remains valid, with a maximum of 32 hours. Once a visitor initially inputs the password and gains successful entry to the data dashboard, they will be able to access it for the duration of this period without re-entering the password.
To require a password each time you access, deselect the Verification Validity Period option.
IP Whitelist: Enable the IP whitelist to allow access to the published visualization application only from the IPs within the set whitelist range.
In the Publish dialog box, access the IP Whitelist.
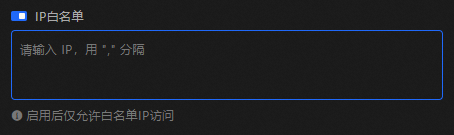
In the IP Whitelist field, enter your IP address and separate multiple entries with commas.
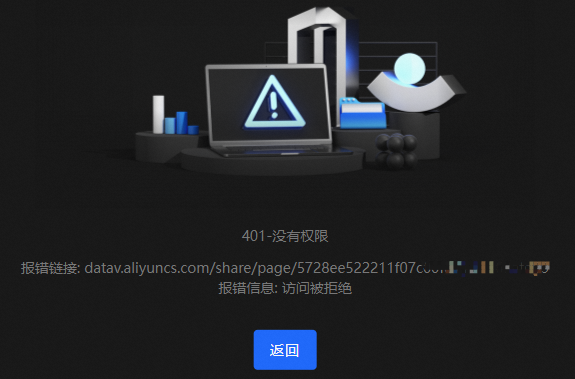
Once the IP whitelist is set, if you access the share link of the visualization application from a non-whitelisted IP, access to the visualization application page will be denied.
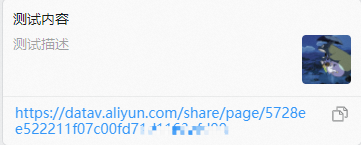
Share information
Customize and modify the share information content when sharing the DataV data dashboard publish link in the DingTalk client. The detailed parameter configuration is as follows.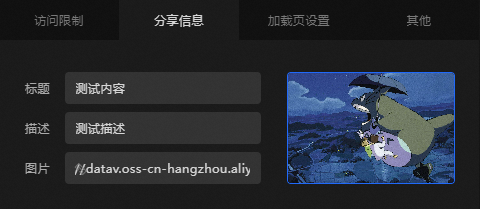
Configuration Parameter | Description |
Title | You can customize and modify the title name of the data dashboard share link that is about to be published. The default is the title name when the dashboard was created. |
Description | You can provide a brief description of the content of the data dashboard share link that is about to be published. |
Image | You can set an image for the data dashboard that is about to be published by entering a custom image URL link or dragging a local image into the right image bar. Important Both static and dynamic images can be added, but they will be displayed statically in the share link. |
If the shared card is not effective, it may be due to the DingTalk client's caching mechanism, which can cause issues with multiple modifications to the share information. It is recommended to restart the DingTalk client and then share the link again.
Loading page settings
The Loading Page Configuration feature is supported only by the Professional Edition .
Customize the loading page content when sharing the DataV data dashboard publish link. The detailed parameter configuration is as follows.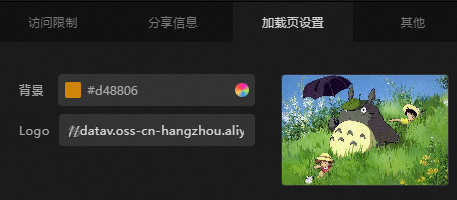
Configuration Parameter | Description |
Background | You can customize and modify the background color of the loading page of the data dashboard that is about to be published, supporting both solid and gradient colors. |
Logo | You can set a Logo image for the loading page of the data dashboard that is about to be published by entering a custom image URL link or dragging a local image into the right image bar. Important Both static and dynamic images can be added. If a dynamic image is set, it will be displayed dynamically on the loading page. |
Snapshot management
In the upper-right corner of the Canvas Editor, click Snapshot to access the Snapshot Management panel directly. To exit, click on any blank area.
NoteThe Personal Edition allows the creation of up to 1 snapshot, the Enterprise Edition up to 3 snapshots, and the Professional Edition And Above up to 10 snapshots.
You can perform the following operations as needed:
Add a Snapshot
Click Add A Snapshot to automatically capture and save the current canvas content as the latest snapshot. Alternatively, you can click the
 icon directly on the canvas editor page to create a snapshot.
Delete a Snapshot
To delete a snapshot, click the
 icon on the right side. Alternatively, click Snapshot Management at the bottom left of the panel, followed by Select All, to remove multiple snapshots at once.
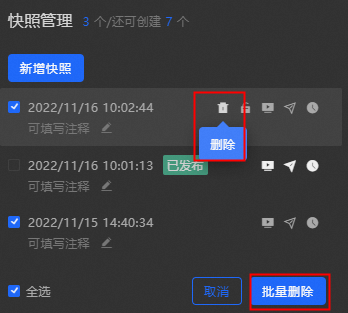 Note
NotePublished snapshots cannot be deleted. To delete, click the
 icon to unpublish.
Locking/Unlocking a Snapshot
Click the
 and
and  icons on the right side of any snapshot to lock and unlock the snapshot. Once locked, the snapshot cannot be edited or selected.
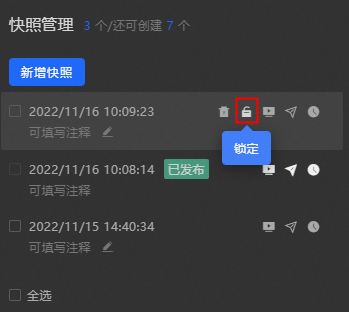
Preview a Snapshot
Click the
 icon on the right side of any snapshot for a quick preview.
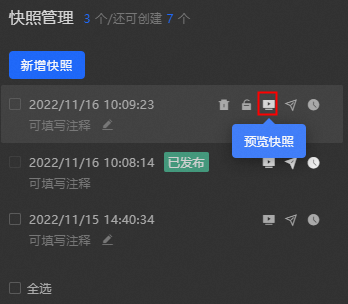
Publish/Close a Snapshot
Click the
 and
and  icons on the right side of any snapshot to publish and close the published snapshot.
Rollback a Snapshot
Click the
 icon on the right side of any snapshot to rollback to that snapshot.
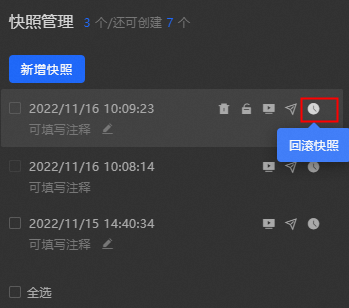 Note
NoteIf the snapshot to be rolled back is consistent with the current canvas content, refresh the canvas.
If the snapshot to be rolled back is inconsistent with the current canvas, the canvas will be rolled back to the snapshot position. After the rollback, the original canvas content cannot be traced. If you need to retain it, please save it as a snapshot first.
Fill in Comments
Click the
 icon beneath a snapshot to add a comment. Once you've entered your comment, press the Enter key.