A logic combination is an interactive logic system that encapsulates and reuses node connections in a visualized manner to implement data-driven dynamic interaction. This topic describes how to create, configure, and manage a logical combination.
Usage notes
The logical combination nodes added to the main canvas reference a specific logical combination. If you modify the name and content of the logical combination, all logical combination nodes on the main canvas are affected.
Go to the Logic Combo page
Access the DataV console.
On the All Projects page, move the pointer over the desired dashboard and click Edit.
In the top navigation bar of the editing page, click the
 icon to go to Blueprint Editor. In the left-side navigation pane, click Logic Combo.
Before you configure a logical combination, you must be familiar with the layout of Blueprint Editor and the operations that you can perform.
Create a logical combination
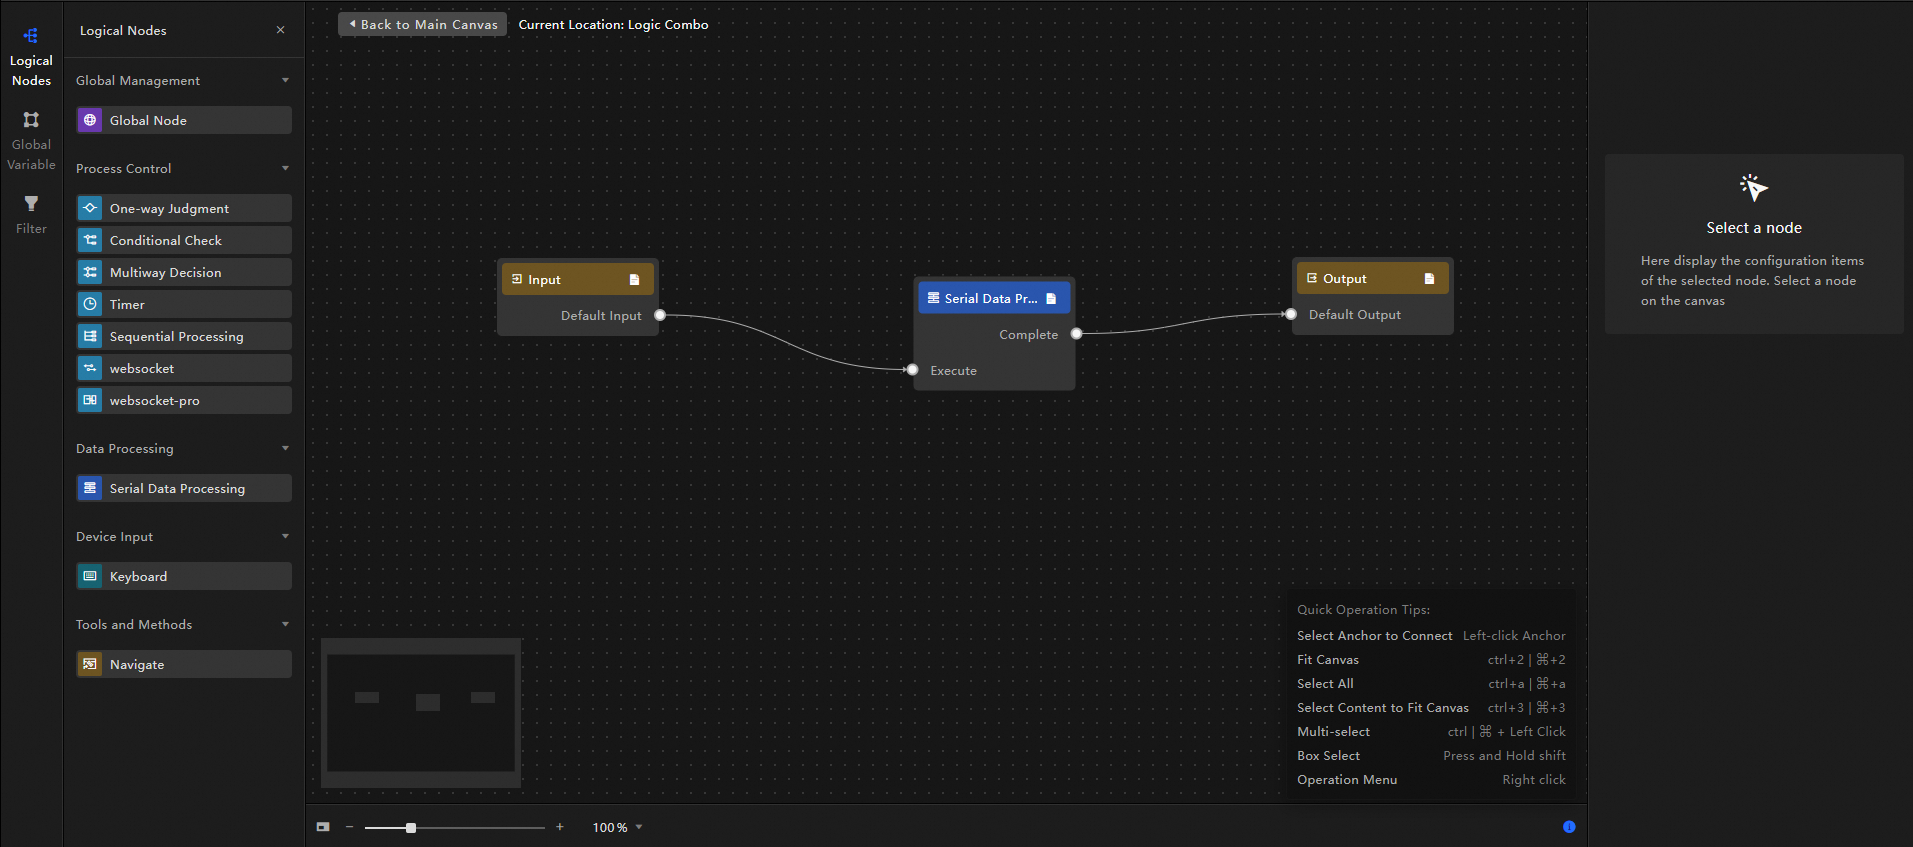
In the Logic Combo pane, click Create Logical Combination. The Input and Output components appear on the canvas.
Optional. Click Input and Output separately and add an input and output anchor in the right area of the canvas.
In the left-side navigation pane, click Logical Nodes. In the Logical Nodes pane, click the Plus icon to add logical nodes to the canvas based on your business requirements. In this example, a serial data processing node is added to the canvas.
Configure the Processing Method parameter for the serial data processing node and click Save. Then, drag lines to connect the node with the Input and Output components, as shown in the following figure.
Click Back to Main Canvas at the top of the canvas to return to the main canvas.
Manage a logical combination
Rename a logical combination
In the Logical Combo pane, move the pointer over the desired logical combination and click the  icon to rename the logical combination.
Delete a logical combination
In the Logical Combo pane, move the pointer over the desired logical combination and click the  icon to delete the logical combination.
After you delete a logical combination, the logical combination cannot be recovered. Proceed with caution.
Drill down a logical combination
In the Logical Combo pane, move the pointer over the desired logical combination and click the  icon to drill down the logical combination.
Add a logical combination to the main canvas
In the Logical Combo pane, move the pointer over the desired logical combination and click the  icon to add the logical combination to the main canvas.
Use a logical combination
In the left-side navigation pane of the editing page of a dashboard, click Widget Library. Search for the desired widgets and add the widgets. In this example, a ticker board widget and a column chart widget are added.
Click the
 icon in the top navigation bar to go to Blueprint Editor. In the Layer Node pane, click the Plus icon to the right of the desired layer nodes to add the nodes to the main canvas.
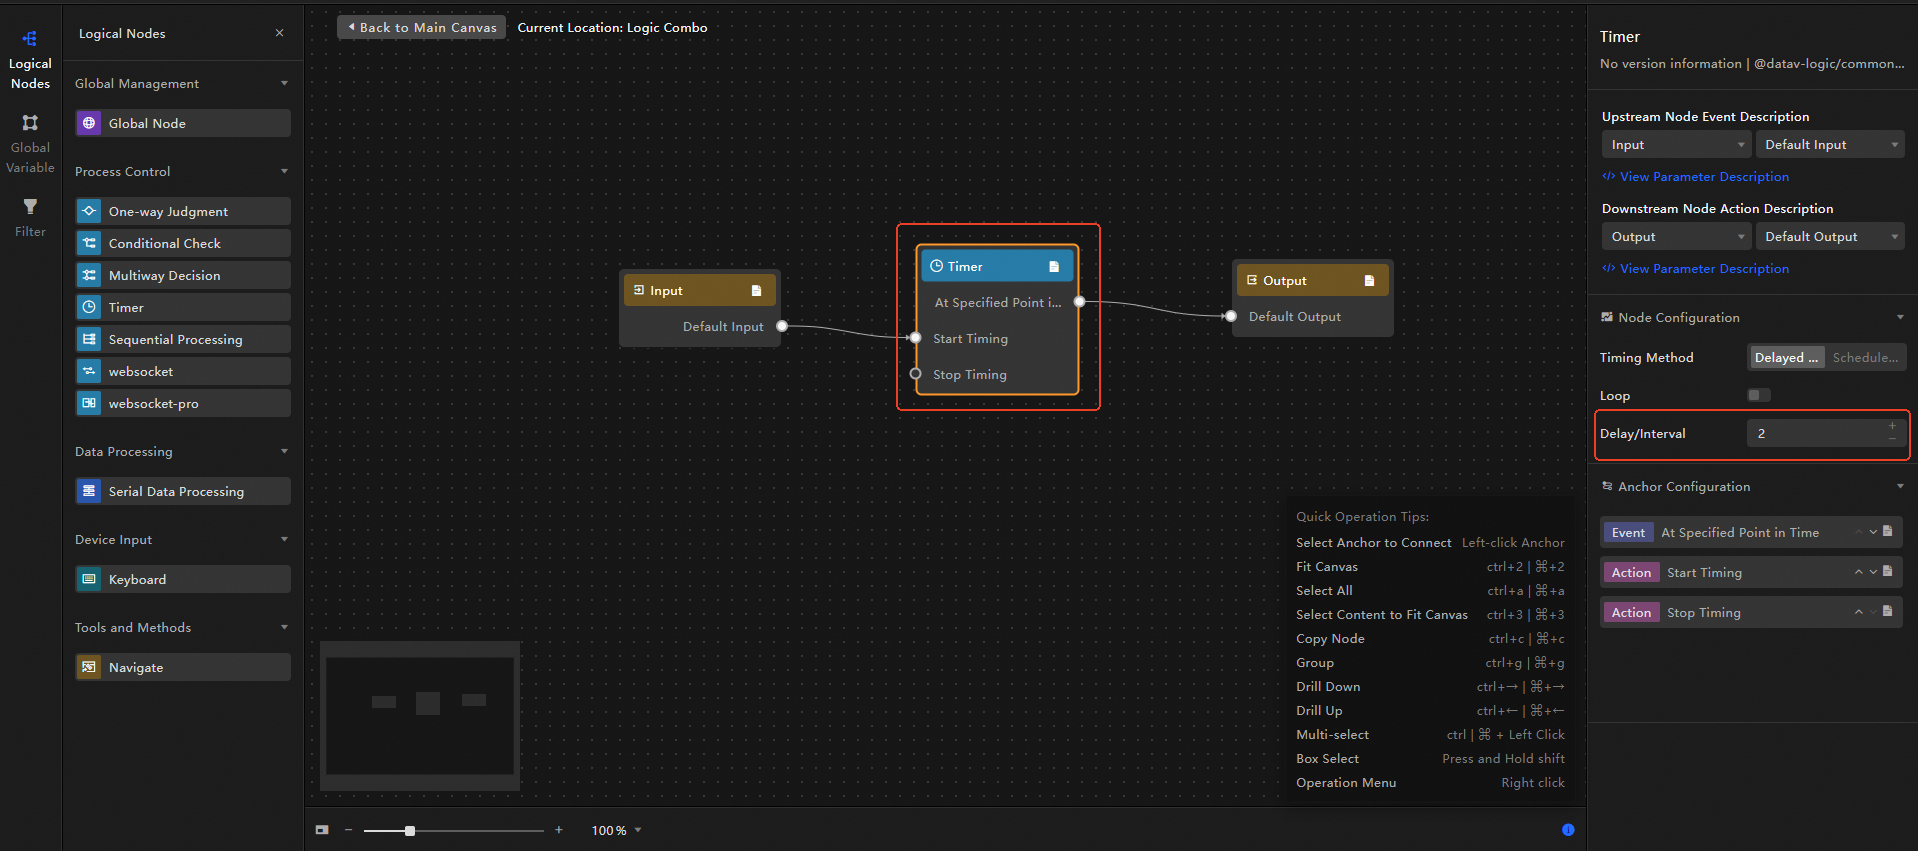
 In the left-side navigation pane, click Logical Combo. In the Logic Combo pane, click Create Logic Combination. Click Logical Nodes. In the Logical Nodes pane, add logical nodes to the canvas based on your business requirements. In this example, a timer node is added and the Delay/Interval parameter of the node is set to 2 seconds.
Click Back to Main Canvas at the top of the canvas to return to the main canvas.
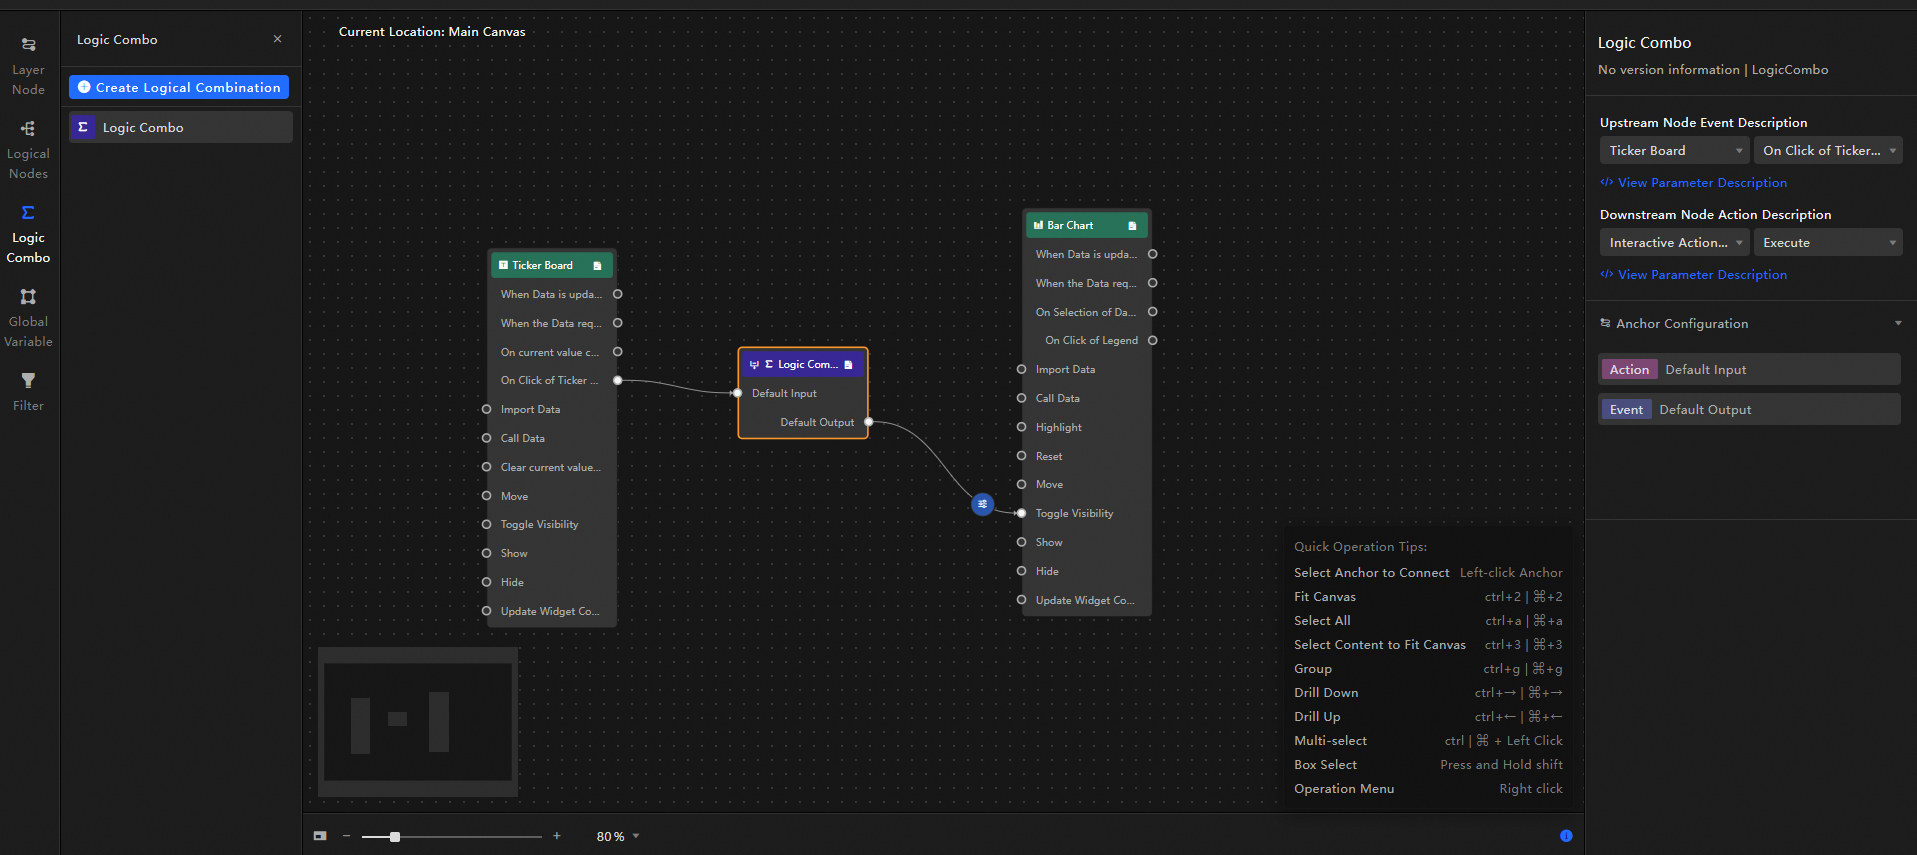
In the Logical Combo pane, click the
icon to add the created logical combination to the main canvas. On the main canvas, configure the layer nodes and logical combination, as shown in the following figure.
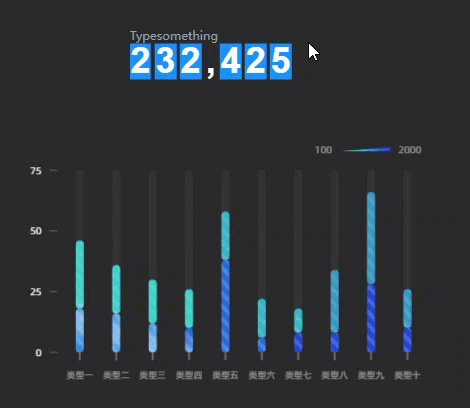
Effect: When the ticker board is clicked, the timer starts. After two seconds, the timer stops. You can view the effects when the column chart is displayed and hidden.
Preview or publish the current dashboard to view the interactive effect.