The logical dimension/fact table list is a collection of the logical dimension and fact tables that you create in Dataphin. This list displays basic information about the tables and provides options for you to view and manage them. This topic describes the management features available on the logical dimension/fact table list.
Managing dimensions and logical fact tables
In the top menu bar of the Dataphin home page, choose Development > Data Development.
In the navigation pane on the left, choose Standardized Modeling > Logical Dimension Table/Logical Fact Table.
At the bottom of the logical dimension table or logical fact table list, click Logical Dimension/Fact Table List. On the list tab that opens, you can perform table management operations.
Section
Description
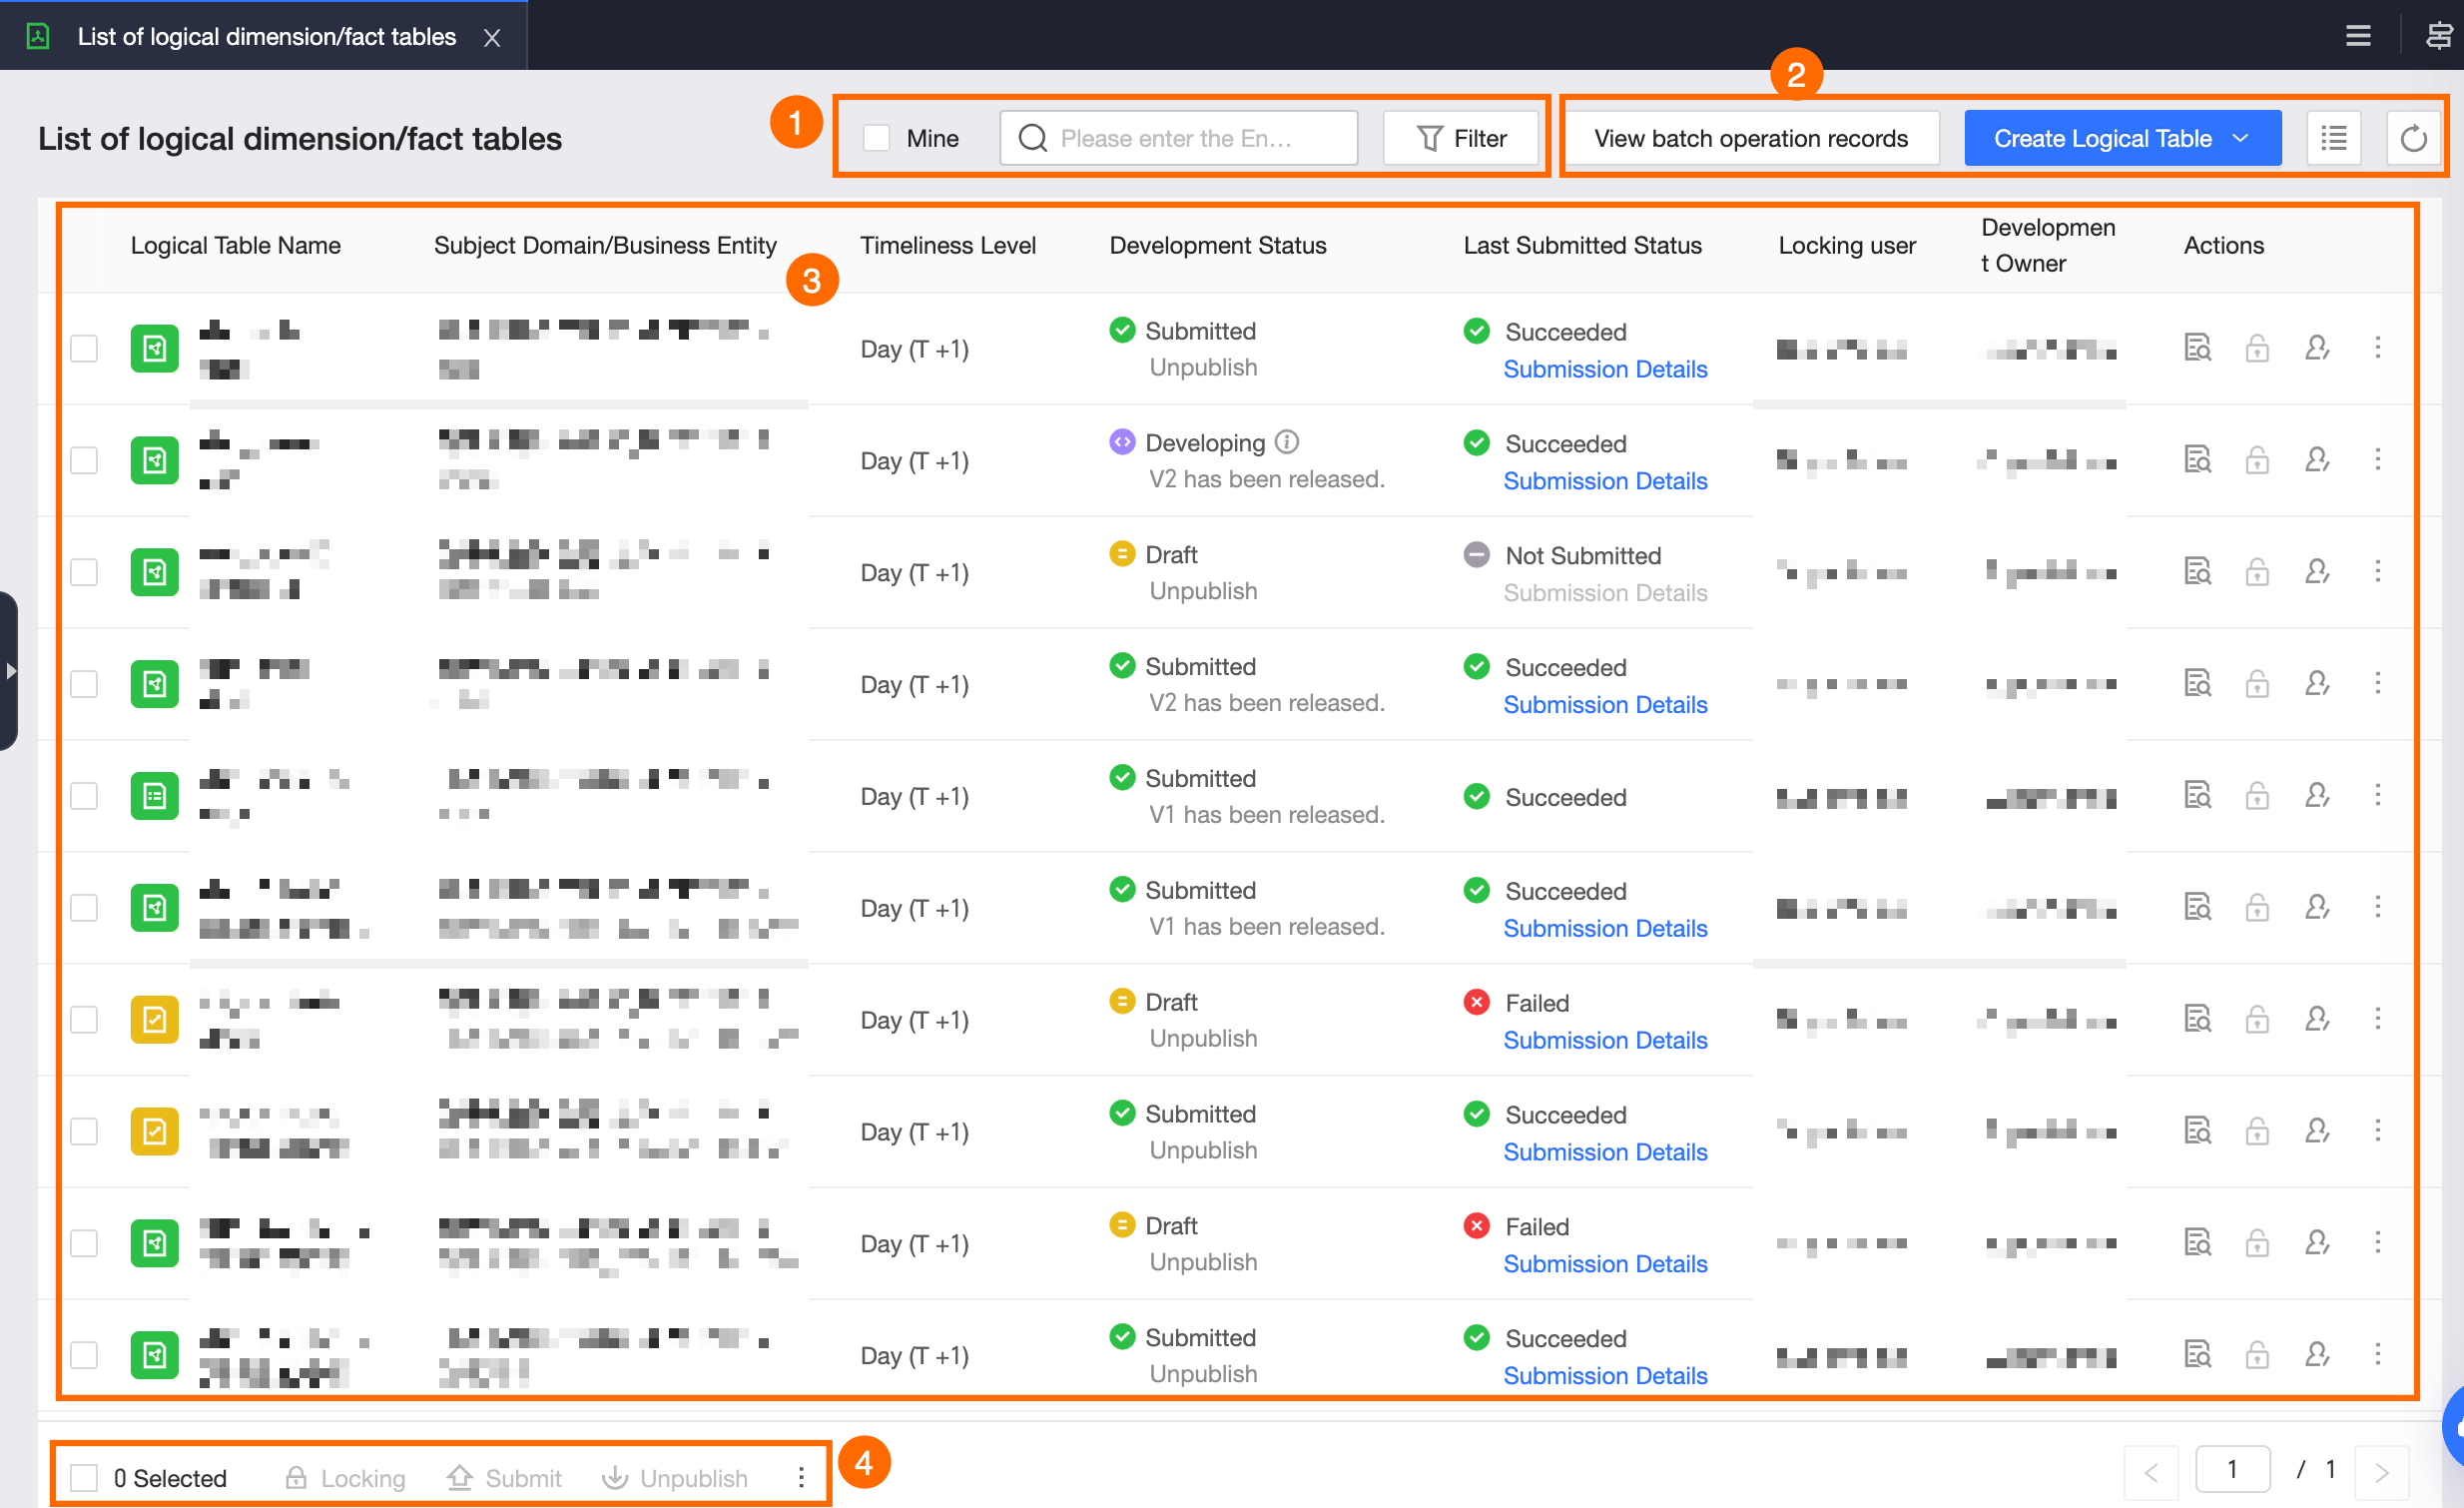
①Search and filter area
Enter the Chinese or English name of a logical table to search for it. You can also select My Development to quickly filter the list. Click Filter to expand the filter area. The following filter options are available.
Logical Table Type: Select one or more table types. Options include regular dimension logical table, hierarchical dimension logical table, enumeration dimension logical table, virtual dimension logical table, event fact logical table, process fact logical table, and snapshot fact logical table.
Data Domain: Filter tables by subject area. You can select one or more subject areas. The list contains all subject areas in the current module.
Schedule Type: Select one or more schedule types. Options include normal scheduling, dry-run, and skip execution.
Published: Filter tables based on whether they are published.
Development Owner: Filter tables by developer. You can select one or more users and search by username keyword. If you select My Development, this filter includes your account.
Created By: Filter tables by creator. You can select one or more users.
Data Timeliness: Filter tables by data timeliness. You can select daily (T+1), hourly (T+h), or minute (T+m).
Development Status: Select one or more development statuses. Options include Submitting, Submission Successful, and Submission Failed.
Last Submission Status: Select one or more recent submission statuses. Options include Submitting, Submission Successful, and Submission Failed.
Conditional Scheduling: Filter tables based on whether conditional scheduling is enabled.
Operation Owner: Filter tables by O&M owner. You can select one or more users and search by username keyword. If you select My O&M, this filter includes your account.
Tag: Select one or more tag values to filter by.
②Function area
View Batch Operation Records: Click View Batch Operation Records to open the Batch Operation Records panel. Click the Submit or Other Operations tab to view the corresponding batch operation records.
Create Logical Table: Click Create Logical Table and select Logical Dimension Table or Logical Fact Table. For more information, see Logical dimension table and Create a logical fact table.
Select list display content: Click the
 icon to select the fields to display in the list.
Refresh: Click the
 icon to refresh the list based on the selected filter conditions.
③Dimension/real-time logical table list
The dimension/real-time logical table list displays information such as logical table name, subject area/business entity, data timeliness, development status, last submission status, current lock holder, and developer. You can perform management operations on the tables in the Actions column. For more information, see Operations supported by the logical dimension/fact table list.
④Batch operations
In the batch operations area, perform batch operations on multiple tables. For more information, see Batch operations supported by the logical dimension/fact table list.
Operations supported by the logical dimension/fact table list
The following operations are supported in the Actions column of the logical dimension/fact table list:
Operation | Description |
Open logical table | Click the |
Get lock | Click the Note After you enable the exclusive edit lock in System Settings > Platform Settings > Development Platform, you can go to the editing area to manually release the edit lock for the current table. |
Transfer Developer Ownership | Change the developer of the current logical dimension or fact table.
|
Go to publish | In the Actions column of the target logical table, click the |
Go to O&M | In the Actions column of the target logical table, click the Note You can perform O&M only on published logical tables. |
Unpublish | Unpublish a published logical table.
|
Delete | Delete a logical table that is in a draft state. In the Actions column of the target logical table, click the Note If the Development environment can delete published objects option in Development Platform Settings > Unpublish and Delete is disabled for the current tenant, you cannot delete a draft object in a Dev-prod project if a corresponding production object exists. |
Unpublish and delete | Unpublish and delete a published logical table.
Note
|
Batch operations supported by the logical dimension/fact table list
Operation | Description |
Lock | Select multiple logical tables and click Lock at the bottom of the list to obtain edit locks for the selected logical tables in a batch. Note After you enable the exclusive edit lock in System Settings > Platform Settings > Development Platform, you can go to the editing area to manually release the edit lock for the current table. |
Submit | Select multiple logical tables and click Submit at the bottom of the list to submit the selected logical tables in a batch. You can view the submission status and details in the Last Submission Status column of the list. You can also click View Batch Operation Records and view the details on the Submit tab of the Batch Operation Records panel. |
Unpublish | Select multiple logical tables and click Unpublish at the bottom of the list. In the Batch Unpublish dialog box, enter a Remark and click OK And Submit. Note
|
Unpublish and delete | Select multiple logical tables, click the Note
|
Batch modify tags | Replace or append tags for multiple dimension or fact tables.
|
Change development owner | Select multiple logical tables, click the |
Run configuration | Select multiple logical tables, click the |
Parameter configuration | Select multiple logical tables, click the |
Dependency configuration | Select multiple logical tables, click the |