You can configure DataHub output widgets to write data from external databases to DataHub, or copy and push data from connected storage systems for integration and reprocessing.
Prerequisites
-
A DataHub data source has been created. For more information, see Create a DataHub data source.
-
The account used to configure DataHub input widget properties must have read-through permission for the data source. If you do not have the permission, request access. For more information, see Request, renew, and return data source permissions.
Procedure
-
On the Dataphin home page, select Development > Data Integration from the top menu bar.
-
On the integration page, select Project from the top menu bar (Dev-Prod pattern requires selecting an environment).
-
In the navigation pane on the left, click Batch Pipeline. Then, in the Batch Pipeline list, click the Offline Pipeline you want to develop to open its configuration page.
-
Click Component Library in the upper right corner of the page to open the Component Library panel.
-
In the Component Library panel's left-side navigation pane, select Output. Find the DataHub widget in the output widget list on the right and drag it to the canvas.
-
Click and drag the
 icon of the target upstream widget to connect it to the DataHub output widget.
 -
On the DataHub output widget, click the
 icon to open the DataHub Output Configuration dialog box.
-
In the DataHub Output Configuration dialog box, configure the following parameters.
Parameter
Description
Basic settings
Step Name
The name of the DataHub output widget. Dataphin automatically generates the step name. You can modify it as needed. The name must meet the following requirements:
-
Can only contain Chinese characters, letters, underscores (_), and numbers.
-
Cannot exceed 64 characters.
Datasource
Lists all DataHub-type data sources, including those you have write-through permission for and those you do not. Click the
 icon to copy the current data source name.
-
For data sources without write-through permission, click Request after the data source to request write-through permission. For more information, see Request, renew, and return data source permissions.
-
If you do not have a DataHub-type data source, click Create Data Source to create a data source. For more information, see Create a DataHub data source.
Subject
Select the topic based on your scenario.
Data Volume Per Submission
Data Integration accumulates data in a buffer to improve write efficiency. When the buffered data reaches the specified volume per submission (in MB), it is submitted in batches to the destination. Default value: 1 MB.
Advanced Configuration
Configure as needed. The following parameters are supported:
-
maxRetryCount: Maximum number of retries for a failed node. The retry count cannot exceed 3.
-
batchSize: Data Integration accumulates data in a buffer to improve write efficiency. When the number of buffered records reaches the batchSize value, the records are submitted in batches to the destination.
-
maxCommitInterval: Maximum buffering time. Unit: milliseconds. Default value: 30,000 (30 seconds). If the data source does not produce data for an extended period, set this parameter to ensure timely data delivery. Data is force-delivered when this interval is exceeded.
NoteData is delivered when any one of the three parameters (data volume per submission, batchSize, or maxCommitInterval) is met. DataHub limits each write request to 10,000 records. Exceeding this limit causes the node to fail. We recommend that you set batchSize to 10,000 or fewer.
Field mapping
Input Fields
The input fields are displayed based on the output of the upstream widget.
Output Fields
Displays all fields of the selected table. To exclude fields from the downstream widget, delete them:
-
To delete a small number of fields, click the Actions column's
 icon to delete the extra fields.
 -
To delete many fields, click Field Management, select multiple fields on the Field Management page, and click the
 icon to move the Selected Input Fields to Unselected Input Fields.
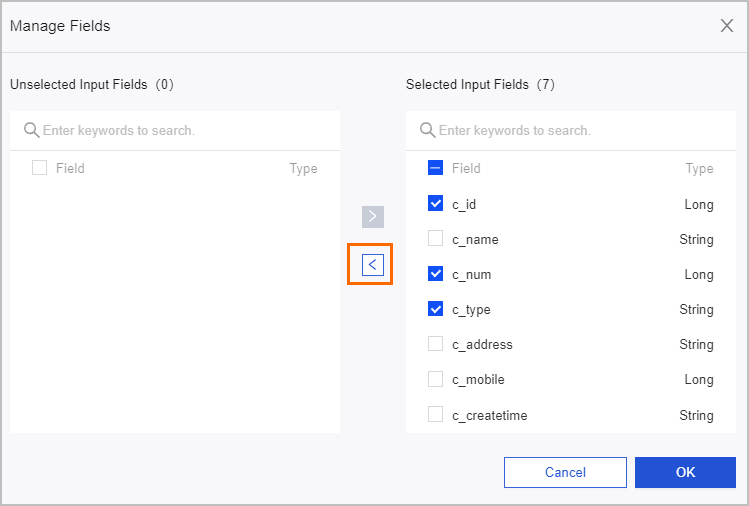
Mapping
Maps input fields from the source table to output fields of the target table. Two mapping modes are available:
-
Same-name mapping: Maps fields with the same field name.
-
Same-row mapping: Maps fields in the same row position when field names differ between the source and target tables.
-
-
Click OK.