The AnalyticDB for PostgreSQL output component writes data to an AnalyticDB for PostgreSQL data source. After configuring the source data, configure this component as the write target.
Prerequisites
-
An AnalyticDB for PostgreSQL data source is created. Create an AnalyticDB for PostgreSQL Data Source.
-
The account used to configure the AnalyticDB for PostgreSQL input component has write-through permission on the data source. If not, request access. Request Data Source Permissions.
Procedure
-
On the Dataphin homepage, in the top menu bar, click Develop, and then click Data Integration.
-
On the Integration page, in the top menu bar, select a Project. In Dev-Prod mode, also select an environment.
-
In the left navigation pane, click Batch Pipeline. In the Batch Pipeline list, click the target offline pipeline to open its configuration page.
-
In the upper-right corner of the page, click Component Library to open the Component Library panel.
-
In the Component Library panel, click Output, locate AnalyticDB for PostgreSQL, and drag it onto the canvas.
-
Drag the
 icon of a target input, transform, or flow component to connect it to the AnalyticDB for PostgreSQL output component.
 -
In the AnalyticDB for PostgreSQL output component card, click the
 icon to open the AnalyticDB for PostgreSQL Output Configuration dialog box.
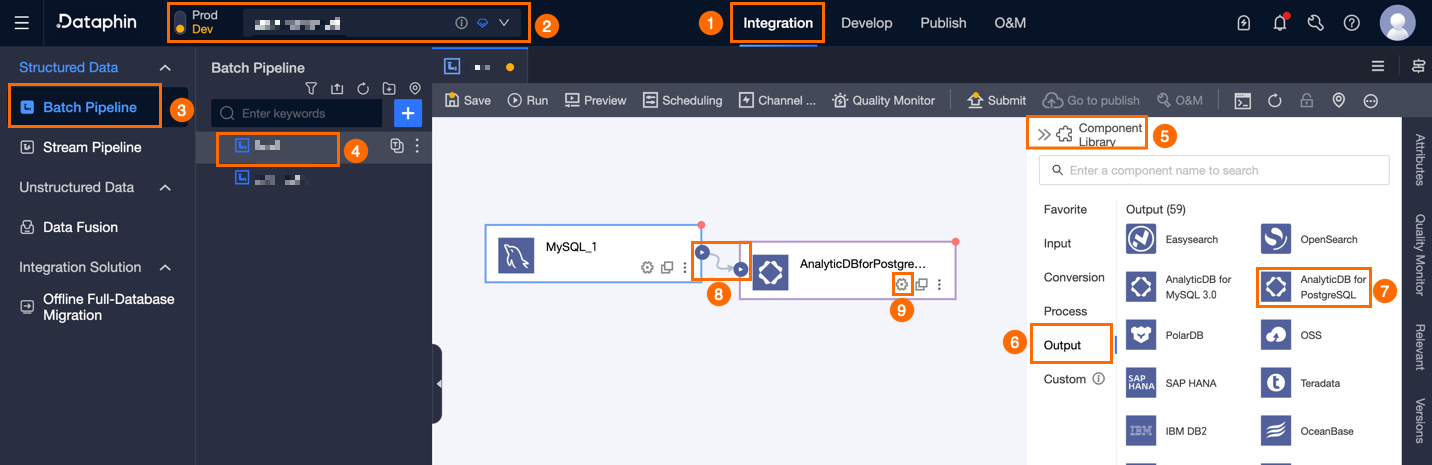
-
In the AnalyticDB for PostgreSQL Output Configuration dialog box, configure the following parameters.
Parameter
Description
Basic Information
Step Name
The component step name. Dataphin auto-generates a name that you can change. Naming rules:
-
Use only Chinese characters, letters, underscores (_), and digits.
-
Keep the name no longer than 64 characters.
Datasource
Lists all AnalyticDB for PostgreSQL data sources, including those you lack write-through permission for. Click the
 icon to copy the data source name.
-
To request write-through permission, click Request next to the data source. Request Data Source Permissions.
-
To create a data source, click Create Data Source. Create an AnalyticDB for PostgreSQL Data Source.
Time Zone
Dataphin processes time-format data using the selected data source's time zone. This setting is read-only.
NoteFor tasks created before V5.1.2, choose between Data Source Default Configuration and Channel Configuration Time Zone (default: Channel Configuration Time Zone).
-
Data Source Default Configuration: The default time zone of the selected data source.
-
Channel Configuration Time Zone: The time zone configured for the current integration task under Properties > Channel Configuration.
Schema (Optional)
Select the schema where the table resides. Cross-schema selection is supported. Defaults to the data source's configured schema.
Table
Select the target table for output data. Search by keyword, or enter the exact name and click Exact Search. The system checks the table status after selection. Click the
 icon to copy the table name.
If the target table does not exist, create it with the one-click table creation feature:
-
Click Create Table. Dataphin generates a CREATE TABLE script with the table name (defaults to the source table name) and field types converted from Dataphin types.
-
Modify the script as needed, then click Create. Dataphin uses the new table as the output target.
NoteIf a table with the same name exists in the development environment, clicking Create returns an error that the table already exists.
Production Table Missing Policy
Defines how to handle missing production tables. Options: No Action or Automatic Creation (default: Automatic Creation).
-
No Action: If the target table does not exist, the system warns during submission but allows publishing. You must manually create the target table in production before running the task.
-
Automatic Creation: Click Edit The Table-creation Statement to modify the prepopulated CREATE TABLE statement. The table name uses the placeholder
${table_name}, and only this placeholder is allowed. At runtime, it is replaced with the actual table name.If the target table does not exist, Dataphin creates it using this statement. If creation fails, fix the statement and republish. If the table already exists, no action is taken.
NoteThis setting is available only for projects in Dev-Prod mode.
Loading Policy
Supports insert and copy policies.
-
insert policy: Writes data using
INSERT INTO ... VALUES .... Rows with primary key or unique index conflicts fail and become dirty data. Use insert mode first. -
copy policy: Loads data using
COPY FROMwith conflict resolution support. Use only for performance issues. Configure the Conflict Resolution Strategy (Error on Conflict or Overwrite on Conflict).ImportantConflict resolution requires AnalyticDB for PostgreSQL kernel versions higher than 4.3. Using it on version 4.3 or earlier, or unknown versions, may cause task failures.
Batch Write Size (Optional)
Maximum data size per batch write. The system writes when either this or Batch Write Count is reached. Default: 32 MB.
Batch Write Count (Optional)
Maximum row count per batch write. Default: 2,048 rows. The system writes when either Batch Write Count or Batch Write Size is reached.
-
A batch write triggers when either limit is reached first.
-
Set the batch write size to 32 MB and adjust the count based on average record size. For example, for ~1 KB records with a 16 MB batch size, set the count above 16,384 (16 MB ÷ 1 KB), such as 20,000 rows.
Preparation Statement (Optional)
An SQL script to run on the database before data import.
Example for zero-downtime switchover: create Target_A → write data → rename Service_B to Temp_C → rename Target_A to Service_B → delete Temp_C.
Finalization Statement (Optional)
An SQL script to run on the database after data import.
Field Mapping
Input Fields
Lists the input fields from upstream components.
Output Fields
Lists the output fields. Available actions:
-
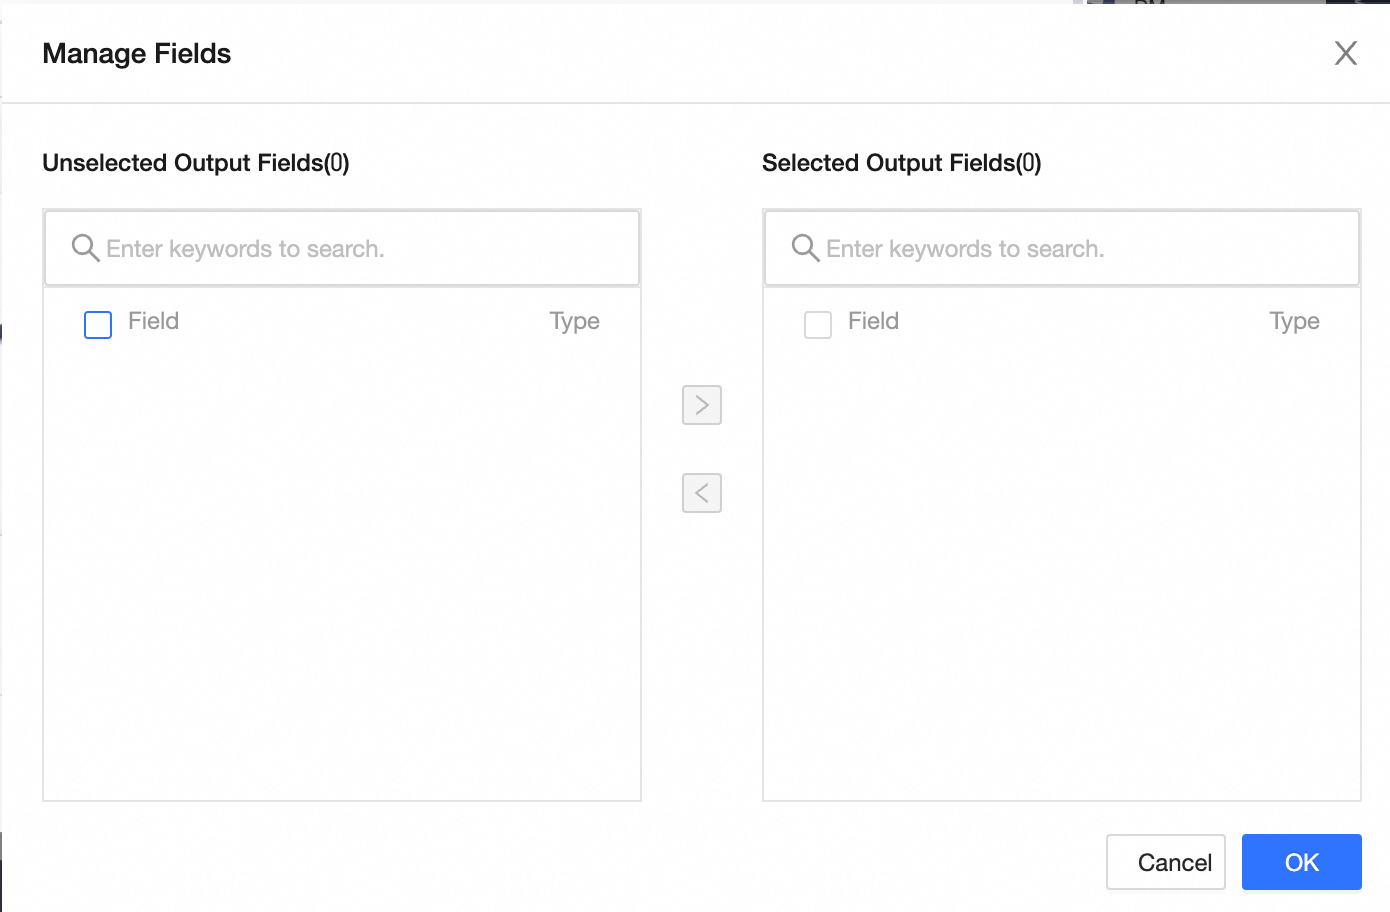
Click Field Management to select output fields.
-
Click the
 icon to move Selected Input Fields to Unselected Input Fields.
 -
Click the
 icon to move the Unselected Input Fields into the Selected Input Fields.
-
-
Click Batch Add to add fields in JSON, TEXT, or DDL format.
-
JSON format example:
// Example: [{ "name": "user_id", "type": "String" }, { "name": "user_name", "type": "String" }]NoteEach entry has a "name" (field name) and "type" (data type), for example:
"name":"user_id","type":"String". -
TEXT format example:
// Example: user_id,String user_name,String-
Row delimiter: line feed (\n) by default. Also supports semicolons (;) and periods (.).
-
Column delimiter: comma (,) by default.
-
-
Batch configuration in DDL format, such as:
CREATE TABLE tablename (
    id INT PRIMARY KEY,
    name VARCHAR(50),
    age INT
);
-
-
Click + Create Output Field, enter the Column name, select the Type, and click the
 icon to save.
Mapping
Map fields between upstream inputs and the target table. Mapping supports Row Mapping and Name Mapping.
-
Name Mapping: Maps fields with identical names.
-
Row Mapping: Maps fields by position when source and target field names differ.
-
-
Click Confirm.