If your data is stored on a remote file system, such as a remote Windows file system, a remote Linux file system, or a Network-Attached Storage (NAS) server, you must mount the file system to a Data Transport device for data migration. This topic describes how to configure a service IP address and mount a remote file system to a Data Transport device.
Prerequisites
The source device is connected to the network port or optical port of the Data Transport device, either directly with a network cable or through a network switch. Ensure that the network cable, optical fiber, and optical transceiver module are connected correctly, and that the port's LED indicator shows a normal status.
A service IP address has been configured. For more information, see Step 2: Configure the network port IP address of the Data Transport device.
Step 1: Create a data address
Data Transport devices support the following remote file systems as data sources: NAS servers, remote Windows file systems, and remote Linux file systems.
Remote Windows file system
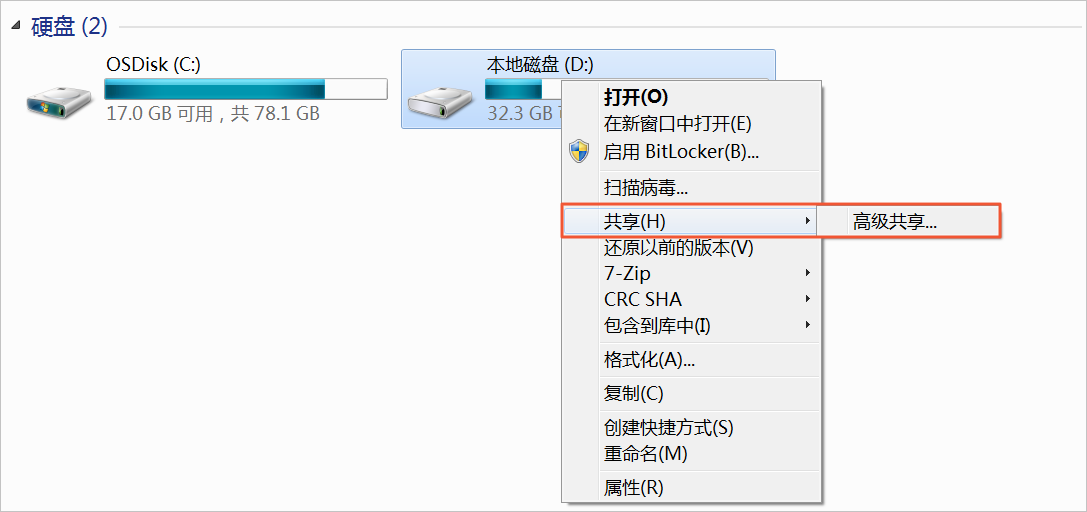
In Windows, share a folder or drive. This example uses the local disk (D:).
Right-click the local disk (D:) and select Share > Advanced Sharing.
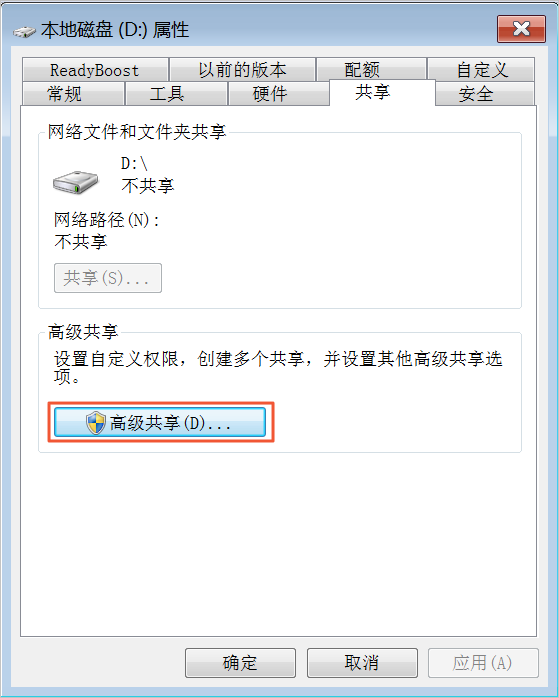
Click Advanced Sharing (D).
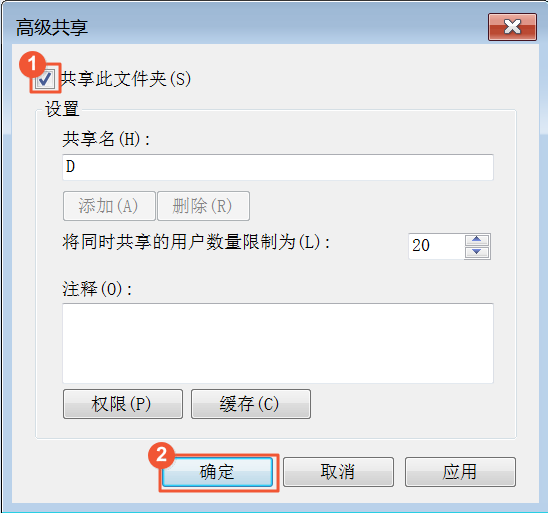
Select Share this folder and click OK. The Windows folder is now shared.
 Note
NoteAfter you share the folder, ensure that the firewall allows the Data Transport device to access port 445. Add an inbound rule to the firewall that allows the Data Transport device to access port 445 on the Windows system. Alternatively, you can temporarily shut down the firewall and restart it after the data migration is complete. After you add the rule, use the telnet command to check the connectivity to port 445.
Mount the remote Windows file system to the Data Transport device.
The mount commands vary depending on the operating system version. Use the command that corresponds to your operating system.
Remote Linux file system
To enable remote file sharing for Linux, you must first set up a Network File System (NFS) on the Linux system.
Create an NFS file system. This example uses CentOS 7.
Install the NFS file system.
yum install -y nfs-utilsModify the /etc/exports file.
/data *(rw,no_root_squash)Start the NFS file system.
systemctl start nfs.serviceCheck the status of the NFS file system.
systemctl status nfs.serviceConfigure startup on boot.
systemctl enable nfs.serviceNoteConfigure the required firewall rules to allow access. You can configure specific policies as needed. Alternatively, you can temporarily shut down the firewall and restart it after the data migration is complete.
Mount the remote NFS file system to the Data Transport device.
The mount commands vary depending on the operating system version. Use the command that corresponds to your operating system.
NAS server
Typically, a NAS server has a default NFS file system, so you do not need to configure one. You can directly mount the NAS file system to the compute node. If your NAS server does not have an NFS file system, you must create one. For more information, see Step 1 in Remote Linux file system.
Step 2: Mount the data source to the Data Transport device
This topic uses the src_data directory as an example. The following mount commands are for reference only. The syntax may vary depending on your operating system.
Before you create and run a data migration task, you must mount the data source to the Data Transport device.
Log on to the Data Transport device as the root user.
Run the following command to create a local mount directory.
mkdir /mnt/src_dataMount the data source to the Data Transport device. Replace the placeholder values with your actual information.
If the source is an NFS or NAS server, use the following mount command:
sudo mount -t nfs -o vers=3,nordirplus <source_service_IP_address>:<shared_directory_name> /mnt/src_dataExample:
sudo mount -t nfs -o vers=3,nordirplus 127.0.0.0:src_data /mnt/src_dataIf the source is a Server Message Block (SMB) share, use the following mount command:
mount -t cifs //<source_service_IP_address>/<shared_directory_name> /mnt/src_data -o username=noUsername,password=noPasswordExample:
mount -t cifs //127.0.0.0/src_data/ /mnt/src_data -o username=noUsername,password=noPassword
Run the
df -hcommand to verify the mount. If the output displays/mnt/src_data, the mount was successful.