This topic describes how to configure a change tracking task in Data Transmission Service (DTS) to track real-time data changes from an ApsaraDB RDS for MySQL instance. Change tracking supports lightweight cache updates, business decoupling with asynchronous data processing, and extract, transform, and load (ETL) synchronization.
Prerequisites
Before you begin, make sure that you have:
- An ApsaraDB RDS for MySQL instance (source)
- A database account with the SELECT permission on the required objects and the REPLICATION CLIENT, REPLICATION SLAVE, and SHOW VIEW permissions
- A purchased change tracking instance. For details, see Purchase a change tracking instance
Precautions
- DTS does not track DDL operations performed by gh-ost or pt-online-schema-change. The change tracking client may fail to write consumed data to destination tables due to schema conflicts.
- If the source database is involved in another task, such as a running data migration task, DTS may track data changes of additional objects. Manually filter the tracked data on the change tracking client.
Configure the change tracking task
- Log on to the DTS console.
- In the left-side navigation pane, click Change Tracking.
- In the upper part of the Change Tracking Tasks page, select the region where the change tracking instance resides.
- Find the change tracking instance and click Configure Task in the Actions column.
- Configure the source database and network type.
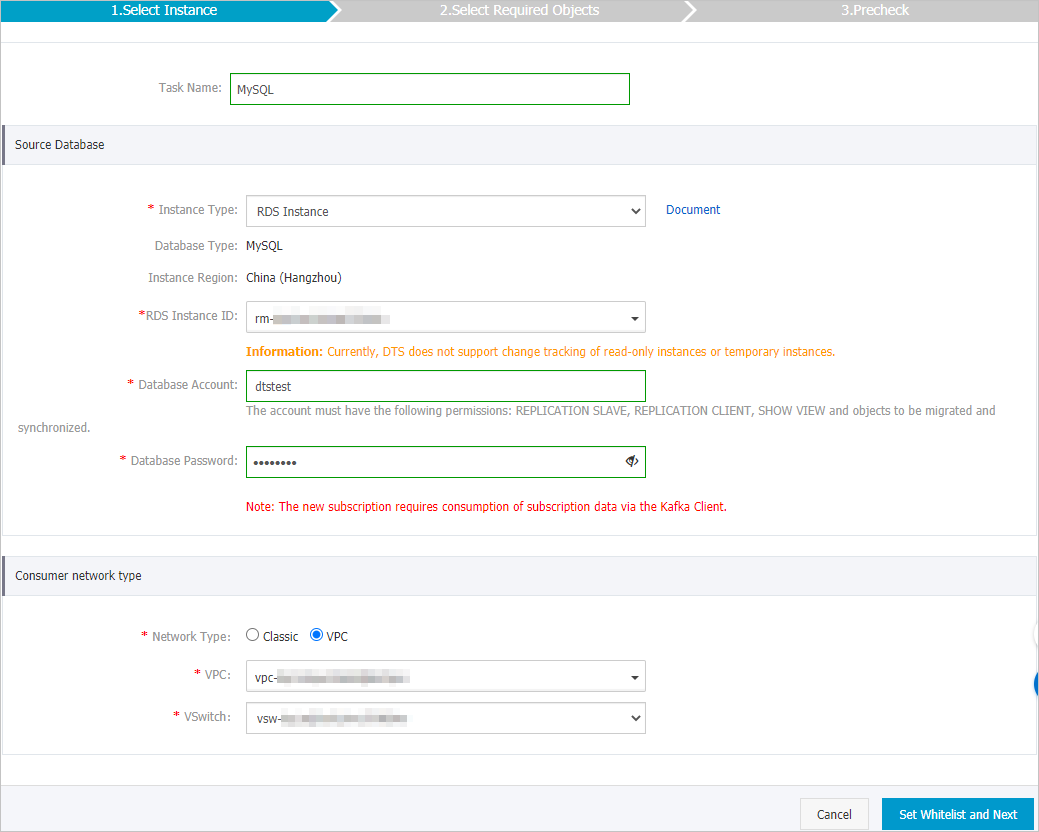
Category Configuration Description Task settings Task Name DTS generates a task name automatically. Specify a descriptive name to identify the task. A unique task name is not required. Source database settings Instance Type Select RDS Instance. Note If your source database is self-managed, deploy the network environment first. For details, see Preparation overview.Database Type Set to MySQL. This value cannot be changed. Instance Region Displays the source region selected on the buy page. This value cannot be changed. RDS Instance ID Select the ID of the ApsaraDB RDS for MySQL instance from which to track data changes. A read-only instance or temporary instance cannot be used as the source. Database Account Enter the database account of the source instance. The account must have the SELECT permission on the required objects and the REPLICATION CLIENT, REPLICATION SLAVE, and SHOW VIEW permissions. Database Password Enter the password for the database account. Network Type - Classic
- VPC
Select the network type for the change tracking instance: Classic or VPC.
Note- If the change tracking client runs on a local server, select either Classic or VPC.
- If the change tracking client runs on an ECS instance, select the network that matches the ECS instance. For example, if the ECS instance is in a VPC, select VPC and specify the VPC and vSwitch parameters.
- Tracking data changes over internal networks minimizes network latency.
- Classic
No additional configuration is required. For details, see Network types.
- VPC
Specify the VPC and vSwitch parameters. For details, see Network types.
- In the lower-right corner of the page, click Test Connectivity and Proceed.
If the source database is an Alibaba Cloud database instance (such as ApsaraDB RDS for MySQL or ApsaraDB for MongoDB) or a self-managed database hosted on ECS, DTS automatically adds the CIDR blocks of DTS servers to the whitelist of the database instance or ECS security group rules. For details, see Add the CIDR blocks of DTS servers to the security settings of on-premises databases. If the source database is a self-managed database in a data center or from another cloud provider, manually add the CIDR blocks of DTS servers to allow access.
Warning Adding CIDR blocks of DTS servers to the whitelist or ECS security group rules may introduce security risks. Before using DTS, understand and acknowledge these risks. Take preventive measures, such as strengthening account and password security, limiting exposed ports, authenticating API calls, regularly reviewing the whitelist or security group rules, removing unauthorized CIDR blocks, or connecting the database to DTS through Express Connect, VPN Gateway, or Smart Access Gateway.After your DTS task is completed or released, manually check for and remove the added CIDR blocks from the whitelist or ECS security group rules.
- Select the data change types and objects.
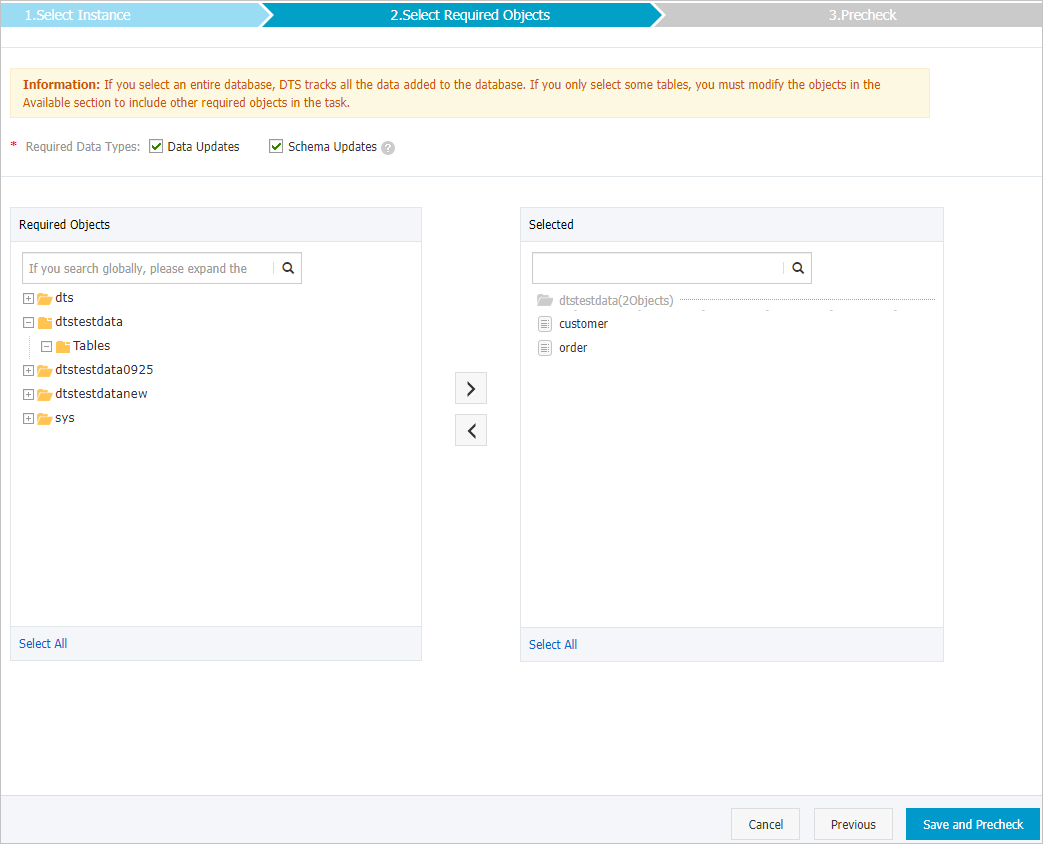
Configuration Description Required Data Types Select one or both data change types:
- Data Updates
Tracks INSERT, DELETE, and UPDATE operations on the selected objects.
- Schema Updates
Tracks create, delete, and modify operations on all object schemas of the source instance. Filter the required data by using the change tracking client.
Note- Selecting a database tracks data changes of all objects in the database, including objects added later.
- Selecting a table tracks data changes of that table only. To track changes for additional tables, modify the selected objects. For details, see Modify the objects for change tracking.
Required Objects Select objects from the Required Objects section and click the
 icon to move them to the Selected section.Note Select tables or databases as the objects for change tracking.
 - Data Updates
- In the lower-right corner of the page, click Save and Precheck. Note
- DTS performs a precheck before starting the change tracking task. The task starts only after the precheck passes.
- If any precheck item fails, click the
 icon next to the failed item for details. Fix the issue and run the precheck again.
- After the message The precheck is passed appears, close the Precheck dialog box.
After configuration, DTS performs initial change tracking. This process takes about one minute. After initial change tracking is complete, create one or more consumer groups to consume the tracked data.