Argo Workflows is a Kubernetes-native workflow engine that orchestrates concurrent batch tasks using YAML or Python. Use it for CI/CD pipelines, data processing, and machine learning workloads. This guide walks you through installing the Argo Workflows component on ACS and accessing it through the Alibaba Cloud Argo CLI or the Argo console.
Prerequisites
Before you begin, ensure that you have:
-
An ACS cluster
-
kubectlconfigured to connect to your cluster
Step 1: Install the Argo Workflows component
Install Argo Workflows from the Add-ons page in the ACS console.
-
Log on to the ACS console. In the left-side navigation pane, click Clusters.
-
Find the cluster you want to manage and click its ID. In the left-side navigation pane of the cluster details page, choose Operations > Add-ons.
-
On the Add-ons page, find Argo Workflows and install the component.
-
After installation, choose Applications > Helm in the left-side navigation pane. Find
ack-workflowand confirm its status is Deployed.
Step 2: Access Argo Workflows
ACS provides two ways to interact with Argo Workflows: the Alibaba Cloud Argo CLI and the Argo console.
Method 1: Install Alibaba Cloud Argo CLI
The Alibaba Cloud Argo CLI is fully compatible with the open-source Argo CLI. It adds CPU and memory usage metrics for workflows, operating cost tracking, and extends log querying to pods that have already been deleted from workflows.
-
Download the CLI binary for your operating system:
-
Linux:
https://ack-one.oss-cn-hangzhou.aliyuncs.com/cli/v3.4.12/argo-cli-aliyun-linux -
Darwin:
https://ack-one.oss-cn-hangzhou.aliyuncs.com/cli/v3.4.12/argo-cli-aliyun-darwin
The following example downloads the Linux binary:
wget https://ack-one.oss-cn-hangzhou.aliyuncs.com/cli/v3.4.12/argo-cli-aliyun-linux -
-
Grant the binary execute permission:
chmod +x argo-cli-aliyun-linux -
Move it to a directory in your PATH, such as
/usr/local/bin/:mv argo-cli-aliyun-linux /usr/local/bin/argo
Method 2: Use the Argo console
To access the Argo console, first get a temporary access token, then open the console in your browser.
Get an access token
Run the following command to generate a temporary token. The command uses ack-argo-server, the pre-configured service account in the argo namespace:
kubectl create token ack-argo-server -n argoThe command returns a token string:
elxxxxxxxxxxThis token is valid for 1 hour. Generate a new token when it expires.
Access the Argo console
By default, Argo Server is only accessible through an internal endpoint. To access the console from the internet, follow the optional step to enable internet access first.
-
(Optional) Enable internet access.
-
Edit the Argo Server Service to change its type to
LoadBalancer:kubectl edit service argo-server -n argoIn the editor, set
type: LoadBalancerunder thespecsection. -
To configure access control, see Work with the access control feature of SLB.
-
-
Get the external IP of the Argo Server Service:
kubectl get service argo-server -n argoThe
EXTERNAL-IPfield in the output is the IP address you use to access the console. -
Open the Argo console in your browser using the following URL format:
https://${IP}:2746The login page appears:
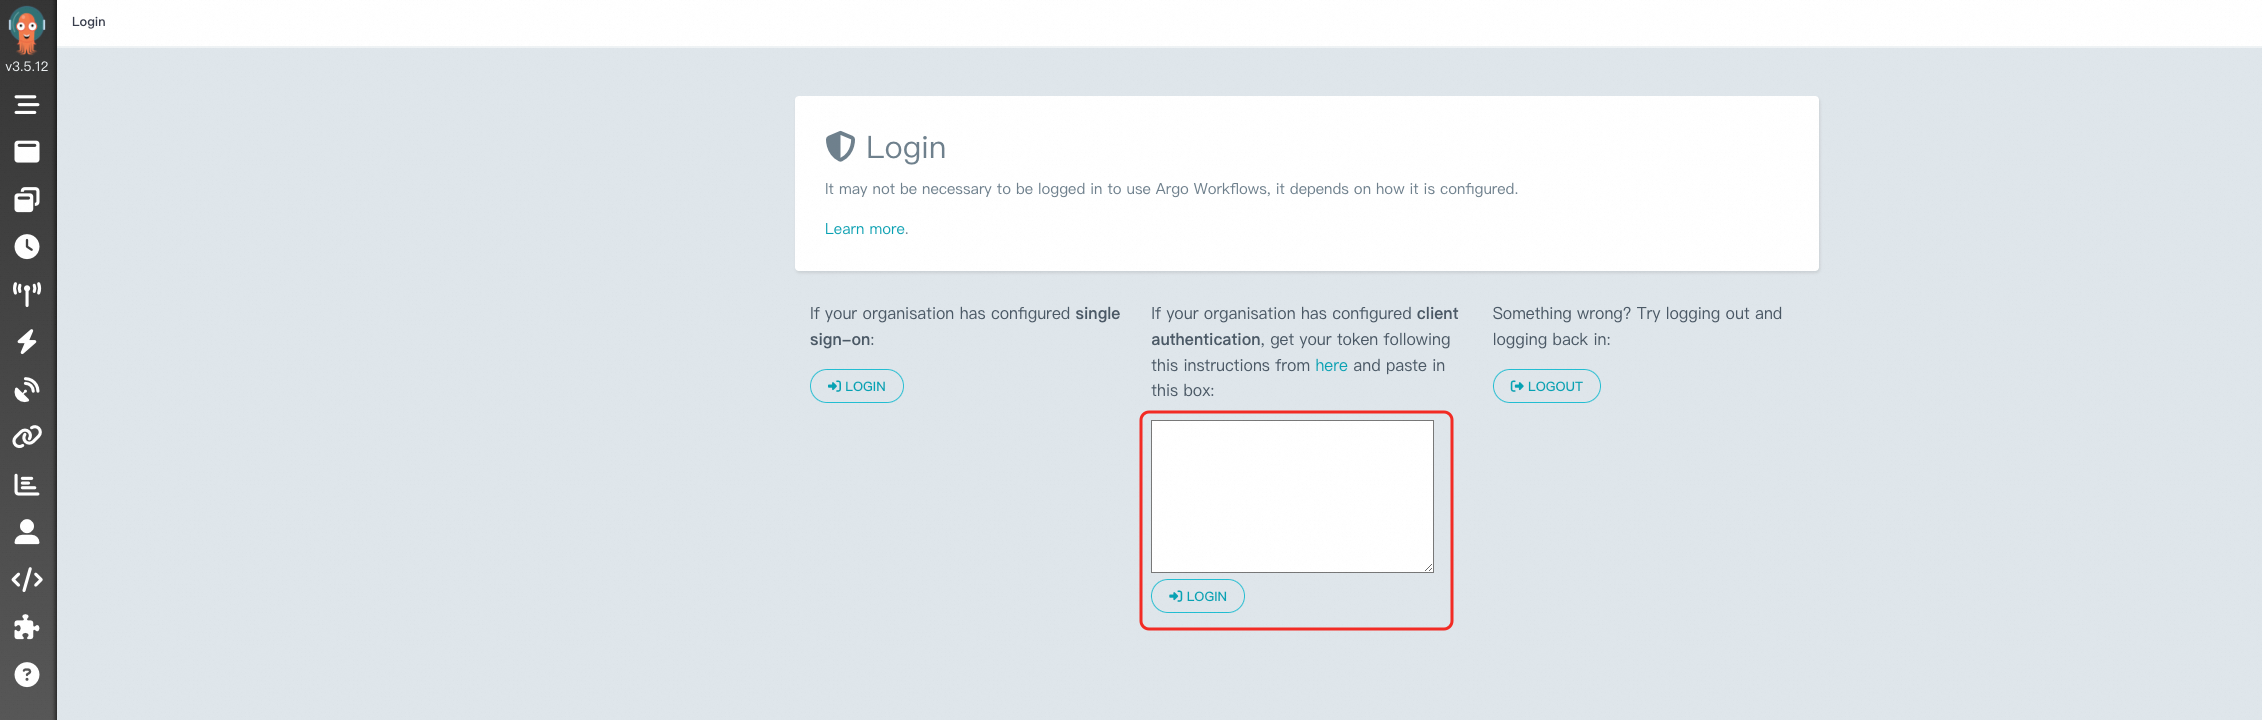
-
Enter the token you obtained earlier in the text box, using the format
Bearer $token: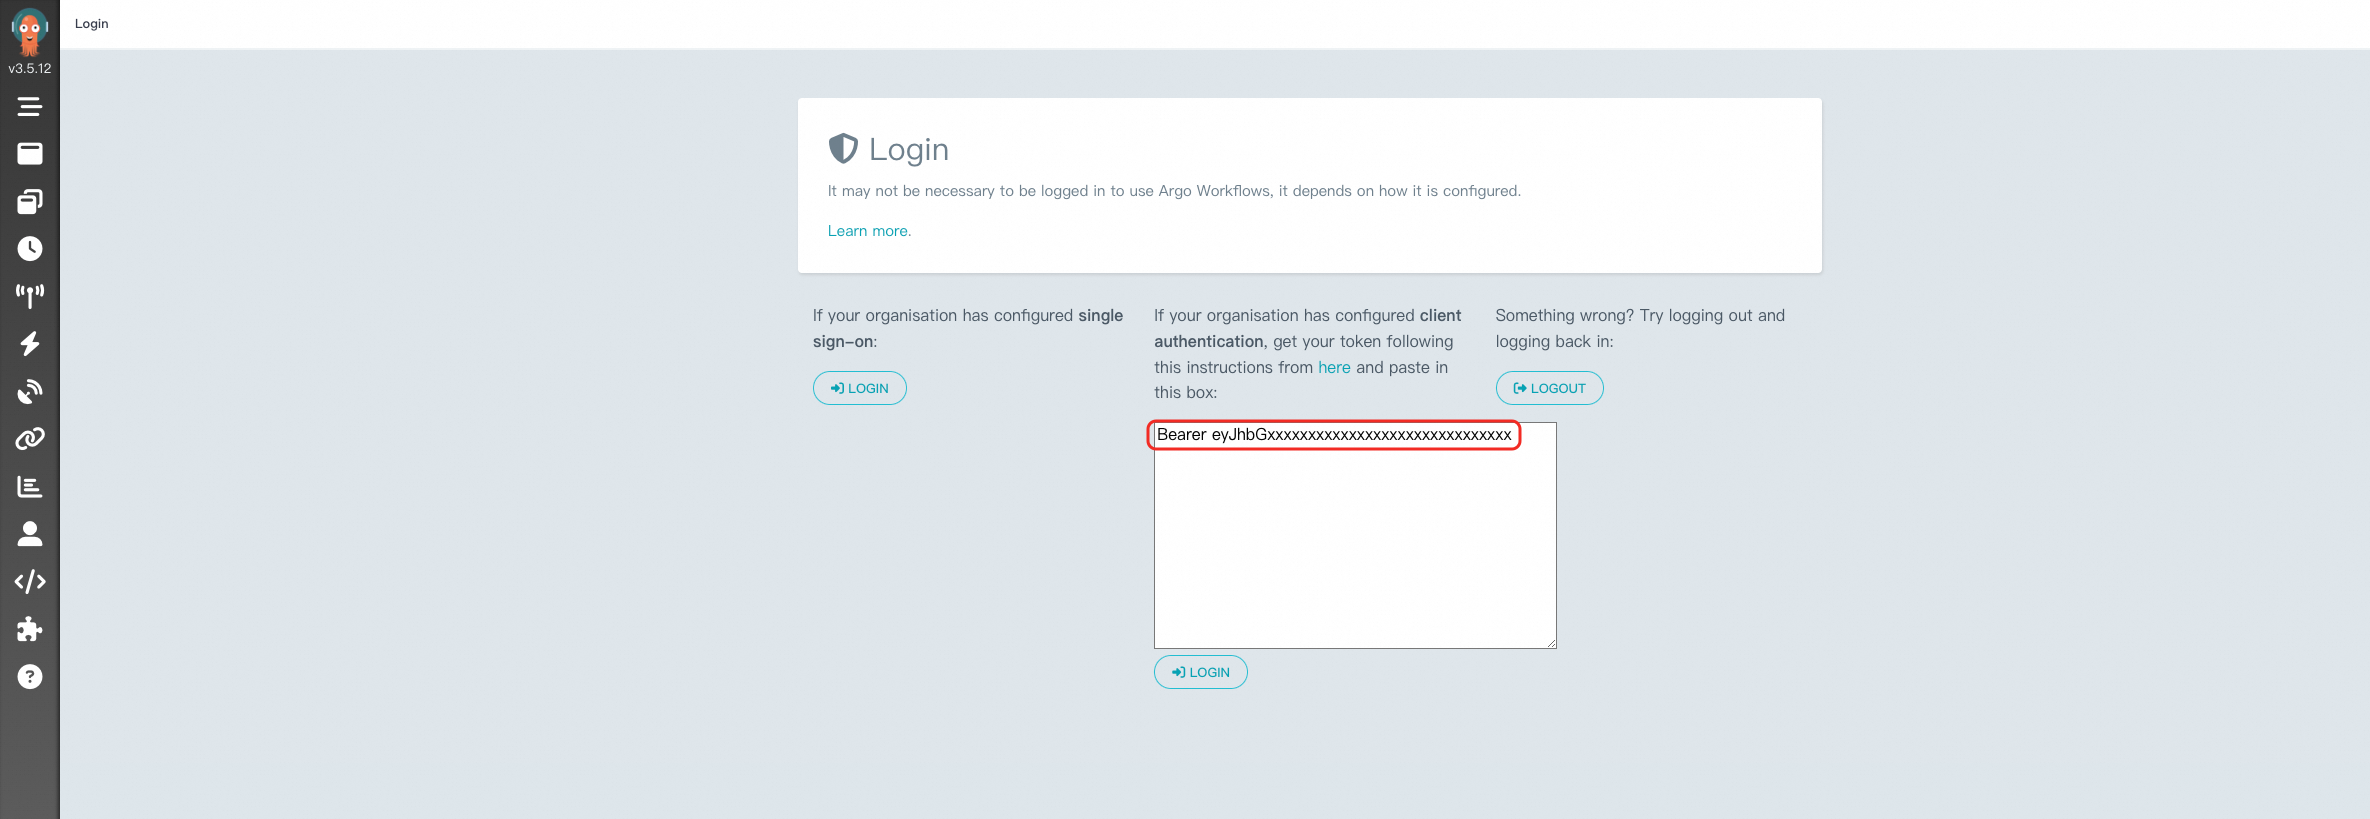
-
After logging in, set the NAMESPACE to
argoto view your workflow tasks: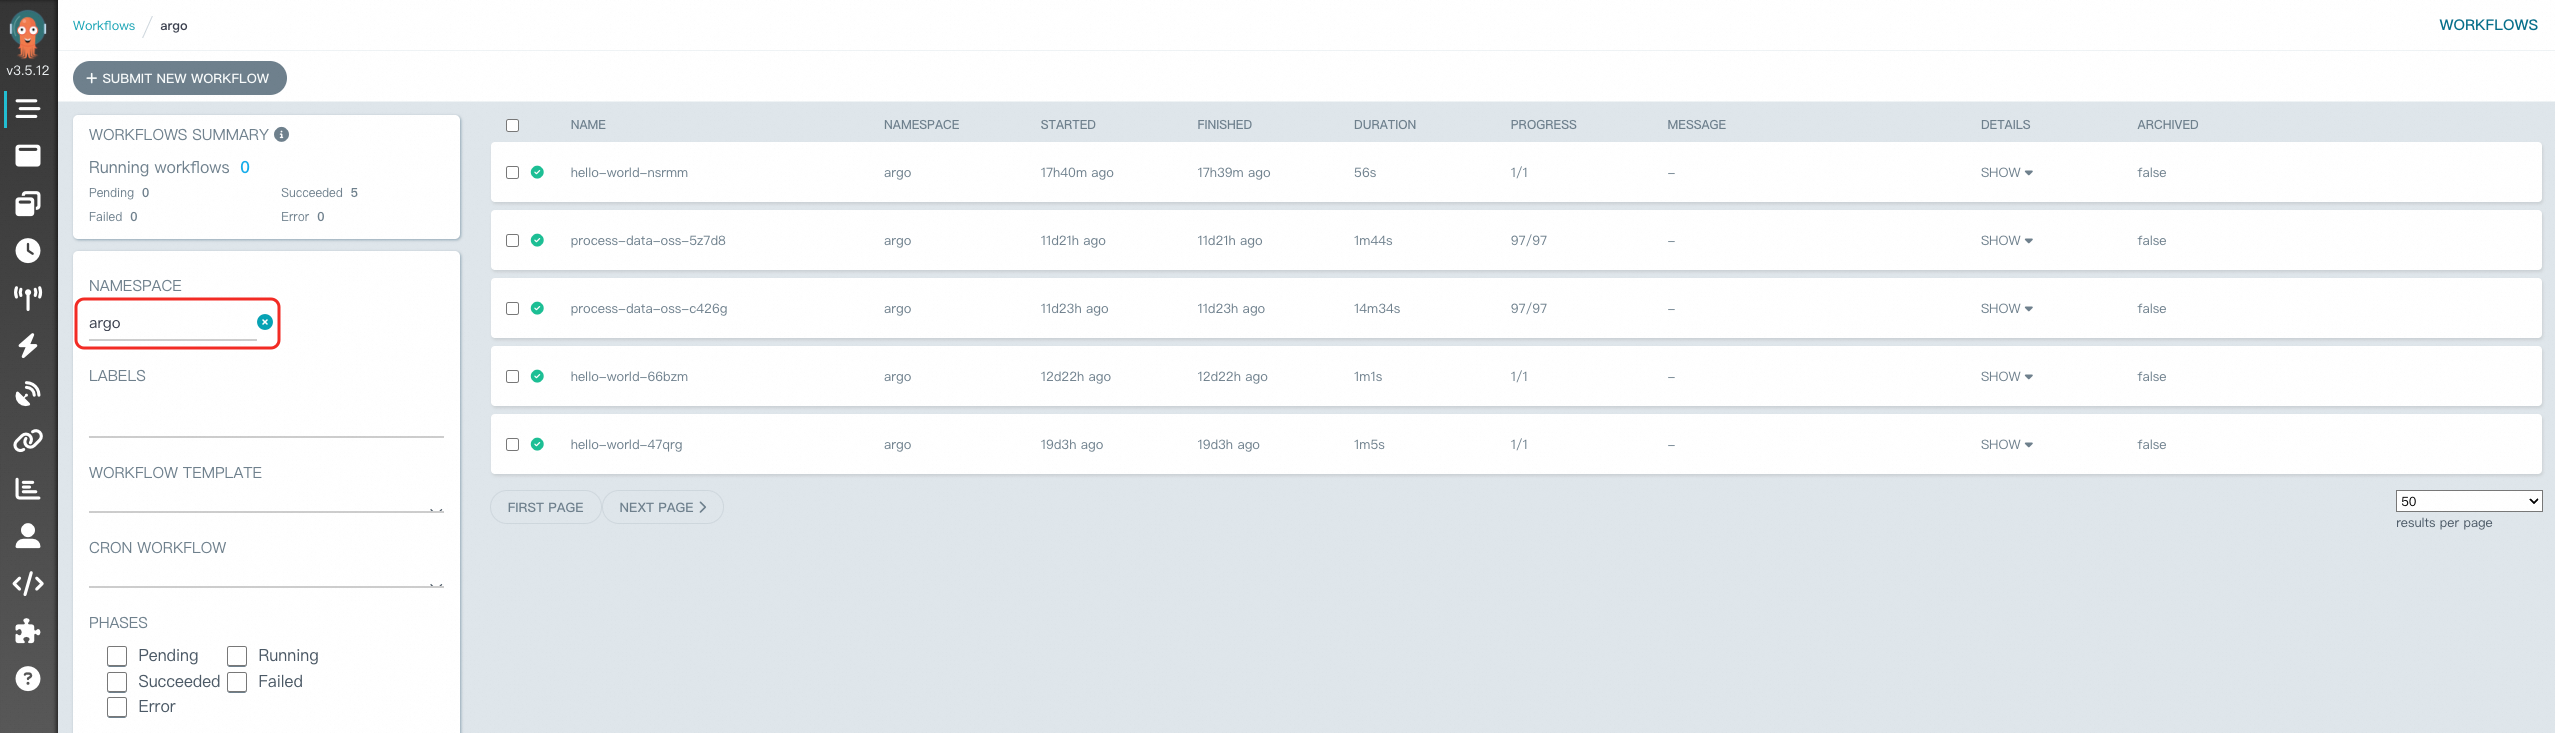
What's next
Create your first workflow using the CLI or the console. For more information, see Create a workflow.