ALB Ingress provides Layer 7 traffic management built on Alibaba Cloud Application Load Balancer (ALB), with support for HTTP, HTTPS, and QUIC. This tutorial shows you how to route traffic to different backend services by URL path.
How ALB Ingress works
Key concepts:
ALB Ingress Controller: This component manages Ingress resources. It dynamically retrieves changes to Ingress and AlbConfig resources from the cluster API Server and updates ALB instances accordingly. Unlike the NGINX Ingress Controller, the ALB Ingress Controller serves as the control plane for ALB instances. It manages ALB instances but does not process user traffic directly. Instead, ALB instances forward user traffic. The ALB Ingress Controller dynamically retrieves changes to Ingress resources from the cluster API Server and updates ALB instances based on the forwarding rules defined in Ingress.
An AlbConfig is a cluster-level Custom Resource Definition (CRD) created by the ALB Ingress Controller. Each AlbConfig contains parameters that define the configuration for a single ALB instance. An ALB instance serves as the entry point for traffic and forwards requests to backend services. It is fully managed by Application Load Balancer (ALB). Unlike the Nginx Ingress Controller, ALB Ingress requires no operations and maintenance (O&M) and provides greater elasticity.
IngressClass: An IngressClass defines the association between an Ingress and an AlbConfig.
Ingress: In Kubernetes, Ingress is a resource object that defines external traffic routing and access rules. The ALB Ingress Controller monitors changes in Ingress resources and updates ALB instances to achieve traffic forwarding.
-
Service: A stable entry point for a group of Pods with the same function. Other applications access backend Pods through the Service's virtual IP and port, decoupled from individual Pod changes.
The following figure shows the relationship between an ALB instance and ALB Ingress.
Limitations
AlbConfig, namespace, ingress, and service resource names must not start with aliyun.
Example scenario
This tutorial deploys four Nginx Pods and configures ALB Ingress to route traffic by URL path under the same domain.
|
Frontend request |
Backend service |
|
|
|
|
|
|
Prerequisites
-
You have installed the ALB Ingress Controller.
-
You have created two VSwitches in different availability zones within your cluster's VPC. Create and manage VSwitches.
Step 1: Deploy the backend service
Using console
-
Log on to the ACS console. In the left navigation pane, click Clusters.
-
On the Clusters page, click the name of the target cluster. In the left navigation pane, choose Workloads > Deployments.
-
On the Deployments page, click Create from YAML in the upper-right corner.
-
On the Create page, configure the parameters.
-
Sample Template: Select Custom.
-
Template: Enter the YAML configuration to deploy two Deployments (
coffeeandtea) and two Services (coffee-svcandtea-svc).
-
-
Click Create. A Created. message appears.
-
Verify the Deployments and Services are created.
-
In the left-side navigation pane, choose Workloads > Stateless. The Deployments named
coffeeandteaappear. -
In the left-side navigation pane, choose Network > Services. The Services named
coffee-svcandtea-svcappear.
-
Using kubectl
-
Create a file named
cafe-service.yamlwith the following content. This deploys two Deployments (coffeeandtea) and two Services (coffee-svcandtea-svc). -
Run the following command to deploy the resources.
kubectl apply -f cafe-service.yamlExpected output:
deployment "coffee" created service "coffee-svc" created deployment "tea" created service "tea-svc" created -
Verify the Deployments and Services.
-
Check the Deployments.
kubectl get deploymentExpected output:
NAME READY UP-TO-DATE AVAILABLE AGE coffee 2/2 2 2 2m26s tea 2/2 2 2 2m26s -
Check the Services.
kubectl get svcExpected output:
NAME                          TYPE            CLUSTER-IP       EXTERNAL-IP           PORT(S)           AGE
coffee-svc                    ClusterIP       172.16.XX.XX     <none>                80/TCP            9m38s
tea-svc                       ClusterIP       172.16.XX.XX     <none>                80/TCP            9m38s
-
Step 2: Create an ALBConfig
Console
-
Log on to the ACS console. In the left navigation pane, click Clusters.
-
On the Clusters page, click the name of the target cluster. In the left navigation pane, choose Workloads > Custom Resources.
-
On the CRDs tab, click Create from YAML.
-
Sample Template: Select Custom.
-
Template: Paste the YAML manifest.
The following table describes the parameters.
Parameter
Required
Description
metadata.nameYes
The name of the ALBConfig.
NoteThe ALBConfig name must be unique within the cluster to avoid naming conflicts.
spec.config.nameNo
The name of the ALB instance.
spec.config.addressTypeNo
The network type of the ALB instance. Valid values:
-
Internet (default): The instance provides public load balancing services over the internet.
NoteInternet-facing ALB instances use an Elastic IP Address (EIP). You are charged for the EIP instance, bandwidth, and data transfer. Pay-as-you-go.
-
Intranet: The instance provides private load balancing services within a VPC.
spec.config.zoneMappingsYes
The IDs of the vSwitches for the ALB instance. For instructions on how to create a vSwitch, see Create and manage vSwitches.
Note-
The vSwitches must be in an ALB-supported availability zone and the same VPC as the cluster. Regions and availability zones supported by ALB.
-
If your region offers multiple availability zones, we recommend selecting vSwitches from at least two different zones for high availability.
spec.listenersNo
The listener port and protocol. This example uses HTTP on port 80.
ALB Ingress requires a listener. Keep this default to avoid manual configuration.
-
-
-
Click Create. A Created. message is displayed.
-
Verify the ALB instance:
-
Log on to the Application Load Balancer (ALB) console.
-
In the top navigation bar, select the region of the instance.
-
On the Instance page, verify that the ALB instance named alb-test appears in the instance list.
-
Kubectl
-
Copy the following content to a file named alb-test.yaml to create an ALBConfig.
The following table describes the parameters.
Parameter
Required
Description
metadata.nameYes
The name of the ALBConfig.
NoteThe ALBConfig name must be unique within the cluster to avoid naming conflicts.
spec.config.nameNo
The name of the ALB instance.
spec.config.addressTypeNo
The network type of the ALB instance. Valid values:
-
Internet (default): The instance provides public load balancing services over the internet.
NoteInternet-facing ALB instances use an Elastic IP Address (EIP). You are charged for the EIP instance, bandwidth, and data transfer. Pay-as-you-go.
-
Intranet: The instance provides private load balancing services within a VPC.
spec.config.zoneMappingsYes
The IDs of the vSwitches for the ALB instance. For instructions on how to create a vSwitch, see Create and manage vSwitches.
Note-
The vSwitches must be in an ALB-supported availability zone and the same VPC as the cluster. Regions and availability zones supported by ALB.
-
If your region offers multiple availability zones, we recommend selecting vSwitches from at least two different zones for high availability.
spec.listenersNo
The listener port and protocol. This example uses HTTP on port 80.
ALB Ingress requires a listener. Keep this default to avoid manual configuration.
-
-
Run the following command to create the ALBConfig.
kubectl apply -f alb-test.yamlExpected output:
albconfig.alibabacloud.com/alb-demo createdThis output confirms that the ALBConfig was created.
Step 3: Create IngressClass
We recommend creating one IngressClass for each AlbConfig.
Console
-
Log on to the ACS console. In the left navigation pane, click Clusters.
-
On the Clusters page, click the name of the target cluster. In the left navigation pane, choose Workloads > Custom Resources.
-
On the CRDs tab, click Create from YAML.
-
Sample Template: Select Custom.
-
Template: Enter the YAML manifest.
The following table describes the parameters.
Parameter
Required
Description
metadata.name
Yes
The name of the IngressClass.
NoteThe name must be unique within the cluster.
spec.parameters.name
Yes
The name of the associated AlbConfig.
-
-
Click Create. A confirmation message appears.
-
Verify that the IngressClass is created:
-
In the left-side navigation pane, choose .
-
Click the Resource Objects tab.
-
In the API Group search box, enter IngressClass. The created IngressClass appears.
-
Kubectl
-
Create a file named alb.yaml with the following content.
The following table describes the parameters.
Parameter
Required
Description
metadata.nameYes
The name of the IngressClass.
NoteThe name must be unique within the cluster.
spec.parameters.nameYes
The name of the associated AlbConfig.
-
Run the following command to create the IngressClass.
kubectl apply -f alb.yamlExpected output:
ingressclass.networking.k8s.io/alb created
Step 4: Create an Ingress
Console
-
Log on to the ACS console. In the left navigation pane, click Clusters.
-
On the Clusters page, click the name of the target cluster. In the left navigation pane, choose Network > Ingresses.
-
On the Ingresses page, click Create Ingress. In the Create Ingress dialog box, configure the Ingress.
Parameter
Description
Example value
Gateway Type
Select the gateway type. Options include ALB and MSE.
ALB Ingress
Name
A custom name for the Ingress.
cafe-ingress
IngressClass
A custom class for the Ingress.
alb
Rules
Click +Add Rule to add multiple routing rules.
-
Domain Name: A custom domain name.
-
Mappings: Configure the following parameters.
-
Path: The URL path for accessing the service. In this example, this parameter is left empty to use the root path /.
-
Rule: Supports Prefix (Prefix-based Match), Exact (Exact Match), and ImplementationSpecific (Default Value).
-
Service: The target backend, which is a Kubernetes Service.
-
Port: The port that the service exposes.
-
-
An Ingress supports multiple paths under the same domain name. Click +Add to add a new path.
-
Domain Name: demo.domain.ingress.top
-
Path mapping:
-
Path: /tea
-
Rule: ImplementationSpecific
-
Service: tea-svc
-
Port: 80
-
-
Mappings:
-
Path: /coffee
-
Rule: ImplementationSpecific
-
Service: coffee-svc
-
Port: 80
-
TLS Settings
Enable this option to secure the Ingress with a TLS certificate (HTTPS).
-
Domain Name: Enter a custom domain name.
-
Secret: Select the Secret that contains the TLS certificate.
To create a Secret, perform the following steps:
-
To the right of Secret, click Create.
-
In the Create Secret dialog box, set the Name, Cert, and Key, and then click OK.
-
From the Secret drop-down list, select the Secret that you created.
-
Click Add to configure multiple TLS settings.
For more information, see Configure an HTTPS certificate for encrypted communication.
Keep TLS Settings disabled. This configuration is not required for this example.
More
-
Canary Release: Enable canary release. You can set canary rules based on request headers, cookies, and weights.
NoteYou can set only one type of rule (by request header, cookie, or weight). If you configure multiple types, they are matched in the order of request header, cookie, and weight.
-
Based on Request Header: Splits traffic based on the request header. This adds the
alb.ingress.kubernetes.io/canary-by-headerandalb.ingress.kubernetes.io/canary-by-header-valueannotations. -
Based on Cookie: Splits traffic based on a cookie. This adds the
alb.ingress.kubernetes.io/canary-by-cookieannotation. -
Based on Weight: Specifies the percentage of requests (an integer from 0 to 100) to route to a specific Service. This adds the
alb.ingress.kubernetes.io/canary-weightannotation.
-
-
Protocol: Enables the HTTPS and gRPC protocols for backend services, adding the
alb.ingress.kubernetes.io/backend-protocolannotation. -
Rewrite Path: The path in a client request is rewritten before the request is sent to the backend service. Configuring this setting adds the alb.ingress.kubernetes.io/rewrite-target annotation.
Keep canary release disabled, and keep the default protocol and rewrite path settings. These configurations are not required for this example.
Custom Forwarding Rules
Enable custom forwarding rules to manage inbound traffic with fine-grained control.
NoteYou can add a maximum of 10 condition entries to a forwarding rule.
-
From the Add Condition drop-down list, select an option:
-
Domain Name:
Matches the request domain. If you specify multiple domains, a request is matched if it uses any of the specified domains. When you configure this condition, the
alb.ingress.kubernetes.io/conditions.host-exampleannotation is added. -
Path:
Matches the request path. If you specify multiple paths, a request is matched if it uses any of the specified ones. When you configure this condition, the
alb.ingress.kubernetes.io/conditions.path-exampleannotation is added. -
HTTP Header:
Matches the request header as a key-value pair. For example, Key is
headernameand Value isheadervalue1. If multiple header values are configured, the relationship between them is OR. When you configure this condition, thealb.ingress.kubernetes.io/conditions.http-header-exampleannotation is added.
-
-
From the Action drop-down list, select an option:
-
Forward To
Forwards requests to one or more backend services based on weight. In the Service field, select the target service. In the Port field, select the target port number. Then, specify a weight.
NoteIf you select this action, you do not need to configure path mapping in the rule.
-
Return Fixed Response
Configures ALB to return a fixed response to the client. You can set the response status code, body content, and content type. As required, configure Response Status Code, Response Content Type (Optional), and Response Content (Optional).
Response Body Type:
-
text/plain: plain text.
-
text/css: CSS content.
-
text/html: HTML content.
-
application/javascript: JavaScript content.
-
application/json: JSON content.
-
-
Custom forwarding rules support conditions based on domain, path, or HTTP header, and actions such as forwarding to a service or returning a fixed response. Customize forwarding rules for an ALB Ingress.
Keep custom forwarding rules disabled. This configuration is not required for this example.
Annotations
You can specify a custom annotation name and value, or select or search for an annotation to configure. For more information about Ingress annotations, see Annotations.
Not required for this example.
Labels
Specifies labels to add to the Ingress. Labels are key-value pairs that are attached to objects to specify identifying attributes.
Not required for this example.
-
-
In the lower-left corner of the Create Ingress page, click OK.
-
Verify the Ingress:
-
In the left-side navigation pane, choose Network > Routes. The cafe-ingress ingress appears.
-
The Endpoint column for cafe-ingress displays the endpoint address.
-
kubectl
-
Create a file named cafe-ingress.yaml and add the following content:
The following table describes the parameters.
Parameter
Required
Description
metadata.nameYes
The name of the Ingress.
NoteThe name must be unique within the cluster to avoid conflicts.
spec.ingressClassNameYes
The name of the associated IngressClass.
spec.rules.hostNo
The domain name in the HTTP
Hostheader. Set this to your own domain name.Kubernetes matches incoming Host headers against Ingress rules and routes matched requests to the specified backend service.
Note-
Custom domain names require a valid ICP filing for Chinese mainland access. ICP filing process.
-
If you do not set this parameter, the Ingress rule matches all requests that reach the Ingress controller.
spec.rules.http.paths.pathYes
The forwarding path URL.
spec.rules.http.paths.pathTypeYes
The URL matching rule. Route requests based on URL paths.
spec.rules.http.paths.backend.service.nameYes
The name of the backend Service.
spec.rules.http.paths.backend.service.port.numberYes
The port number of the backend Service.
Ensure this port matches the Service definition.
-
-
Run the following command to create the Ingress with
path-based routing for thecoffeeandteaservices.kubectl apply -f cafe-ingress.yamlExpected output:
ingress.networking.k8s.io/cafe-ingress created -
(Optional) Get the ALB DNS name assigned to the Ingress.
kubectl get ingressExpected output:
NAME           CLASS    HOSTS                         ADDRESS                                               PORTS   AGE
cafe-ingress   alb      demo.domain.ingress.top       alb-m551oo2zn63yov****.cn-hangzhou.alb.aliyuncs.com   80      50s
(Optional) Step 5: Configure domain name resolution
If you specified a custom domain in spec.rules.host, add a CNAME record pointing it to the ALB DNS name to enable access through your domain.
-
Log in to the Container Service for Kubernetes (ACK) console.
-
Click the cluster name to open the cluster management page.
-
In the navigation pane on the left, choose Network > Routes.
-
In the Endpoint column of cafe-ingress, copy its DNS name.
-
To add a CNAME record:
-
Log in to the Alibaba Cloud DNS console.
-
On the Domain Name Resolution page, click Add Zone.
-
In the Add Zone dialog box, enter your domain name and click OK.
ImportantYou must verify the domain name with a TXT record.
-
For the target domain, click Settings in the Actions column.
-
On the Settings page, click Add Record.
-
In the Add Record panel, configure the following settings for the CNAME record and click OK.
Parameter
Description
Record Type
From the drop-down list, select CNAME.
Hostname
The prefix of your domain name, such as
www.DNS Query Source
Select the default value.
Record Value
Enter the DNS name that you copied from the Endpoint column.
TTL
The duration a DNS record is cached on a DNS server. Use the default value.
-
Step 6: Test traffic forwarding
Enter the test domain and URL path in your browser to verify traffic routing.
-
If you configured a custom domain, use that domain.
-
If you did not configure a custom domain, use the cafe-ingress endpoint DNS name.
In this example, the domain is demo.domain.ingress.top:
-
Enter
demo.domain.ingress.top/coffee. The coffee-svc backend page is displayed.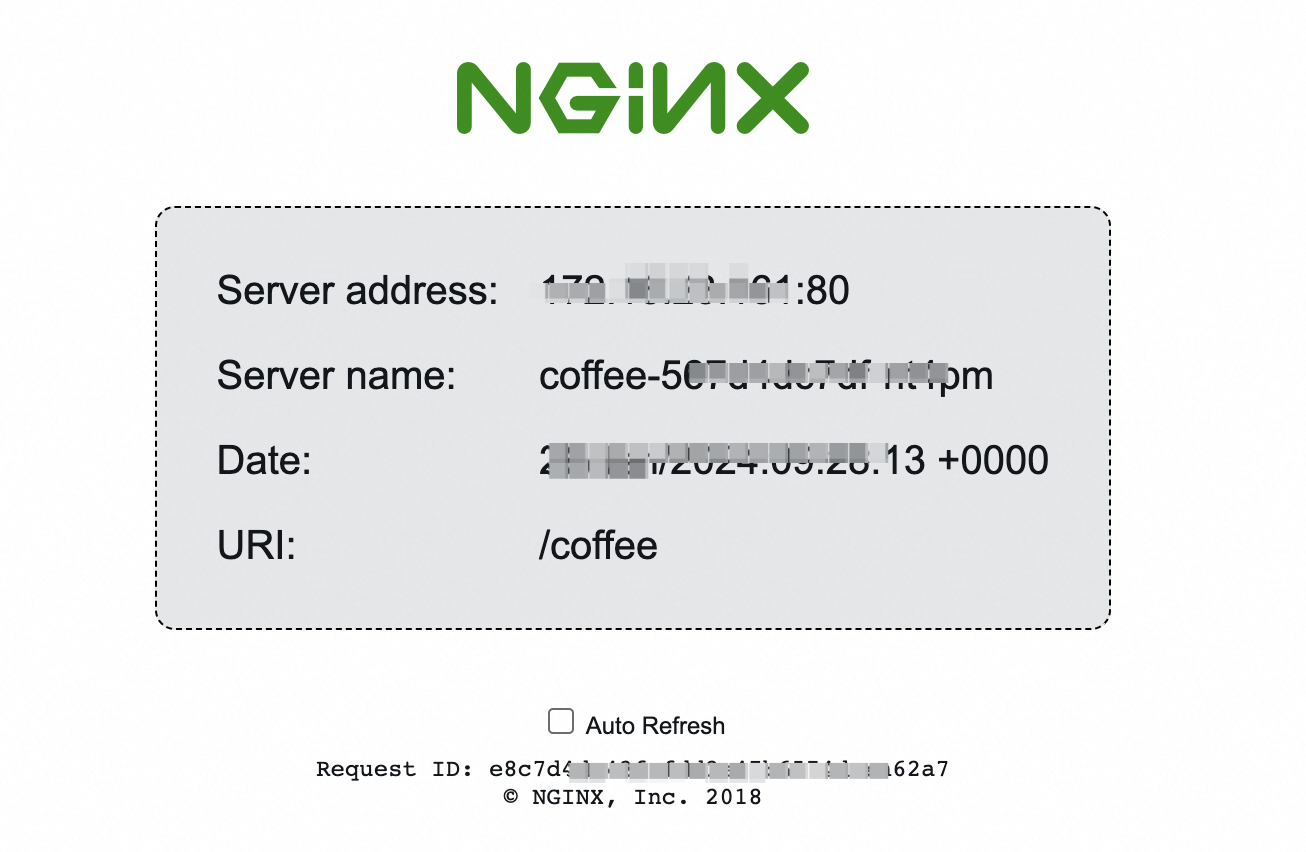
-
Enter
demo.domain.ingress.top/tea. The tea-svc backend page is displayed.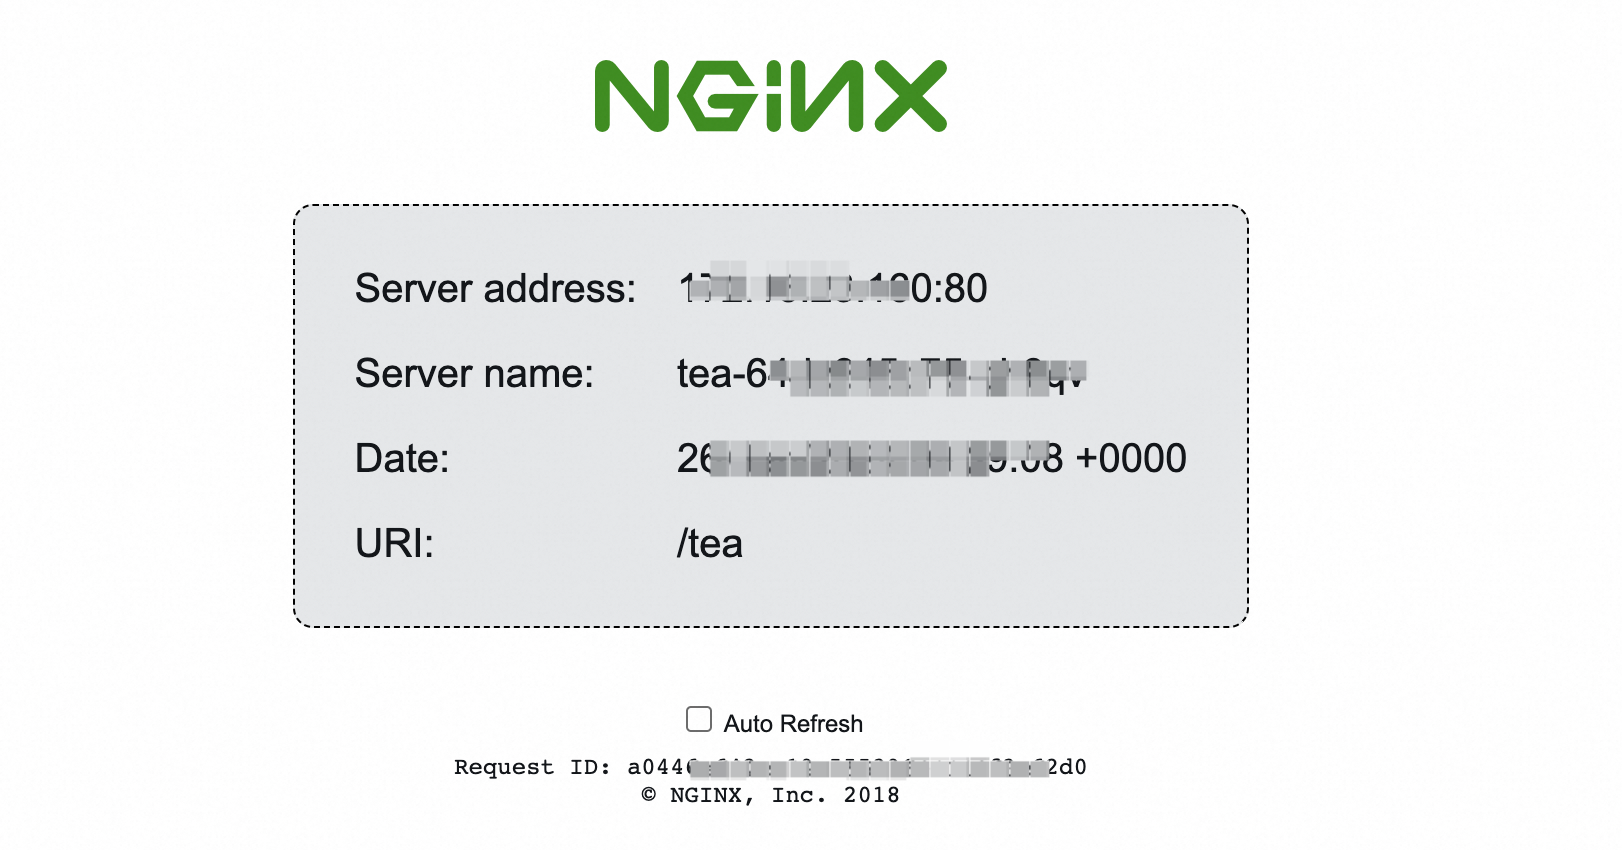
References
-
Advanced usage of the ALB Ingress service covers health checks, HTTPS redirect, canary releases, and custom listener ports.