In Kubernetes 1.16, the feature to dynamically expand a disk volume is in public preview. Container Service for Kubernetes (ACK) allows you to dynamically expand a disk volume by using FlexVolume in Kubernetes 1.16 and later. This topic describes how to dynamically expand a disk volume by using FlexVolume.
Usage notes
- Limits
You can expand only disks that are 2,000 GiB or smaller without service interruptions.
- Data backup
To avoid data loss caused by errors during the expansion, we recommend that you first create a snapshot to back up the disk data.
- Scenarios
- You can expand only dynamically provisioned persistent volumes (PVs) without service interruptions, which are mounted by using persistent volume claims (PVCs) that contain the StorageClassName parameter.
- You cannot expand disk volumes of the inline type. This type of disk volume is not created by using PVs and PVCs.
- You cannot expand volumes that are associated with basic disks without service interruptions.
- Specify AllowVolumeExpansion: True for the StorageClass. The AllowVolumeExpansion parameter is automatically set to True for StorageClasses that are created by ACK. For StorageClasses that are manually created, you must manually set the AllowVolumeExpansion parameter to True.
- Pods must remain in the Running state during volume expansion.
- Plug-in version
Make sure that the CSI plug-in is updated to the latest version.
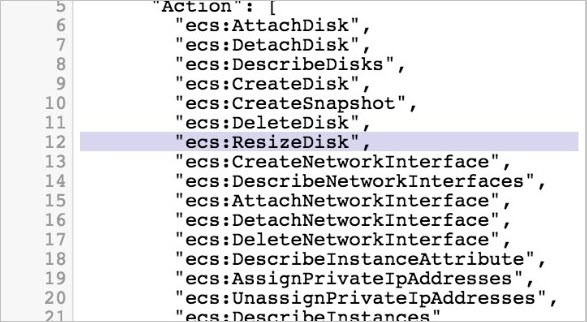
Grant the ResizeDisk permission to the Resource Access Management (RAM) role of the cluster
Before you expand a disk volume without service interruptions, you must grant the ResizeDisk permission to the RAM role of the cluster. Perform the following steps based on the cluster type and the volume plug-in that is used:
CSI plug-in is updated to the latest version
- Log on to the ACK console.
- In the left-side navigation pane, click Clusters.
- On the Clusters page, find the cluster that you want to manage and click Details in the Actions column.
- In the left-side navigation pane, click Cluster Information.
- Click the Cluster Resources tab and click the hyperlink next to Master RAM Role.
- In the RAM console, grant the ResizeDisk permission to the RAM role. For more information, see Modify the document and description of a custom policy.
ACK dedicated clusters that use FlexVolume or ACK managed clusters
Perform the preceding Step 1 to Step 4 and click the hyperlink next to Master RAM Role.
Expand a disk volume without the need to restart the pod
- Obtain the kubeconfig file of a cluster and use kubectl to connect to the cluster.
In this example, the pod that you want to manage is in the following state
Run the following command to query the information about the pod:
kubectl get podExpected output:
web-0 1/1 Running 0 42sRun the following command to view the mounting details of the pod:
kubectl exec web-0 -- df /dataExpected output:
Filesystem     1K-blocks  Used Available Use% Mounted on
/dev/vdb        20511312 45080  20449848   1% /data
Run the following command to query the information about the persistent volume claim (PVC):
kubectl get pvcExpected output:
NAME             STATUS   VOLUME                   CAPACITY   ACCESS MODES   STORAGECLASS              AGE
disk-ssd-web-0   Bound    d-wz9hpoifm43yn9zie6gl   20Gi       RWO            alicloud-disk-available   57s
Run the following command to query the information about the persistent volume (PV):
kubectl get pvExpected output:
NAME CAPACITY ACCESS MODES RECLAIM POLICY STATUS CLAIM STORAGECLASS REASON AGE d-wz9hpoifm43yn9zie6gl 20Gi RWO Delete Bound default/disk-ssd-web-0 alicloud-disk-available 65s - Make sure that the requirements that are described in the Usage notes section are met. After the requirements are met, run the following command to expand the volume:
kubectl patch pvc disk-ssd-web-0 -p '{"spec":{"resources":{"requests":{"storage":"30Gi"}}}}'Wait one minute and then perform the following steps to check whether the volume is expanded.Run the following command to query the information about the PV:
kubectl get pv d-wz9hpoifm43yn9zie6glExpected output:
NAME                     CAPACITY   ACCESS MODES   RECLAIM POLICY   STATUS   CLAIM                    STORAGECLASS              REASON   AGE
d-wz9hpoifm43yn9zie6gl   30Gi       RWO            Delete           Bound    default/disk-ssd-web-0   alicloud-disk-available            5m23s
Run the following command to query the information about the PVC:
kubectl get pvcExpected output:
NAME             STATUS   VOLUME                   CAPACITY   ACCESS MODES   STORAGECLASS              AGE
disk-ssd-web-0   Bound    d-wz9hpoifm43yn9zie6gl   30Gi       RWO            alicloud-disk-available   5m10s
Run the following command to view the mounting details of the pod:
kubectl exec web-0 -- df /dataExpected output:
Filesystem     1K-blocks  Used Available Use% Mounted on
/dev/vdb        30832548 45036  30771128   1% /data
To expand a disk volume without the need to restart the pod, you need only to run the preceding command.
Restart the pod to which a disk volume is mounted and then expand the disk volume
- Connect to a Kubernetes cluster by using kubectl. For more information, see Step 2: Select a type of cluster credentials.
In this example, the pod that you want to manage is in the following state.
Run the following command to query pod information:
kubectl get podExpected output:
web-0 1/1 Running 0 42sRun the following command to query the volume that is mounted to the pod:
kubectl exec web-0 -- df /dataExpected output:
Filesystem     1K-blocks  Used   Available Use% Mounted on
/dev/vdb       20511312   45080  20449848  1%   /data
Run the following command to query PVC information:kubectl get pvcExpected output:NAME STATUS VOLUME CAPACITY ACCESS MODES STORAGECLASS AGE disk-ssd-web-0 Bound d-wz9hpoifm43yn9zi**** 20Gi RWO alicloud-disk-available 57sRun the following command to query PV information:kubectl get pvExpected output:NAME CAPACITY ACCESS MODES RECLAIM POLICY STATUS CLAIM STORAGECLASS REASON AGE d-wz9hpoifm43yn9zi**** 20Gi RWO Delete Bound default/disk-ssd-web-0 alicloud-disk-available 65s - Run the following command to view the scheduling information about the PV:
kubectl get pv d-wz9g2j5qbo37r2lamkg4 -oyaml | grep failure-domain.beta.kubernetes.io/zone failure-domain.beta.kubernetes.io/zone: cn-shenzhen-e - Replace the value of the zone field in the label of the scheduled resource. Then, the pod to which the PV is mounted cannot be scheduled.
For example, you can change the value of the zone field in the label from cn-shenzhen-e to cn-shenzhen-e-nozone.
kubectl label pv d-wz9g2j5qbo37r2lamkg4 failure-domain.beta.kubernetes.io/zone=cn-shenzhen-e-nozone --overwrite persistentvolume/d-wz9g2j5qbo37r2lamkg4 labeled - Restart the pod.
The pod scheduling setting is modified. Therefore, the pod temporarily remains in the Pending state.
Run the following command to delete the pod:
kubectl delete pod web-0Run the following command to query the information about the pod:
kubectl get podExpected output:
web-0 0/1 Pending 0 27s - Run the following command to expand the volume:
kubectl patch pvc disk-ssd-web-0 -p '{"spec":{"resources":{"requests":{"storage":"30Gi"}}}}' - Restart the pod by changing the zone field in the label to the previous setting. In this example, change the value from cn-shenzhen-e-nozone to cn-shenzhen-e.
kubectl label pv d-wz9g2j5qbo37r2lamkg4 failure-domain.beta.kubernetes.io/zone=cn-shenzhen-e --overwrite
persistentvolume/d-wz9g2j5qbo37r2lamkg4 labeled
Wait one minute and then perform the following steps to check whether the volume is expanded.Run the following command to query the information about the pod:
kubectl get podExpected output:
web-0 1/1 Running 0 3m23sRun the following command to query the information about the PVC:
kubectl get pvcExpected output:
disk-ssd-web-0 Bound d-wz9g2j5qbo37r2lamkg4 30Gi RWO alicloud-disk-available 17mRun the following command to query the information about the PV:
kubectl get pv d-wz9g2j5qbo37r2lamkg4Expected output:
d-wz9g2j5qbo37r2lamkg4 30Gi RWO Delete Bound default/disk-ssd-web-0 alicloud-disk-available 17mRun the following command to view the mounting details of the pod:
kubectl exec web-0 -- df /dataExpected output:
/dev/vdb 30832548 45036 30771128 1% /dataThe result indicates that the disk volume is expanded from 20 GiB to 30 GiB.