File Storage NAS is a file system service designed for computing services, such as Elastic Compute Service (ECS) instances, Elastic High Performance Computing (E-HPC) clusters, and Container Service for Kubernetes (ACK) clusters. NAS provides seamless integration, shared storage, and security management. NAS is ideal for multi-cluster applications where computing services, such as ECS instances, E-HPC clusters, or ACK clusters, need to access the same data source. This topic describes how to configure a shared NAS volume.
Background information
To protect the work of data scientists and provide access to shared training data, you can configure and mount a shared persistent volume in the Arena job submission environment. This ensures that the work of data scientists, including code and data, is retained when containers are deleted. For team development, you can allocate a shared storage pool to allow data and code to be shared among team members.
When you submit a job in Arena, you can use the --data parameter to declare a shared storage configuration and a mount path in the operating environment. The shared storage is then mounted to the specified directory. This allows the job to reuse the data or code.
In Kubernetes, storage is managed using persistent volumes (PVs) and persistent volume claims (PVCs). As a cluster administrator, you must create a separate PVC for each data scientist when you allocate an environment. For example, the backend for the PVCs of User A and User B can be mounted to the same NAS or CPFS file system. However, you must specify different subdirectories to isolate their operating environments.
Step 1: Create a NAS instance
For more information about how to create a NAS instance, see Create a General-purpose NAS file system using the console.
When you create the NAS instance, note the following parameter configurations:
Set File System Type to General-purpose NAS.
Set Region to the same region as your ACK cluster.
For Virtual Private Cloud (VPC), select the same VPC as your ACK cluster.
Set Protocol Type to NFS.
Step 2: Mount the file system
After you create a File Storage NAS instance, you must mount the NFS file system to an ECS instance in the same VPC and verify the mount. This topic uses the one-click mount feature in the console as an example. For more information about other mount methods, see Scenarios for mounting a file system.
Mount the NAS file system
Log on to the NAS console and perform the following steps:
In the left-side navigation pane, choose .
In the top navigation bar, select the resource group and region where your file system resides.

Find the file system that you created and click Mount in the Actions column.
NoteThe first time you use the mount feature in the NAS console, you must assign the AliyunServiceRoleForNasEcsHandler service-linked role to NAS. Follow the instructions in the dialog box to complete authorization. For more information, see Service-linked roles of NAS.
In the Mount panel, perform the configurations to mount the file system.
Select a mount target and click Next.
Select an ECS instance and click Next.
The selected ECS instance must reside in the same VPC as the file system. Otherwise, NAS prompts that the network may be disconnected. Proceed with caution.
NoteIf you cannot find the ECS instance from the drop-down list, refresh the page and try again.
You can select only one ECS instance. If you want to mount a NAS file system on multiple ECS instances, see Mount an NFS file system on multiple ECS instances at a time.
Mount the file system on the ECS instance.
Parameter
Description
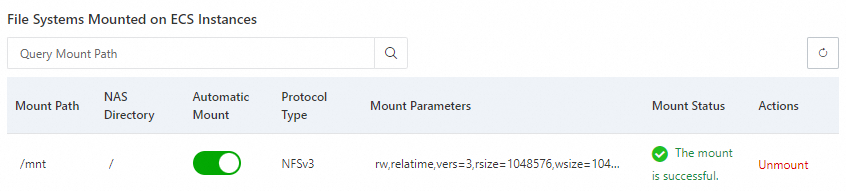
Mount Path
Enter the local path of the ECS instance on which you want to mount the file system.
Automatic Mount
By default, Automatic Mount at Startup is selected. When you restart the ECS instance, you do not need to re-mount the file system.
Protocol Type
Select the protocol type of the file system.
General-purpose NAS file systems support NFSv3 and NFSv4. If you do not need to modify the same NAS file on multiple ECS instances at a time, we recommend that you select NFSv3 to ensure optimal performance.
Extreme NAS file systems support only NFSv3.
NAS Directory
Enter the directory of the NAS file system.
You can enter the root directory / or a subdirectory, for example, /abc.
NoteIf the directory does not exist, you can select Confirm New Directory to create a directory in the file system. In addition, you must configure the user identifier (UID), group identifier (GID), and POSIX permissions for creating the directory. Otherwise, the default values and default permissions are used to create the directory.
Mount Parameters
We recommend that you use the default mount parameters. For more information, see the mount parameters described in Mount an NFS file system on a Linux ECS instance.
Click Complete.
The mount takes about 1 to 2 minutes. If the mount status is Mounted, the NAS file system is mounted on the ECS instance.
If the mount status is Failed, you can use the troubleshooting tool to troubleshoot the issue. For more information, see Mount an NFS file system on a Linux ECS instance.
After the file system is mounted, you can connect to the ECS instance and run the
mount -lordf -hcommand to view the mount parameters or the capacity of the file system.
Verify the mount
After the file system is mounted, you can access and use it on the ECS instance as a regular directory. The following section provides an example.
Remotely connect to the ECS instance and run the following commands to access the NAS file system.
mkdir /mnt/dir1
mkdir /mnt/dir2
touch /mnt/file1
echo 'some file content' > /mnt/file2
ls /mnt
If a message similar to the one in the following figure is returned, you have successfully accessed the General-purpose NAS NFS file system.

In File Storage NAS, you must use a mount target to mount a file system to an ECS instance. For more information about how to add more mount targets and view mount target addresses, see Manage mount targets.
When you add a mount target, note the following:
Set Mount Target Type to VPC.
Set VPC Network and vSwitch to the same VPC and vSwitch as the ACK cluster.
Step 3: Configure a PV and a PVC for the ACK cluster
Create a PV
Create a PV to register the existing NAS file system in the cluster.
Log on to the ACK console. In the left navigation pane, click Clusters.
On the Clusters page, find the cluster you want and click its name. In the left navigation pane, choose .
On the Persistent Volumes page, click Create. In the dialog box that appears, configure the parameters and click OK.
Configuration Item
Description
Example
PV Type
Select NAS.
NAS
Name
The name of the PV. The name must be unique within the cluster.
pv-nas
Capacity
The capacity of the PV. This is used only for matching with a PVC and does not limit the actual available capacity. The upper limit of the actual available storage is the total capacity of the NAS file system.
The actual capacity limit of a NAS file system is determined by its specifications. For more information, see General-purpose NAS file systems and Extreme NAS file systems.
5 Gi
Access Mode
Configure the access mode. Valid values:
ReadWriteMany: The volume can be mounted as read-write by many nodes.
ReadWriteOnce: The volume can be mounted as read-write by a single node.
ReadWriteMany
Enable CNFS
Whether to use Container Network File System (CNFS) to leverage its enhanced capabilities in automated O&M, cache acceleration, and performance monitoring.
To use CNFS to manage an existing NAS file system, see Create a CNFS to manage a NAS file system (Recommended).
Disabled
Mount Target Domain Name
This parameter is available only when CNFS is disabled.
The address of the NAS mount target.
To obtain the address, see Manage mount targets.
Select Mount Target: Select a previously added mount target address.
Custom: Use a custom domain name as the mount address. Make sure that you have configured the custom domain name to resolve to the destination NAS mount target.
0c47****-mpk25.cn-shenzhen.nas.aliyuncs.co
Advanced Options (Optional)
Mount Path
The subdirectory of the NAS file system to be mounted. If this is not set, the root directory is mounted by default.
If the directory does not exist in the NAS file system, the system automatically creates and mounts it.
The root directory of a General-purpose NAS file system is
/.The root directory of an Extreme NAS file system is
/share. When you mount a subdirectory, thepathmust start with/share(for example,/share/data).
/data
Reclaim Policy
Retain (default): When the PVC is deleted, the PV and the NAS files are not deleted. You must delete them manually.
Delete: This must be used with
archiveOnDelete. Static PVs do not supportarchiveOnDelete. Even if you set the policy to Delete, the PV and NAS files are not actually deleted when the PVC is deleted.To configure
archiveOnDelete, see Use dynamically provisioned NAS volumes.
Retain
Mount Options
The mount parameters for the NAS file system, including the NFS protocol version. We recommend that you use NFSv3.
nolock,tcp,noresvport
vers=3
Label
The labels of the PV.
pv-nas
After the PV is created, you can view it on the Persistent Volumes page.
Create a PVC
Create a PVC to claim the persistent storage capacity that your application requires.
In the navigation pane on the left of the cluster management page, choose .
On the Persistent Volume Claims page, click Create. In the dialog box that appears, configure the parameters and click OK.
Configuration Item
Description
Example
PVC Type
Select NAS.
NAS
Name
The name of the PVC. The name must be unique within the cluster.
pvc-nas
Allocation Mode
Select Use Existing Persistent Volume.
This topic uses a previously created PV. If you have not created a PV, you can set Allocation Mode to Create Volume.
Use Existing Persistent Volume
Existing Volumes
Select the previously created PV.
pv-nas
Capacity
The capacity of the persistent volume to be claimed. The requested capacity is used only for matching with a PV and does not limit the actual capacity.
The actual capacity limit of a NAS file system is determined by its specifications. For more information, see General-purpose NAS file systems and Extreme NAS file systems.
5
Step 4: Populate the PVC with data
Because the Kubernetes cluster accesses shared data through the PVC, you only need to populate the corresponding NAS instance created in Step 1.
Use Workbench to log on to any ECS node in the ACK cluster. For more information, see Log on to a Linux instance. For more information about other ways to connect to an ECS instance, see Overview of methods for connecting to ECS instances.
In Step 2, the NFS file system was mounted to the
/mntdirectory of the ECS instance. Run the following commands to create two directories,tf_data/andpytorch_data/, in the mounted directory. These directories will store the training data forTF-mnistandPytorch-mnist, respectively.cd /mnt/ mkdir tf_data/ mkdir pytorch_data/Run the following command to download the
TF-mnistdataset.cd tf_data git clone https://code.aliyun.com/xiaozhou/tensorflow-sample-code.git mv tensorflow-sample-code/data/* ./ && rm -rf tensorflow-sample-codeRun the following command to download the
Pytorch-mnistdataset.cd pytorch_data git clone https://code.aliyun.com/370272561/mnist-pytorch.git mv mnist-pytorch/MNIST ./ && rm -rf mnist-pytorch