This topic provides an example of how to implement single sign-on (SSO) between KeyCloak and CloudSSO.
Background information
Suppose your company uses a local directory service based on the LDAP protocol to manage users and has established a multi-account structure in Alibaba Cloud Resource Directory (RD). You want to configure KeyCloak SSO to allow users from the local directory service to access specified resources within specified member accounts in your resource directory.
Before you configure SSO logon, set up the KeyCloak service on a server and sync users from your local directory service to KeyCloak. This example uses the official Docker image service from the KeyCloak website.
The KeyCloak configuration steps in this topic are suggestions. They are provided only to help you understand the end-to-end configuration process for Alibaba Cloud SSO logon. Alibaba Cloud does not provide support for KeyCloak configuration.
Step 1: Get service provider (SP) metadata from CloudSSO
Log on to the CloudSSO console.
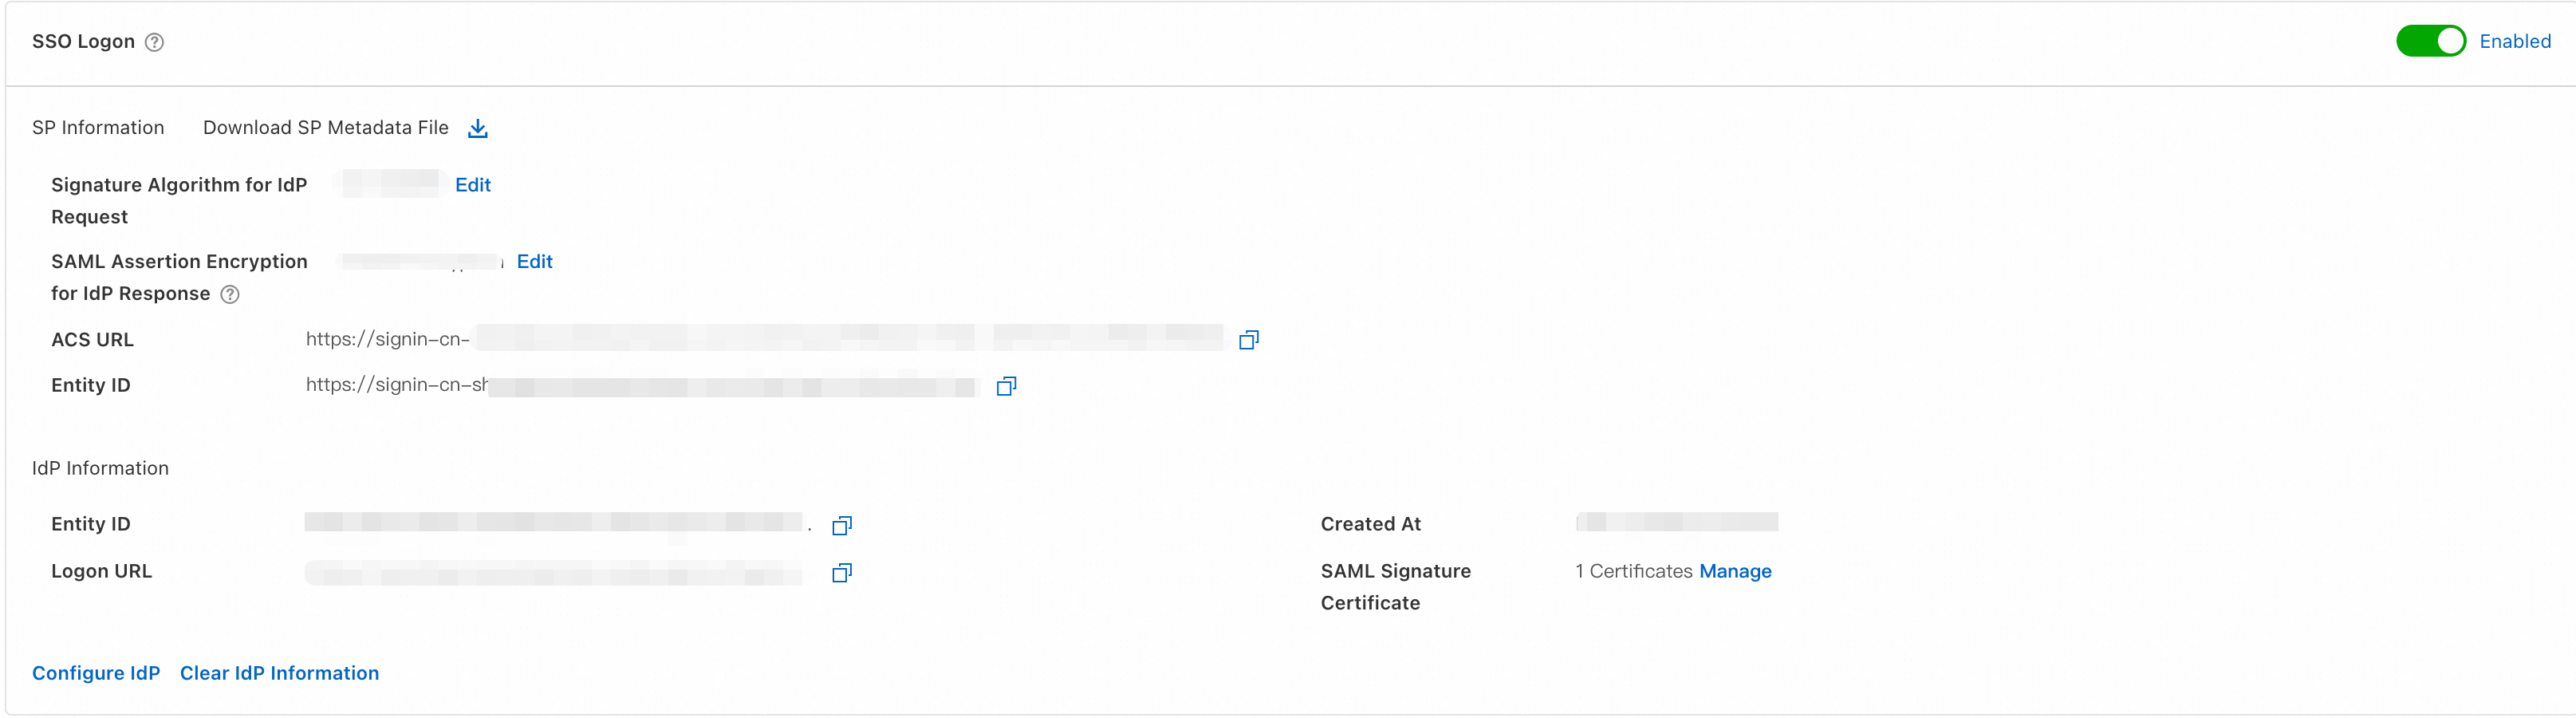
In the navigation pane on the left, click Settings.
In the SSO Logon section, copy the ACS URL and Entity ID of the service provider (SP), or download and save the SP metadata file.
Step 2: Create a new realm in KeyCloak
Log on to the KeyCloak service and go to the console.
In the navigation pane on the left, select Manage realms.
On the Manage realms tab, click Create realms to create a new realm.
Step 3: Create a new client in KeyCloak
In the navigation pane on the left, choose Manage > Clients.
On the Clients tab, click Import Client to quickly create a new client.
Import the CloudSSO metadata file that you obtained in Step 1 to create the new client. KeyCloak automatically parses the information.
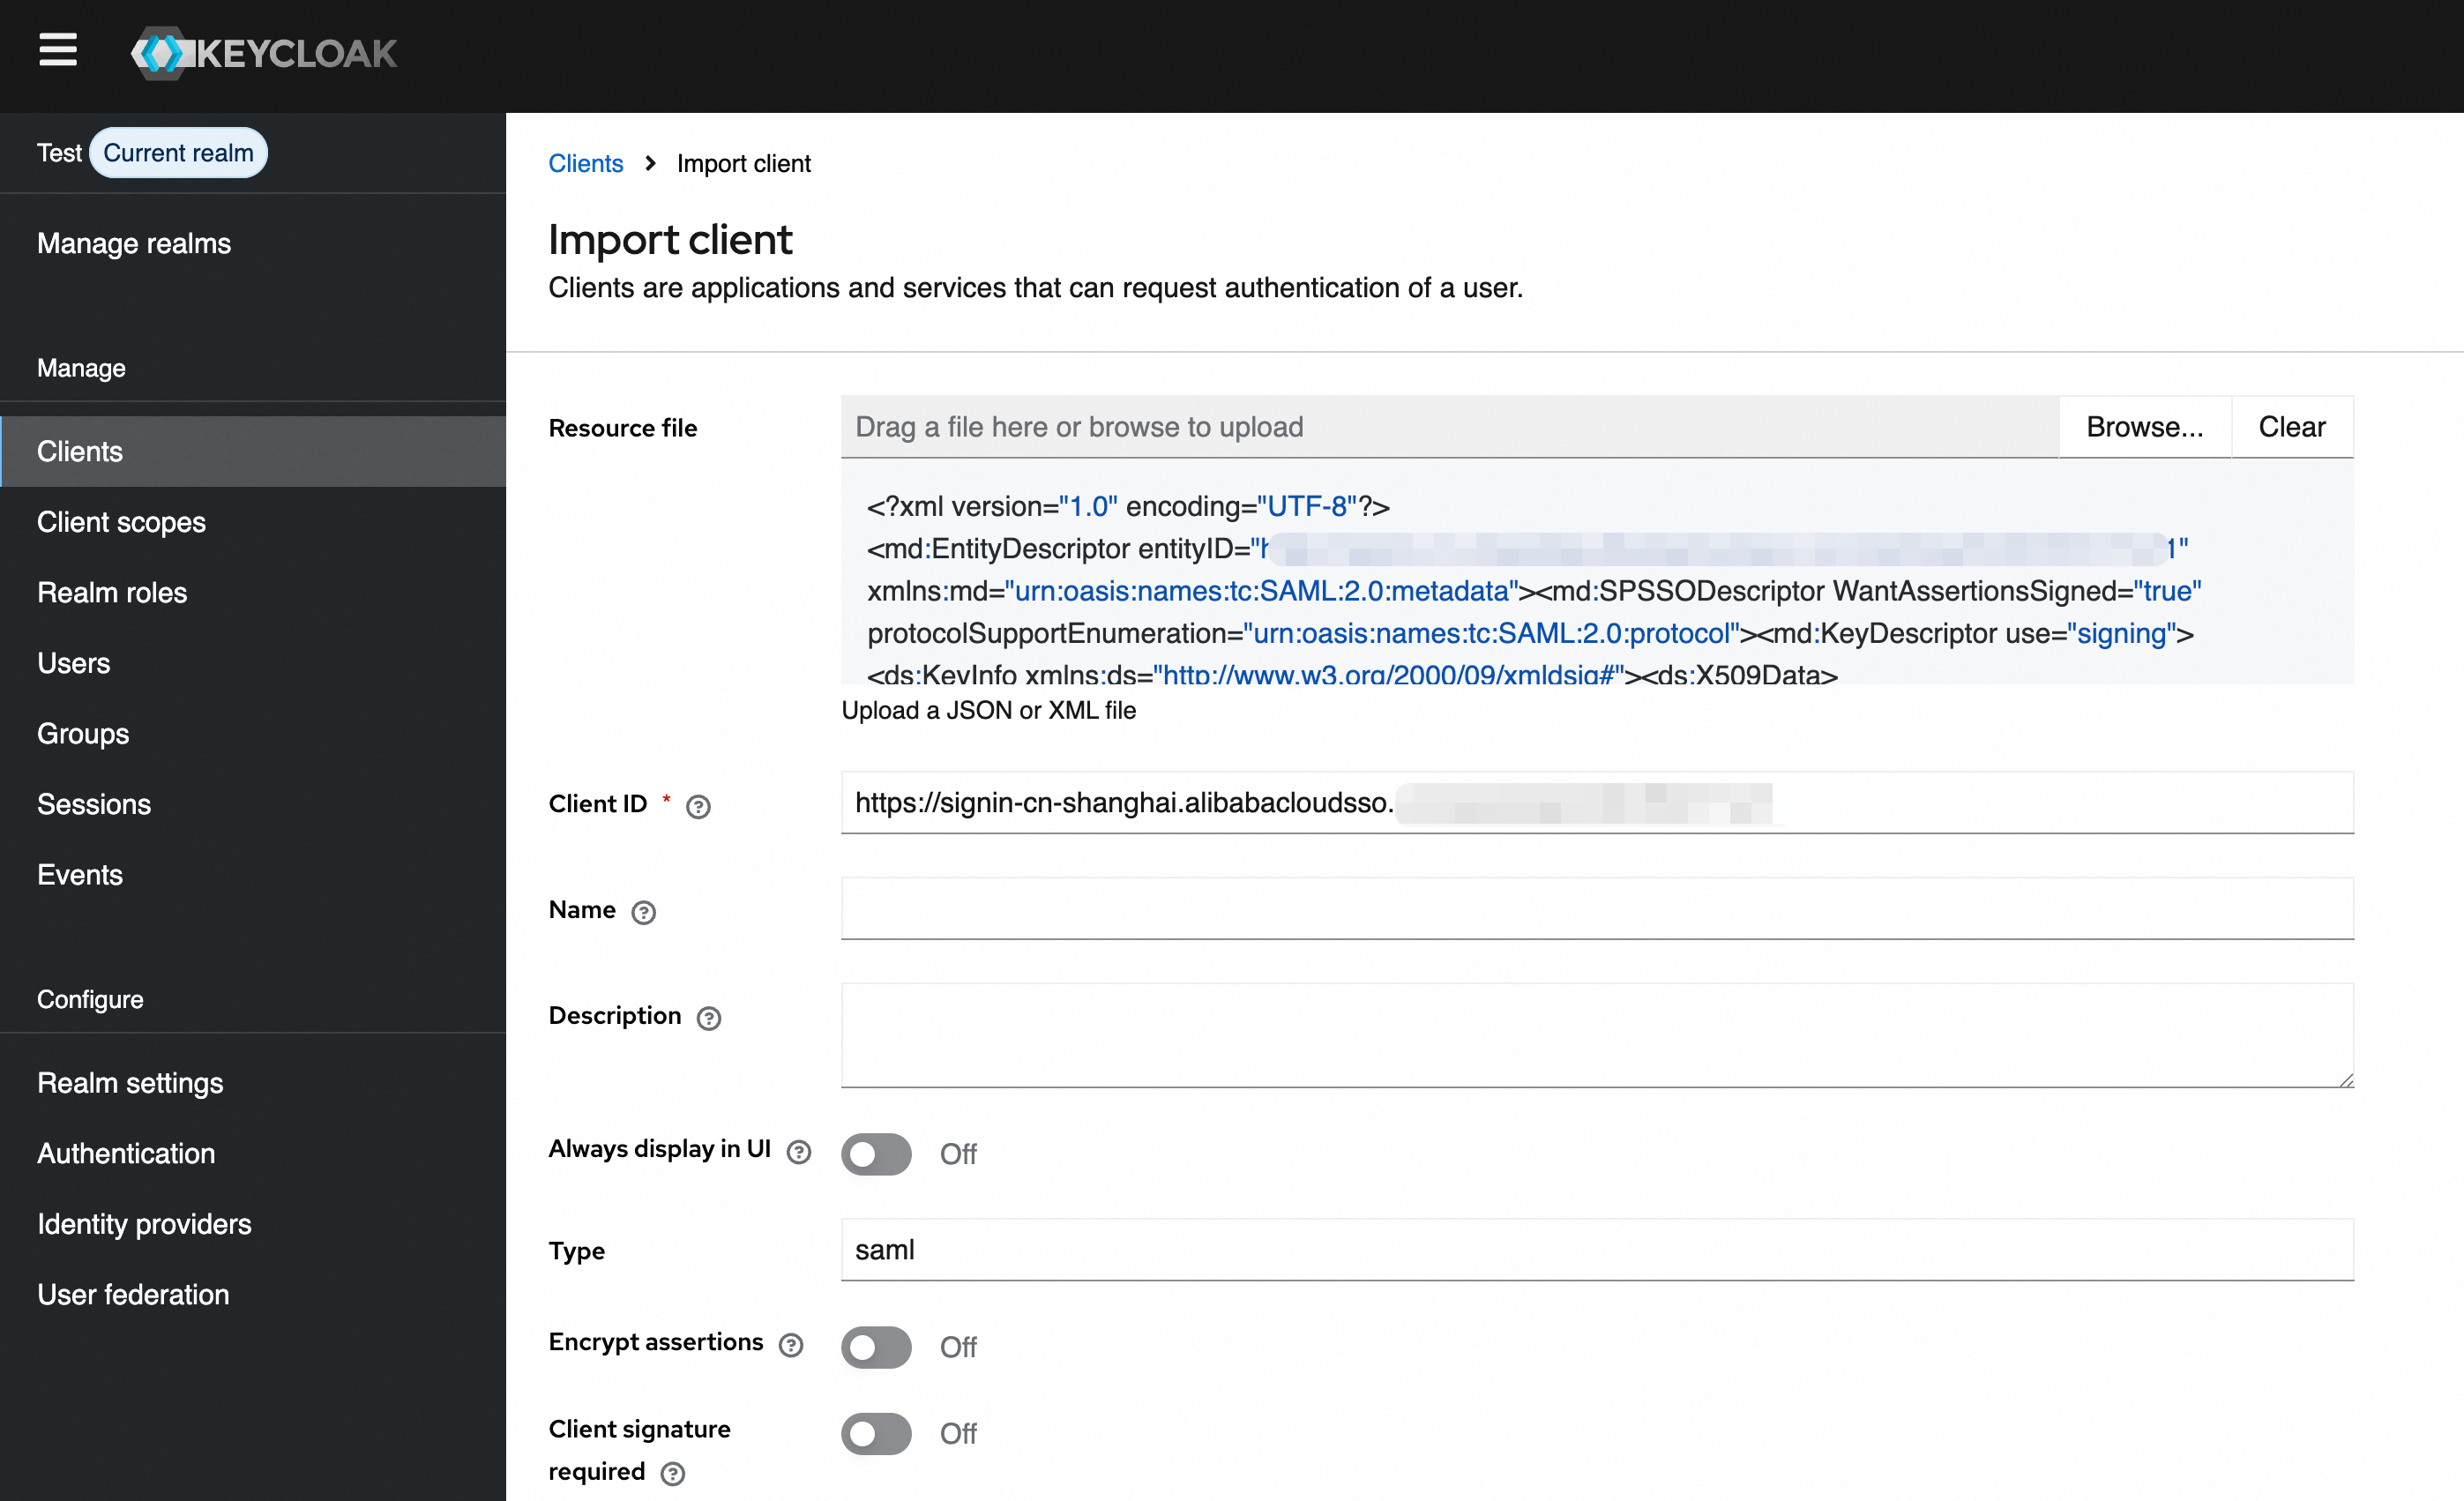
Click Save.
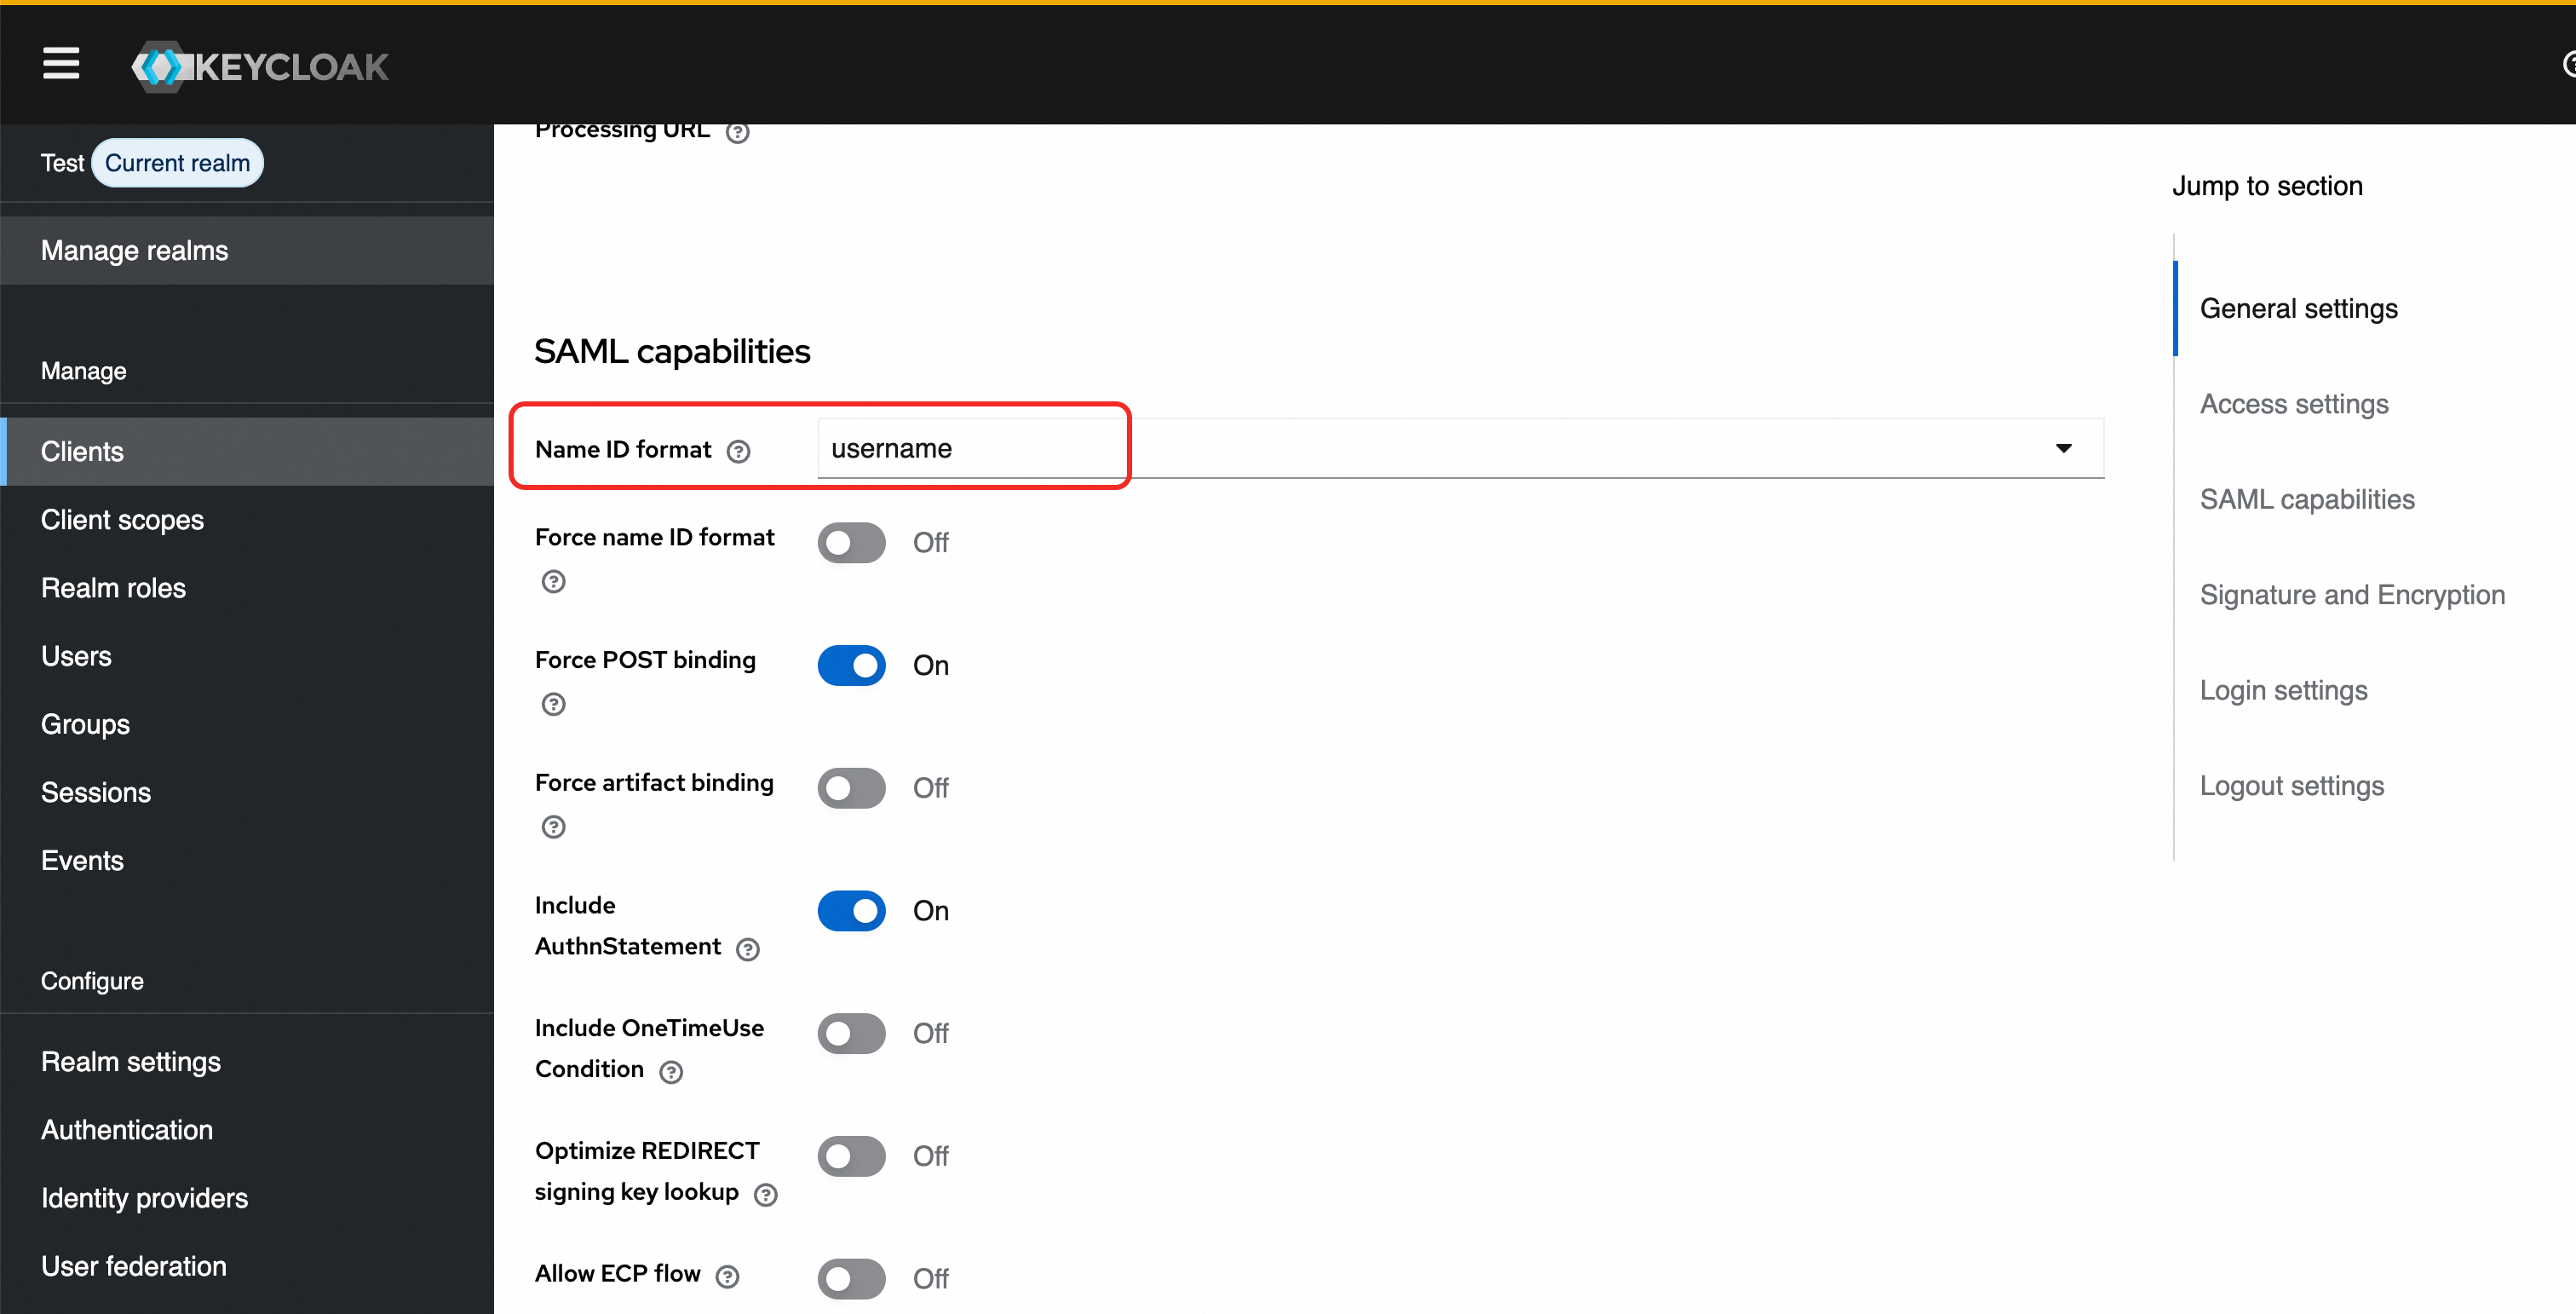
On the Clients tab, select the new client to open the Client Details page. At the top of the page, select the Settings tab. Scroll down to the SAML capability section and set Name ID format to username.
Step 4: Get identity provider (IdP) metadata from KeyCloak
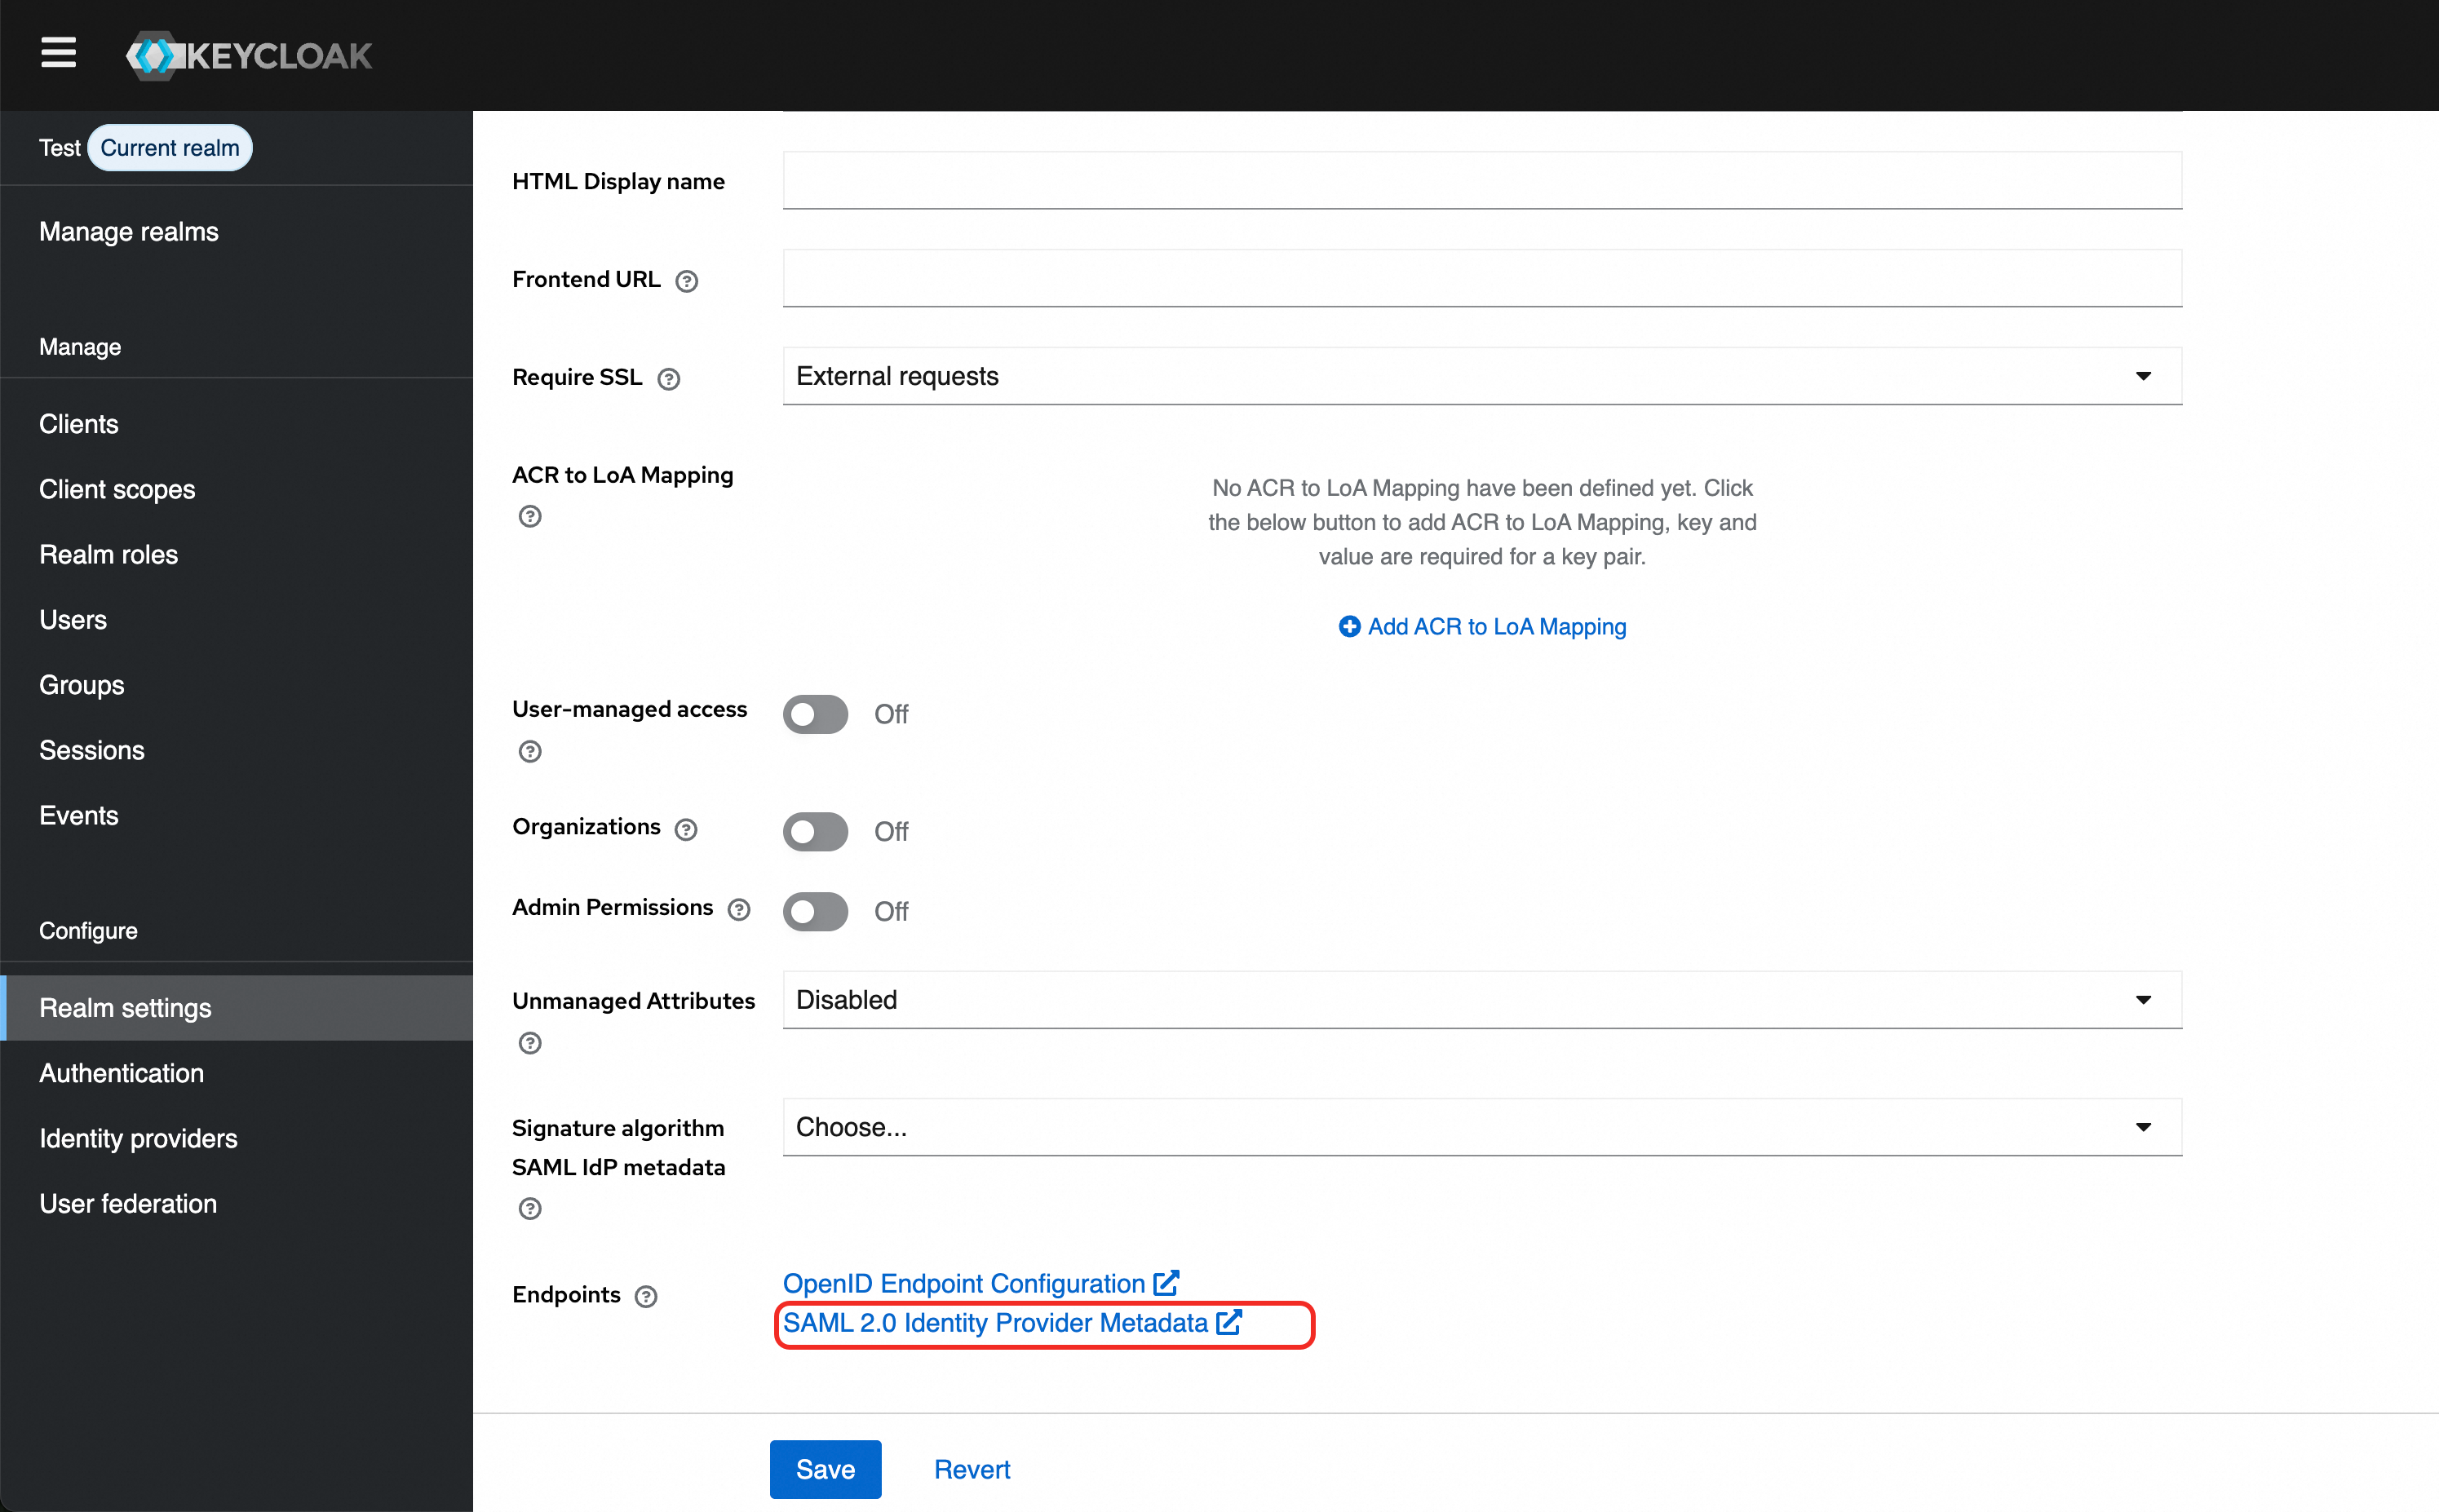
In the navigation pane on the left, click Realm Settings.
On the right, select the General tab at the top. Scroll to the bottom of the page, and then download and save the SAML 2.0 Identity Provider Metadata file.
Step 5: Enable SSO logon in CloudSSO
In the navigation pane on the left of the CloudSSO console, click Settings.
In the SSO Logon section, click Configure Identity Provider.
In the Configure Identity Provider dialog box, select Upload Metadata File.
Click Upload File and upload the IdP metadata file that you obtained in Step 4.
Turn on the SSO logon switch to enable SSO logon.
Step 6: Create a user in CloudSSO
Create a user in CloudSSO that has the same name as the user in KeyCloak. For more information, see Basic operations.
(Optional) Step 7: Grant permissions to the user
If you want the user to access specified resources in specified member accounts after an SSO logon, you must also create an access configuration and grant permissions to the user for the account in the resource directory.
Create an access configuration in CloudSSO and define an access policy.
For more information, see Create an access configuration.
Grant permissions to the user for the account in the resource directory.
For more information, see Grant permissions for an account in a resource directory.
Verification results
After you complete the configuration, you can initiate an SSO logon from Alibaba Cloud or KeyCloak.
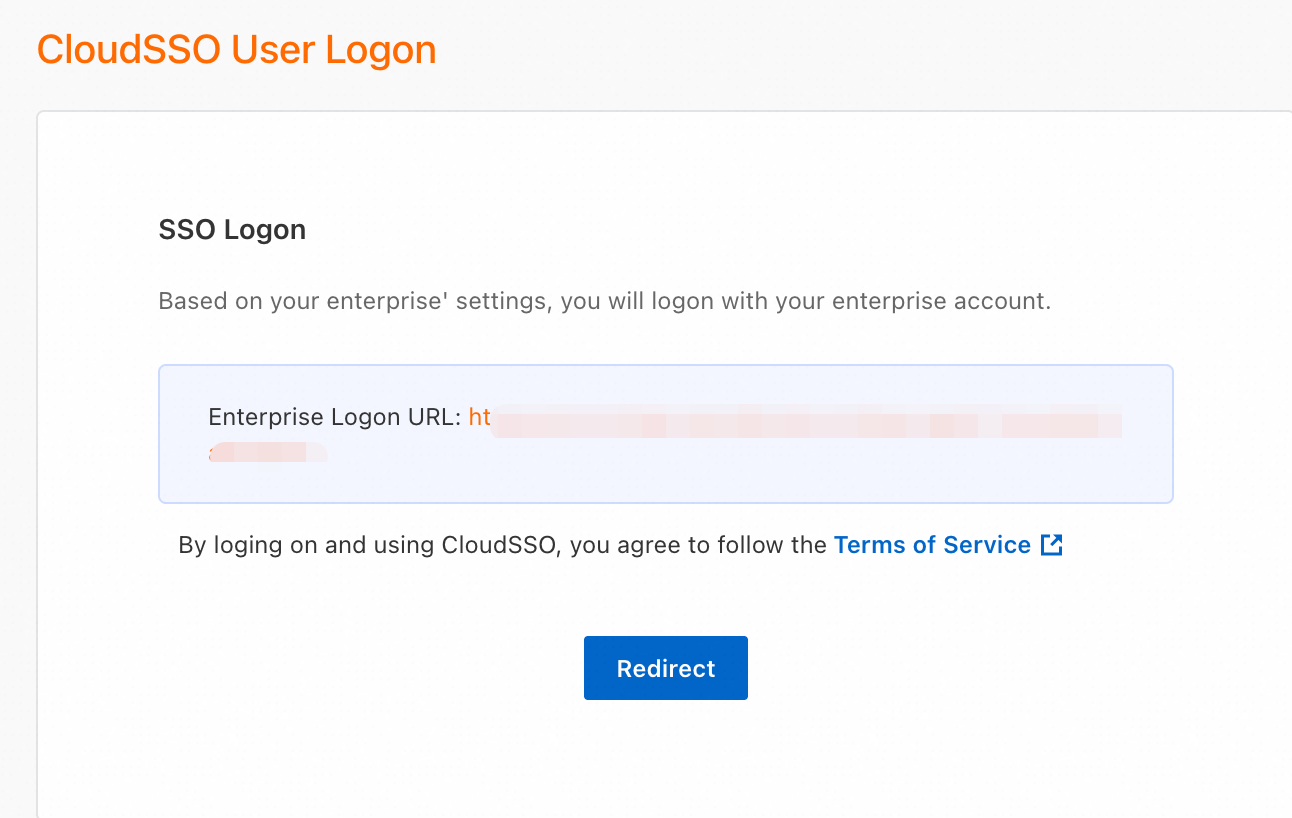
Initiate an SSO logon from Alibaba Cloud
On the Overview page of the CloudSSO console, copy the user logon URL.
Open the user logon URL in a new browser.
Click Redirect. The system automatically redirects you to the KeyCloak logon page.
Log on with your KeyCloak username and password. The system automatically performs an SSO logon and redirects you to the page specified by Default RelayState. In this example, because Default RelayState is not specified, the system redirects you to the CloudSSO user portal.
Log on from KeyCloak
In the navigation pane on the left of the KeyCloak console, click Clients. Select the SAML client that you created to open its details page.
On the Settings tab, scroll down to Access Settings and set a name for IDP-Initiated SSO URL name. The logon URL is constructed as follows:
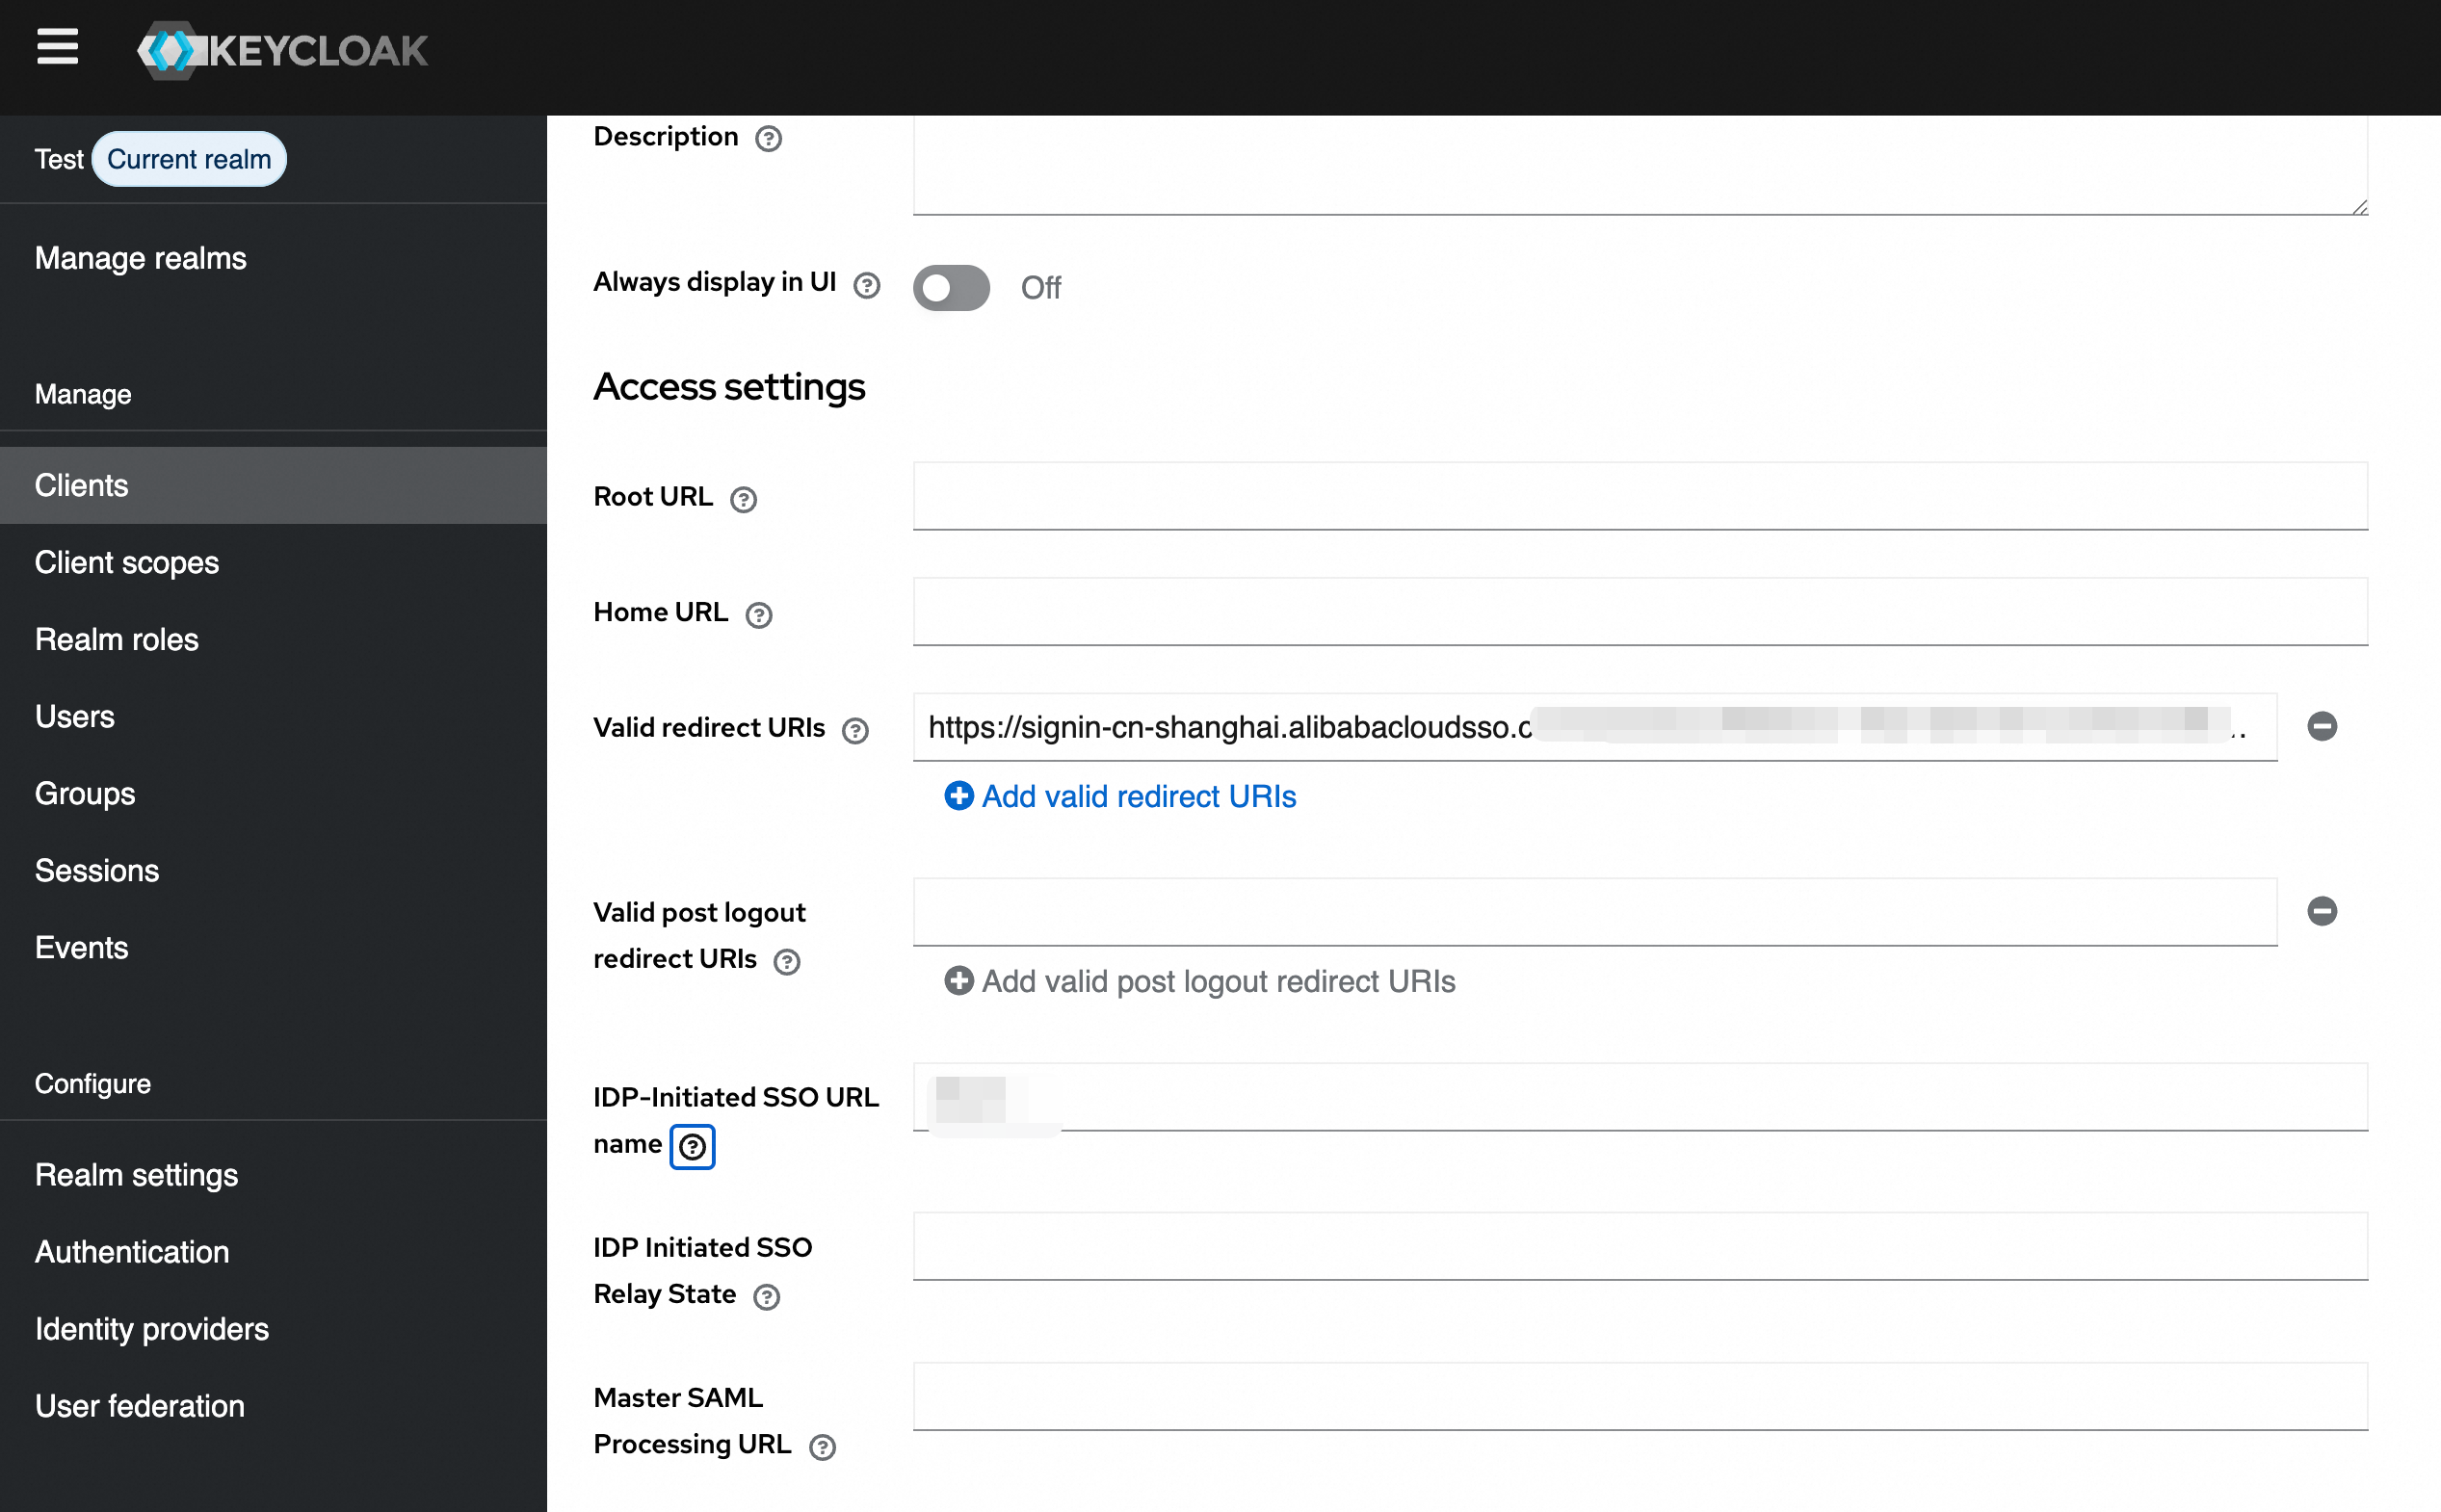
{server-root}/realms/{realm}/protocol/saml/clients/{client-url-name}.Open the URL in a new browser and log on with your KeyCloak username and password. The system automatically performs an SSO logon and redirects you to the page specified by Default RelayState. In this example, because Default RelayState is not specified, the system redirects you to the CloudSSO user portal.